If you’re anything like me, you’ve probably found yourself wanting to quickly turn a part of your Excel spreadsheet into an image. Maybe it’s for a presentation, a report, or simply to share a chart with your team. At first, I used to take screenshots, but that often led to clumsy cropping and blurry results. Then, I discovered the magic of macros in Excel. In this article, I’ll walk you through how I convert selected range into an image using macros, breaking down each step in a way that’s easy to follow, even if you’re new to VBA. By the end, you’ll be saving crisp, professional-looking images directly from Excel—and wondering how you ever managed without this trick!
Key Takeaways:
- Macros can convert any selected Excel range into a PNG-like image.
- It eliminates the need for manual screenshots or cropping.
- Works great for sharing static, formatted data in presentations or emails.
- No need for third-party add-ins—just Excel’s built-in tools.
- Takes less than 5 minutes to set up and use.
Table of Contents
Practical Use Cases for Image Conversion in Excel
Why I Convert Ranges to Images
There are so many practical reasons for converting an Excel range into an image. For me, the most common scenario is sharing a portion of data or a chart with colleagues who don’t use Excel. Images are universal—you can embed them in emails, PowerPoint slides, or even social media posts.
Another big plus is preserving formatting. With an image, you don’t have to worry if someone’s Excel theme or zoom setting messes up your careful layout. It’s also a quick way to protect your data from accidental edits. And let’s be honest—sometimes you just want your work to look good, and images help ensure it stays that way.
When to Use This Trick
I find this method particularly handy in the following situations:
- Sharing dashboards or summaries in reports where interactivity isn’t needed.
- Inserting Excel visuals into PowerPoint slides without fiddling with formatting.
- Emailing data snapshots to clients or colleagues who prefer visual summaries.
- Creating printable versions of data for handouts or brochures.
- Preserving confidential formulas by sharing the results as images instead.
If any of these sound like your workflow, you’re in for a serious time-saver.
Convert Selected Range into an Image Using Macros In Excel
Enable Developer Tab
Here are the quick steps to enable the Developer tab in Excel.
Open Excel and go to the File tab (top-left corner).
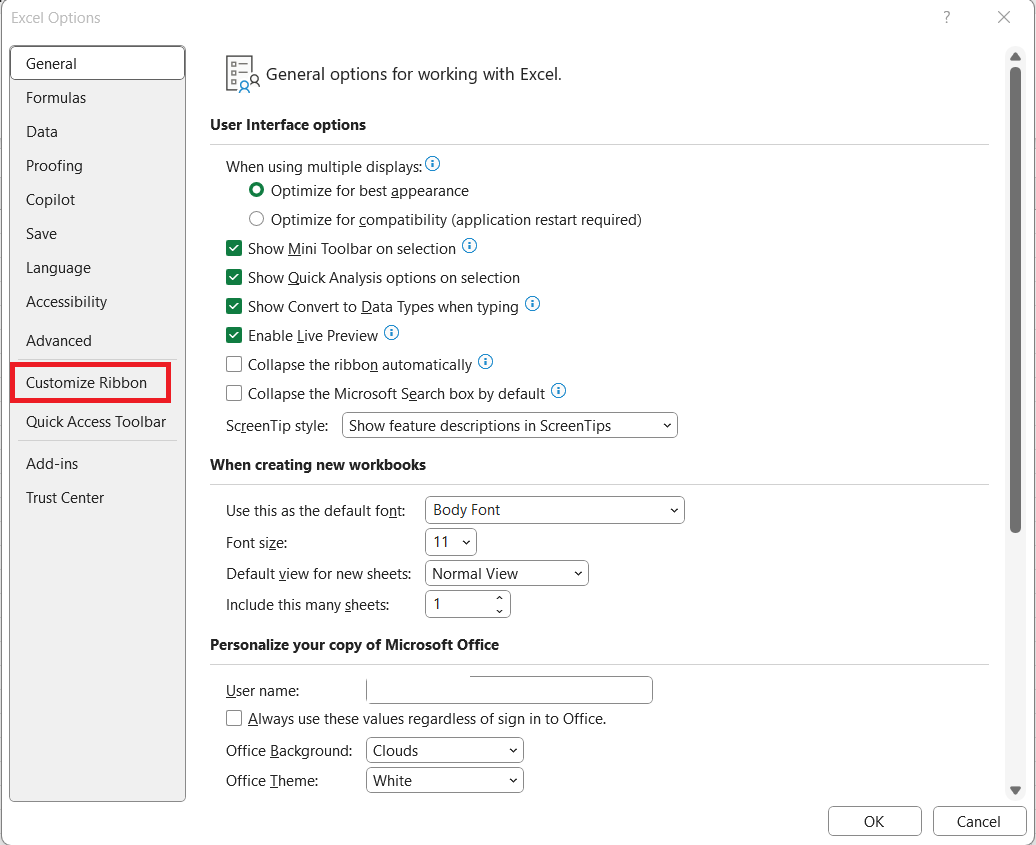
Click Options at the bottom of the left menu.
In the Excel Options dialog box, click Customize Ribbon on the left.
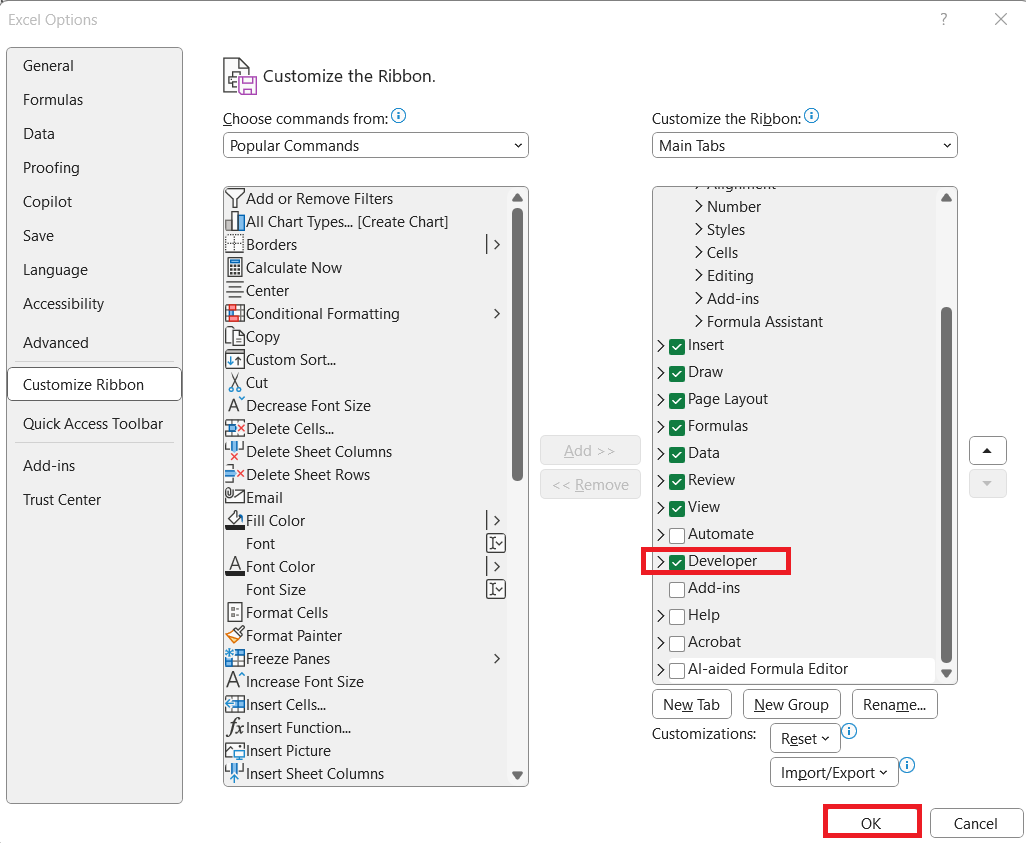
On the right, under Main Tabs, check the box labeled Developer. Click OK.
You’ll now see the Developer tab appear on the Excel ribbon, usually between View and Help. From here, you can access Macros, Visual Basic Editor, Form Controls, and more Excel geeky goodness.
VBA Macro to Convert Selected Range into an Image
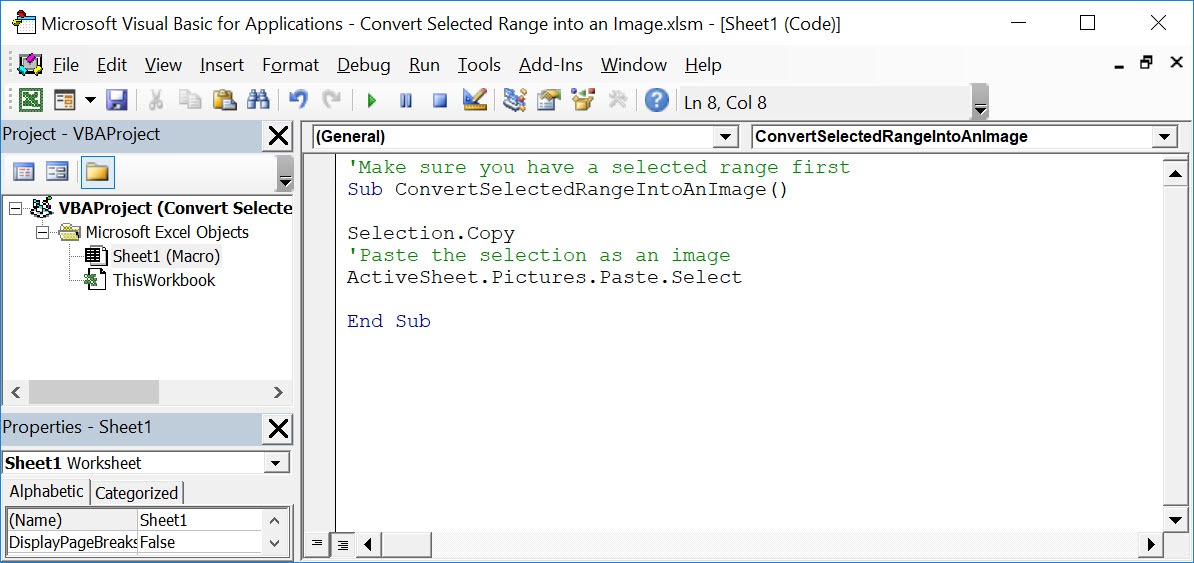
STEP 1: Go to Developer > Code > Visual Basic
STEP 2: Paste in your code and Select Save. Close the window afterwards.
'Make sure you have a selected range first
Sub ConvertSelectedRangeIntoAnImage()
Selection.Copy
'Paste the selection as an image
ActiveSheet.Pictures.Paste.Select
End Sub
STEP 3: Let us test it out!
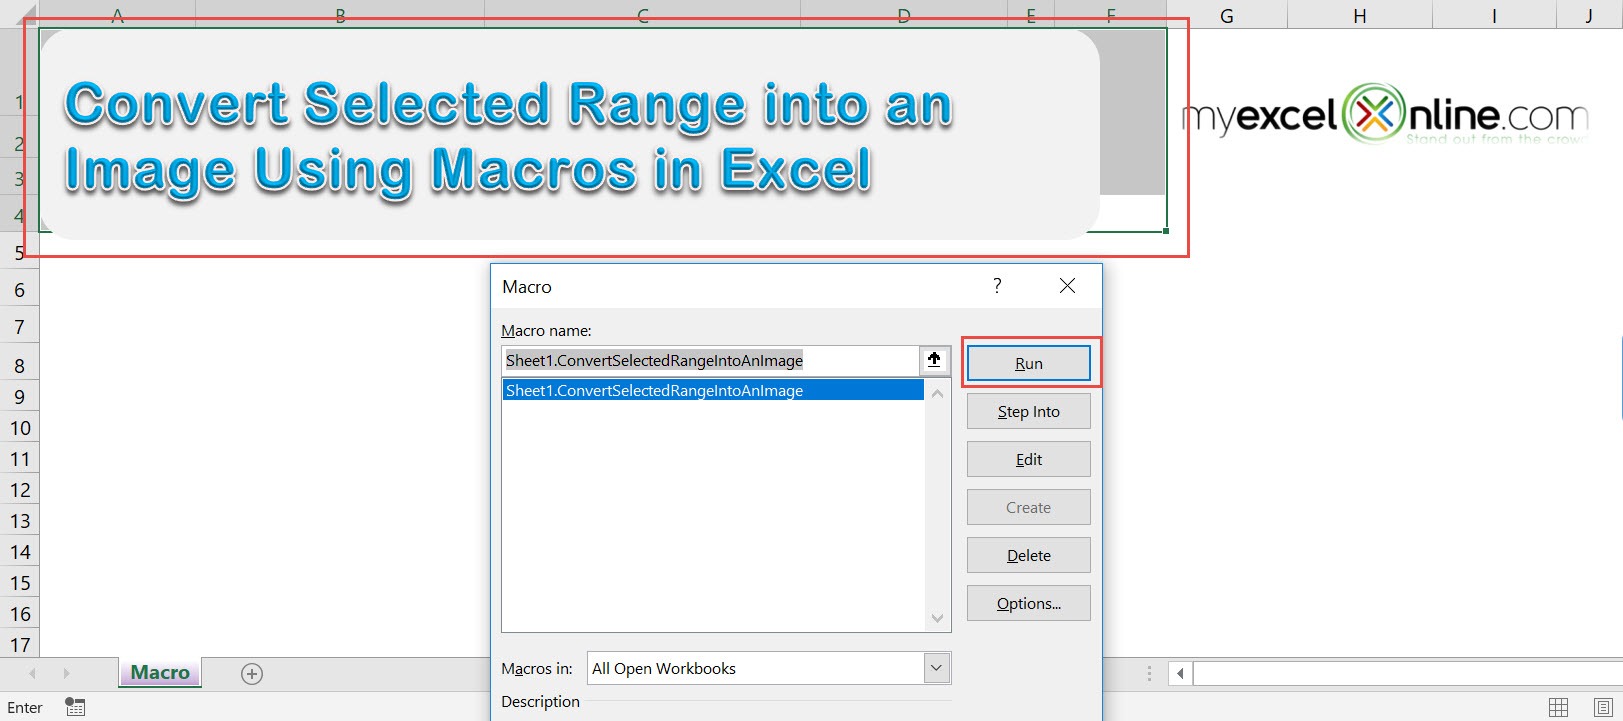
Open the sheet containing the header. Go to Developer > Code > Macros
Make sure the header and your macro are selected. Click Run.
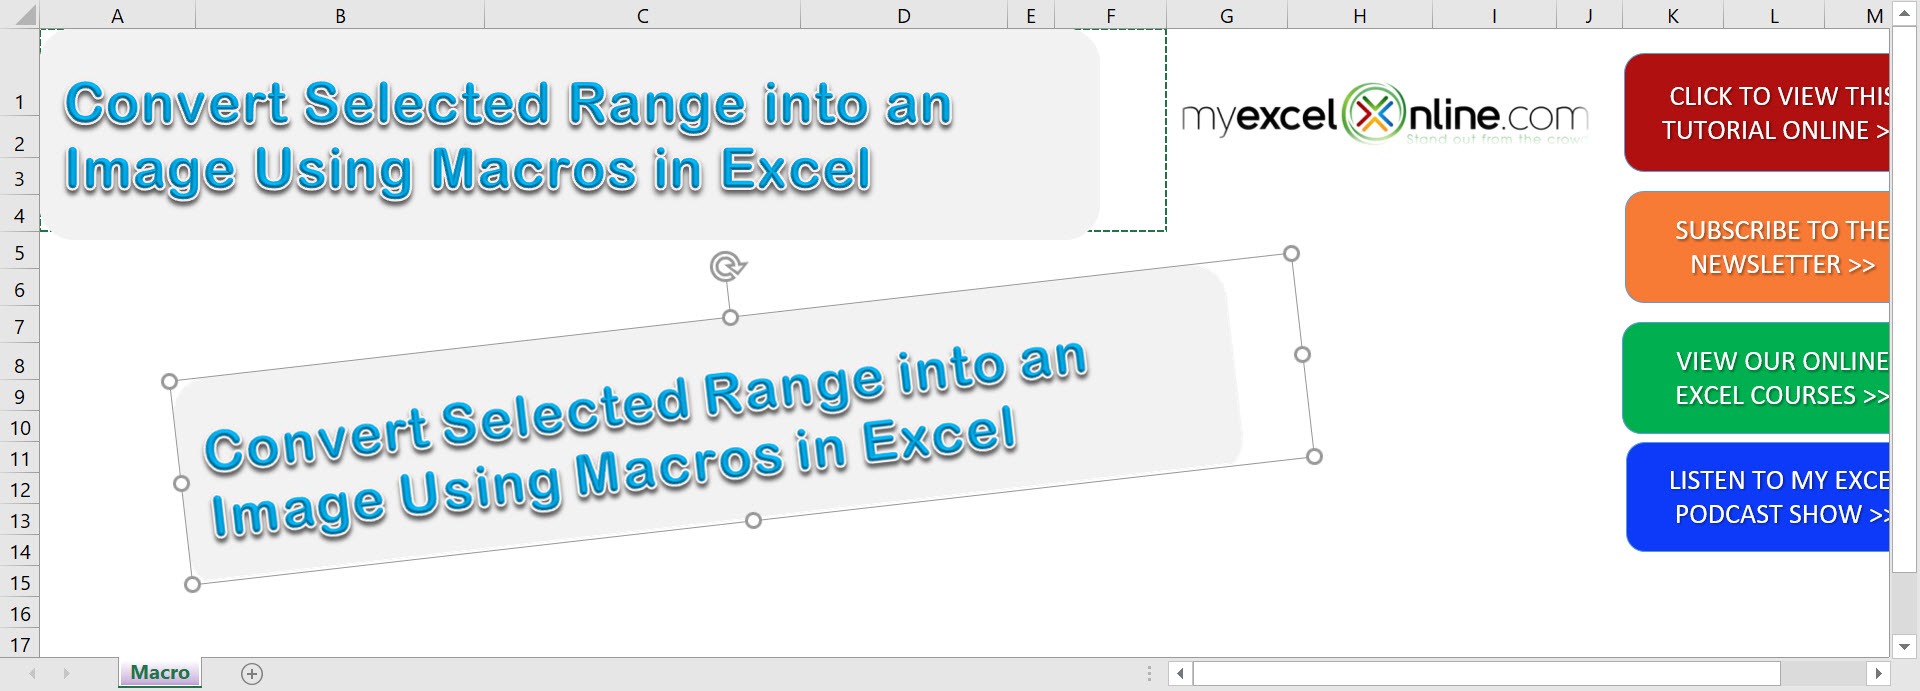
With just one click, you have now created a screenshot using Macros! You can even rotate it or resize it now.
Save the Image as a File
Want to save the image outside Excel? Here’s a fast manual way:
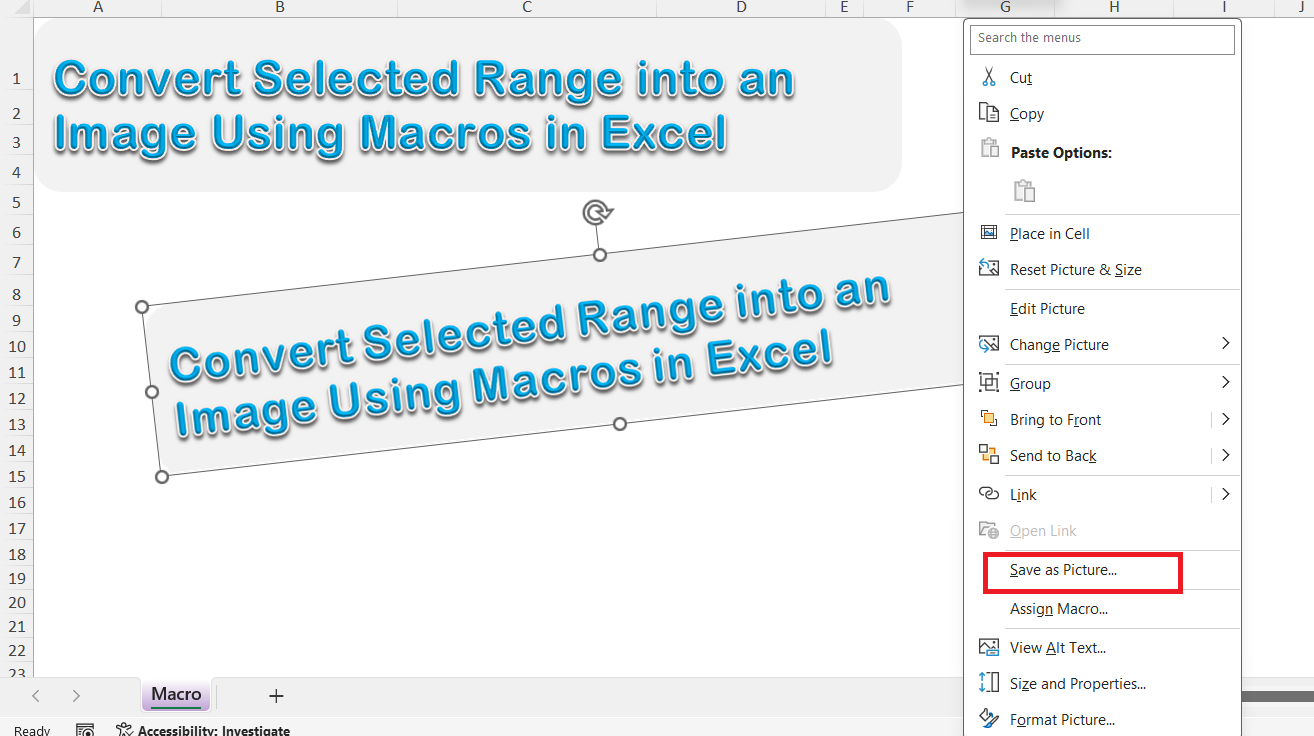
Right-click the pasted image. Choose Save as Picture.
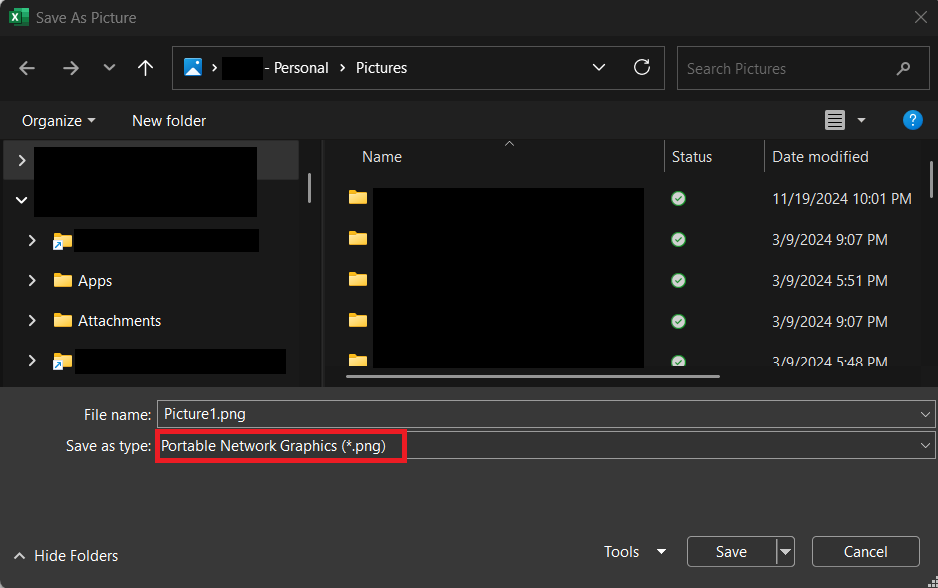
Select your file format (e.g., PNG or JPEG) and save it wherever you like.
If you want to automate even this step, you can extend your macro to export the image directly as a file. Let me know if you want that version too—I’ve got you.
Troubleshooting: Common Issues and Solutions
- Macro doesn’t run: Make sure macros are enabled and your workbook is saved as an .xlsm file.
- Range selection box doesn’t appear: Double-check that you’re running the macro from the correct workbook.
- Image quality is poor: Try increasing the size of your range or using a higher screen resolution.
- Error messages or crashes: Ensure you have the latest version of Excel and that your VBA references are not missing.
- Chart object remains on sheet: If the temporary chart doesn’t delete, you can remove it manually or add error handling to the macro.
FAQs
1. Can I use this macro to export charts too?
Yes! Charts can also be copied and pasted as images, though you may want to use slightly different VBA methods depending on how the chart is selected. But if your chart is inside a cell range, the macro above will grab it just fine.
2. Does the macro keep the formatting of the cells?
Absolutely. The image is a visual representation, so it includes all colors, borders, fonts, and conditional formatting exactly as you see it on-screen. What you see is truly what you get.
3. Can I automate this process for multiple sheets or ranges?
Yes, you can loop through predefined ranges and apply this macro automatically. With a bit of VBA tweaking, you can even name and save each image individually. It’s an excellent option for reporting templates.
4. Will this work on Excel for Mac?
VBA is supported on some versions of Excel for Mac, but certain objects and methods (especially related to image handling) behave differently or may be restricted. If you’re on Mac, you may need to test and adapt the code.
5. Can I email the generated image directly from Excel?
You can, with extended VBA scripts that interface with Outlook. While it takes a bit more coding, it’s entirely doable to grab the image and attach it to an email draft programmatically. Let me know if you want to explore that next!

Bryan
Bryan Hong is an IT Software Developer for more than 10 years and has the following certifications: Microsoft Certified Professional Developer (MCPD): Web Developer, Microsoft Certified Technology Specialist (MCTS): Windows Applications, Microsoft Certified Systems Engineer (MCSE) and Microsoft Certified Systems Administrator (MCSA).
He is also an Amazon #1 bestselling author of 4 Microsoft Excel books and a teacher of Microsoft Excel & Office at the MyExecelOnline Academy Online Course.


