As someone who spends countless hours working with Microsoft Excel, I’ve often found myself needing to format text quickly and efficiently. One of the most frequent tasks I encounter is converting cell contents to uppercase, especially when preparing data for reports, importing information from various sources, or ensuring consistency in presentations. While Excel offers some built-in functions for text manipulation, I’ve discovered that using macros to automate the process of converting selected cells to uppercase can save a significant amount of time and reduce errors. In this article, I’ll walk you through how I use macros in Excel to convert selection to upper case, sharing practical tips, code snippets, and my personal experiences to help you streamline your workflow.
Key Takeaways:
- Converting text to uppercase ensures consistency and professionalism in Excel data.
- Macros automate repetitive formatting tasks and save valuable time.
- A simple VBA macro can convert any selected text in Excel to uppercase instantly.
- You can assign the macro to a button for easy access by any user.
- Keyboard shortcuts make the process even faster and more efficient.
Exercise Workbook:
Table of Contents
Automating Text Formatting in Excel with Macros
Why Convert Text to Upper Case in Excel?
Before diving into the technical details, I want to touch on why converting text to uppercase is so important in my daily Excel usage. Uppercase text is often required for data standardization, especially when dealing with product codes, serial numbers, names, or any information that must be uniform across different documents. Inconsistent capitalization can lead to problems when merging datasets, searching for values, or generating reports. By automating the conversion process, I ensure that my data remains clean and professional.
Introduction to Macros in Excel
Macros are essentially sets of instructions written in Visual Basic for Applications (VBA) that automate repetitive tasks in Excel. As someone who values efficiency, I’ve found macros to be invaluable for tasks like formatting, data manipulation, and even creating custom functions. With a macro, I can select a range of cells and instantly convert all text within those cells to uppercase with just a click or a keyboard shortcut.
Step-by-Step Guide to Convert Selection to Uppercase using Macros
Getting Started: Enabling Macros
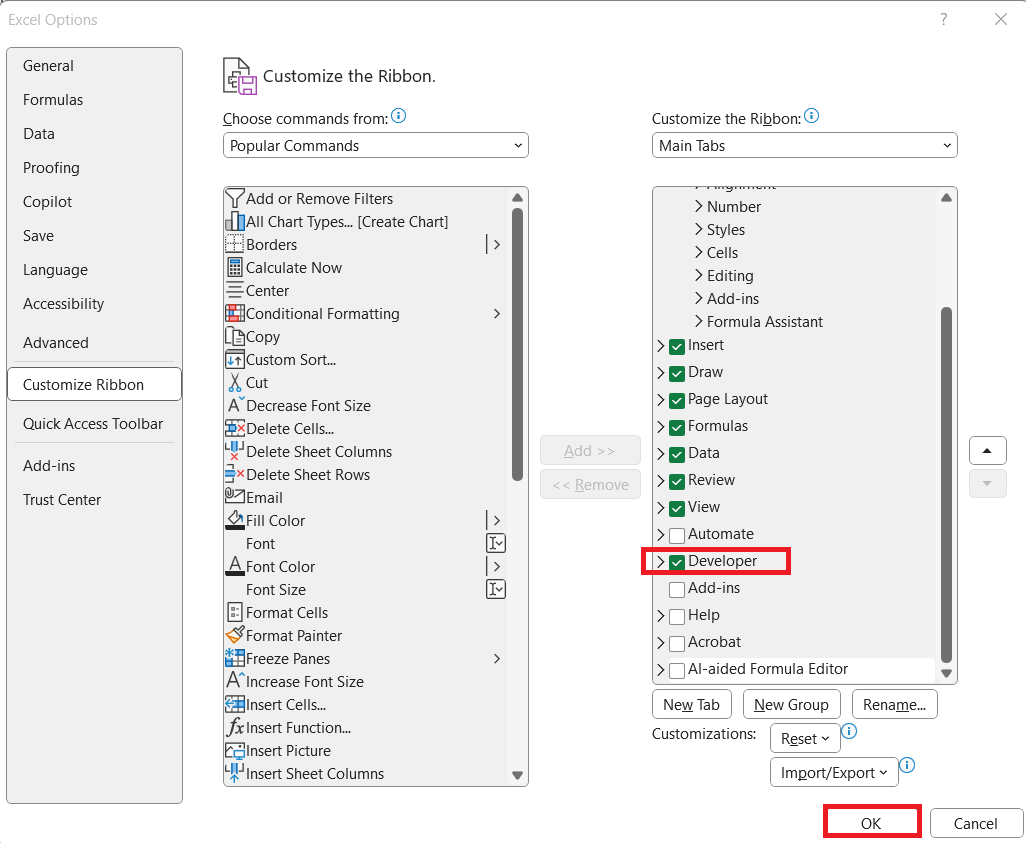
If you’re new to macros, the first step is to enable the Developer tab in Excel. Here’s how I do it:
STEP 1: Go to the File menu and click Options.
STEP 2: Select Customize Ribbon. Check the box for Developer in the right pane and click OK.
The Developer tab now appears in the ribbon, giving access to macro tools and the VBA editor.
Writing the Macro: Convert Selection to Upper Case
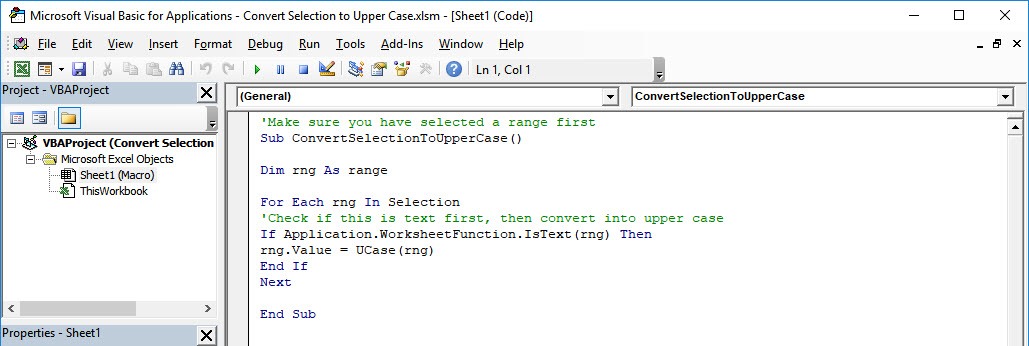
STEP 1: Go to Developer > Code > Visual Basic
STEP 2: Paste in your code and Select Save. Close the window afterwards.
'Make sure you have selected a range first
Sub ConvertSelectionToUpperCase()
Dim rng As Range
For Each rng In Selection
'Check if this is text first, then convert into upper case
If Application.WorksheetFunction.IsText(rng) Then
rng.Value = UCase(rng)
End If
Next
End Sub
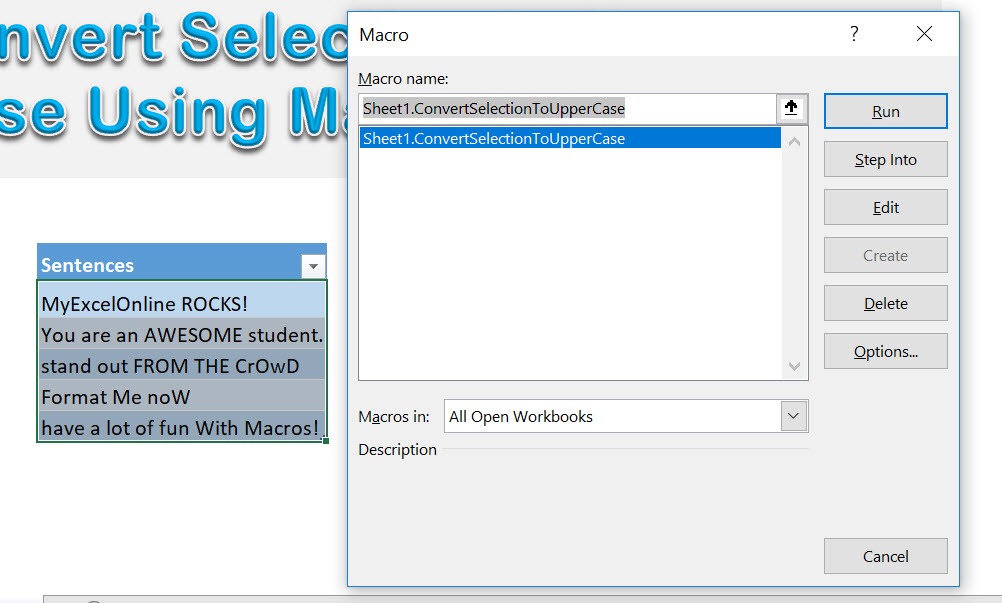
STEP 3: Let us test it out!
Open the sheet containing the data. Go to Developer > Code > Macros
Make sure your text and macro are both selected. Click Run.
With just one click, all of the cells now converted to upper case!
Advanced Tips & Tricks
Assigning the Macro to a Button
For even greater convenience, I often assign this macro to a button on my worksheet. Here’s how I do it:
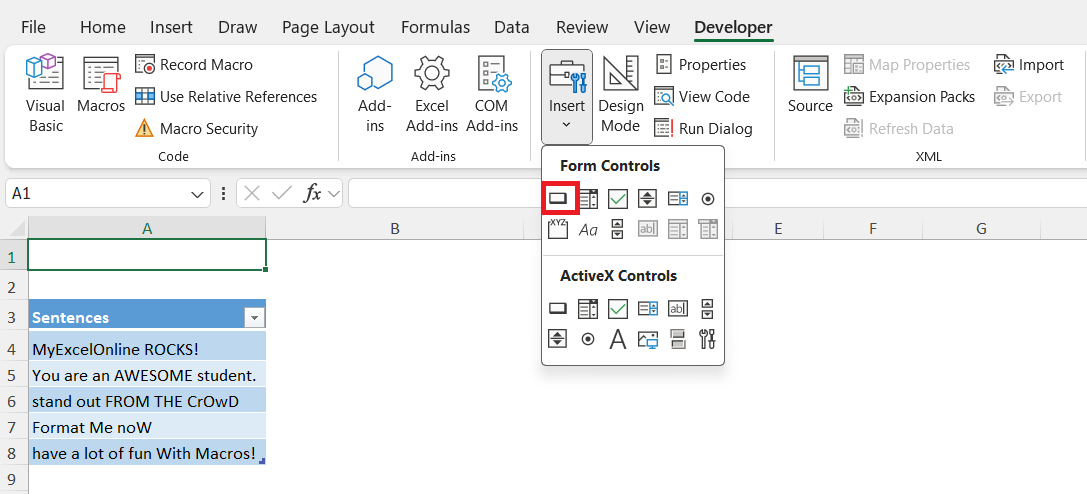
STEP 1: Go to the Developer tab and click Insert in the Controls group.
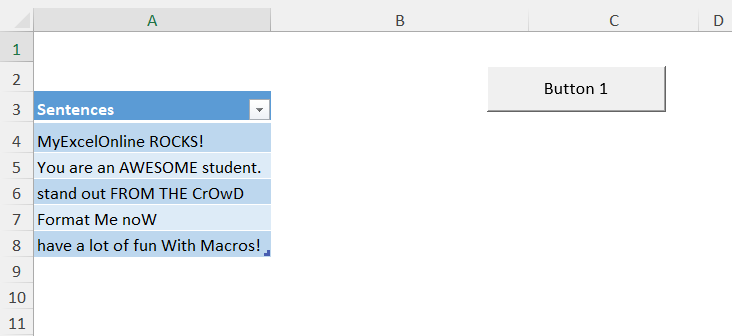
STEP 2: Select Button (Form Control) and draw it on the worksheet.
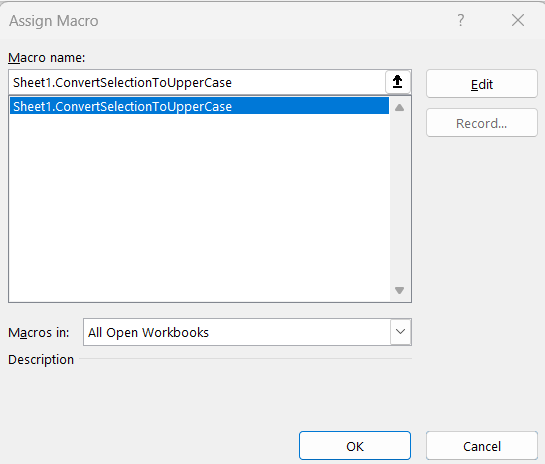
STEP 3: In the Assign Macro dialog, select ConvertSelectionToUpperCase and click OK.
Now, whenever I select a range and click the button, the macro runs automatically. This is especially useful when sharing the workbook with others who may not be comfortable with the VBA editor.
Using Keyboard Shortcuts for the Macro
Since I love efficiency, I also assign a keyboard shortcut to the macro for even faster access:
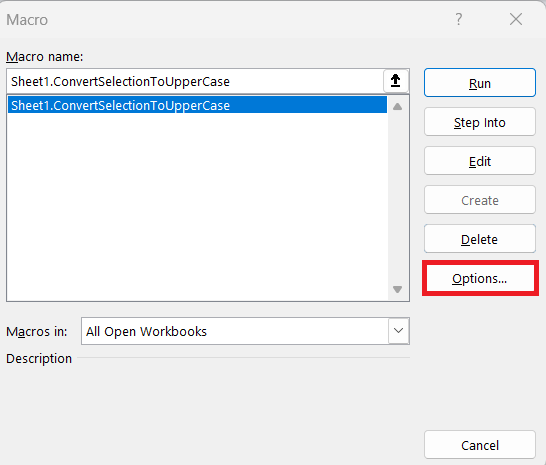
STEP 1: Go to Developer > Macros.
STEP 2: Select ConvertSelectionToUpperCase and click Options.
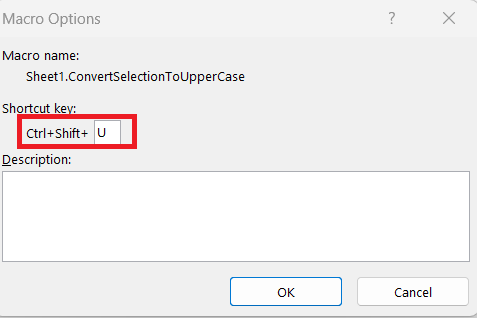
STEP 3: Assign a keyboard shortcut, such as Ctrl+Shift+U.
With this setup, I can select my cells and convert them to uppercase with a simple keystroke, making the process almost instantaneous.
FAQs
1. Why should I convert text to uppercase in Excel?
Converting text to uppercase helps standardize data across large spreadsheets, making it easier to read, search, and merge. This is especially important when dealing with IDs, names, or codes that must be consistent. Uppercase formatting also reduces mistakes caused by inconsistent capitalization, which can break formulas or look unprofessional in reports. It’s a simple but powerful way to keep data clean and reliable.
2. Do I need programming experience to use macros in Excel?
No, you don’t need prior programming knowledge to use simple macros like the uppercase converter. The VBA code is short and easy to copy-paste directly into the editor. Once saved, you can run it without touching the code again. Over time, you may pick up small adjustments, but even beginners can handle this with ease.
3. Can I undo the macro after converting text to uppercase?
Yes, just like other actions in Excel, you can undo a macro immediately using Ctrl+Z. However, once you save and close the workbook, the undo history resets. If you’re working with important data, it’s always a good practice to create a backup copy before running macros. That way, you’ll avoid accidental permanent changes.
4. Is it possible to apply the uppercase macro automatically when entering data?
Yes, you can set up a Worksheet Change Event in VBA so that every time you type something in a cell, it automatically converts to uppercase. This is slightly more advanced but highly useful when you want consistent formatting without manual triggers. It’s especially helpful for shared workbooks where multiple users enter data.
5. Can I use this macro in all my Excel workbooks?
By default, macros are saved only in the workbook where you create them. If you want to use the macro everywhere, you can store it in your Personal Macro Workbook. This makes it available in any Excel file you open on your computer. It’s a great way to build your own personal library of productivity macros.

Bryan
Bryan Hong is an IT Software Developer for more than 10 years and has the following certifications: Microsoft Certified Professional Developer (MCPD): Web Developer, Microsoft Certified Technology Specialist (MCTS): Windows Applications, Microsoft Certified Systems Engineer (MCSE) and Microsoft Certified Systems Administrator (MCSA).
He is also an Amazon #1 bestselling author of 4 Microsoft Excel books and a teacher of Microsoft Excel & Office at the MyExecelOnline Academy Online Course.


