Have a lot of comments in your spreadsheet and want to find all of them at once? Manually scanning for those tiny red triangles can be a pain — especially in large workbooks. But here’s the good news: Excel Macros can handle it in a second! With just a few lines of VBA (Visual Basic for Applications) code, you can automatically highlight all cells that contain comments. This saves time, improves visibility, and makes reviewing notes a breeze.
In this article, we’ll walk you through the entire process — from enabling the Developer tab to running your macro and highlighting those comment-filled cells in one go.
Key Takeaways:
- Excel comments are like digital sticky notes attached to cells.
- Comments help explain, clarify, or provide feedback without changing data.
- Highlighting commented cells improves visibility and speeds up data review.
- Macros automate the process, saving time in large workbooks.
- The VBA macro uses SpecialCells(xlCellTypeComments) and applies the “Note” style.
Exercise Workbook:

Table of Contents
Understanding and Managing Comments in Excel
What are Comments?
Comments in Excel are like digital sticky notes attached to your spreadsheet cells. They allow users to leave explanations, clarifications, or feedback without changing the actual cell content. For example, a team member might add a comment to a cell containing a number to explain how it was calculated or to flag it for review.
You can spot a commented cell by the small red triangle in its top-right corner. When you hover over it, the note pops up, showing the comment’s text and author.
They’re especially useful in:
- Collaborative workbooks where multiple users need to communicate changes or instructions
- Financial models to explain the assumptions behind the figures
- Reports and audits where context or approval notes are important
In short, comments make Excel smarter, more transparent, and easier to use for teams that need to document their thought process alongside data.
Why You’d Want to Highlight Cells with Comments
When working on large datasets, comments are often used for collaboration — adding notes, feedback, or reminders without affecting the actual data. But here’s the issue: comments are tiny, easy to miss, and not always obvious unless you hover over each cell.
- Highlighting all cells with comments gives you:
- Instant visibility — no more hunting for red triangles.
- Easier navigation — jump between notes during data review.
- Better presentation — make feedback stand out before sharing reports.
- Automation — avoid doing repetitive, manual checks.
So instead of scanning every cell like a detective, let’s use a macro to do the heavy lifting.
How to Highlight Cells with Comments Using Macros
Enable Developer Tab
Before we dive into the VBA code, make sure the Developer tab is visible on your Excel ribbon. If you don’t see it yet, here’s how to enable it:
STEP 1: Go to File > Options

STEP 2: Click Customize Ribbon
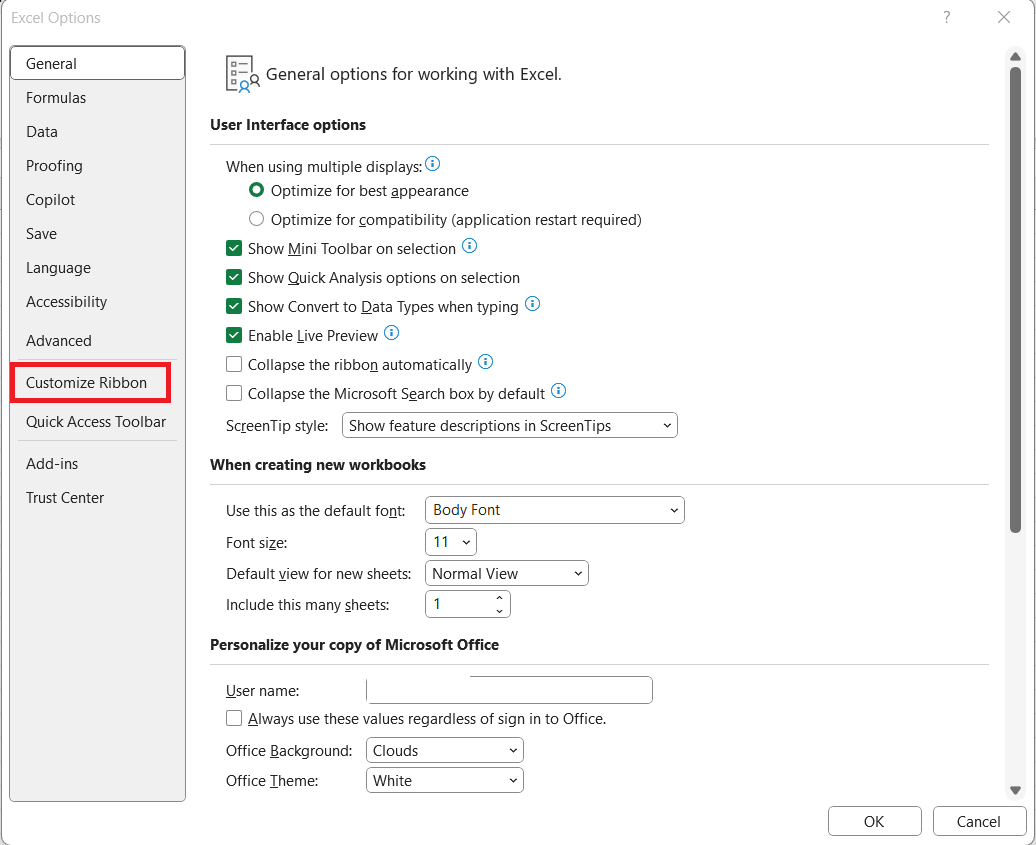
STEP 3: On the right panel, check the box that says Developer. Click OK.
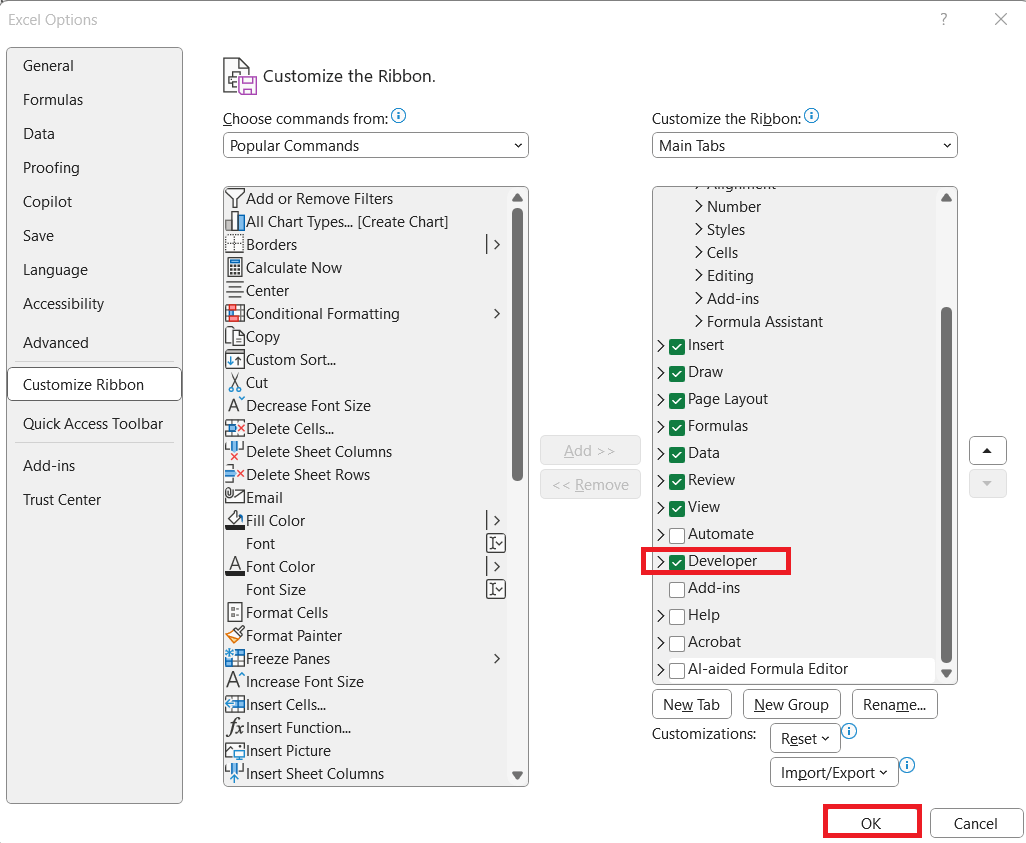
Now you’ll see the Developer tab appear in your Excel ribbon. This tab is your gateway to VBA — the language that powers macros in Excel.

Write VBA Code
This is our initial set of data, you can see the ones with the red triangle on the right corner are the ones with comments inserted:

STEP 1: Go to Developer > Code > Visual Basic

STEP 2: Paste in your code and Select Save. Close the window afterwards.
Sub HighlightCellsWithComments()
'Select the cells with comments
Selection.SpecialCells(xlCellTypeComments).Select
'Set all the cells' style to the Note style
Selection.Style= "Note"
End Sub

STEP 3: Let us test it out!
Open the sheet containing the data. Go to Developer > Code > Macros

Make sure your macro is selected. Click Run.

With just one click, all of the cells with comments are now highlighted!

How the Code Works
Let’s break it down line by line so you understand what’s happening:
- Selection.SpecialCells(xlCellTypeComments).Select
- This line tells Excel to look within the selected range (or sheet) and find cells that have comments attached.
- It uses the SpecialCells method with the parameter xlCellTypeComments, which targets only commented cells.
- Selection.Style = “Note”
- Once those cells are selected, this line applies the “Note” style.
- The “Note” style is one of Excel’s built-in cell formats that gives cells a distinct, highlighted look.
So, in summary, the code finds cells with comments and highlights them instantly.
FAQs
1. What is a comment in Excel?
A comment in Excel is a note attached to a cell that provides additional information without altering the cell’s content. It is represented by a small red triangle in the top-right corner. Hovering over the triangle displays the comment’s text. Comments are useful for collaboration, auditing, and documenting calculations. They make spreadsheets easier to understand for multiple users.
2. Why should I highlight cells with comments?
Highlighting commented cells makes them easier to spot, especially in large datasets. It saves time by avoiding manual scanning for the tiny red triangles. Highlighted cells improve navigation and readability. It also helps ensure no feedback or notes are missed during reviews. Automation with macros further simplifies this process.
3. How do I enable the Developer tab in Excel?
Go to File > Options, then select Customize Ribbon. On the right panel, check the Developer box and click OK. The Developer tab will now appear on your ribbon. This tab gives you access to VBA and macros. It is essential for creating and running Excel macros.
4. How does the macro work to highlight cells with comments?
The macro uses Selection.SpecialCells(xlCellTypeComments) to select only cells with comments. Then it applies the built-in “Note” cell style to highlight them. This makes commented cells visually distinct. You can run the macro on a selected range or the entire worksheet. It automates a process that would otherwise be time-consuming.
5. Can I customize the highlight style for comments?
Yes, you can replace the “Note” style with a custom cell color or a new cell style. For example, Selection.Interior.Color = vbYellow highlights cells in yellow. You can also create a custom style under Home > Cell Styles and apply it in the macro. This allows you to match your spreadsheet’s design preferences. Automation remains fully functional.

Bryan
Bryan Hong is an IT Software Developer for more than 10 years and has the following certifications: Microsoft Certified Professional Developer (MCPD): Web Developer, Microsoft Certified Technology Specialist (MCTS): Windows Applications, Microsoft Certified Systems Engineer (MCSE) and Microsoft Certified Systems Administrator (MCSA).
He is also an Amazon #1 bestselling author of 4 Microsoft Excel books and a teacher of Microsoft Excel & Office at the MyExecelOnline Academy Online Course.


