Excel is a powerhouse when it comes to data handling, analysis, and automation. While many users are familiar with its built-in search and filter options, there is a more powerful way to take control of your data: Excel Macros. With a simple macro, you can automatically highlight any text you specify — saving time, reducing errors, and making your spreadsheets far more interactive.
This article will walk you through how to highlight custom text using macros. We will explore the logic behind the code, break down the steps, and provide a downloadable workbook to help you practice.
Key Takeaways:
- Macros let you highlight any custom text in Excel instantly.
- The Developer tab must be enabled to access Macros and VBA.
- VBA code can be customized for font color, background, boldness, and more.
- Macros save time and reduce manual errors in repetitive tasks.
- You can extend the macro for case-insensitive or partial text matches.
Exercise Workbook:
Table of Contents
Highlight Custom Text Using Macros in Excel
Activate Developer Tab
Here are the quick steps to enable the Developer tab in Excel.
STEP 1: Open Excel and go to the File tab (top-left corner).
STEP 2: Click Options at the bottom of the left menu.
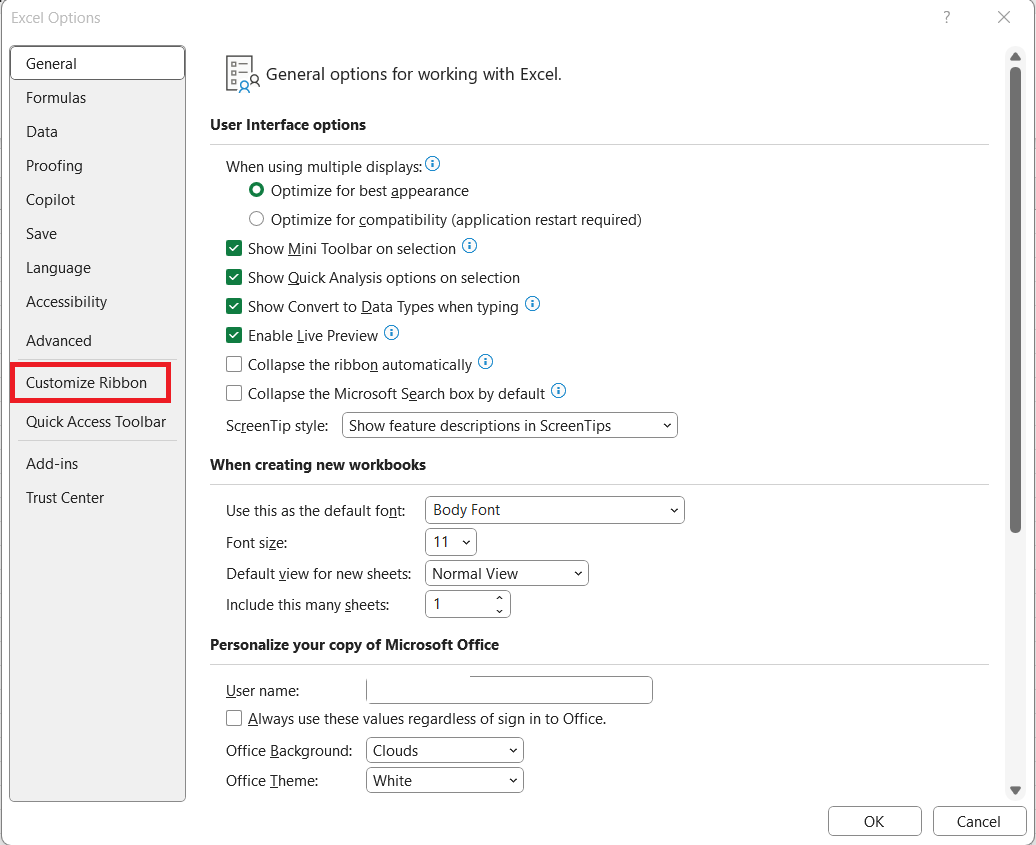
STEP 3: In the Excel Options dialog box, click Customize Ribbon on the left.
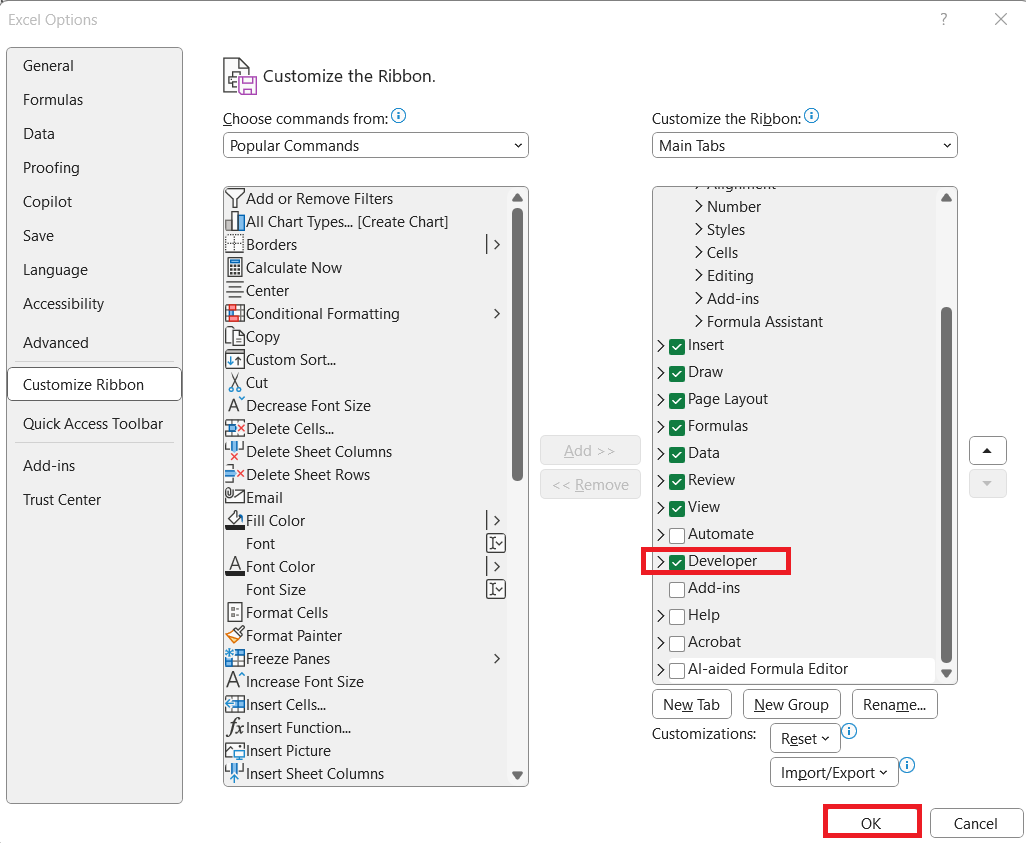
STEP 4: On the right, under Main Tabs, check the box labeled Developer. Click OK.
You’ll now see the Developer tab appear on the Excel ribbon, usually between View and Help. From here, you can access Macros, Visual Basic Editor, Form Controls, and more Excel geeky goodness.
Write VBA Code
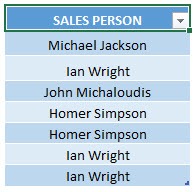
Here is our initial set of data:
STEP 1: Go to Developer > Code > Visual Basic
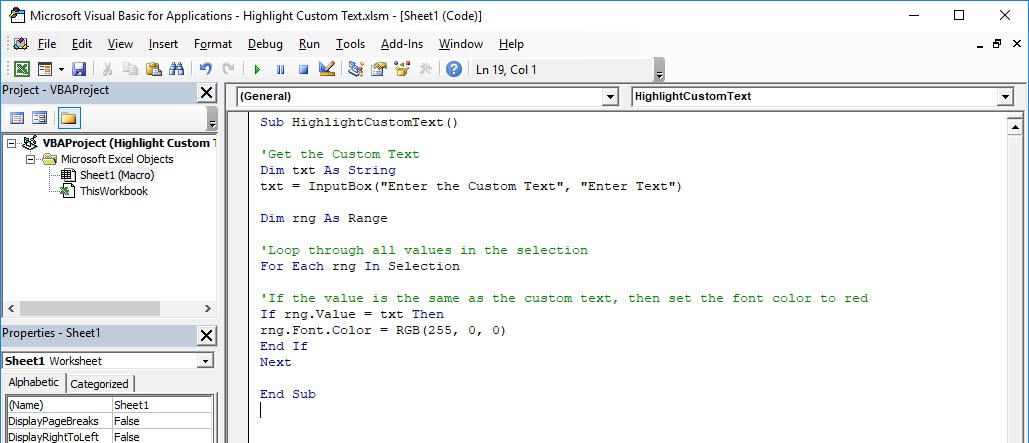
STEP 2: Paste in your code and Select Save. Close the window afterwards.
Sub HighlightCustomText()
'Get the Custom Text
Dim txt As String
txt = InputBox("Enter the Custom Text", "Enter Text")
Dim rng As Range
'Loop through all values in the selection
For Each rng In Selection
'If the value is the same as the custom text, then set the font color to red
If rng.Value = txt Then
rng.Font.Color = RGB(255, 0, 0)
End If
Next
End Sub
STEP 3: Let us test it out!
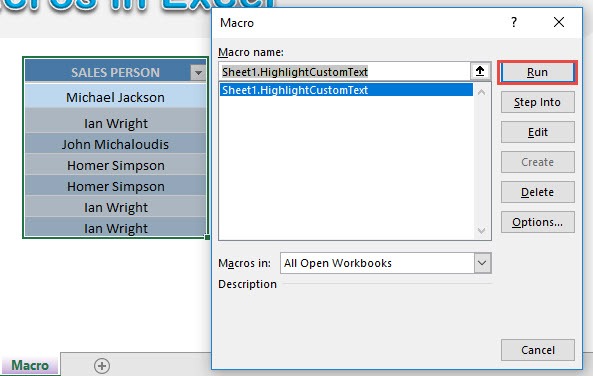
Open the sheet containing the data. Go to Developer > Code > Macros
Make sure your macro is selected. Click Run.
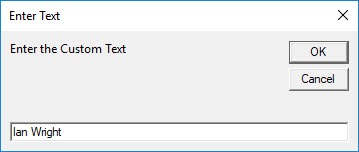
For the text, let’s type in Ian Wright. Click OK.
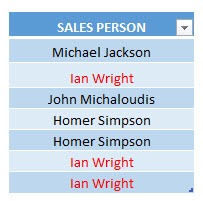
With just one click, all Ian Wright values are now highlighted!
Customizing the Macro
The best part of VBA macros is that you can tweak them to fit your needs. Here are some variations:
Highlight Background Instead of Font
rng.Interior.Color = RGB(255, 255, 0) 'Yellow background
Make Text Bold
rng.Font.Bold = True
Case-Insensitive Search
If LCase(rng.Value) = LCase(txt) Then
rng.Font.Color = RGB(255, 0, 0)
End If
Partial Match Search
If InStr(1, rng.Value, txt, vbTextCompare) > 0 Then
rng.Font.Color = RGB(0, 0, 255) 'Blue font for partial matches
End If
Tips & Tricks
Practical Use Cases
- Employee Records: Highlight a particular employee name across different sheets.
- Product Tracking: Quickly highlight all rows containing a specific product code.
- Survey Data: Find and highlight particular responses instantly.
- Financial Reports: Spot and format key account names or transaction IDs.
- Customer Support Logs: Highlight priority customer names for follow-ups.
In short, anywhere you have repetitive searches, this macro saves time.
Troubleshooting & Tips
- Macro Security: If macros are disabled, enable them via File > Options > Trust Center > Macro Settings.
- Selection Limitation: Make sure to highlight the range first before running the macro.
- Exact Match vs Partial Match: By default, it only highlights exact matches. Modify with InStr if you want partial matches.
- Undo Option: VBA actions cannot be undone with Ctrl + Z. Save your workbook before testing.
- Performance: For huge datasets, try limiting your selection to specific columns.
FAQs
1. Why should I use a macro instead of Conditional Formatting in Excel?
Conditional Formatting works great when you already know the conditions and set them up in advance, but it can be time-consuming if you want to highlight different text values frequently. A macro gives you the flexibility to type in any custom text dynamically each time you run it. You don’t need to create or edit rules repeatedly. It saves time, especially when you’re dealing with large data sets or multiple terms. In short, macros provide flexibility and automation that static rules cannot match.
2. How do I enable the Developer tab if I don’t see it in Excel?
To enable the Developer tab, go to File > Options > Customize Ribbon. In the Excel Options window, look at the right-hand side under “Main Tabs” and check the box labeled Developer. Click OK and the tab will appear on the ribbon, usually between View and Help. Once enabled, you’ll gain access to tools like Macros, the Visual Basic Editor, and form controls. This tab is essential for creating, running, and managing VBA macros in Excel.
3. Can I make the macro highlight partial matches instead of exact matches?
Yes, you can modify the code to highlight cells that contain part of the text you enter. By replacing the condition with InStr(1, rng.Value, txt, vbTextCompare) > 0, the macro checks if your search text exists anywhere inside the cell value. For example, if you search for “Ian,” it will highlight both “Ian Wright” and “Ian Johnson.” This makes the macro more flexible when you don’t know the exact wording. However, keep in mind that it may also highlight unintended matches if the string is too broad.
4. What happens if macros are disabled on my computer?
By default, Excel disables macros for security reasons since they can contain malicious code. If macros are disabled, you won’t be able to run or test your VBA script until you enable them. To do this, go to File > Options > Trust Center > Trust Center Settings > Macro Settings, and then choose “Enable all macros” or “Disable all macros with notification.” It’s always best to enable macros only from trusted sources. Once enabled, your custom highlight macro will run smoothly.
5. Can I undo the macro’s changes if I make a mistake?
Unfortunately, changes made by VBA macros cannot be undone using the standard Ctrl + Z shortcut. This is one of the key differences between manual formatting and macro-based actions. To avoid mistakes, always save your workbook before running the macro so you can easily revert if something goes wrong. You can also create a backup copy of your data before testing new macros. If you anticipate running the macro frequently, consider adding more conditions or safeguards to avoid accidental formatting errors.

Bryan
Bryan Hong is an IT Software Developer for more than 10 years and has the following certifications: Microsoft Certified Professional Developer (MCPD): Web Developer, Microsoft Certified Technology Specialist (MCTS): Windows Applications, Microsoft Certified Systems Engineer (MCSE) and Microsoft Certified Systems Administrator (MCSA).
He is also an Amazon #1 bestselling author of 4 Microsoft Excel books and a teacher of Microsoft Excel & Office at the MyExecelOnline Academy Online Course.


