When I first started working with Excel, I thought I had it all figured out—formulas, charts, conditional formatting—the usual tools. But over time, I realized that repeating tasks (like highlight top 10 values in a dataset) was chewing up hours of my productivity. That’s when I discovered the power of macros in Excel. Writing a simple macro to automate something as routine as highlighting the top 10 values completely changed the way I approached data analysis. In this article, I’ll walk you through how to do it step by step.
Key Takeaways:
- Macros save time by automating repetitive Excel tasks like highlighting top values.
- A simple VBA script can transform how you analyze and present data.
- Beyond top 10 highlights, macros can sort, format, and even generate reports.
- Small code tweaks allow flexibility—like flipping focus from top to bottom performers.
- Combining macros creates efficient workflows that speed up insights.
Exercise Workbook:
Table of Contents
Step-by-Step Guide to Highlight Top 10 Values of Selection Using Macros
STEP 1: Go to Developer > Code > Visual Basic
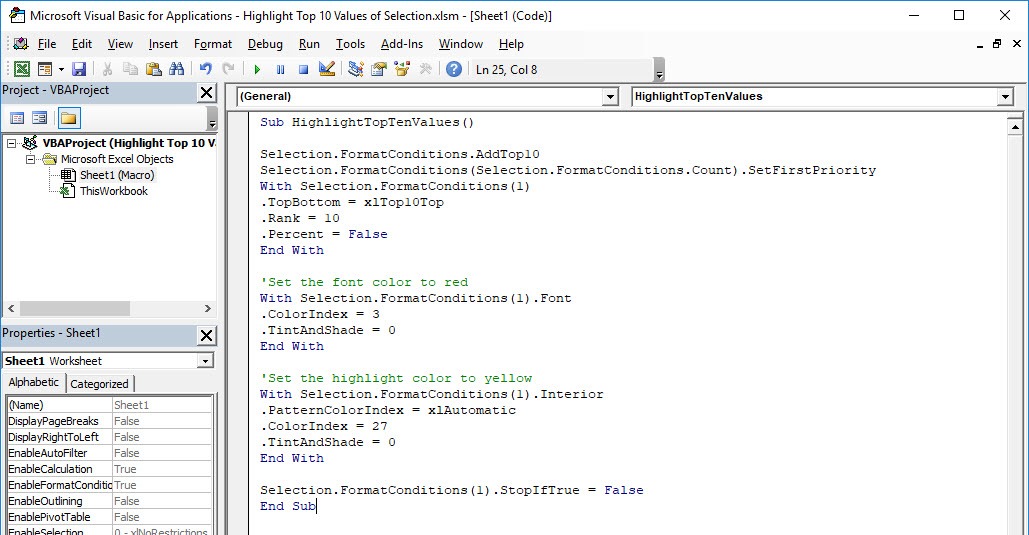
STEP 2: Paste in your code and Select Save. Close the window afterwards.
Sub HighlightTopTenValues()
Selection.FormatConditions.AddTop10
Selection.FormatConditions(Selection.FormatConditions.Count).SetFirstPriority
With Selection.FormatConditions(1)
.TopBottom = xlTop10Top
.Rank = 10
.Percent = False
End With

'Set the font color to red
With Selection.FormatConditions(1).Font
.ColorIndex = 3
.TintAndShade = 0
End With

'Set the highlight color to yellow
With Selection.FormatConditions(1).Interior
.PatternColorIndex = xlAutomatic
.ColorIndex = 27
.TintAndShade = 0
End With

Selection.FormatConditions(1).StopIfTrue = False
End Sub
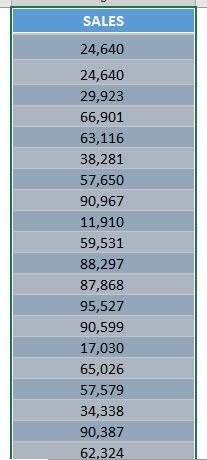
STEP 3: Let us test it out! Select the data that you want its top 10 values to be highlighted.
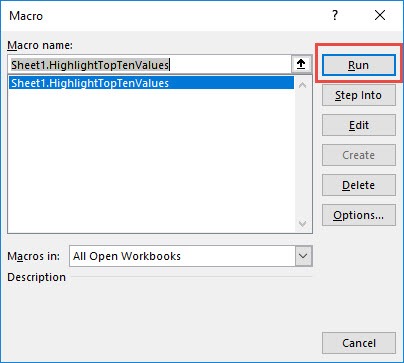
Go to Developer > Code > Macros
Make sure your macro is selected. Click Run.
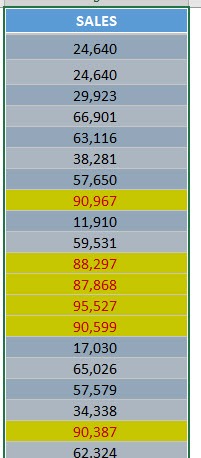
With just one click, your top 10 values will now be highlighted with a yellow background and red font. That’s it! Simple, effective, and repeatable.
Advanced Automation
This macro represents only the beginning. Recognizing its potential, I began exploring more advanced and practical use cases that significantly enhanced my efficiency and broadened the scope of what I could achieve in Excel.
Highlighting the Bottom 10 Values
Just as I could highlight the top performers, I realized I could flip the logic and highlight the bottom 10 values instead. This was especially useful when analyzing sales performance, identifying underperforming products, or spotting students who might need extra help. By simply changing the line .TopBottom = xlTop10Top to .TopBottom = xlTop10Bottom, Excel instantly shifted focus from the leaders to the laggards.
Selection.FormatConditions.AddTop10
Selection.FormatConditions(Selection.FormatConditions.Count).SetFirstPriority
With Selection.FormatConditions(1)
.TopBottom = xlTop10Bottom
.Rank = 10
.Percent = False
End With
Sorting data automatically from highest to lowest
Sorting data automatically by highest to lowest makes it effortless to bring the most important figures to the forefront without manually dragging filters or re-arranging rows. With a macro, a single click ensures your dataset is always prioritized correctly.
Sub SortDescending()
With ActiveSheet.Sort
.SortFields.Clear
.SortFields.Add Key:=Selection, Order:=xlDescending
.SetRange Selection
.Header = xlNo
.Apply
End With
End Sub
Formatting tables with borders, headers, and color scheme
Formatting tables with borders, headers, and color schemes in one click not only saves time but also ensures a polished, professional look across all reports. Instead of spending minutes tweaking styles, the macro applies a consistent layout instantly.
Sub FormatTable()
With Selection
.Borders.LineStyle = xlContinuous
.Borders.Weight = xlThin
.Font.Name = "Calibri"
.Font.Size = 11
.Interior.Color = RGB(242, 242, 242) ' Light gray background
End With
End Sub
By chaining these macros together, I created mini “workflows” in Excel. Instead of spending 30 minutes cleaning and formatting data before even analyzing it, I could run my macros and jump straight to insights.
Tips & Tricks
Here are some handy tips I picked up while using this macro:
- Use Keyboard Shortcuts: Assign the macro to a shortcut like Ctrl+Shift+T to trigger it instantly.
- Expand Beyond Top 10: Change .Rank = 10 in the code to highlight the top 20, top 50, or even just the top 1.
- Use Percentages: Set .Percent = True if you’d rather highlight the top 10% instead of 10 values.
- Apply to Bottom Values: Replace xlTop10Top with xlTop10Bottom to surface the lowest performers.
- Combine with Other Macros: Run this together with macros for formatting, sorting, or chart creation for maximum efficiency.
FAQs
Q1. What exactly is a macro in Excel?
A macro in Excel is a set of recorded or written instructions that automates repetitive tasks. Instead of performing the same steps manually, you can run a macro with one click or shortcut. Instead of clicking through 10–15 steps, you can trigger a macro with a single button or keyboard shortcut. This makes macros especially powerful for tasks you repeat often, such as cleaning raw data, standardizing reports, or generating monthly dashboards.
Q2. Why use macros when Excel already has built-in tools?
Excel does come with strong built-in tools—like filters, conditional formatting, PivotTables, and functions—but they often still require manual effort each time you use them. For example, if you prepare a weekly sales report, you might need to apply filters, update charts, adjust formatting, and copy results into a summary sheet. Doing this manually every week is time-consuming and prone to mistakes. A macro automates the entire process so that with one click, Excel executes the steps consistently and without error. The real value of macros shines when you need to repeat the same task across multiple sheets, workbooks, or even when handling large datasets. In short: built-in tools handle “one-off” work; macros shine when you need automation and scale.
Q3. Do I need programming knowledge to write macros?
Not necessarily. . Excel has a “Record Macro” feature that lets you perform a series of actions while Excel records them in the background. Once recorded, you can replay that macro whenever you like—no coding required. However, if you want to go beyond simple automation, learning a bit of VBA (Visual Basic for Applications) is a huge advantage. VBA lets you edit the recorded code, add logic (like “If this, then do that”), and make your macros dynamic. Even small tweaks—such as changing a fixed cell reference into a variable, or adjusting a filter condition—can take your macros from basic to powerful. So while programming knowledge isn’t required, it definitely unlocks the full potential of what macros can do.
Q4. Can macros be used for more than highlighting values?
Yes, macros go far beyond highlighting. They can sort datasets, apply consistent formatting, generate charts, and even compile automated reports. Once you grasp the basics, you can chain multiple macros together into workflows that streamline your entire Excel process.
Q5. Are macros safe to use in Excel?
Macros themselves are safe when you create them. However, Excel warns about macros in downloaded files because malicious VBA code can exist. Always enable macros only in files you trust. For personal use and internal automation, they are an efficient and secure way to supercharge Excel.

Bryan
Bryan Hong is an IT Software Developer for more than 10 years and has the following certifications: Microsoft Certified Professional Developer (MCPD): Web Developer, Microsoft Certified Technology Specialist (MCTS): Windows Applications, Microsoft Certified Systems Engineer (MCSE) and Microsoft Certified Systems Administrator (MCSA).
He is also an Amazon #1 bestselling author of 4 Microsoft Excel books and a teacher of Microsoft Excel & Office at the MyExecelOnline Academy Online Course.


