In Excel we can opt to print out with very narrow margins through its interface. We can do the same thing with Excel Macros, you can print with a narrow margin, or even customize the margin values so that it will be constant every time! Make sure your Excel has the Developer Tab enabled following this tutorial. I explain how you can do this below step by step!
Key Takeaways
-
Automate Page Setup – Macros can quickly set consistent narrow margins across worksheets without manual adjustments.
-
Maximize Printable Area – Narrow margins give you more space for data on each printed page, reducing page count.
-
Ideal for Reports – Use macros to standardize margin settings for documents like financial statements or dashboards.
-
Time-Saving Solution – Avoid repetitive setup every time you print; let the macro handle it in one click.
-
Reusable Across Projects – Store the macro for use in any workbook, making it part of your go-to printing tools.
Table of Contents
Quick Overview
What does it do?
Prints out with narrow margins then shows the print dialog
Copy Source Code:
Sub PrintWithNarrowMargin()

'Set the Margins to be narrow and print it out
With ActiveSheet.PageSetup
.HeaderMargin= Application.InchesToPoints(0.3)
.FooterMargin= Application.InchesToPoints(0.3)
.LeftMargin= Application.InchesToPoints(0.25)
.RightMargin= Application.InchesToPoints(0.25)
.TopMargin= Application.InchesToPoints(0.75)
.BottomMargin= Application.InchesToPoints(0.75)
End With

Application.Dialogs(xlDialogPrint).Show

End Sub
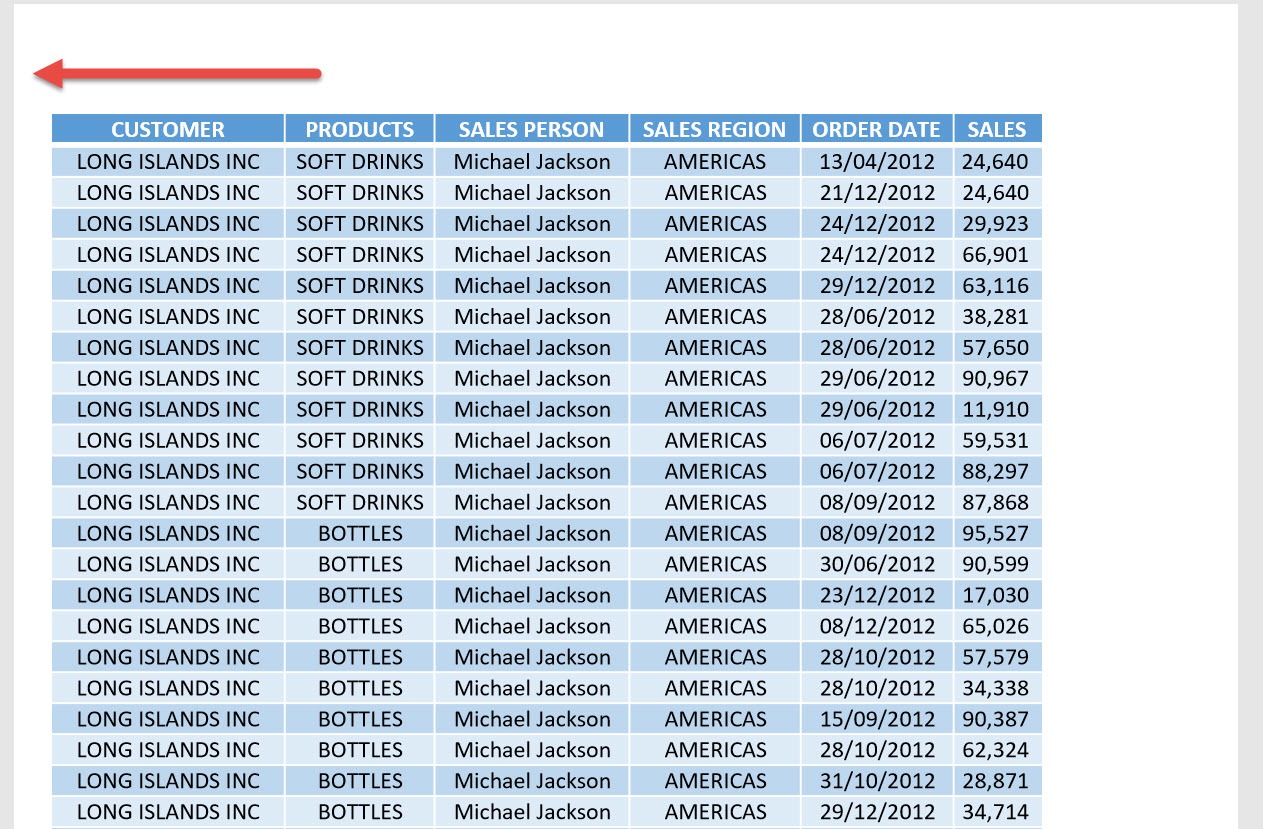
Final Result:
How to Print with a Narrow Margin Using Macros In Excel
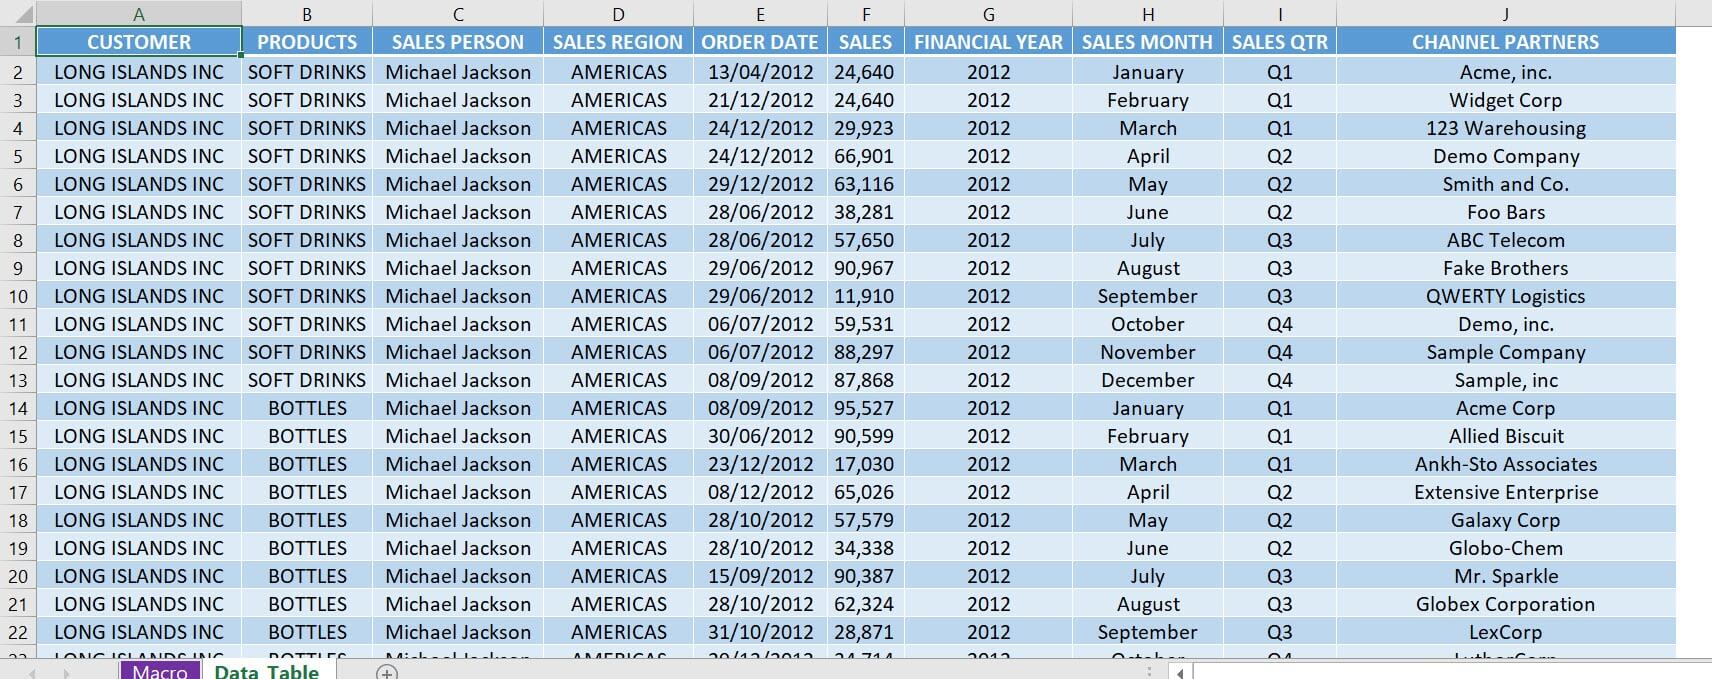
This is our data table:
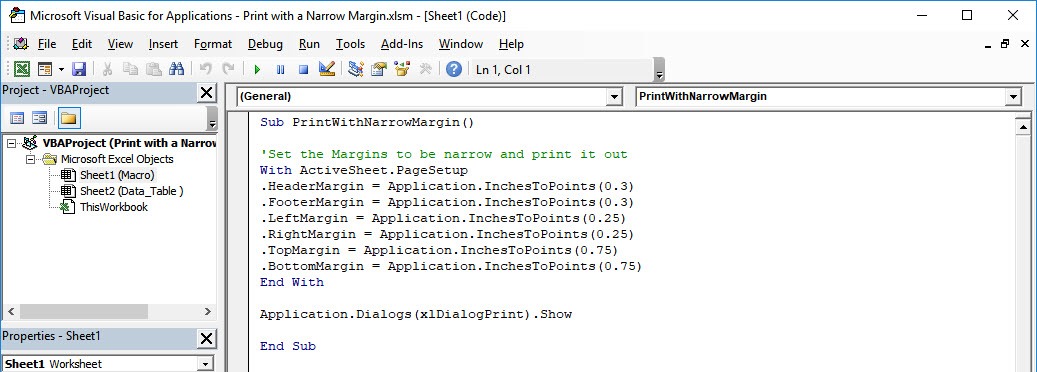
STEP 1: Go to Developer > Code > Visual Basic
STEP 2: Paste in your code and Select Save. Close the window afterwards.
STEP 3: Let us test it out!
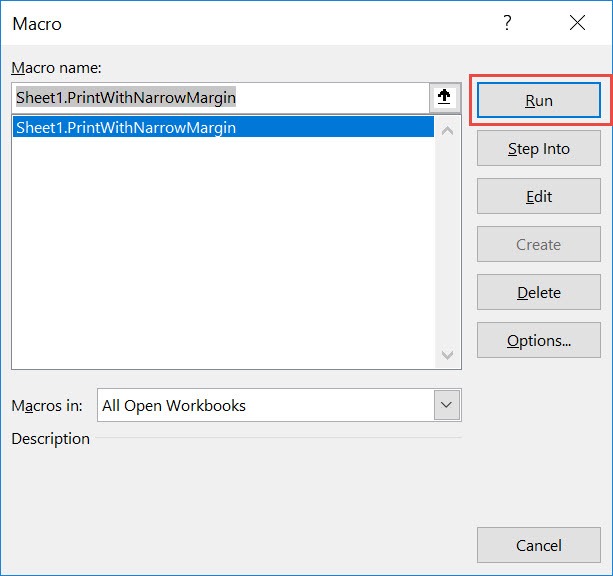
Open the sheet containing the data. Go to Developer > Code > Macros
Make sure your macro is selected. Click Run.
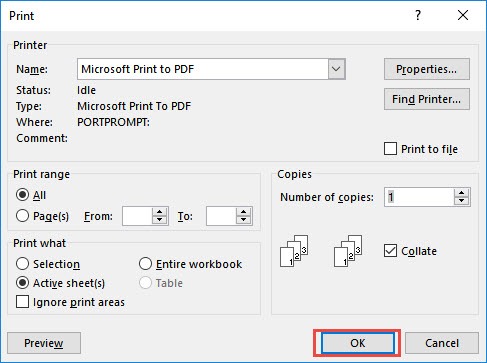
The Print Dialog is shown. Click OK once settings are good.
With just one click, you have now printed out with narrow margins!
Frequently Asked Questions
What are narrow margins in Excel printing?
Narrow margins minimize the white space around the edges of your printed sheet, allowing more content per page.
Can macros apply narrow margins to multiple sheets at once?
Yes, a macro can loop through and apply settings to all or selected worksheets automatically.
Is it safe to use macros for printing adjustments?
Yes, as long as macros are from a trusted source. They only automate steps you would normally do manually.
Can I customize the exact margin size in the macro?
Absolutely. You can define top, bottom, left, and right margins in inches or centimeters within the macro.
Do narrow margins affect how Excel looks on screen?
No, margin changes only apply to printed output and the Print Preview view—not your on-screen worksheet.

Bryan
Bryan Hong is an IT Software Developer for more than 10 years and has the following certifications: Microsoft Certified Professional Developer (MCPD): Web Developer, Microsoft Certified Technology Specialist (MCTS): Windows Applications, Microsoft Certified Systems Engineer (MCSE) and Microsoft Certified Systems Administrator (MCSA).
He is also an Amazon #1 bestselling author of 4 Microsoft Excel books and a teacher of Microsoft Excel & Office at the MyExecelOnline Academy Online Course.
