If you’ve ever worked on a report or dashboard in Excel with multiple charts, you know the pain: they all start off in different shapes and sizes, and aligning them perfectly can feel like trying to herd cats. Manually resizing each chart is not only tedious but also error-prone. With a simple VBA script, I could resize all charts on a sheet in just a single click, saving time and avoiding frustration.
In this article, I’m going to walk you through exactly how I did it.
Key Takeaways:
- Macros in Excel can instantly resize all charts on a sheet with one click.
- This saves time, ensures consistency, and eliminates manual resizing errors.
- The default macro sets charts to 400×400 pixels, but you can customize the size.
- The provided code works only on the active sheet, but it can be adapted for all sheets.
- Always save your workbook as .xlsm to retain and run macros.
Exercise Workbook:
Table of Contents
Why Macros Are Perfect for This
Before diving into the steps, let me explain why I went for a macro instead of just resizing manually or using some “align and distribute” trick.
- Speed – Resizing one chart might take a few seconds, but doing it for 20+ charts could take several minutes. A macro does it instantly.
- Consistency – Manually resizing often leads to slightly off sizes. Macros set exact height and width values across the board.
- Reusability – Once written, the macro can be reused for any future reports.
- Automation-friendly – If your dashboards refresh regularly, running the macro after an update keeps everything tidy.
How to Resize all Charts using Macro
Activate Developer Tab
The first step was to open the Visual Basic for Applications (VBA) editor. If you don’t see the Developer tab in Excel, here’s how to enable it:
STEP 1: Click File → Options.
STEP 2: Select Customize Ribbon.
STEP 3: Tick the checkbox for Developer in the right panel. Click OK.
Write VBA Code
STEP 1: Go to Developer > Code > Visual Basic
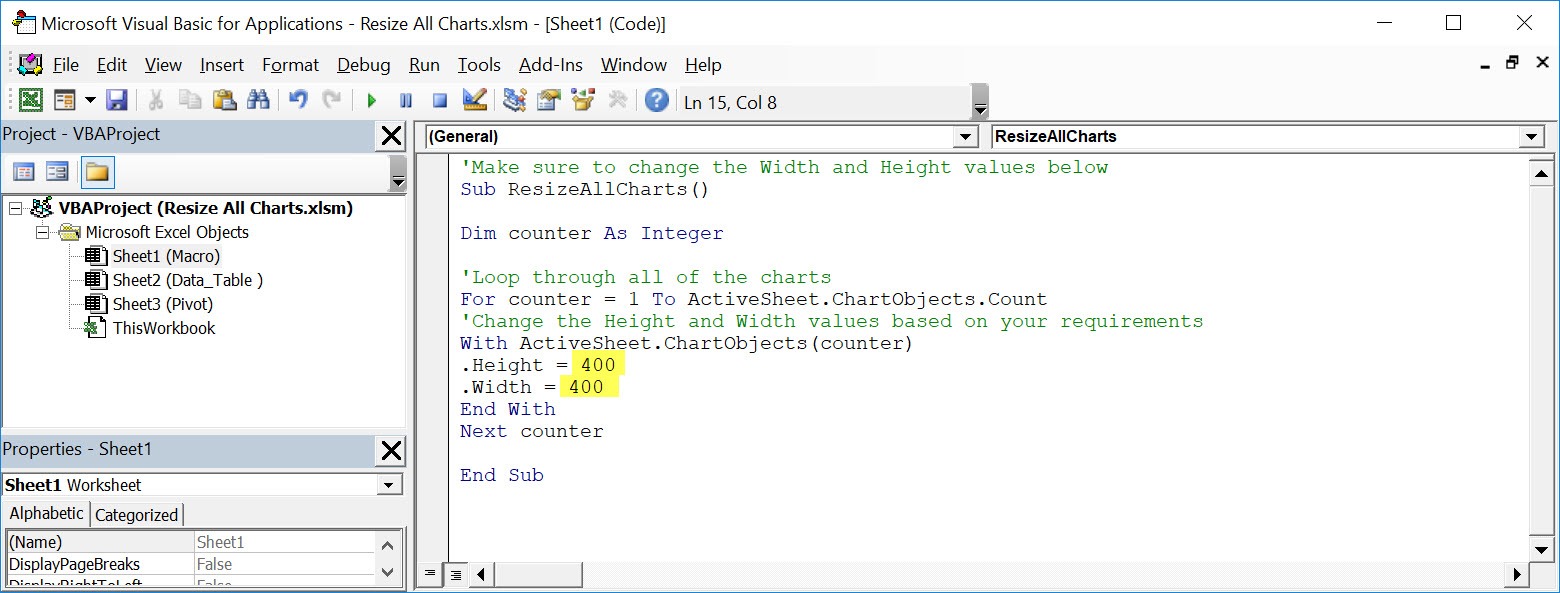
STEP 2: Paste in your code and Select Save. You can change the Height and Weight if you prefer a different size than 400. Close the window afterwards.
'Make sure to change the Width and Height values below
Sub ResizeAllCharts()
Dim counter As Integer
'Loop through all of the charts
For counter = 1 To ActiveSheet.ChartObjects.Count
'Change the Height and Width values based on your requirements
With ActiveSheet.ChartObjects(counter)
.Height = 400
.Width = 400
End With
Next counter
End Sub
STEP 3: Let us test it out!
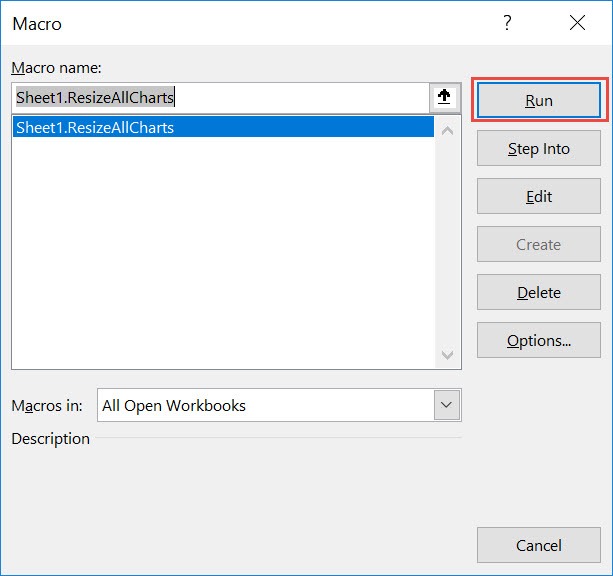
Open the sheet containing the charts. Go to Developer > Code > Macros
Make sure your macro is selected. Click Run.
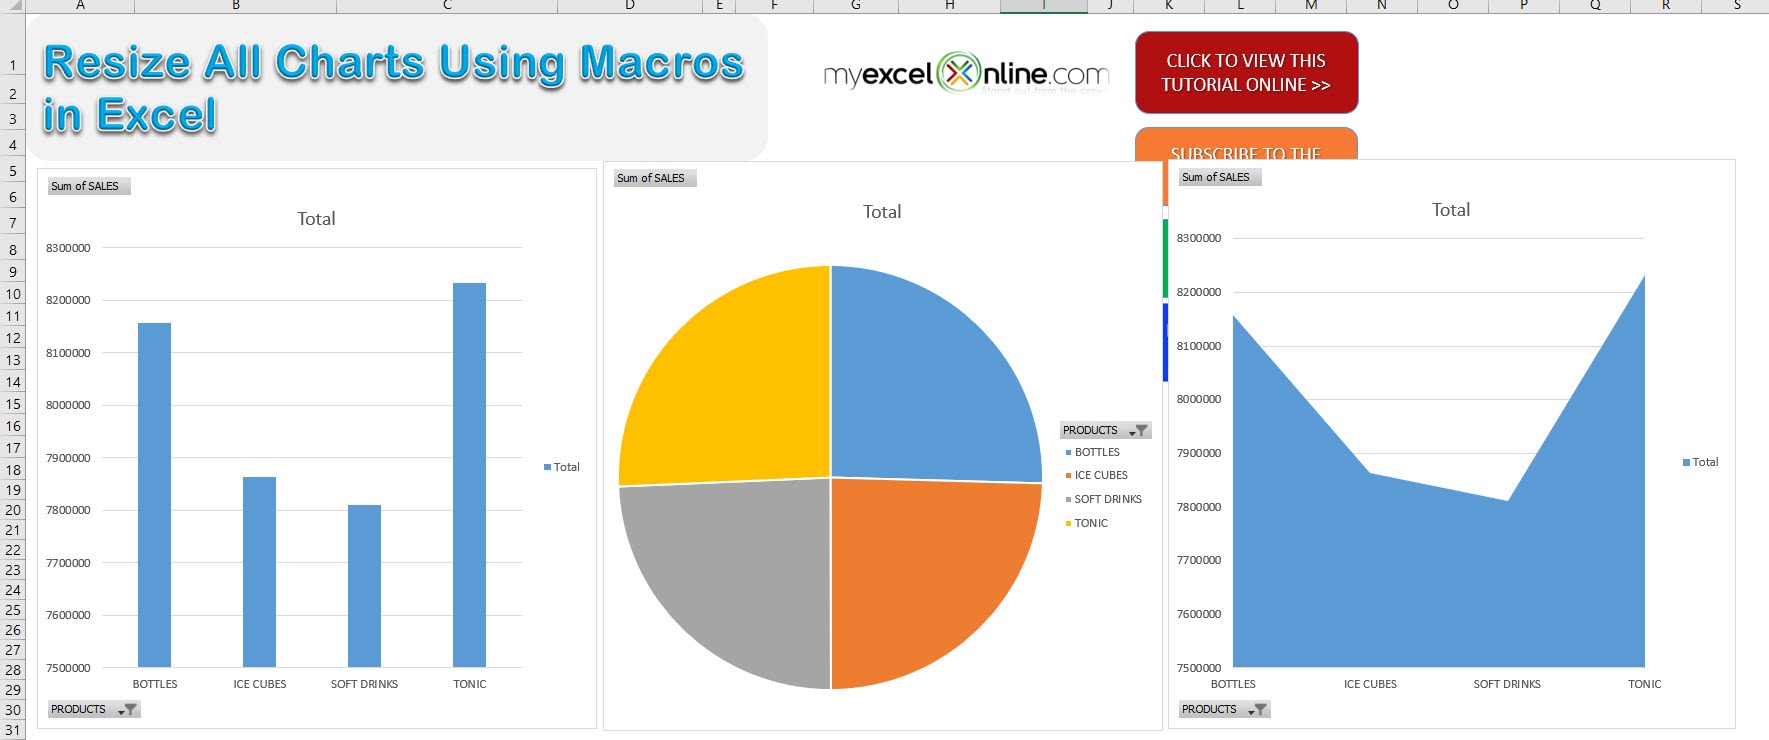
With just one click, all of your charts are now resized!
Breaking Down the Code
Let me explain what each part does:
- Sub ResizeAllCharts() – This is the start of the macro. Think of it like giving a name to your new Excel “superpower.”
- Dim counter As Integer – This creates a variable called counter to help loop through all charts on the sheet.
- For counter = 1 To ActiveSheet.ChartObjects.Count – This loop starts at the first chart and goes until it reaches the last one.
- With ActiveSheet.ChartObjects(counter) – This means: “Hey Excel, whatever chart I’m looking at right now, apply the following changes to it.”
- .Height = 400 and .Width = 400 – This sets the height and width for the current chart.
- End With – Ends the specific chart’s commands.
- Next counter – Moves on to the next chart in the sheet.
Saving the Code
After pasting in the code:
- I clicked File > Save in the VBA editor.
- Then, I closed the VBA window to go back to Excel. When saving your Excel workbook after creating a macro, you must save it as a Macro-Enabled Workbook (.xlsm).
If you forget this, your macro won’t be saved, and you’ll be back to square one next time.
Advanced Tips & Tricks
Why This Macro Works Only on the Active Sheet
You might have noticed that the code uses ActiveSheet. This means it only resizes the charts on the sheet you currently have open.
If you want to resize charts on all sheets in the workbook, you can tweak the macro like this:
Sub ResizeChartsInWorkbook()
Dim ws As Worksheet
Dim counter As Integer
For Each ws In ThisWorkbook.Worksheets
For counter = 1 To ws.ChartObjects.Count
With ws.ChartObjects(counter)
.Height = 400
.Width = 400
End With
Next counter
Next ws
End Sub
This version loops through every sheet and resizes every chart it finds.
Adjusting Height and Width
The numbers 400 for height and width are completely flexible. I chose them because they fit nicely into my dashboard layout.
If you want something different, just replace the values:
.Height = 300
.Width = 500
This is perfect if you have a horizontal layout and want wider charts or a vertical stack with taller charts.
FAQs
1. Why should I use a macro instead of resizing charts manually?
Using a macro is faster, more consistent, and less error-prone than manual resizing. When you manually drag chart borders, small differences in height and width can creep in, making the dashboard look unprofessional. A macro applies exact dimensions to all charts instantly, saving you time and giving your work a polished, uniform look.
2. Do I need programming skills to use this macro?
Not really. You only need to copy the provided VBA code into Excel’s Visual Basic editor. The steps to access the Developer tab, paste the code, and run the macro are straightforward. Even if you’ve never written a line of code before, you can follow the step-by-step instructions and get it working in minutes.
3. Can I make the macro resize charts on all sheets, not just one?
Yes. The default version affects only the active sheet because it uses ActiveSheet. However, by modifying the code to loop through ThisWorkbook.Worksheets, you can apply the resizing to every chart in your entire workbook. The adjusted version is provided in the article for convenience.
4. What if I want a different chart size than 400×400?
That’s easy—just change the .Height and .Width values in the macro to match your desired size. For example, .Height = 300 and .Width = 500 will create wider, shorter charts. You can experiment with different values until you find the size that fits your layout best.
5. How do I make sure my macro doesn’t disappear after saving?
When saving your workbook after adding the macro, choose Excel Macro-Enabled Workbook (.xlsm) from the Save As dialog. If you save it as a normal .xlsx file, Excel will strip out your macro, and you’ll have to re-add it. Always check the file format before closing your work.

Bryan
Bryan Hong is an IT Software Developer for more than 10 years and has the following certifications: Microsoft Certified Professional Developer (MCPD): Web Developer, Microsoft Certified Technology Specialist (MCTS): Windows Applications, Microsoft Certified Systems Engineer (MCSE) and Microsoft Certified Systems Administrator (MCSA).
He is also an Amazon #1 bestselling author of 4 Microsoft Excel books and a teacher of Microsoft Excel & Office at the MyExecelOnline Academy Online Course.


