We have a cool trick to try out using Excel Macros: you can display a closing message to thank your users once they close the spreadsheet. This is not only professional but also adds a personal touch—imagine your user leaving the file with a smile because they got a short thank-you pop-up.
In this article, I will show you step by step how to create a closing message in Excel using VBA (Visual Basic for Applications).
Key Takeaways:
- A closing message macro shows a pop-up when an Excel workbook is closed.
- The macro must be saved in ThisWorkbook, not in a module.
- You must save your file as .xlsm (Macro-Enabled Workbook) for the code to work.
- Users need to enable macros for the message to appear.
- The message text can be customized for professional, branding, or reminder purposes.
Table of Contents
Understanding Closing Messages in Excel
What Does a Closing Message Do?
When you close an Excel workbook, it normally just shuts down without saying a word (unless you forgot to save). With a closing message macro, you can control what happens right before the workbook shuts down.
For example, you can:
- Thank the user for downloading or using your file.
- Remind them to check your website or resources.
- Provide an alert about updates, disclaimers, or next steps.
This message appears every time the workbook is closed. It’s a subtle but effective way to engage your audience.
Why Is It Useful?
Closing messages may seem like a small trick, but they serve important purposes:
- Professionalism – It makes your Excel file feel like a polished product rather than just a spreadsheet.
- Engagement – You can direct users to your website, blog, or contact details.
- Education – If your file is part of a learning exercise, you can encourage them to explore more tutorials.
- Branding – It’s a low-key way to remind users where the file came from.
Think of it as the closing credits of a movie—you don’t just leave your audience hanging; you leave them with a message.
Step-by-Step Guide to Creating a Closing Message
STEP 1: Go to Developer > Code > Visual Basic
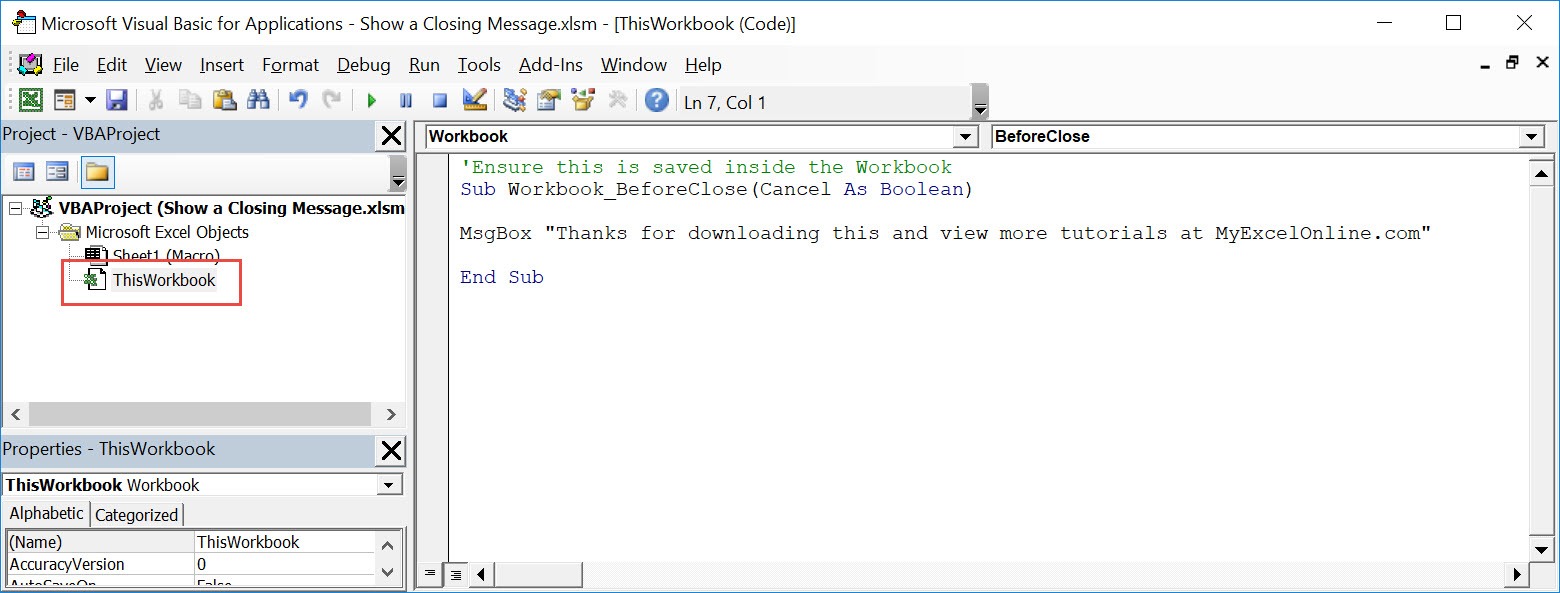
STEP 2: Paste in your code and Select Save. Make sure it is saved in ThisWorkbook.
'Ensure this is saved inside the Workbook
Sub Workbook_BeforeClose(Cancel As Boolean)
MsgBox "Thanks for downloading this and view more tutorials at MyExcelOnline.com"
End Sub
You can change the text to show in the closing message as well.
Close the window afterwards.
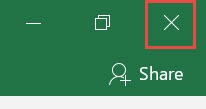
STEP 3: Let us test it out! Close your workbook.
Your macro will execute once you close the workbook. Now you can see your closing message!
Common Mistakes and Troubleshooting
Code Not Running?
If your closing message doesn’t appear, check the following:
- Did you put the code inside ThisWorkbook, not a Module or Sheet?
- Did you save the file as .xlsm (Macro-Enabled)?
- Is Macros enabled in your Excel settings? (Go to File > Options > Trust Center > Enable all macros if needed.)
Users Blocking Macros
Some users may disable macros altogether for security reasons. If macros are disabled, your closing message won’t run. To minimize this:
- Always save as .xlsm.
- Provide a short note instructing users to Enable Content when opening the file.
- Avoid overcomplicating the macro—keep it simple and trustworthy.
FAQs
1. What exactly does the Workbook_BeforeClose macro do?
The Workbook_BeforeClose macro runs automatically whenever a user attempts to close the Excel workbook. It allows you to add actions, such as showing a message, saving the file, or preventing closure. In the simplest form, it displays a message box thanking or reminding the user. This makes the workbook more interactive and user-friendly. It essentially lets you control the final action before Excel shuts the file down.
2. Where should I paste the closing message code?
The code must be pasted into ThisWorkbook in the VBA editor, not in a standard module or worksheet. This is because the event is tied to the workbook itself, and modules won’t automatically trigger on close. To do this, open the VBA editor from the Developer tab, find your workbook in the Project Explorer, and double-click ThisWorkbook. Then paste the macro code in the code window. If you put it anywhere else, the closing message will not appear.
3. Why is my closing message not showing up?
There are several possible reasons for this issue. The most common is saving the workbook as .xlsx instead of .xlsm, which does not support macros. Another reason is placing the code in the wrong location, like a module instead of ThisWorkbook. Sometimes, macros are simply disabled in Excel settings, so you need to enable them. Always double-check that your file type, location of code, and macro settings are correct. This usually resolves the issue quickly.
4. Can I customize the message to include icons or titles?
Yes, the MsgBox function allows for customization. You can add icons like vbInformation, vbExclamation, or vbCritical to change the look of the pop-up. You can also specify a title that appears in the message box window. For example:
MsgBox “Please save your work before closing!”, vbExclamation, “Reminder”
This displays a warning icon with the title “Reminder.” Customizing the text and icons makes the message more professional and relevant.
5. What if users disable macros on their Excel?
If macros are disabled, the closing message will not appear because Excel VBA won’t run. This is a common security feature in Excel to prevent harmful code from running automatically. To overcome this, you should instruct users to click Enable Content when opening the workbook. It also helps to add a note on the first sheet explaining that macros must be enabled for full functionality. While you can’t force users to enable macros, clear instructions usually solve the problem.

Bryan
Bryan Hong is an IT Software Developer for more than 10 years and has the following certifications: Microsoft Certified Professional Developer (MCPD): Web Developer, Microsoft Certified Technology Specialist (MCTS): Windows Applications, Microsoft Certified Systems Engineer (MCSE) and Microsoft Certified Systems Administrator (MCSA).
He is also an Amazon #1 bestselling author of 4 Microsoft Excel books and a teacher of Microsoft Excel & Office at the MyExecelOnline Academy Online Course.


