As someone who spends countless hours working in Microsoft Excel, I’ve encountered numerous challenges that forced me to rethink my approach to data management. One recurring issue is dealing with hidden rows and columns. Sometimes, after collaborating with colleagues or importing data from external sources, I find myself with spreadsheets littered with hidden information. Manually unhiding each row and column can be tedious and time-consuming, especially when working with large datasets. That’s where Excel macros come into play—a powerful tool that automates repetitive tasks and saves valuable time.
In this article, I’ll share my journey and practical steps to unhide all hidden rows and columns using macros in Excel, complete with code examples and tips for effective use.
Key Takeaways:
- Hidden rows and columns can cause missed data during analysis.
- Macros can instantly unhide all rows and columns in seconds.
- The Developer tab must be enabled to write and run macros.
- You can assign macros to buttons for quick, no-code execution.
- Macros can be customized to unhide specific sheets or ranges only.
Exercise Workbook:
Table of Contents
Understanding Hidden Rows and Columns in Excel
Before diving into macros, it’s essential to understand why rows and columns might be hidden in Excel. In my experience, hidden rows and columns are typically the result of one or more of the following:
- Filtering data to show only relevant information
- Collapsing sections for cleaner presentation
- Accidentally hiding data during formatting
- Importing files with pre-hidden content
Regardless of the reason, hidden data can create confusion, especially when trying to analyze or share information. I’ve lost count of the number of times I’ve missed crucial data simply because it was hidden from view. That’s why learning to unhide everything quickly became a priority for me.
Unhide All Hidden Rows and Columns Using Macros
Enable the Developer Tab
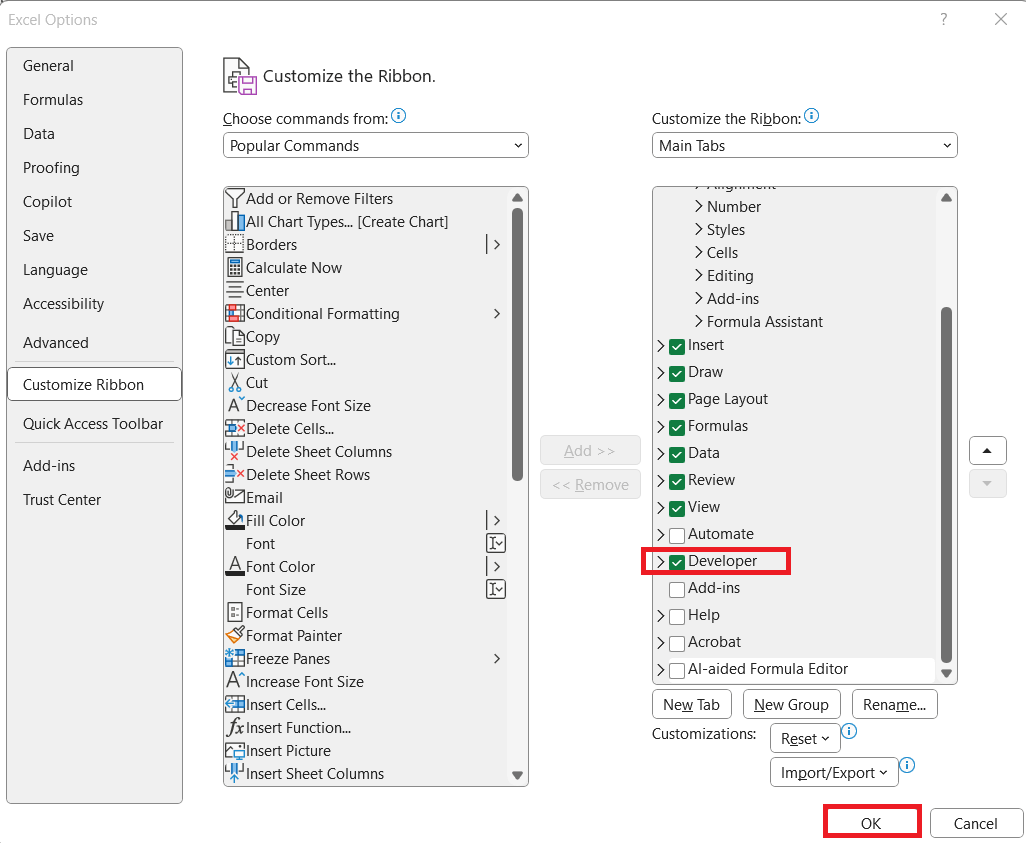
If the Developer tab isn’t visible on your Excel ribbon:
Go to File > Options.
Select Customize Ribbon. On the right, check the box for Developer. Click OK.
Done! The Developer tab will now appear on your ribbon.
Write VBA Code
STEP 1: Go to Developer > Code > Visual Basic
STEP 2: Paste in your code and Select Save. Close the window afterwards.
Sub UnhideAllHiddenRowsAndColumns()
'Unhide all hidden rows and columns
Columns.EntireColumn.Hidden = False
Rows.EntireRow.Hidden = False
End Sub
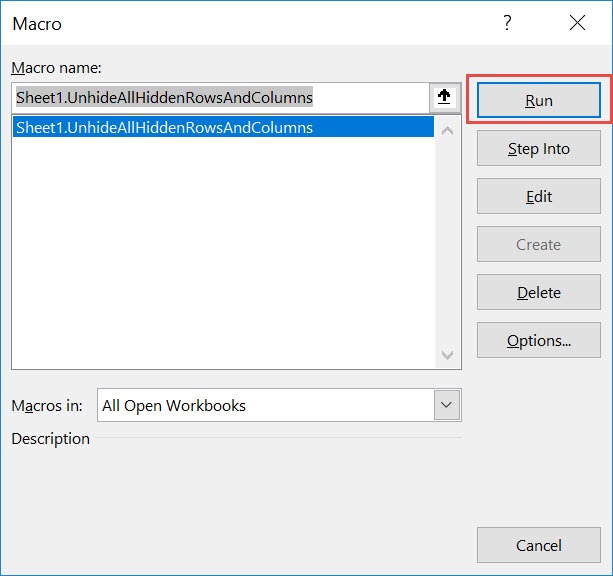
STEP 3: Let us test it out!
Open the sheet containing the data. Go to Developer > Code > Macros
Make sure your macro is selected. Click Run.
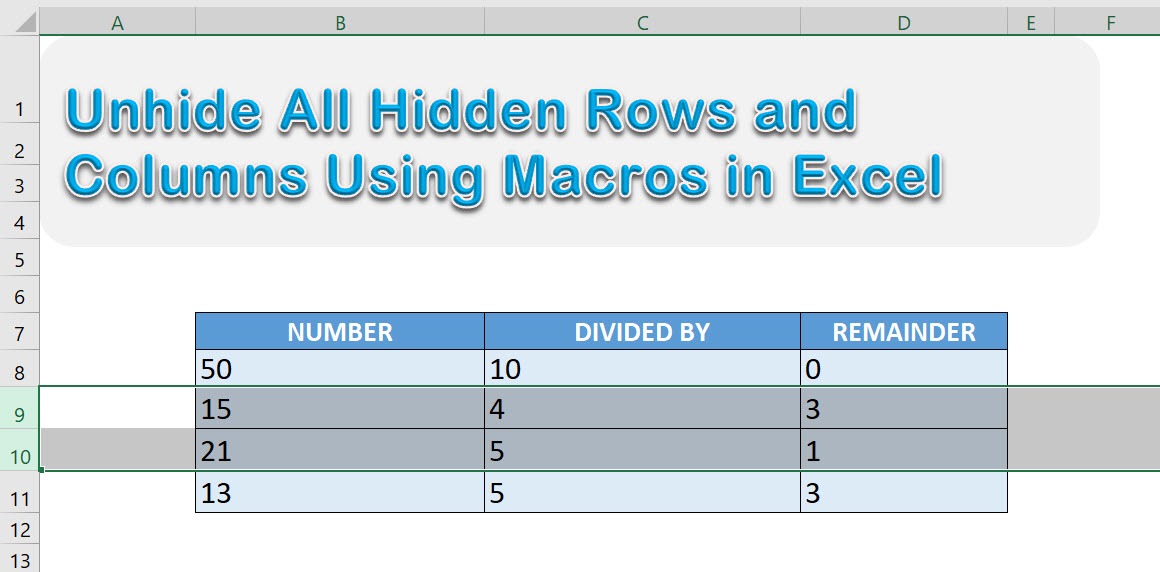
With just one click, all of the hidden rows and columns are now shown!
Assigning the Macro to a Button
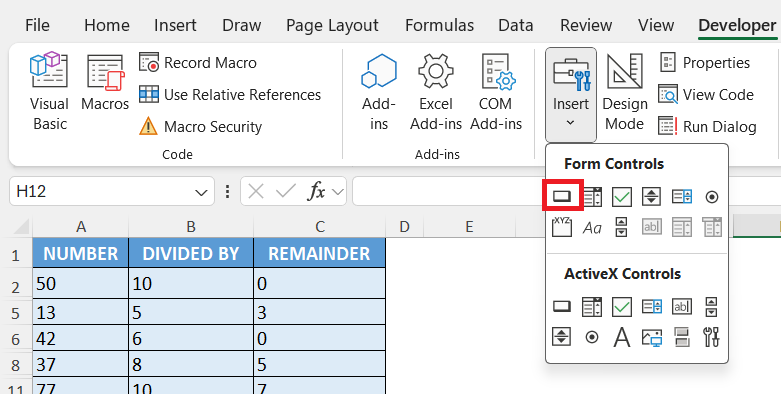
For added convenience, I often assign the macro to a button on the worksheet:
STEP 1: Go to the Developer tab.
STEP 2: Click Insert and choose a Button (Form Control).
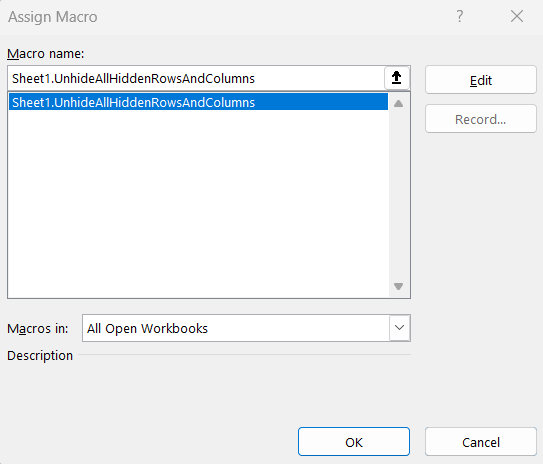
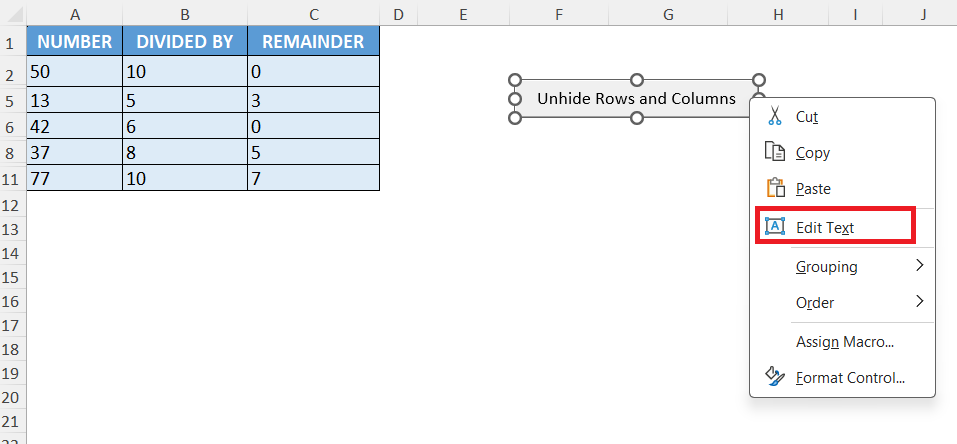
STEP 3: Draw the button on your worksheet, then assign the UnhideAllRowsAndColumns macro to it.
STEP 4: Rename it.
Now, I can unhide all rows and columns with a single click—no coding required each time.
Customizing the Macro
Unhide Rows and Columns in Active Sheet
Sometimes, I don’t want to unhide everything in every worksheet. For more targeted control, I modify the macro to affect only the active worksheet:
Sub UnhideRowsAndColumnsActiveSheet()
With ActiveSheet
.Rows.Hidden = False
.Columns.Hidden = False
End With
End Sub
This version unhides all rows and columns only in the worksheet I’m currently viewing. It’s perfect when I’m working with a single sheet and want to avoid altering others.
Unhiding Specific Ranges
Occasionally, I need to unhide a specific range of rows or columns. For example, if I know that rows 10 through 20 are hidden, I use:
Sub UnhideSpecificRows()
Rows("10:20").Hidden = False
End Sub
This is great when I only want to reveal a certain section without disturbing the rest of the sheet.
FAQs
1. Why would I use a macro instead of manually unhiding rows and columns?
While you can manually unhide rows and columns, it becomes tedious and time-consuming when dealing with large spreadsheets or multiple worksheets. A macro automates the process, completing the task in seconds regardless of the dataset’s size. It also ensures you don’t accidentally skip hidden sections. This is especially useful when working with imported or collaborative files.
2. Will running the macro affect the formatting or data in my sheet?
No, the macro only changes the Hidden property of rows and columns—it does not alter cell content or formatting. Your formulas, conditional formatting, and styles remain untouched. However, if rows or columns were hidden intentionally for layout reasons, they will still become visible. It’s wise to double-check before running it on sensitive layouts.
3. Can I use this macro across multiple workbooks?
Yes, but you have to either paste the macro into each workbook’s VBA editor or save it in your Personal Macro Workbook. Saving it there allows you to run the macro in any Excel file without re-adding the code each time. This is ideal if unhiding hidden data is something you do frequently.
4. How can I make the macro easier to run without opening the VBA editor each time?
The easiest method is assigning it to a button or adding it to the Quick Access Toolbar. A button on the sheet lets you click once to unhide everything instantly, while adding it to the Quick Access Toolbar gives you a one-click option no matter which sheet you’re in. Both methods remove the need to open the Macros dialog box.
5. Can I modify the macro to only unhide certain parts of my worksheet?
Yes, the macro can be adjusted to target specific ranges instead of the entire sheet. For example, Rows(“5:15”).Hidden = False unhides only rows 5 through 15, and Columns(“B:F”).Hidden = False unhides only columns B to F. This is helpful when you only need certain sections revealed without disrupting the rest of the sheet’s layout.

Bryan
Bryan Hong is an IT Software Developer for more than 10 years and has the following certifications: Microsoft Certified Professional Developer (MCPD): Web Developer, Microsoft Certified Technology Specialist (MCTS): Windows Applications, Microsoft Certified Systems Engineer (MCSE) and Microsoft Certified Systems Administrator (MCSA).
He is also an Amazon #1 bestselling author of 4 Microsoft Excel books and a teacher of Microsoft Excel & Office at the MyExecelOnline Academy Online Course.


