Merging cells in Excel can be a handy tool for formatting reports, creating headers, or giving your spreadsheet a neat and professional look. However, when working with raw data, merged cells often create more problems than they solve. They make sorting, filtering, and formulas messy. This is where learning how to unmerge all cells using Macros in Excel becomes a lifesaver.
Instead of manually selecting each merged cell and unmerging it (a slow and painful process if you have hundreds of them), you can use a simple macro that does the job instantly. In this article, we’ll go step by step to unmerge all cells using macros in Excel.
Key Takeaways:
- Merged cells look neat, but create major issues with sorting, filtering, and formulas.
- Using a VBA macro is the fastest way to unmerge multiple cells in one go.
- The basic macro works on selected cells, while a small tweak lets you unmerge the entire sheet.
- Assigning a keyboard shortcut or button makes unmerging cells even quicker.
- Avoid merging altogether by using alternatives like Center Across Selection.
Exercise Workbook:

Table of Contents
Understanding the Basics of Macros in Excel
What Are Macros and VBA?
Macros are like recorded instructions that Excel can repeat whenever you want. VBA (Visual Basic for Applications) is the programming language behind macros. With it, you can write custom commands that Excel executes.
For example, if you often merge and unmerge cells, you can create a macro for each action and run them whenever needed instead of manually navigating the Ribbon.
In this case, our macro will tell Excel:
“Look at the selected cells. If they’re merged, unmerge them all in one go.”
This simplicity is why VBA is so powerful. Even with just one line of code, you can drastically speed up your workflow.
Preparing Excel for Macros
Before writing or running macros, you need to make sure the Developer tab is enabled in Excel. By default, it’s hidden. Here’s how to turn it on:
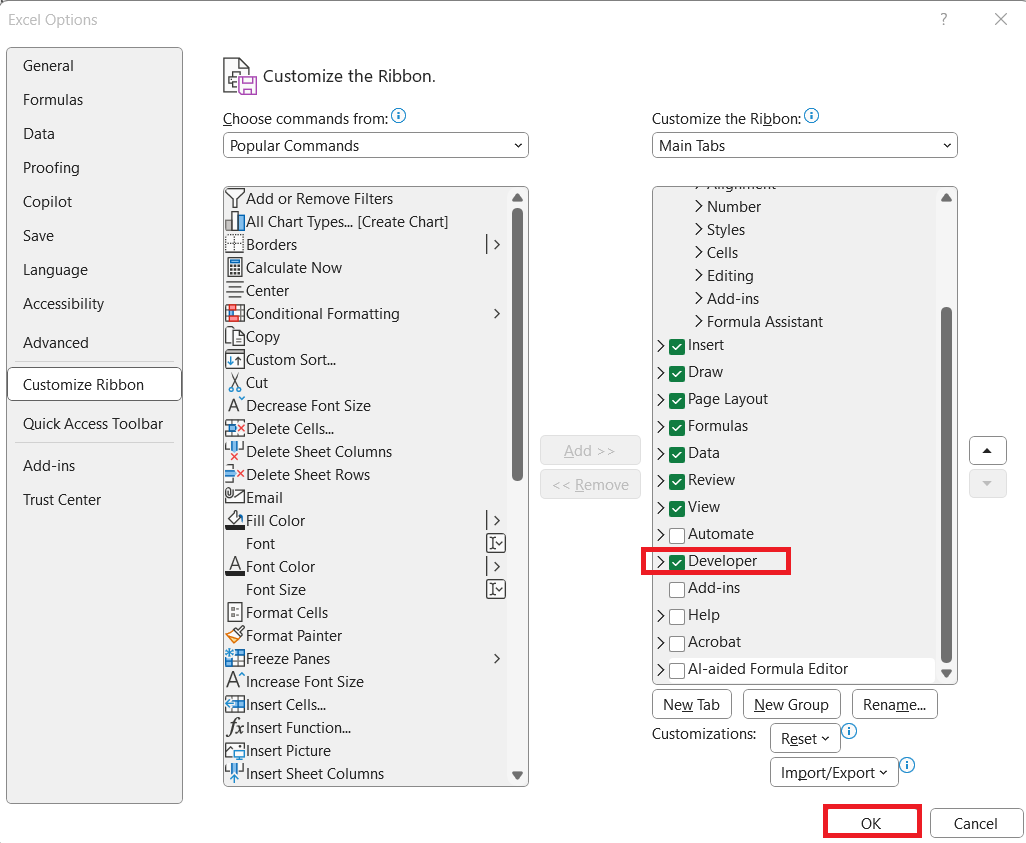
STEP 1: Open Excel and click on File > Options.

STEP 2: Go to Customize Ribbon.
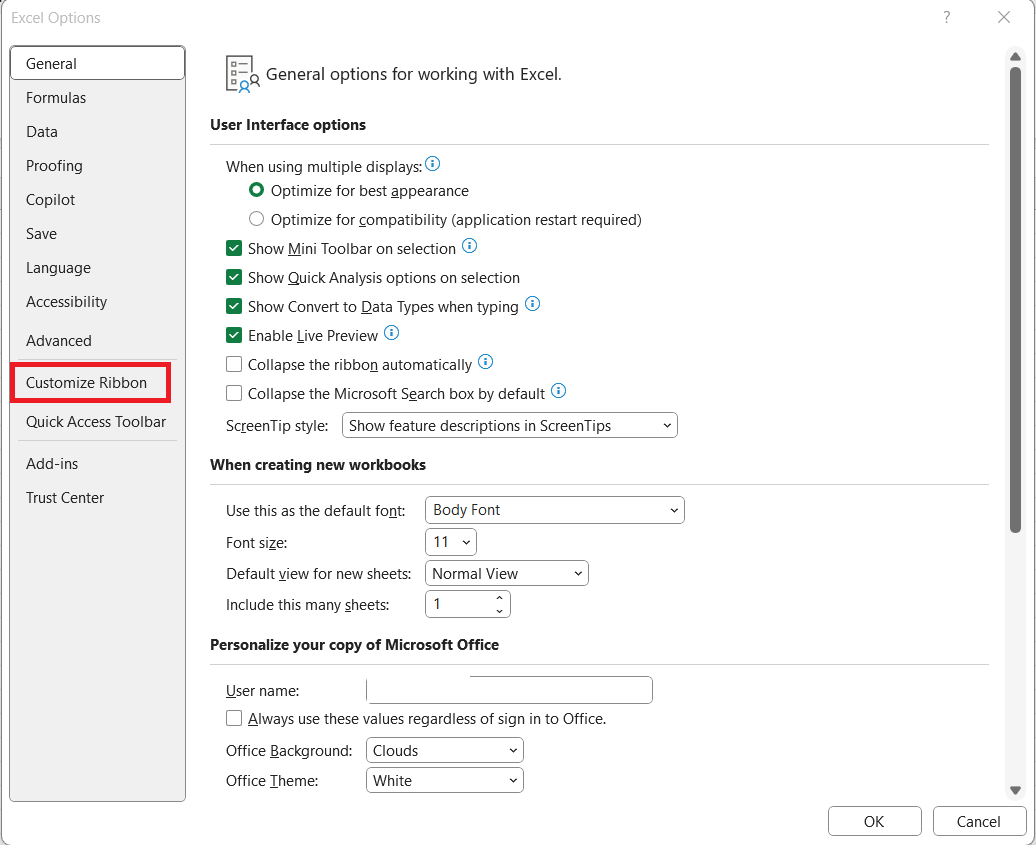
STEP 3: On the right-hand side, check the box for Developer. Click OK.
Now, you’ll see the Developer tab appear on your Ribbon. This is your gateway to writing, recording, and running macros.

With this preparation done, you’re ready for the hands-on steps to unmerge cells using VBA.
Unmerge All Cells Using Macros In Excel
Why Use Macros for Unmerging Cells?
Before diving into the steps, let’s understand why macros are the best solution:
- Efficiency: Unmerging a single cell is easy, but unmerging hundreds scattered across your worksheet can waste hours.
- Automation: Macros let you automate repetitive actions—one click and the task is done.
- Scalability: Whether your dataset has 10 merged cells or 10,000, the same macro works without extra effort.
Creating and Running the Unmerge Cells Macro
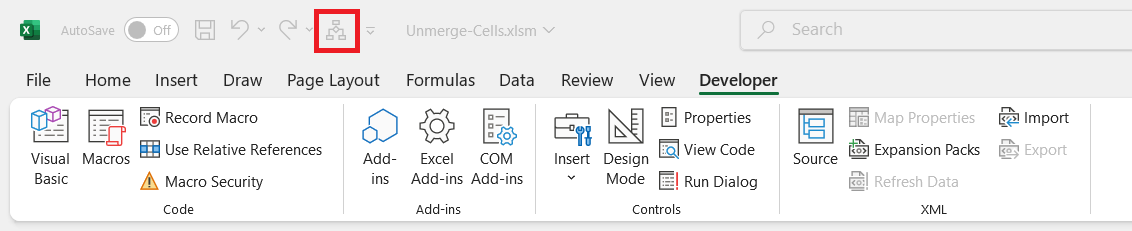
STEP 1: Go to Developer > Code > Visual Basic

STEP 2: Paste in your code and Select Save. Close the window afterwards.
Sub UnmergeAllCells()
'Unmerge all cells in one go!
Selection.UnMerge
End Sub

STEP 3: Let us test it out!
Make sure you have selected your merged cells for unmerging. Go to Developer > Code > Macros

Make sure your macro is selected. Click Run.

With just one click, all of the cells are now unmerged!

Advanced Tips & Tricks
Unmerging All Cells in the Entire Worksheet
The macro we wrote unmerges only the selected cells. But what if you want to unmerge every merged cell in the entire sheet? With a small tweak, you can do that:
Sub UnmergeEntireSheet()
'Unmerge every merged cell in the active sheet
ActiveSheet.Cells.UnMerge
End Sub
Here, instead of just targeting the selection, we tell Excel to look at all the cells (ActiveSheet.Cells) and unmerge them.
This is perfect when you receive a messy spreadsheet full of merges and want to clean it up instantly.
Assign a Keyboard Shortcut
STEP 1: Go to Developer > Macros.

STEP 2: Select your macro and click Options.
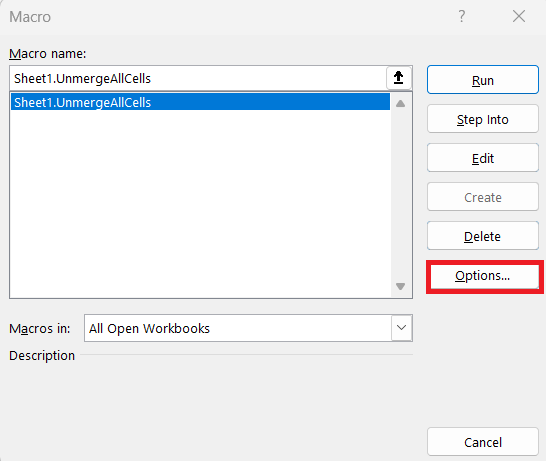
STEP 3: Assign a shortcut key (for example, Ctrl + Shift + U).

Now, every time you press that shortcut, Excel will unmerge cells instantly.
Add a Button to Quick Access Toolbar
STEP 1: Right-click the Quick Access Toolbar. Choose Customize Quick Access Toolbar.
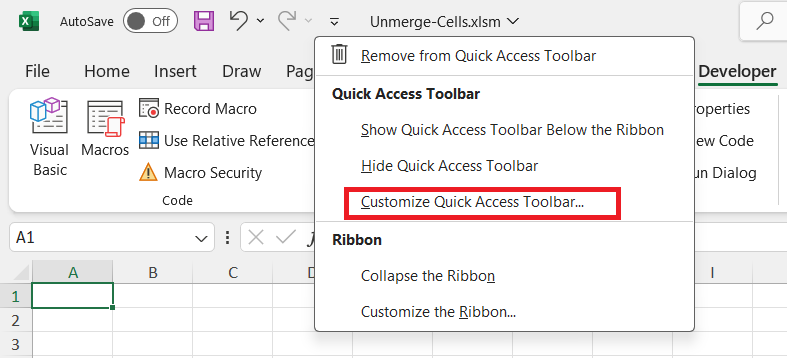
STEP 2: Add your macro as a button.
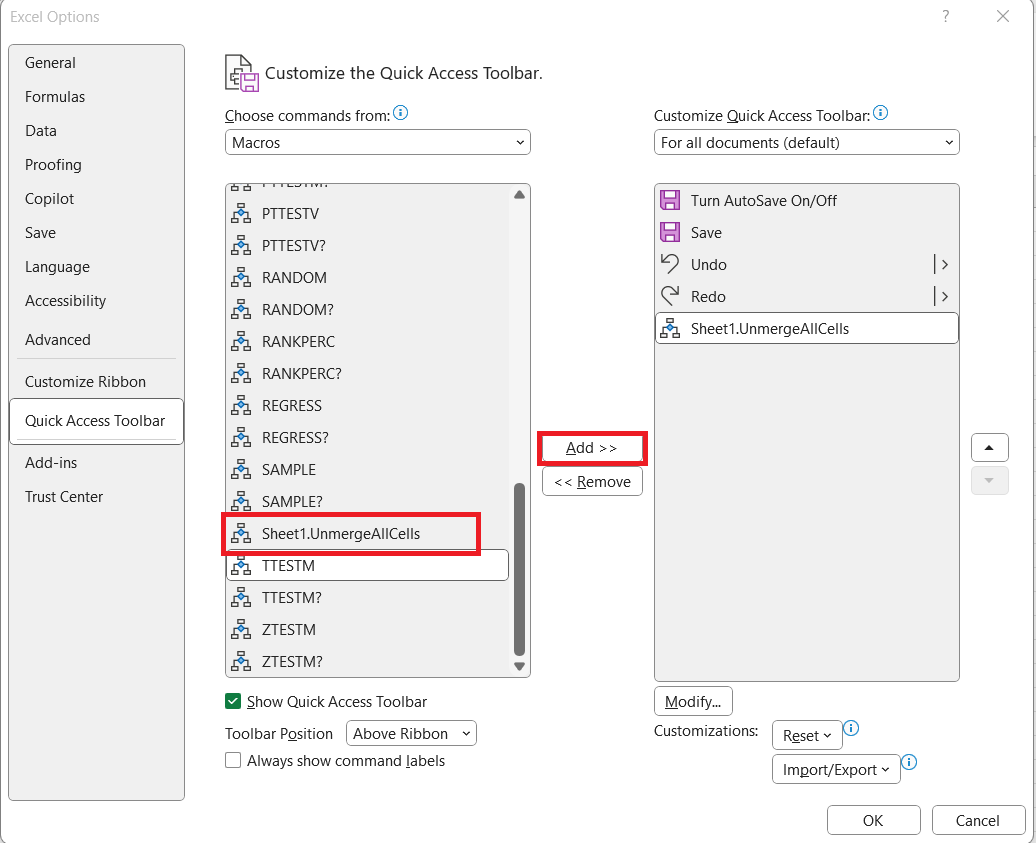
You’ll now have a one-click option right in your interface.
With these additions, you’ve gone from manual frustration → automation → complete ease of use.
FAQs
1. Why should I avoid using merged cells in Excel?
Merged cells often break Excel’s core functionality. They interfere with sorting and filtering, make formulas unreliable, and cause problems when copying data. While they may look good in formatted reports, they create chaos when working with raw datasets. By unmerging, you restore Excel’s full power for analysis.
2. Can the macro unmerge every cell in the worksheet at once?
Yes, with a slight modification. The basic macro unmerges only the selected cells, but replaces Selection.UnMerge with ActiveSheet.Cells.UnMerge allows you to target the entire sheet. This instantly clears all merges without needing to highlight anything. It’s especially useful for cleaning messy workbooks sent by others.
3. Do I need coding knowledge to use the unmerge macro?
Not at all. The macro provided is only a few lines long and doesn’t require any prior coding experience. All you need to do is copy-paste it into the VBA editor and save. Running it is as simple as clicking Developer > Macros > Run. Once set up, it’s a one-click solution.
4. Can I make the unmerge macro easier to access?
Yes, you can assign it to a keyboard shortcut or add it as a button on the Ribbon/Quick Access Toolbar. For example, assigning Ctrl + Shift + U means you can unmerge cells instantly without opening menus. Customizing access makes the macro a true time-saver. You can even create a dedicated “Macros” group on your Ribbon for quick access to multiple VBA tools. If you often work with messy spreadsheets, this setup ensures you never waste time searching for the command.
5. What alternatives should I use instead of merging cells?
Instead of merging, use Center Across Selection, which gives the same look without breaking functionality. You can also apply Wrap Text to handle long content neatly. Borders and shading can visually separate headers without merging. These options keep your spreadsheet functional while maintaining good design.

Bryan
Bryan Hong is an IT Software Developer for more than 10 years and has the following certifications: Microsoft Certified Professional Developer (MCPD): Web Developer, Microsoft Certified Technology Specialist (MCTS): Windows Applications, Microsoft Certified Systems Engineer (MCSE) and Microsoft Certified Systems Administrator (MCSA).
He is also an Amazon #1 bestselling author of 4 Microsoft Excel books and a teacher of Microsoft Excel & Office at the MyExecelOnline Academy Online Course.


