Setting up a timer in Excel may seem unconventional, yet it’s a powerful tool once you harness its capabilities. While timers are commonplace in today’s digital world, using Excel offers unique benefits, such as manual control and comprehensive customization. Whether you’re working on projects that require precise temporal tracking or maintaining personal goals, a 20 minute timer can be an effective addition to your productivity toolkit.
Key Takeaways:
- Excel timers offer offline control and complete customization, allowing users to tailor them to specific needs.
- They ensure data security by functioning without any reliance on internet connectivity.
- With the help of VBA, users can add personalized alerts, messages, and visual indicators to enhance functionality.
- Timer behavior can be fully automated, enabling hands-free operation based on predefined conditions.
- Setting up a 20-minute timer in Excel is straightforward and can be done with just a few simple steps.
Table of Contents
Why Use Excel for Timers?
Benefits of Excel Over Online Timers
Using Excel over online timers offers several key advantages. First, it ensures data confidentiality since everything remains on your local machine, eliminating internet dependency and potential data breaches. Additionally, Excel supports integration with numerous spreadsheet functionalities, providing not just a timer but also analytics and reporting capabilities in one platform.
The user has complete control and can tailor every aspect of the timer to fit particular needs, from altering the visual display to embedding complex calculations. Unlike many online solutions, these customizations come without subscription fees or ads, making Excel a cost-effective and distraction-free option.
Versatility and Customization
Excel stands out for its unparalleled versatility and customization capabilities, making it an ideal platform for crafting unique solutions. Users can tailor their timers to meet specific needs, incorporating visuals, conditional formatting, or additional functionality like alerts.
The ability to link the timer with other spreadsheet elements enables seamless data integration and complex workflows. You can adapt the timer for varying durations or incorporate complementary tools like progress trackers. This flexibility empowers users to create a fully personalized experience that online timers typically cannot match. The possibilities are essentially limitless, restricted only by one’s creativity and Excel proficiency.
Step-by-Step Guide to Creating Your Timer
STEP 1: Open the VBA Editor
I pressed Alt + F11 to open up the Visual Basic for Applications (VBA) editor. It’s like Excel’s behind-the-scenes control room.
STEP 2: Insert a New Module
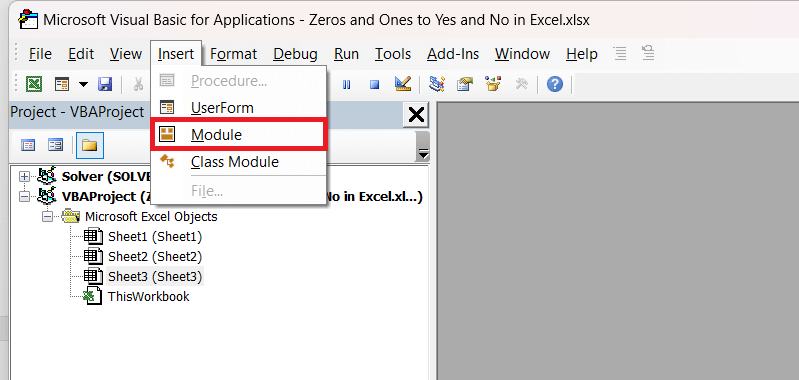
In the VBA editor, I went to the Insert menu and clicked Module. This gave me a blank canvas to write my timer script.
STEP 3: Paste the Countdown Timer Code
Here’s the exact code I used:
Sub StartTimer()
Dim EndTime As Double
Dim TimeLeft As Double
EndTime = Now + TimeValue("00:20:00") ' 20-minute timer
Do
TimeLeft = EndTime - Now
If TimeLeft <= 0 Then
Beep
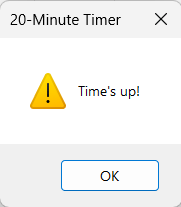
MsgBox "Time's up!", vbExclamation, "20-Minute Timer"
Exit Do
End If
ThisWorkbook.Sheets(1).Range("A1").Value = Format(TimeLeft, "hh:mm:ss")
DoEvents
Loop
End Sub
I copied this into the module. The DoEvents line is what keeps Excel responsive while the timer ticks down.
STEP 4: Save as a Macro-Enabled Workbook
I saved the file as Excel Macro-Enabled Workbook (.xlsm) so that it wouldn’t scream at me about macros every time I opened it.
STEP 5: Run the Timer
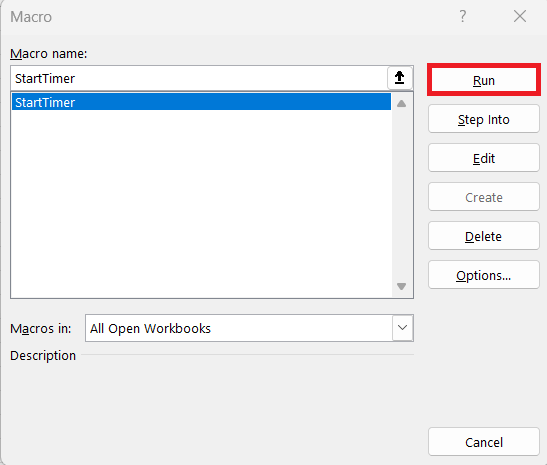
To start the timer, I went back to Excel, pressed Alt + F8, selected StartTimer, and clicked Run.
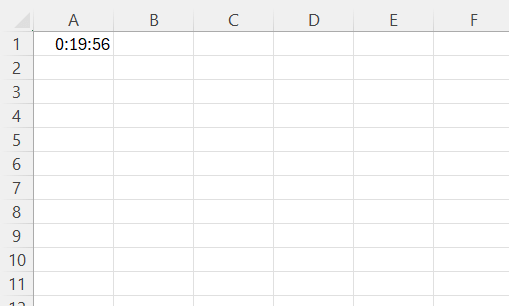
Like magic, cell A1 began showing a live countdown from 20:00.
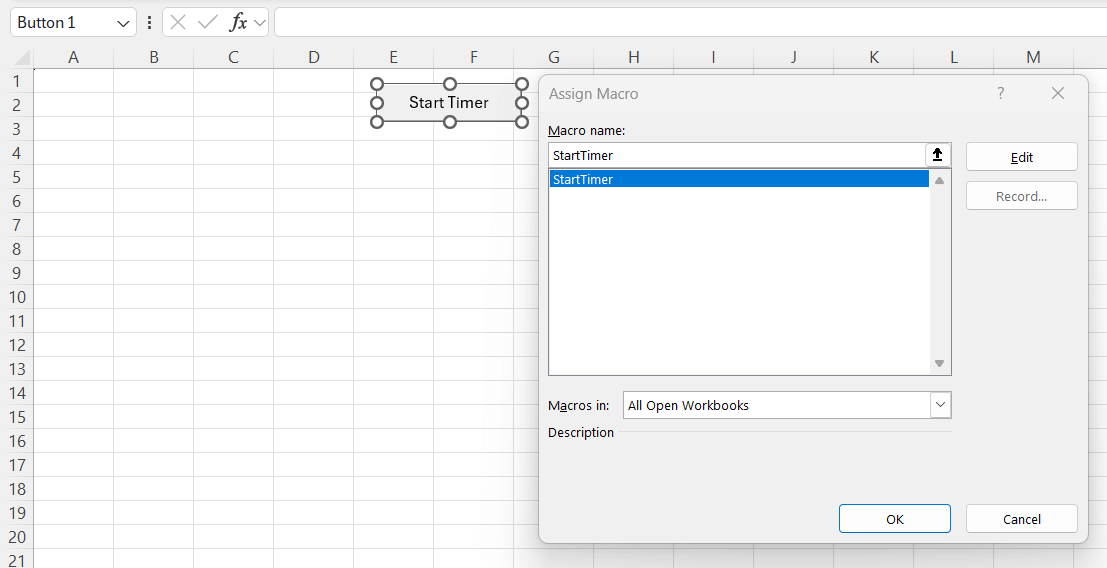
STEP 6: Make a button using Developer > Insert > Button, and assign it to StartTimer.
Advanced Tips for Power Users
Integrating Alerts and Notifications
To enhance your Excel timer with alerts and notifications, use VBA for added functionality. Begin by opening the Visual Basic for Applications editor from the “Developer” tab and ensure your VBA code is correctly linked to your timer macros.
Add an alert function using a message box or sound notification as the timer counts down to zero. Insert the following VBA code snippet to create a simple alert:
Sub AlertNotification()
If Range("A1").Value <= 0 Then
MsgBox "Time's up!", vbExclamation, "Timer Alert"
End If
End Sub
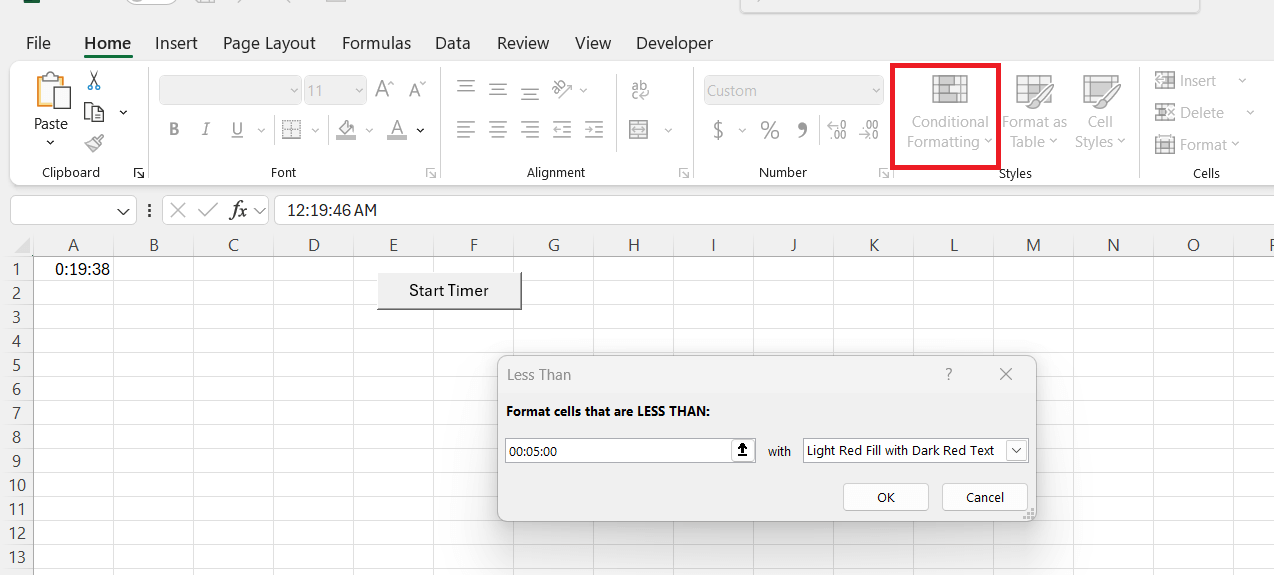
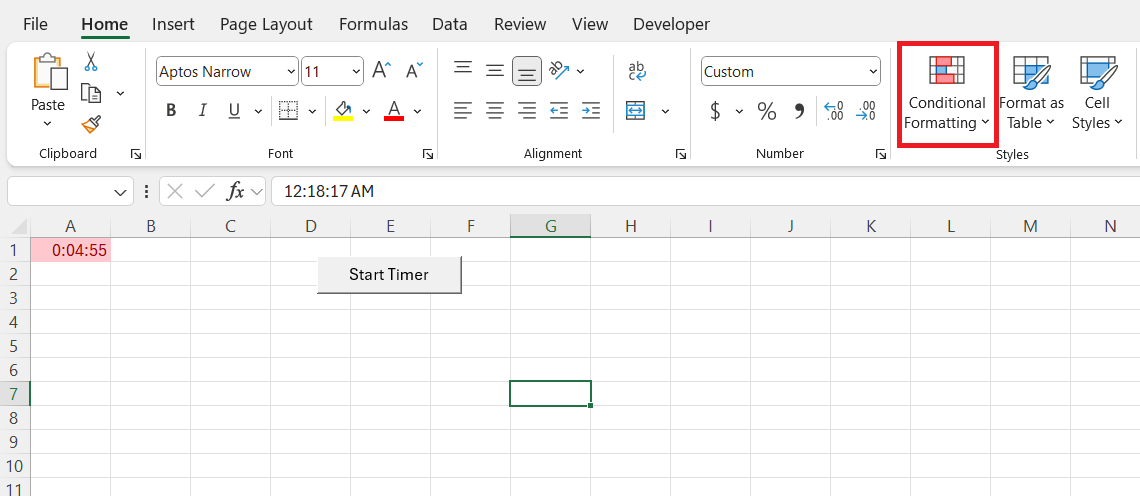
Additionally, set conditional formatting to visual cues, like changing the cell color when the timer approaches zero.
These alerts create a multifaceted notification system that ensures you never miss the timer count.
FAQs
Why would I use Excel instead of a regular online timer?
Excel provides full control, customization, and offline functionality. Unlike online timers that rely on internet connections and may display ads or collect data, Excel keeps everything local. You can personalize every aspect of the timer, including alerts, visuals, and even how it’s triggered. Plus, it integrates directly with other spreadsheet tools for reporting and task management.
How do I create a basic 20-minute timer in Excel?
To create the timer, open the VBA editor using Alt + F11, insert a new module, and paste the countdown code provided. Save the file as a macro-enabled workbook (.xlsm), then run the macro from Alt + F8 or link it to a button. Cell A1 will show the live countdown. This setup is quick, clean, and functional without any external tools.
Can I customize the timer with alerts or visual cues?
Yes, you can enhance the timer with message boxes, sound alerts, and conditional formatting using VBA. For instance, you can set the timer to display a message or change cell colors when nearing zero. These features improve visibility and usability, especially for tasks requiring high attention. It also makes Excel more interactive and engaging.
Is it possible to make the timer start or stop automatically?
Absolutely. You can automate the timer to start when the workbook opens using Workbook_Open, and stop it based on a condition, like a cell value or event. This reduces manual actions and is ideal for recurring workflows or preset schedules. It’s especially handy for productivity tools or timed tasks.
Do I need advanced coding knowledge to set this up?
Not really. The provided VBA code is plug-and-play—just follow the step-by-step guide to insert and run it. If you’re comfortable with copy-pasting and saving files as .xlsm, you’re good to go. For advanced features like automation or alerts, some basic VBA tweaking helps, but it’s accessible even for beginners with minimal effort.
John Michaloudis is a former accountant and finance analyst at General Electric, a Microsoft MVP since 2020, an Amazon #1 bestselling author of 4 Microsoft Excel books and teacher of Microsoft Excel & Office over at his flagship MyExcelOnline Academy Online Course.


