If you’re working with large datasets in Excel, chances are you’ve encountered errors—#DIV/0!, #VALUE!, #N/A, #REF!, and so on. While these errors are useful for troubleshooting formulas, when you have hundreds or even thousands of cells, manually finding and fixing errors can quickly become a tedious task. That’s where Excel Macros come to the rescue. Using a simple Macro, you can highlight all errors in your worksheet instantly, saving time and reducing frustration.
In this guide, we’ll walk you through how to create a Macro in Excel that highlights all errors, step by step, including the source code, examples, and practical tips. Even if you’re new to Excel Macros, don’t worry—we’ll keep it simple and easy to follow.
Key Takeaways:
- Excel Macros can quickly highlight all errors in a worksheet.
- The WorksheetFunction.IsError function detects any type of Excel error.
- Highlighting errors improves data accuracy and speeds up cleaning.
- Macros can be customized to apply different styles or colors.
- Always test macros on a copy and save workbooks as .xlsm.
Exercise Workbook:

Table of Contents
Why Highlight Errors in Excel?
Errors in Excel can stem from a variety of causes:
- Dividing by zero
- Referencing invalid cells
- Using incorrect formula syntax
- Missing or unavailable data
While Excel provides visual cues for errors (small green triangles or the # symbols), these can easily be overlooked in large datasets. Highlighting all errors at once can:
- Help you quickly locate problematic cells.
- Make data cleaning faster.
- Reduce the risk of propagating errors in reports or dashboards.
- Improve accuracy and reliability of your data analysis.
- Save significant time in repetitive checks.
Highlight All Errors Using Macros
Enable Developer Tab
Before we dive into the VBA code, make sure the Developer tab is visible on your Excel ribbon. If you don’t see it yet, here’s how to enable it:
STEP 1: Go to File > Options

STEP 2: Click Customize Ribbon
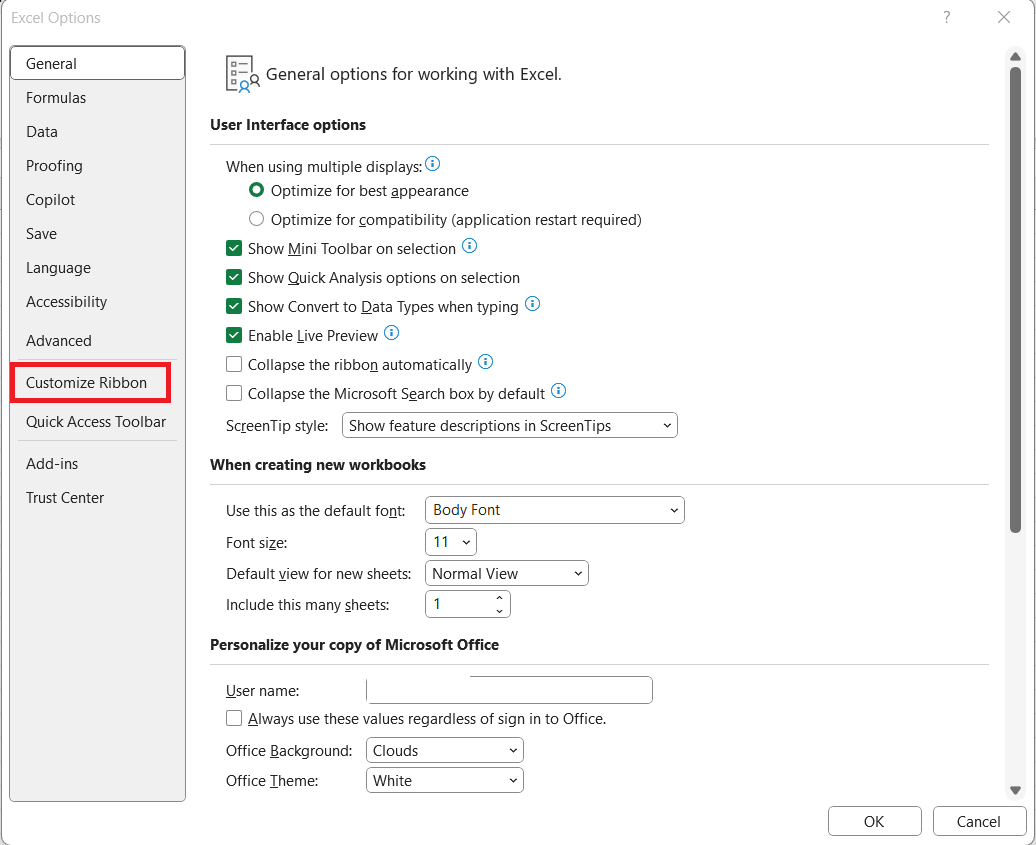
STEP 3: On the right panel, check the box that says Developer. Click OK.
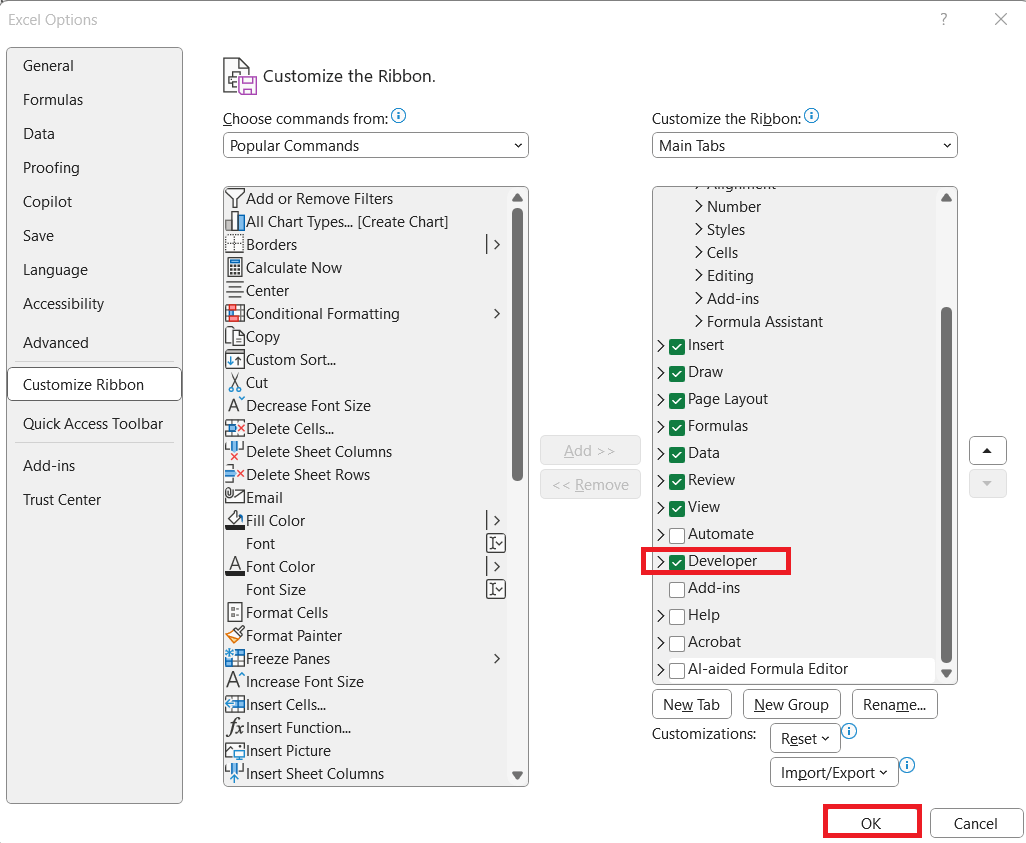
Now you’ll see the Developer tab appear in your Excel ribbon. This tab is your gateway to VBA — the language that powers macros in Excel.

Write VBA Code
Here is our initial set of data, you can see there are a lot of errors in there:

STEP 1: Go to Developer > Code > Visual Basic

STEP 2: Paste in your code and Select Save. Close the window afterwards.
Sub HighlightAllErrors()
Dim cell As Range
For Each cell In ActiveSheet.UsedRange
'Check if it is an error, then change the style to be Bad
If WorksheetFunction.IsError(cell) Then
cell.Style = "Bad"
End If
Next cell
End Sub

STEP 3: Let us test it out!
Open the sheet containing the data. Go to Developer > Code > Macros

Make sure your macro is selected. Click Run.

With just one click, all of the cells with errors are now highlighted!

What This Code Does:
- For Each cell In ActiveSheet.UsedRange – Loops through all the cells in the currently active worksheet.
- WorksheetFunction.IsError(cell) – Checks if the cell contains any type of Excel error.
- cell.Style = “Bad” – Applies Excel’s predefined “Bad” style, which highlights the cell with a red fill and white text. You can customize this later if you prefer a different color.
- Next cell – Moves to the next cell in the loop until all cells have been checked.
Tips & Tricks
Benefits of Using a Macro for Error Highlighting
- Efficiency: One click highlights all errors, no manual scanning needed.
- Accuracy: Reduces the chance of missing errors in large datasets.
- Automation: Can be reused on multiple worksheets or shared with colleagues.
- Customization: Format error cells to suit your style or reporting requirements.
- Learning VBA: A simple, practical introduction to Macros and VBA coding.
Additional Tips
- Test on a copy of your workbook before running Macros on important data. Mistakes in VBA can’t always be undone with Ctrl+Z.
- Combine with Conditional Formatting: If you want to dynamically highlight new errors as they appear, you can use conditional formatting in conjunction with VBA.
- Save as Macro-Enabled Workbook: Always save your workbook as .xlsm to preserve macros.
FAQs
Q1: What types of errors can this Macro detect?
This Macro can detect all Excel errors, including #DIV/0!, #VALUE!, #REF!, #N/A, #NAME?, and #NUM!. It uses the WorksheetFunction.IsError function, which is comprehensive. Any cell containing an error will be highlighted automatically. You don’t need to modify the code for different error types. This makes it a versatile tool for large datasets.
Q2: Can I use this Macro on multiple worksheets at once?
Yes, but you need to modify the code to loop through all worksheets. Replace ActiveSheet with a loop like For Each ws In Worksheets. Inside the loop, check each cell in ws.UsedRange for errors. This allows you to highlight errors across your entire workbook with one run. It’s useful for multi-sheet reports or dashboards.
Q3: How can I customize the color or style for highlighted errors?
Instead of using the predefined “Bad” style, you can use VBA formatting commands. For example, cell.Interior.Color = RGB(255,200,200) sets a light red fill, and cell.Font.Color = RGB(0,0,0) changes the font to black. You can adjust RGB values to match your theme. This customization allows your highlighted errors to blend with your report style. It gives full control over appearance.
Q4: What should I do if I accidentally highlight the wrong cells?
If the workbook hasn’t been saved, press Ctrl+Z to undo the highlighting. Otherwise, you can write a small Macro to clear formatting from the worksheet. Another option is to use Excel’s Clear Formats command under the Home tab. Testing the Macro on a copy of your workbook is always safer. Regular backups prevent accidental formatting issues.
Q5: Do I need to enable macros every time I open the workbook?
Yes, Excel disables macros by default for security reasons. When opening the workbook, you’ll see a yellow security warning bar. Click Enable Content to allow the Macro to run. Once enabled, you can run the Macro on any worksheet in that workbook. Remember to save the workbook as .xlsm to preserve macros for future use.

Bryan
Bryan Hong is an IT Software Developer for more than 10 years and has the following certifications: Microsoft Certified Professional Developer (MCPD): Web Developer, Microsoft Certified Technology Specialist (MCTS): Windows Applications, Microsoft Certified Systems Engineer (MCSE) and Microsoft Certified Systems Administrator (MCSA).
He is also an Amazon #1 bestselling author of 4 Microsoft Excel books and a teacher of Microsoft Excel & Office at the MyExecelOnline Academy Online Course.


