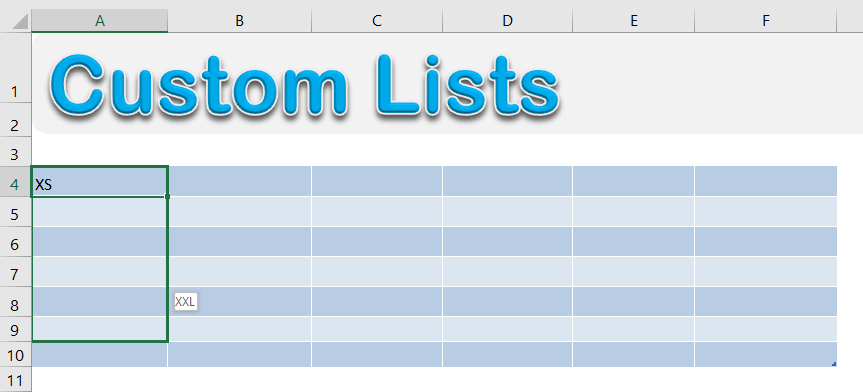
A Custom List in Excel is very handy to fill a range of cells with your own personal list. It could be a list of your team members at work, countries, regions, phone numbers, or customers. The main goal of a custom list is to remove repetitive work and manual errors. It is extremely useful when you need to fill in the same data from time to time. There are two options to create a list in Excel that can be used repeatedly by using the fill handle.
Key Takeaways:
- Organize Data Efficiently: Excel lists help you organize data systematically by entering values in rows and columns, enabling easy sorting, filtering, and analysis.
- Use Data Validation for Dropdown Lists: With the Data Validation feature, you can create dropdown lists to standardize inputs, reduce errors, and ensure consistency in data entry.
- Leverage Tables for Dynamic Lists: Converting a list to an Excel Table enhances functionality by enabling dynamic ranges, automatic formatting, and structured referencing for better data management.
Table of Contents
Using Pre-existing List
At first, it might seem like magic how Excel does this!
There are some lists that are already stored in Excel like days of the week and months in a year.
To demonstrate the power of Excel’s Custom Lists, we’ll explore what’s currently in Excel’s memory as a default list:
STEP 1: Type February in the first cell
STEP 2: From that first cell, click the lower right corner and drag it to the next 5 cells to the right
STEP 3: Release and you will see it get auto-populated to July (The succeeding months after February)
Create a list in Excel manually
You can also manually add new values in the Custom List box and re-use them whenever you wish to.
Let us go straight into the Options in Excel to view how it’s being done, and how you can create your own Custom List:
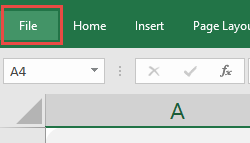
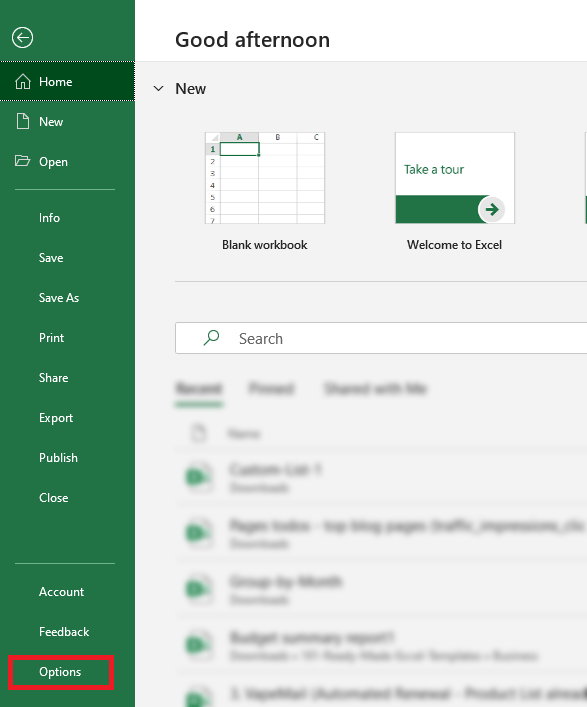
STEP 1: Select the File tab
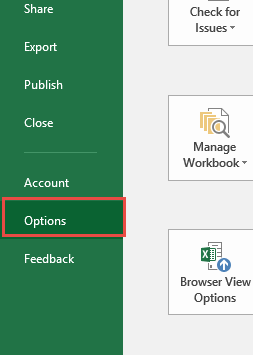
STEP 2: Click Options
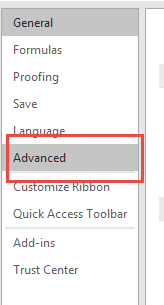
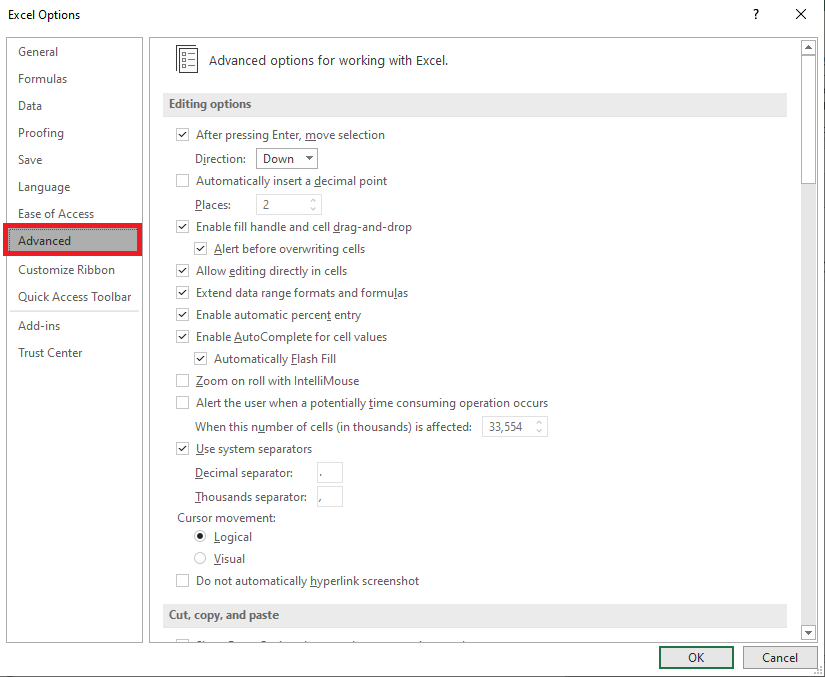
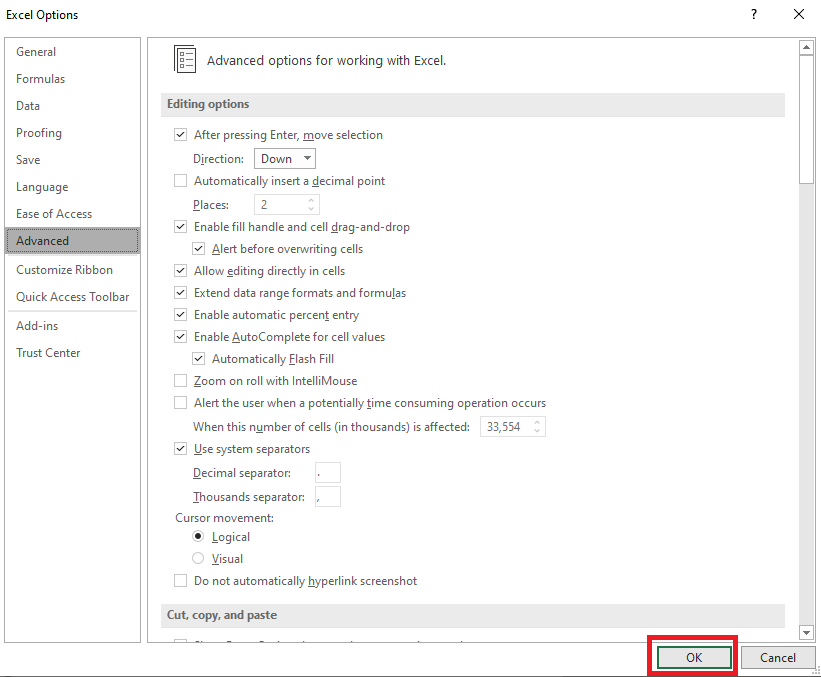
STEP 3: Select the Advanced option
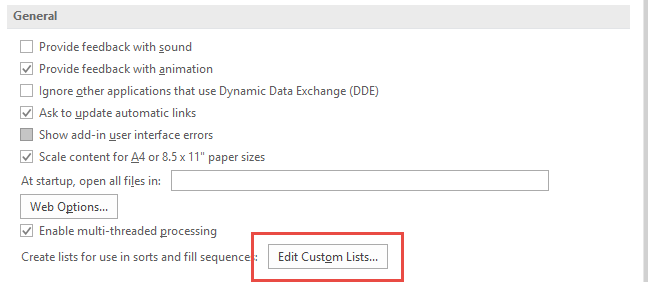
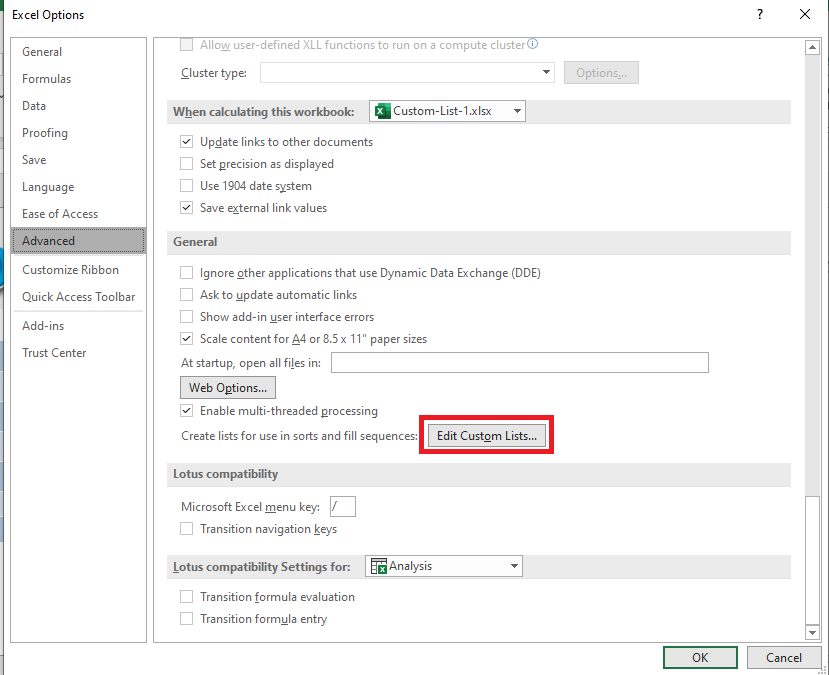
STEP 4: Scroll all the way down and under the General section, click Edit Custom Lists.
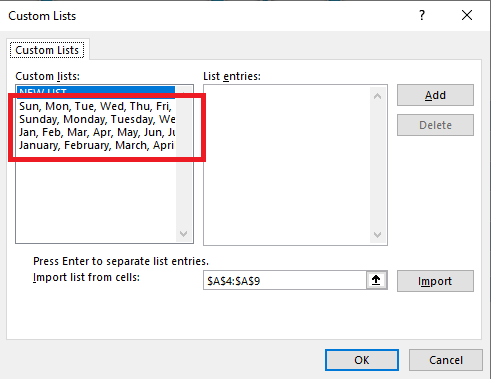
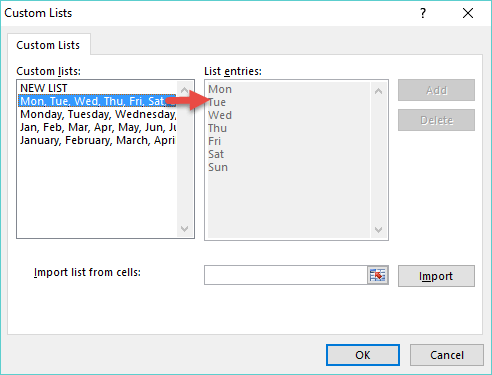
Here you can see the built-in default Excel lists of the calendar months and the days.
If you click on a Custom List, you will see under List entries that it is greyed out and you cannot make any changes. This indicated that it is a default Excel Custom List.
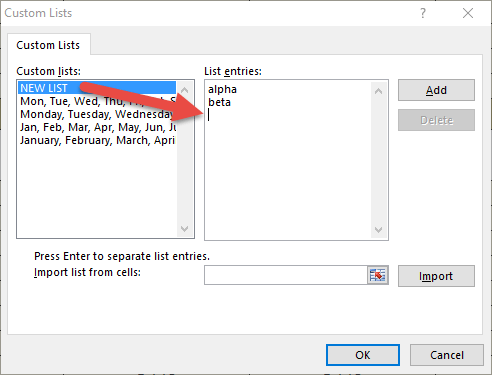
STEP 5: You can create & add your own Custom List under the List entries section.
Click on NEW LIST under the Custom Lists area and then manually enter your list, entering one entry per line:
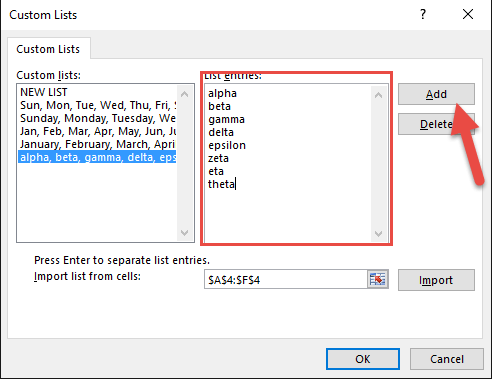
After typing the values, click Add.
In our screenshot below, we added the values of the Greek alphabet (alpha, beta, gamma, and so on)
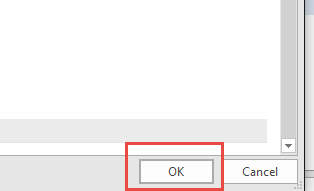
Click OK once done.
STEP 6: Click OK again
STEP 7: Now let’s go back into our Excel workbook to see our new Custom List in action. Type alpha on a cell.
STEP 8: From that cell, click the lower right corner and drag it to the next 5 cells to the right
STEP 9: Release and you will see it get auto-populated to zeta, which is based on our Custom List created in Step 8
Next up is a demonstration of how to make a list in Excel by importing data from another worksheet.
Import from another worksheet
You can easily import a custom list from another worksheet. Follow the steps below to get this done:
STEP 1: Go to the File Tab.
STEP 2: Select Options from the left panel.
STEP 3: In the Excel Options dialog box, select Advanced.
STEP 4: Under the General section, click on the Edit Custom List button.
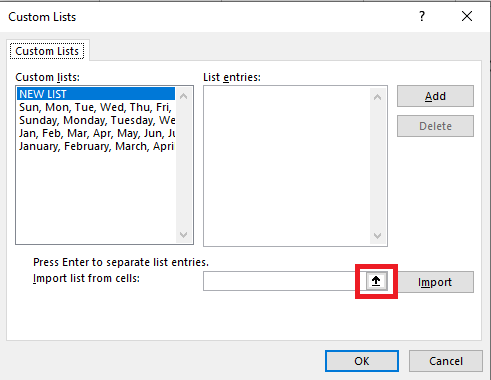
STEP 5: In the Custom List dialog box, select the small arrow up button.
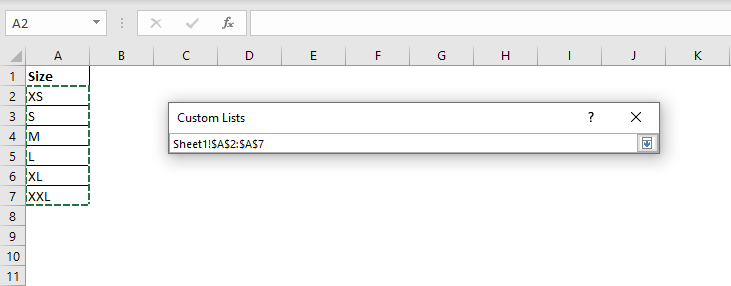
STEP 6: Select the range containing the custom list.
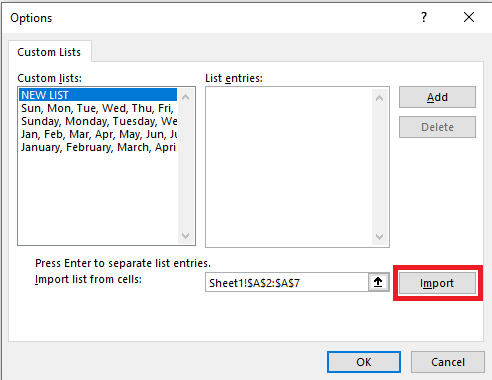
STEP 7: Click on Import.
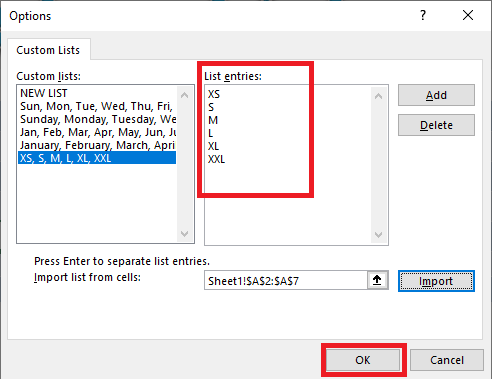
STEP 8: Once the list will appear under list entries and click OK.
STEP 9: Click OK.
Now, your custom list is stored in Excel!
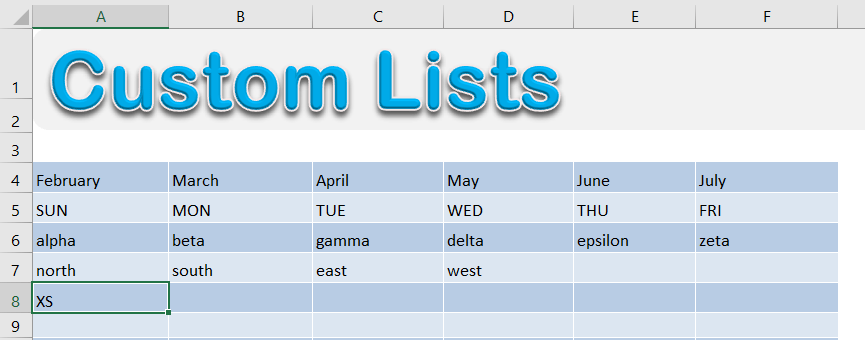
STEP 10: Type the first entry of the list “XS” in cell A8.
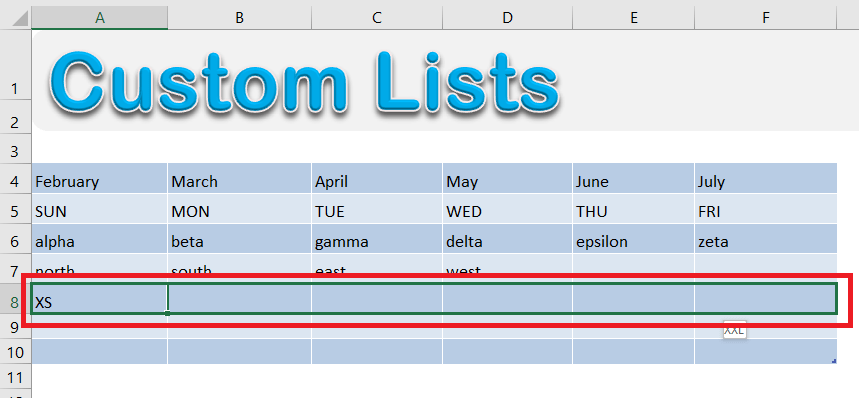
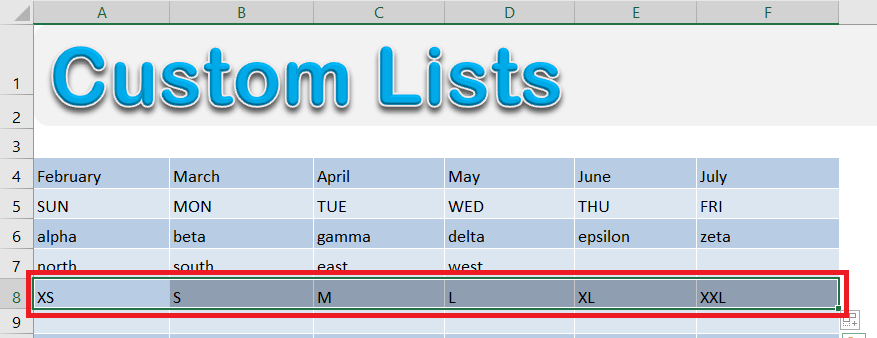
STEP 11: From that first cell, click the lower right corner and drag it to the next 6 cells to the right.
The entire list will be displayed in the selected range!
You can even create this list vertically. Simply, type the XS in a cell. Click on the lower right corner and drag the cell downwards.
The list will appear vertically!
Frequently Asked Questions
How do I create a simple list in Excel?
To create a simple list, enter your data in a single column or row. Each value should occupy a separate cell. For example, enter items like “Apple,” “Banana,” and “Orange” in consecutive cells (A1, A2, A3) to form a vertical list.
How can I create a dropdown list in Excel?
To create a dropdown list, go to the Data tab, select Data Validation, and choose “List” as the validation criteria. In the source field, either type the list items separated by commas (e.g., Apple, Banana, Orange) or select a range of cells containing the items. Press OK, and the dropdown will appear in the selected cells.
Can I make my list dynamic so it updates automatically?
Yes, you can create a dynamic list by converting your data range into an Excel Table. Select your data and press Ctrl + T to convert it into a table. When you add or remove items, the list updates automatically, and any dropdowns linked to the table will also reflect these changes.
How do I sort or filter a list in Excel?
To sort or filter a list, select your data and go to the Data tab. Use the Sort option to arrange items in ascending or descending order. For filtering, click Filter, and dropdown arrows will appear in the headers, allowing you to select or exclude specific items.
Can I create a multi-level list in Excel?
Yes, you can create a multi-level list by organizing your data hierarchically across columns or rows. For example, column A might contain categories (e.g., Fruits), and column B might contain subcategories (e.g., Apple, Banana). You can also use Conditional Formatting or group rows/columns to visually distinguish levels in the list.
Conclusion
In this article, you have learned how to make a list in Excel so that you don’t have to type the same list over and over again. You use the Custom list feature in Excel and store it in Excel and use it whenever necessary.
You can either use the pre-existing list, manually type the list or link it from another worksheet!

Bryan
Bryan Hong is an IT Software Developer for more than 10 years and has the following certifications: Microsoft Certified Professional Developer (MCPD): Web Developer, Microsoft Certified Technology Specialist (MCTS): Windows Applications, Microsoft Certified Systems Engineer (MCSE) and Microsoft Certified Systems Administrator (MCSA).
He is also an Amazon #1 bestselling author of 4 Microsoft Excel books and a teacher of Microsoft Excel & Office at the MyExecelOnline Academy Online Course.
