Free Practice Workbook
Table of Contents
Introduction to Indents in Excel Cells
When I use spreadsheets, I can often feel overwhelmed by the large amount of data. But have I ever thought about what that data looks like?
Knowing how to adjust my text in just the right direction is important. There are several techniques for indenting text within cells.
- Use the Indent button for a swift shift, or
- Dive into the Format Cell dialog box, or
- Use the Tab key
By understanding the strengths and limitations of each method, I can choose the most efficient method.
How to Indent Line in Excel
Keyboard Shortcuts
Keyboard shortcuts can save a lot of time in Excel. If you want to increase the indent of selected cells, use ALT + H + 6.
- Select the cells you want to indent.
- Press ALT, then H, then 6.
- The content in the selected cells will move slightly to the right.
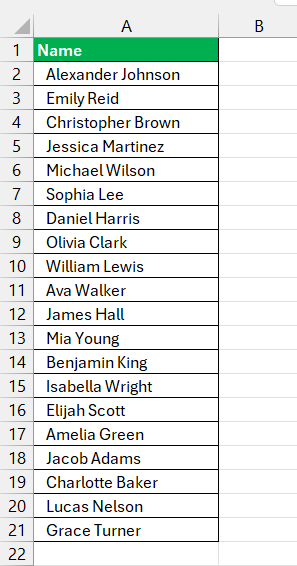
To decrease the indent and move the content back to the left, use ALT + H + 5.
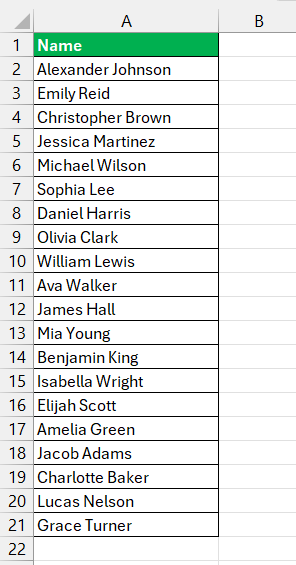
Ribbon Options
STEP 1: I will highlight the cells I want to indent.

STEP 2: Click on the Home tab.

STEP 3: In the Alignment group, select indent left or right.
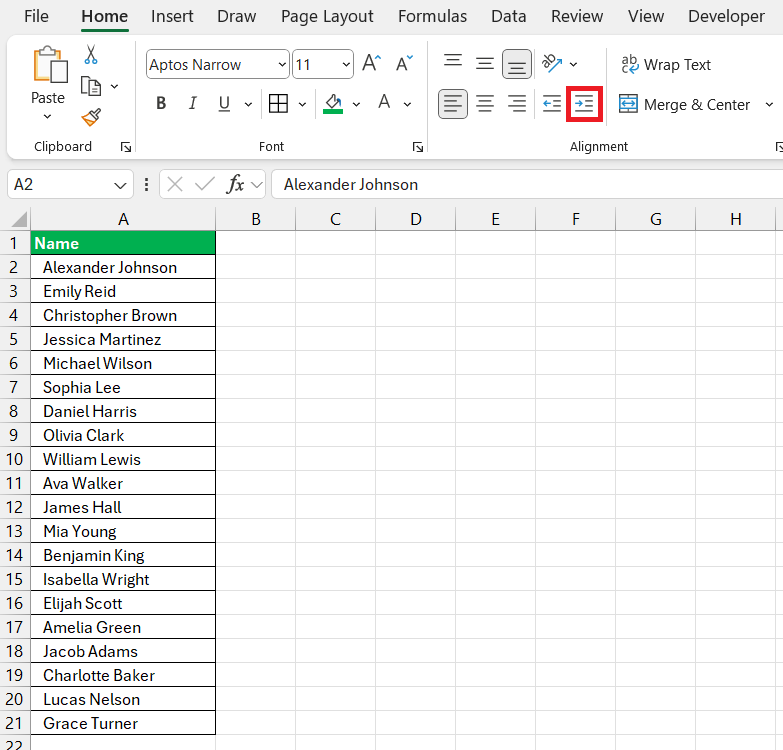
Each click of the indent button shifts my text by three spaces.
Format Cell Dialog Box
STEP 1: Select the cell or cells.

STEP 2: Right-click and from the context menu, opt for ‘Format Cells’. Alternatively, I can reach this via the Home tab by clicking on the tiny arrow cornered in the Alignment group.
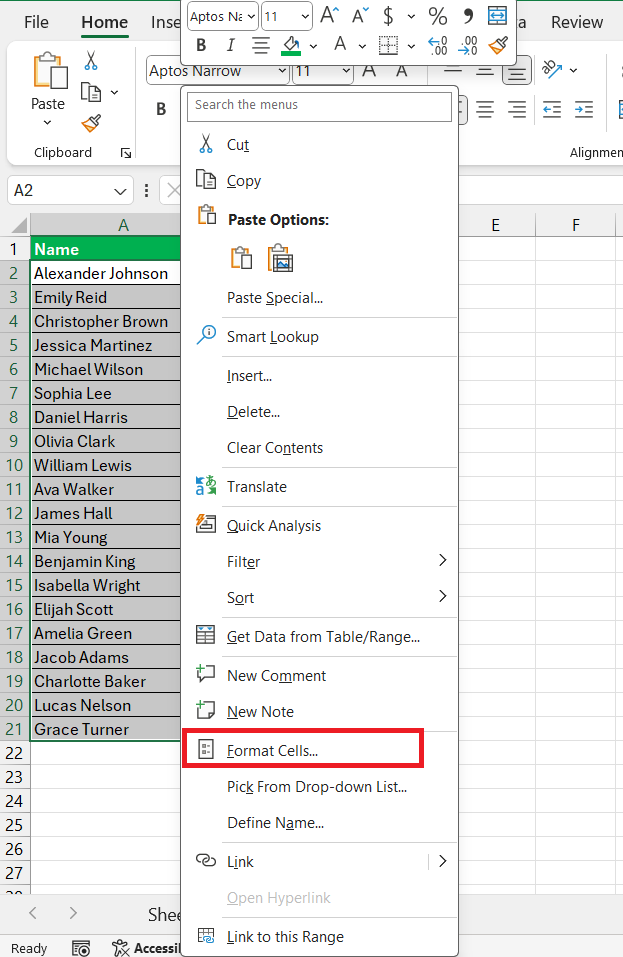
STEP 3: A window will pop up with a tab called ‘Alignment’.
In this tab, you will find the Indent option. Here, you can enter the number of indent levels you want.
Each indent level moves the cell content by about three characters. This helps you control the spacing more accurately.
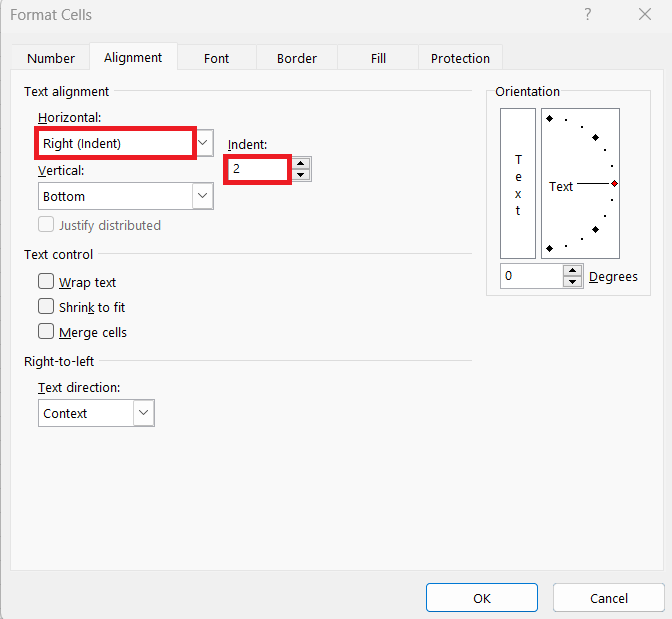
Using this method, you can align your data more accurately. It helps make your spreadsheet look clean and organized.
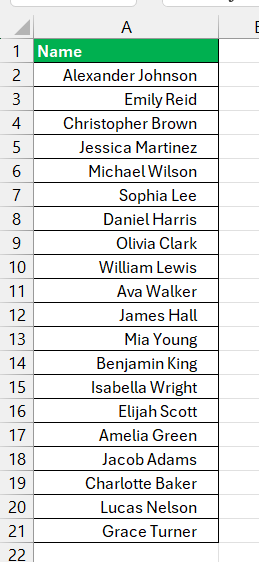
How to Indent Second Line
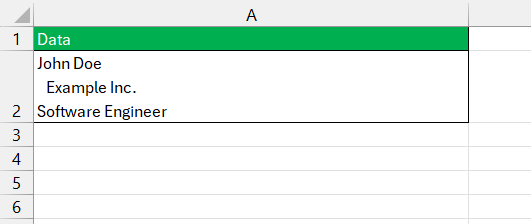
Excel does not have a built-in feature to set indentation for specific lines within a cell. Here’s how I can indent the second line:
STEP 1: Select the cell I wish to indent.
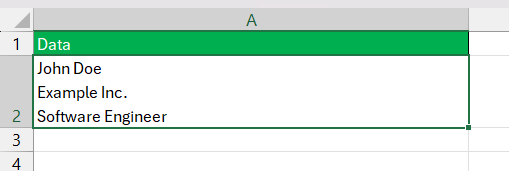
STEP 2: Double-click on the cell to enter the edit mode.
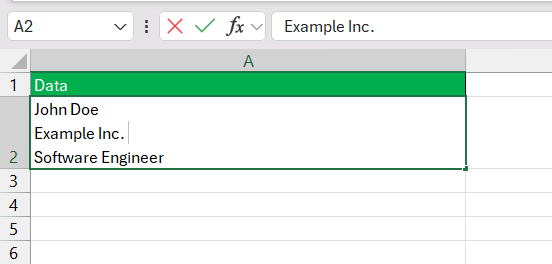
STEP 3: Place the cursor before the line I wish to indent.
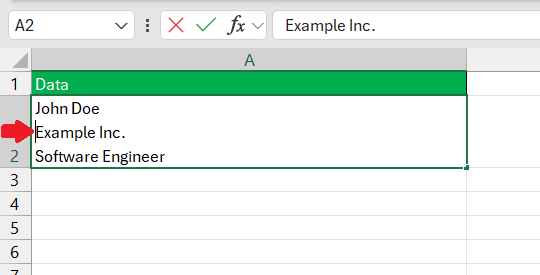
STEP 4: Enter space to get the indentation.
FAQs
How to indent Excel rows?
To indent rows in Excel, follow the steps below:
- Select the cells or entire rows that you want to indent.
- Go to the Home tab
- In the Alignment group, click the Increase Indent icon.
Your selected rows will be indented neatly.
When to use line indent?
Use a line indent in Excel when you need to improve readability or create a visual hierarchy in your data. It is handy for distinguishing subpoints under a main point or for aligning text uniformly when mixing single and multi-line cells.
How to do a hanging indent in a cell in Excel?
To create a hanging indent in an Excel,
- Make sure ‘Wrap Text’ is enabled for your cell
- Insert your cursor at the start of the second line
- Hit ‘ALT + Enter’ to create a new line.
- Add spaces at the beginning of this line to create the hanging indent effect. Repeat for additional lines as needed.
How to Remove an Unwanted Indent in Excel?
To remove an unwanted indent in Excel,
- Select the cells you wish to adjust
- Go to the Home tab
- Find the Alignment group
- Click on the Decrease Indent icon
Can You Indent Multiple Lines in a Single Excel Cell?
Yes, you can indent multiple lines within a single Excel cell. To do this, double-click the cell or press F2 to edit. Click before the text on each line to place the cursor, then press the spacebar to create the desired indentation manually. This gives you control line by line within the same cell.

John Michaloudis is a former accountant and finance analyst at General Electric, a Microsoft MVP since 2020, an Amazon #1 bestselling author of 4 Microsoft Excel books and teacher of Microsoft Excel & Office over at his flagship MyExcelOnline Academy Online Course.

 30 Days - Full Access