MS Word has a great system for inserting and customizing page numbers. Your document becomes more structured and easier to navigate once you insert page numbers in Word. Page numbers can be placed at the top or bottom of the page, and there are several layouts to pick from. It only takes a few clicks to add page numbers to Microsoft Word documents.
Key Takeaways
- Quick Access via the Insert Tab: Page numbers can be easily inserted through the Insert tab in Word. Clicking on Page Number allows you to choose different positions, such as top, bottom, or margins of the page.
- Customizable Number Formats: Word provides various numbering styles, including Roman numerals, letters, and traditional numbers, which you can customize in the Page Number Format dialog box.
- Exclude the First Page: You can exclude the page number from the first page (e.g., for a title page) by enabling the Different First Page option in the Header & Footer tools.
- Restart Numbering for Sections: Page numbering can be restarted for specific sections of your document by using section breaks. This is especially useful for documents with separate parts, like chapters or appendices.
- Positioning and Alignment Options: Page numbers can be aligned to the left, right, center, or even inside/outside margins. You can use pre-designed templates or customize the placement to fit your document’s layout.
Table of Contents
Inserting Basic Page Numbers
So let us start with the basics and insert a simple page number. To do this, you need to:
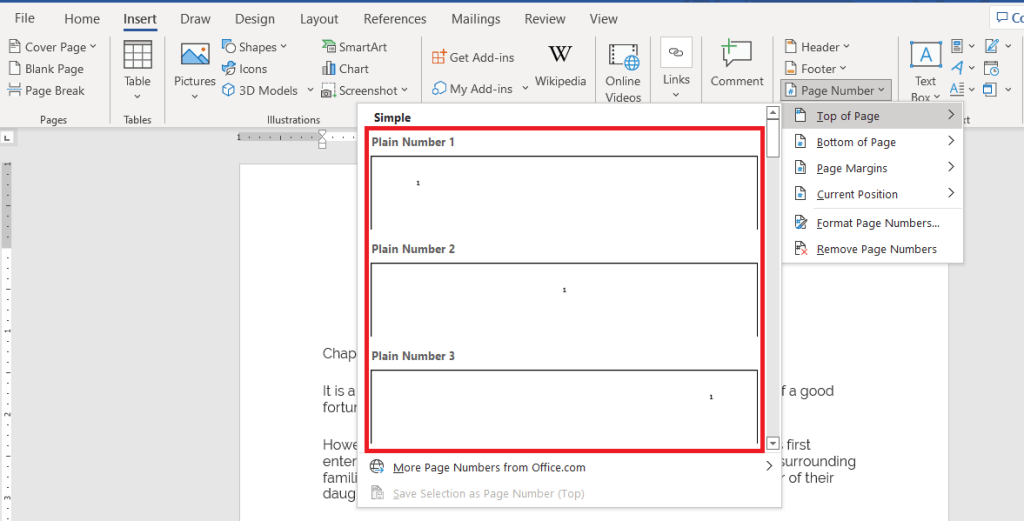
- Go to Insert.
- Click on Page Number.
- Select Top of Page.
- Select the side you want the number to be. A common choice is on the right side.
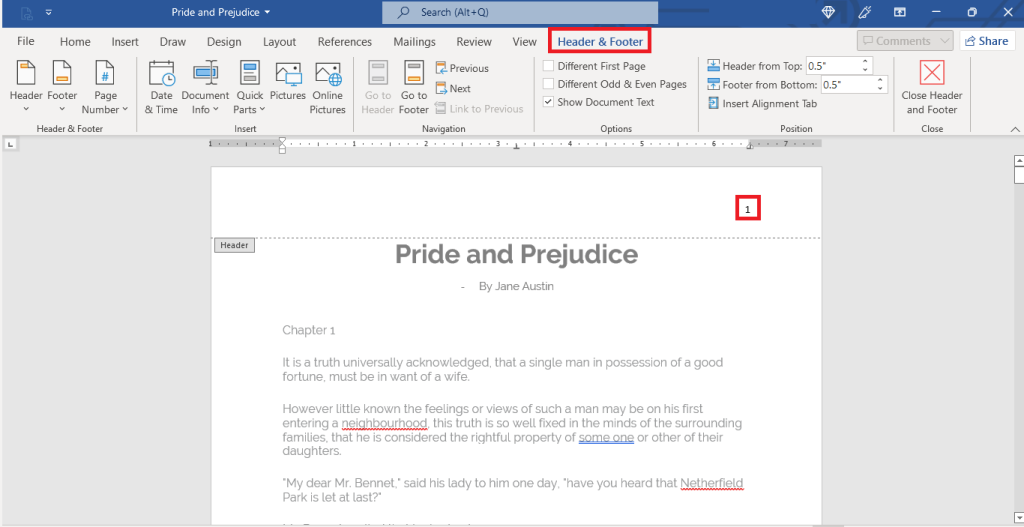
If you have added page numbers to the top or bottom of the page, the Headers & Footers tab of your document will immediately open up, allowing you to make any changes you want.
When you’re ready, press the Close Header & Footer button on the ribbon or double-click anywhere in your document outside the header or footer section to return to your work.
Now you will be able to view your page number at the top of the page! As these page numbers are automated, you won’t have to manually add page numbers again. MS Word will automatically insert the page number on all pages of your document.
As you can see, it only took us a matter of seconds to insert page numbers. Now let us dive into different styles and customizations that you can add to your page numbers.
Let us explore the different positions where you can insert your page numbers!
Changing Location of Page Number
- Go to Insert
- Click on Page Number
- You can select Top of Page.
Here, you can have the page numbers on the Left, Center, or Right side at the top of the page.
or,
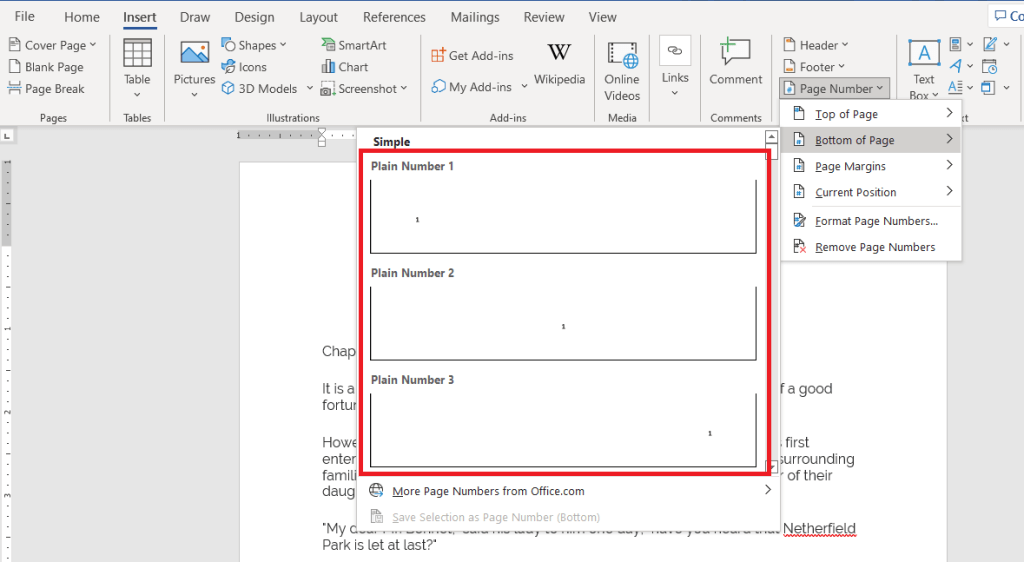
- You can select Bottom of Page.
Here, you can have the page numbers on the Left, Center, or Right side at the bottom of the page.
We can now explore the different formats of page numbering that are available to us.
Formatting Page Numbers
Once you have inserted a page number in your Word document, follow the steps below to format them:
- Go to Insert
- Select Page Numbers
- Go to Format Page Numbers
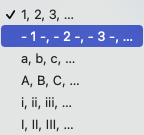
- In the pop-up window, click on the Number format drop-down menu.
- Choose different formats for your page numbers such as different types of numbers, ABC or roman numerals.
You will notice that once you change the format, all the page numbers in your document change to the new format automatically.
There is another option for inserting page numbers. Let us now understand that option:
- Go to Insert
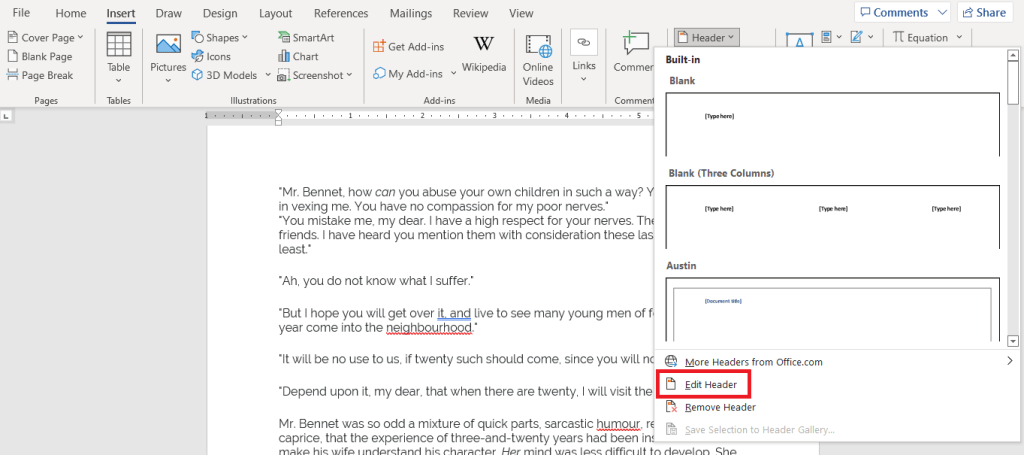
- Go to Header, and select Edit Header.
You will see that you are inside the header.
- Now you can choose where you want your page number to be. You can do that by going to the Home tab and selecting the alignment you want – Right, Left or Center.
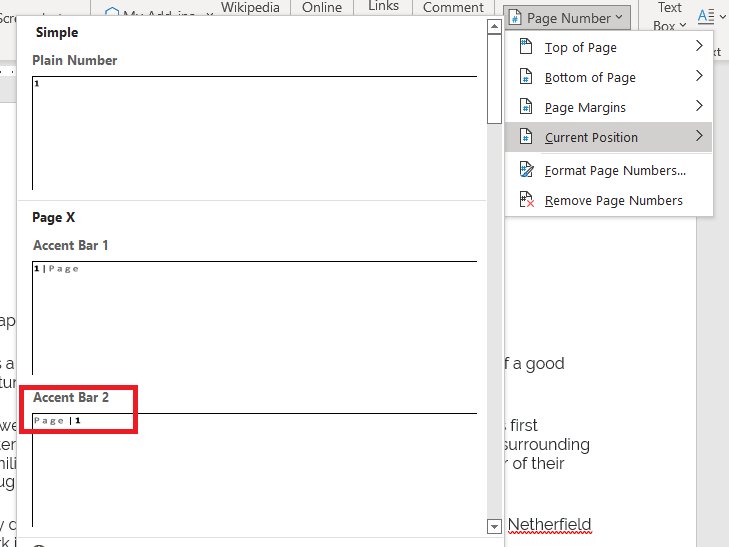
- Now go to Insert > Page Number > Current Position.
- Here you can select different accent bars.
This is what the page number will look like!
Now that we have explored so many different options revolving around page numbers, let’s focus on chapter numbers as well.
Including Chapter Number
You might even want to display your chapter number alongside your page number. Let us see how we can do that.
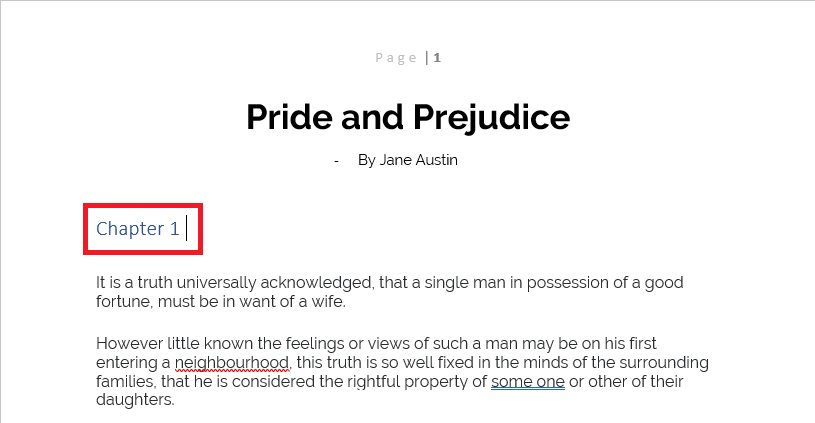
- Remove your Chapter 1 title.
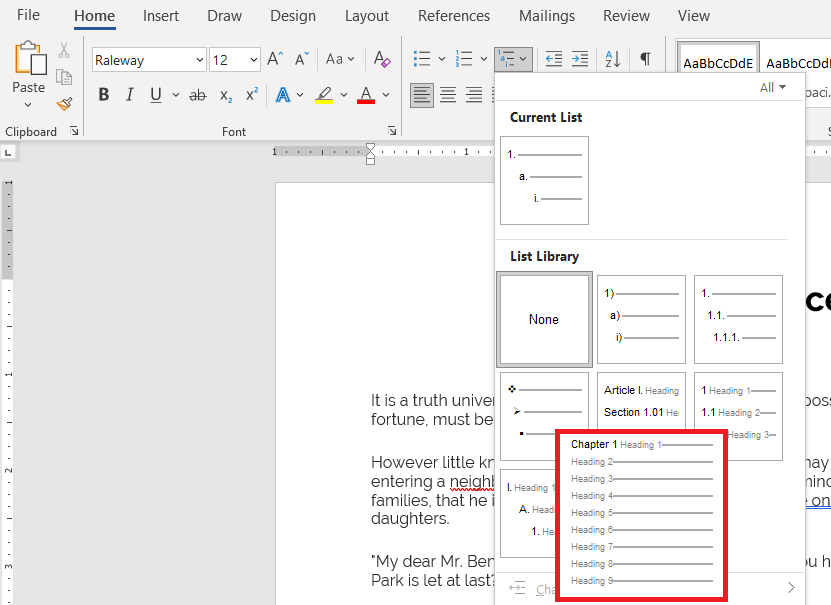
- Go to the Home ribbon.
- Under the Multilevel List drop-down, select the last one for chapters.
- Repeat the process for all your chapters.
- Now go to Insert > Page Number > Format Page Numbers.
- Select the Include chapter number checkbox.
Now you will see that the page number is showing the chapter number first, and then the page number. The image below is the screenshot of chapter number 1 and page number 3.
You might be confused when there are two chapters on the same page, let us say chapters 1 and 2. The page number would display chapter number as 2. To avoid this, just go to the line before your new chapter and hit Ctrl + Enter. This will insert a page break and the new chapter will start from a new page.
Now your page and chapter numbers will be displayed correctly.
Simple but attractive formatting can also be added:
- Go to Insert.
- Go to Header, and select Edit Header.
- Enter the word “Chapter” before your chapter number.
This will give your document a nice aesthetic look and this new change will be added to all pages automatically.
Having covered all basics for inserting page numbers, let us see how to remove them as well.
Removing Page Numbers
Go to Insert > Page Number > Remove Page Numbers.
This will remove all the page numbers in the document.
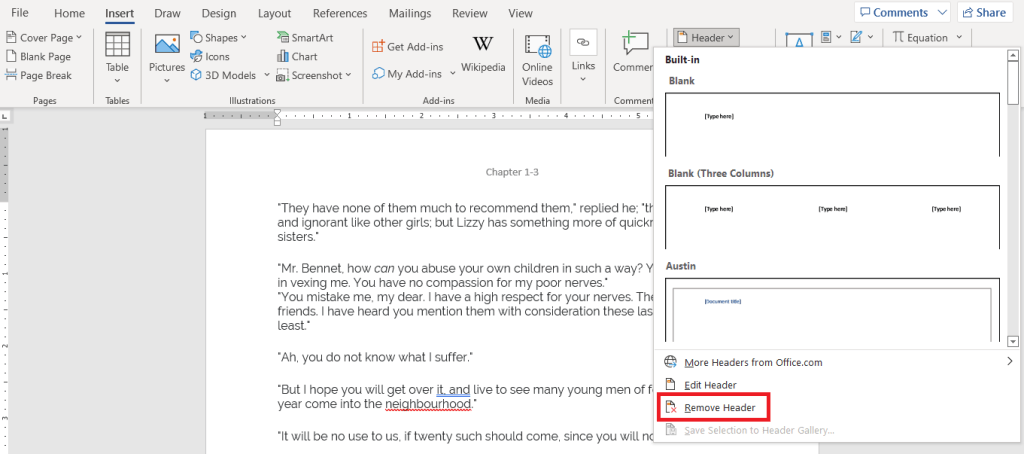
If you had entered anything else in the header, such as the word “Chapter”, go to Insert > Header > Remove Header.
Hopefully, this article gives you a clear and concise introduction to inserting page numbers into your word document and exploring some of the different options present for formatting it!
Frequently Asked Questions
How do I insert page numbers in Word?
To insert page numbers, go to the Insert tab, click Page Number, and choose the desired location (top, bottom, or margins of the page). Select a format, and the numbers will appear automatically on every page.
Can I skip the page number on the first page of my document?
Yes, you can exclude the page number on the first page by going to the Header & Footer tools and checking the Different First Page option. This is useful for title pages or cover pages.
How can I format page numbers to use Roman numerals or letters instead of regular numbers?
You can change the format by clicking Page Number in the Insert tab, then selecting Format Page Numbers. From the dialog box, choose the number format you prefer, such as Roman numerals (i, ii, iii) or letters (a, b, c).
How do I restart page numbering for a specific section in my document?
To restart page numbering, first insert a section break where you want the numbering to restart. Then, go to the Insert tab, click Page Number, and choose Format Page Numbers. In the dialog box, set the starting number to your desired value.
Can I place page numbers in custom positions, like next to the document title?
Yes, you can manually position page numbers by inserting them into the Header or Footer area. Once added, use the alignment tools or drag the text box to place the page number in your desired position.
John Michaloudis is a former accountant and finance analyst at General Electric, a Microsoft MVP since 2020, an Amazon #1 bestselling author of 4 Microsoft Excel books and teacher of Microsoft Excel & Office over at his flagship MyExcelOnline Academy Online Course.

