
Power Query lets you clean and transform your raw & messed up data into a format where you can do further Excel analysis with ease.
Firstly, we would need data to play with Power Query, right? The good thing with Power Query is that there is a multitude of ways to pull in data.
One ways is to get data from the internet by using the importing web data feature. I will show you how we can parse a webpage and use it for Power Query!
Click to see tutorial on how to install Power Query in Excel 2013
Click to see tutorial on how to install Power Query in Excel 2010
In Excel 2016 it comes built in the Ribbon menu under the Data tab and within the Get & Transform group.
Let’s go through the steps in detail using Excel 2016 as our workbook:
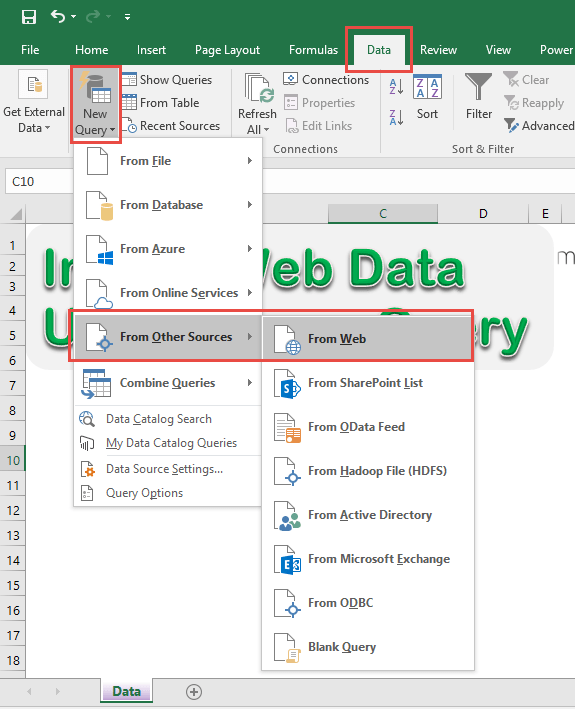
STEP 1: Go to Data > New Query > From Other Sources > From Web.
(In Excel 2010 & 2013 you need to go to Power Query > From Web)
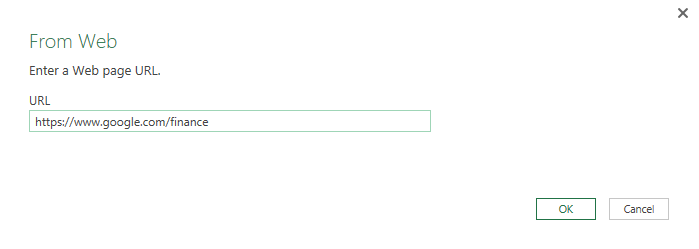
STEP 2: This will ask for a website where you want to get the data from.
We want to get the stock market indexes from Google finance.
Copy and paste this URL: https://www.google.com/finance
Press OK to continue
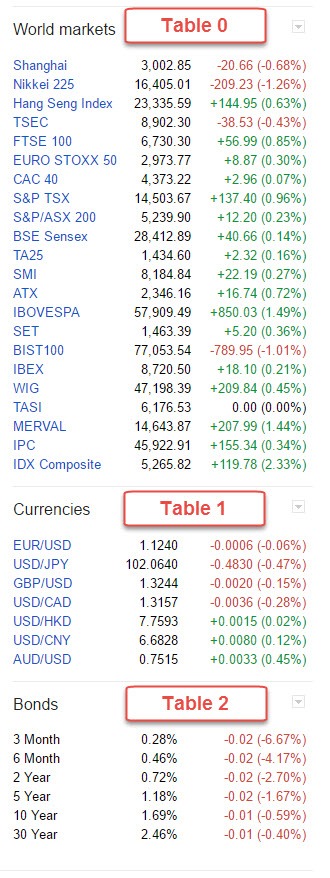
STEP 3: Power Query will now try to parse this webpage, and in doing so, has determined that there are multiple tables of data in there.
Here is what Power Query brings back as Table options:
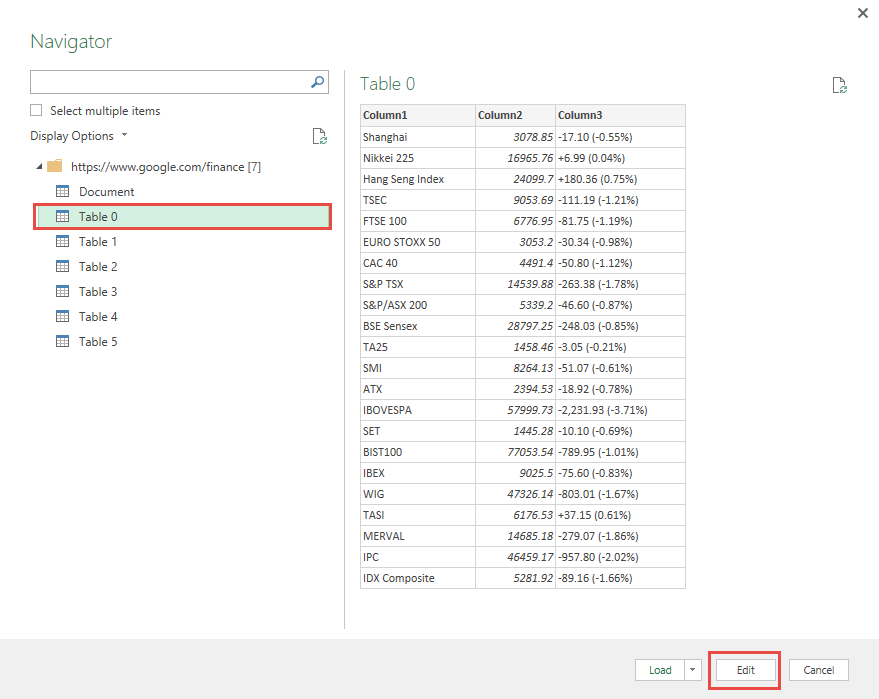
By clicking on the Table options in the Navigator pane, you will get a preview of the web data on the right hand side.
Let’s select Table 0 for our example and press Edit.
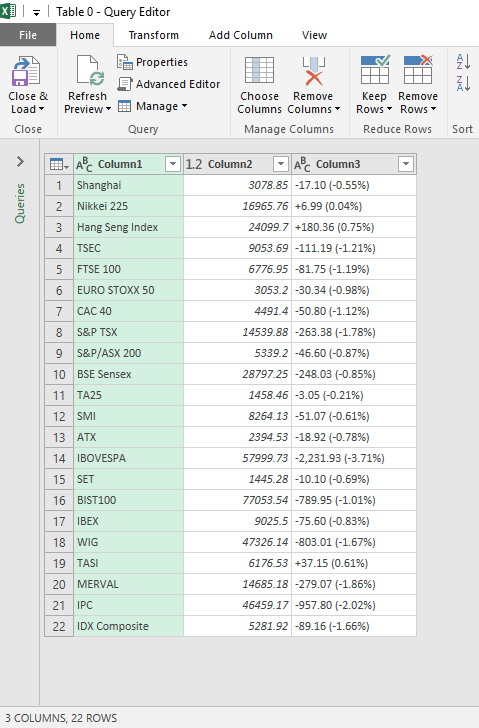
STEP 4: The data is now imported into the Query Editor window.
STEP 5: We are going to transform Column3 so the data can be easier to analyze.
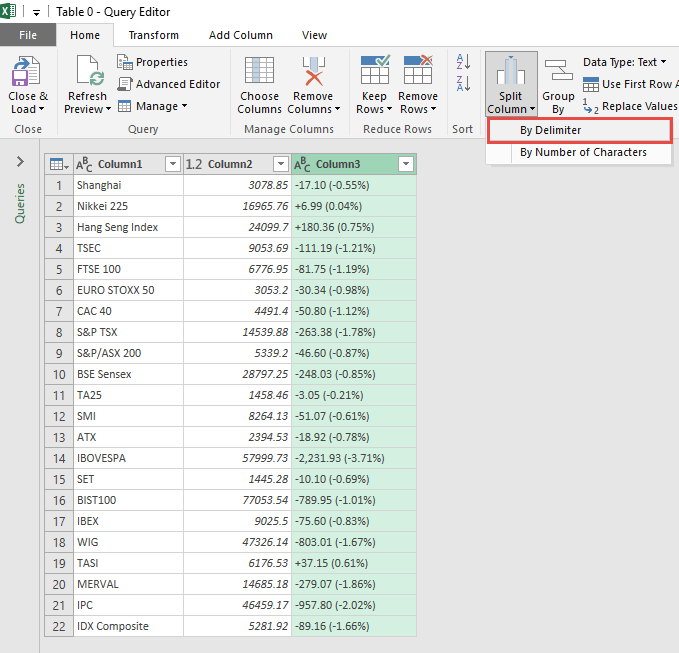
Select the Column3 heading with your mouse and go to Home > Split Column > By Delimiter.
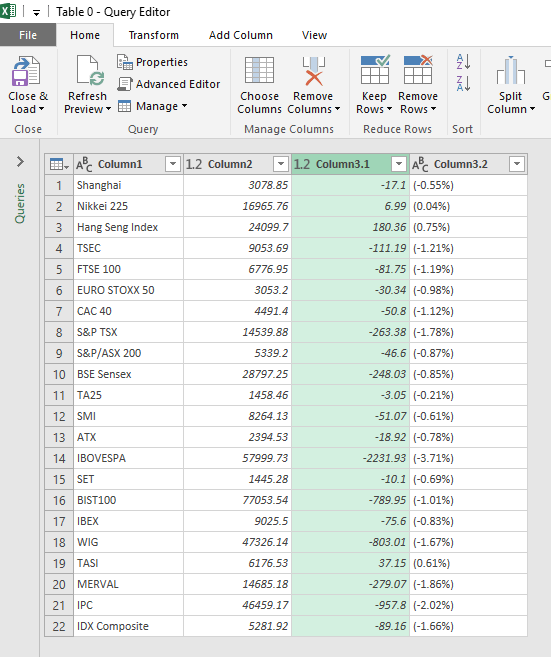
STEP 6: We want to split the third column into two separate values. One for the actual number, and another for the percentage.
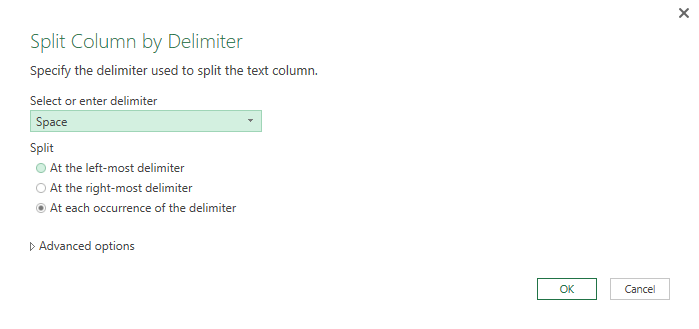
To achieve this, we need to split the data by the space in between the two values.
Select Space from the delimiter drop-down and press OK.
STEP 7: Our imported web data has been transformed into our liking.
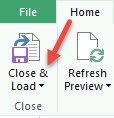
We are now ready to load it into our Excel worksheet by selecting Close & Load
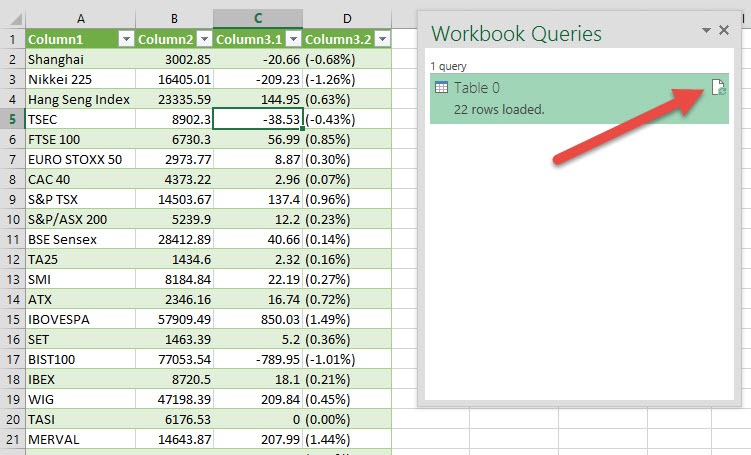
STEP 8: Now that the data is in your Excel worksheet, tomorrow all you need to do is select the data & press the Refresh button from the Workbook Queries pane on the right hand side.
You will have the latest stock prices & all this without copying and pasting from the webpage! Thank You Power Query 🙂


Bryan
Bryan Hong is an IT Software Developer for more than 10 years and has the following certifications: Microsoft Certified Professional Developer (MCPD): Web Developer, Microsoft Certified Technology Specialist (MCTS): Windows Applications, Microsoft Certified Systems Engineer (MCSE) and Microsoft Certified Systems Administrator (MCSA).
He is also an Amazon #1 bestselling author of 4 Microsoft Excel books and a teacher of Microsoft Excel & Office at the MyExecelOnline Academy Online Course.


