Excel is an essential tool for managing data across various fields, offering robust features for complex data manipulation. One crucial skill is adding multiple rows efficiently. Whether you’re updating a massive dataset or simply structuring a spreadsheet, learning these techniques can save you time and frustration. Let’s dive into the practical methods on how to add multiple rows in Excel.
Key Takeaways:
- Excel’s grid system helps organize and manipulate large datasets with precision.
- Multiple row insertion preserves data structure while allowing expansion.
- Use the Ribbon menu or right-click context menu to insert rows easily.
- Keyboard shortcut Ctrl + Shift + ‘+’ is the fastest way to insert rows.
- Copy-paste with “Insert Copied Cells” is ideal for duplicating template rows.
Table of Contents
The Basics of Adding Rows in Excel
Understanding Excel’s Grid System
Excel functions with a grid system made up of rows and columns, forming individual cells where data is stored. Each row is numbered sequentially across the vertical axis, while columns are labeled alphabetically along the horizontal axis. This structure enables users to organize data systematically, making it easy to perform calculations, apply functions, and visualize data relationships.
By understanding this grid system, you can efficiently navigate and manipulate data within spreadsheets. Adding multiple rows enhances your ability to expand datasets without disrupting the existing structure, facilitating a smoother data management process.
Why Multiple Rows Are Useful
Adding multiple rows in Excel is invaluable for various reasons. It allows you to accommodate additional data entries without altering the existing structure, ensuring continuity and organization. This capability is particularly beneficial when dealing with large datasets that are frequently updated or expanded.
By using multiple rows, you maintain a logical flow of information, which aids in data analysis and reporting. Additionally, it makes room for new calculations, comparisons, or categorizations without the need for extensive formatting adjustments. This flexibility and efficiency make it a crucial skill for anyone working with Excel regularly.
How to Add Multiple Rows
Insert Rows Using the Ribbon Menu
Inserting multiple rows using the Ribbon menu in Excel is straightforward and efficient. Here’s a step-by-step guide:
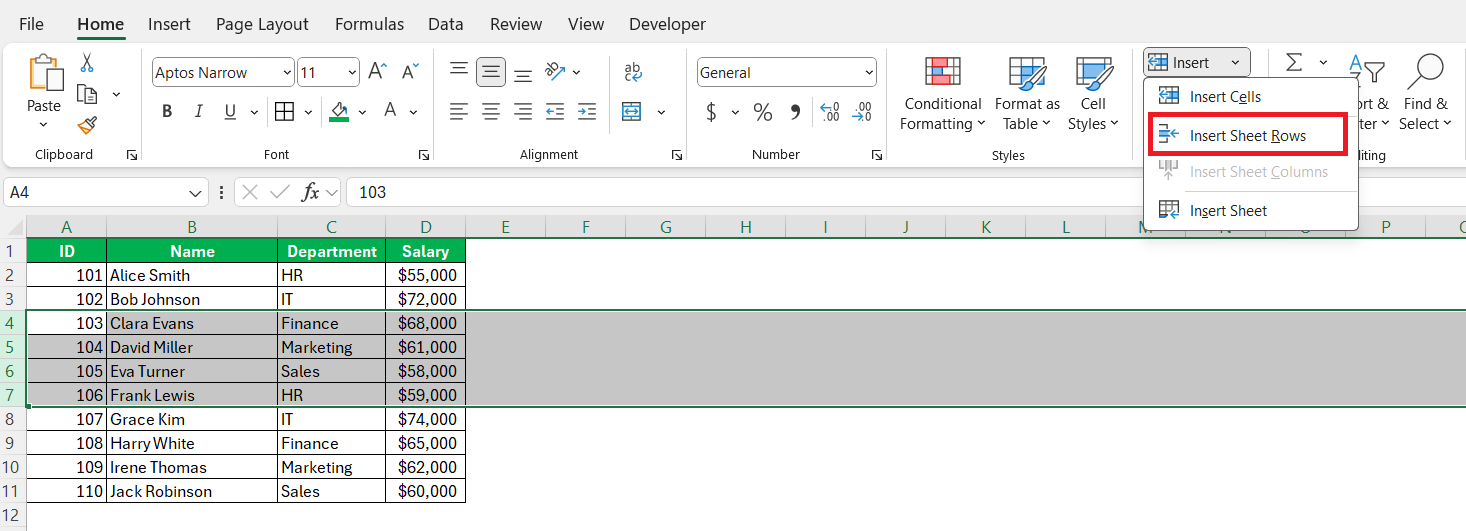
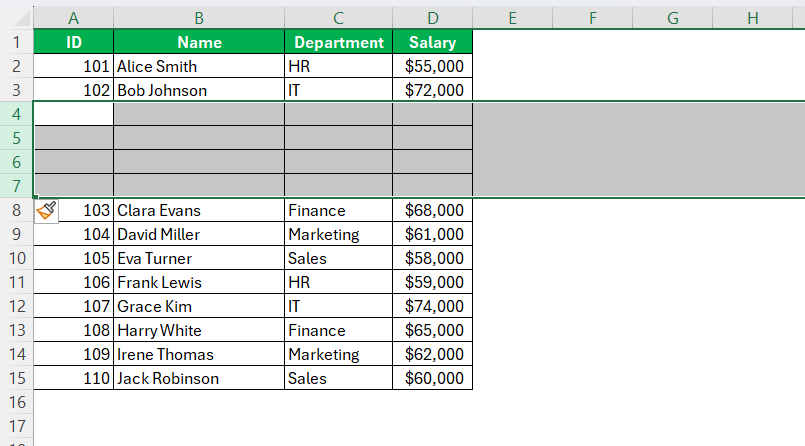
STEP 1: Click the row number on the left of your spreadsheet to select an entire row. To insert multiple rows, drag your cursor down to select the same number of rows you want to add.
STEP 2: Navigate to the “Home” tab on the Ribbon at the top of Excel. Locate the “Cells” group in the Ribbon, and click on the “Insert” drop-down arrow.
STEP 3: Select “Insert Sheet Rows” from the menu.
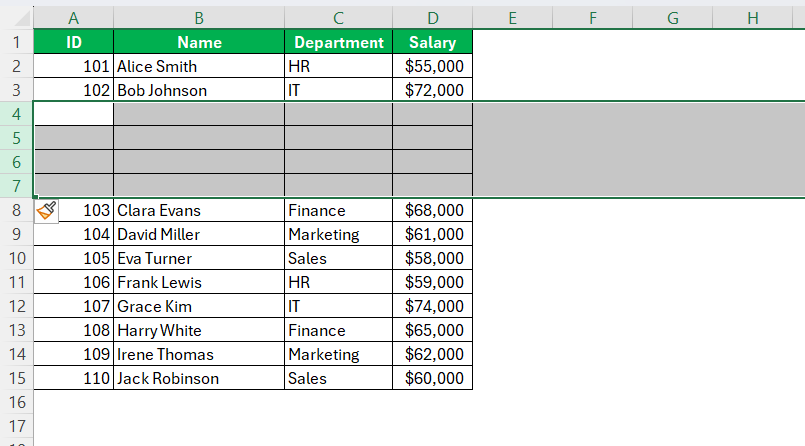
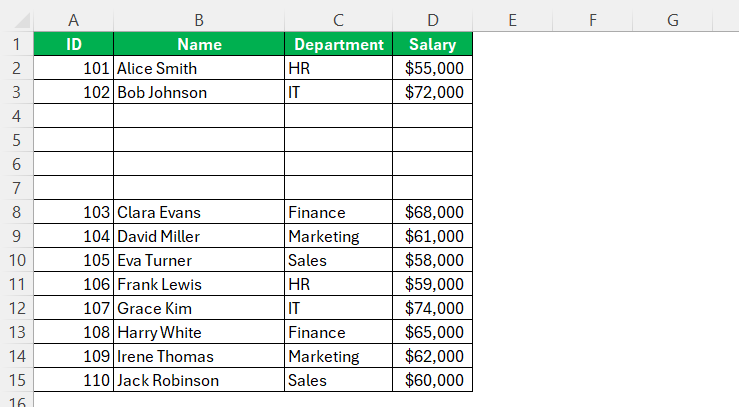
Excel will add new rows above the ones you initially selected. This sequence ensures that you add rows without interrupting the existing formatting and data alignment of your spreadsheet.
Keyboard Shortcuts for Speed
Mastering the keyboard shortcut Ctrl + Shift + ‘+’ in Excel is a powerful way to expedite your workflow when adding multiple rows. Here’s how to use this shortcut:
STEP 1: First, choose the row above which you want the new rows to appear. For multiple rows, drag your cursor to highlight the equivalent number of existing rows.
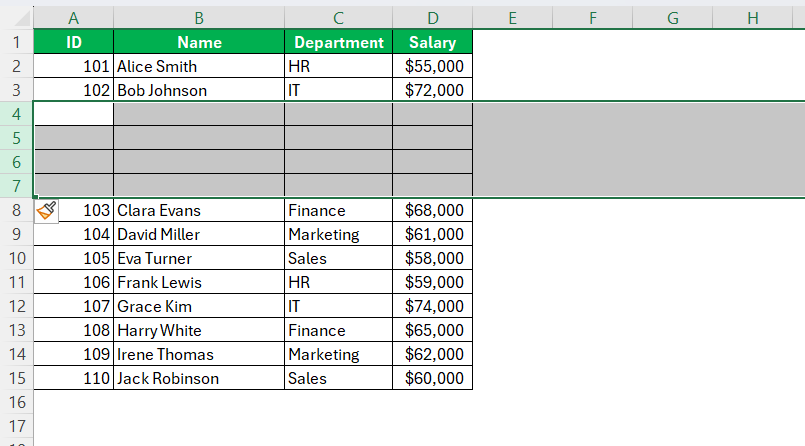
STEP 2: Press Ctrl + Shift + '+'. This action will immediately insert a blank row above each selected row.
This shortcut is particularly useful for users who prefer keyboard navigation over mouse clicks, enhancing speed and efficiency, especially when working with large datasets. It minimizes the time spent on repetitive tasks and reduces the risk of disrupting existing data compared to manual operations.
Using keyboard shortcuts in Excel, like Ctrl + Shift + ‘+’, offers numerous advantages that enhance productivity and accuracy. First and foremost, it significantly speeds up repetitive processes, allowing you to insert multiple rows with just a few keystrokes. This efficiency translates into time savings, especially in large-scale data projects where manual actions are prone to error and consume valuable time.
Additionally, relying on shortcuts reduces dependency on the mouse, which can streamline your workflow and minimize physical strain during prolonged use. This keyboard-centric approach lessens the likelihood of accidental data manipulations or formatting issues since you’re not navigating through various menu options.
Moreover, adopting shortcuts can lead to greater precision, as you’re directly executing commands without intermediate steps. This precision is crucial for maintaining data integrity and ensuring that any changes are deliberate and accurate. Overall, mastering shortcuts not only enhances speed but also promotes efficient and error-free data management.
Using the Right-Click Context Menu
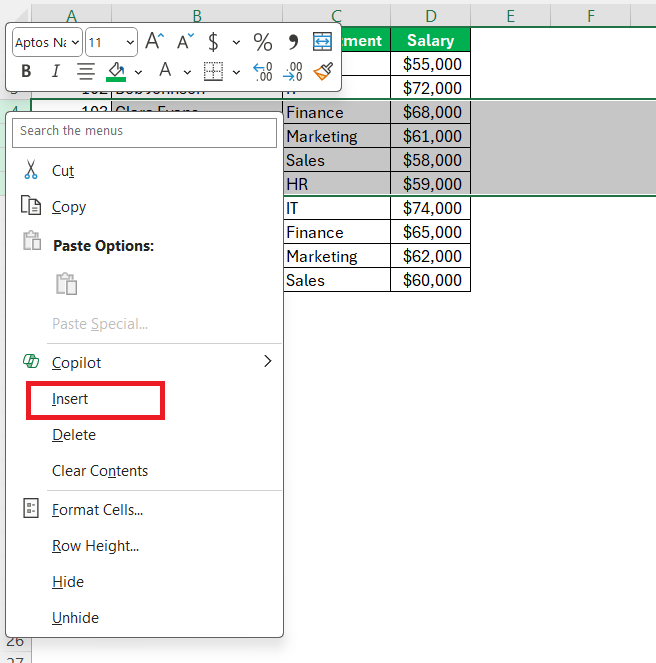
When using the right-click context menu in Excel for quick row insertion, efficiency is key. Start by selecting the row number where you want new rows to appear. Highlight the number of rows you wish to insert. Then, right-click to open the context menu and choose “Insert.”
Excel will add a new row directly above the selected one.
Moreover, you can expedite the process by familiarizing yourself with this menu’s location and options in Excel’s interface. By mastering quick insertion through the right-click menu, you can effectively manage smaller datasets or perform one-off adjustments without navigating away from your current view, making it an ideal solution for those who prefer staying in the flow of the spreadsheet rather than alternating between keyboard and mouse.
Copy and Paste Techniques
Efficiently duplicating rows in Excel can be achieved through various techniques, streamlining your data management process. Here’s a straightforward method using copy and paste:
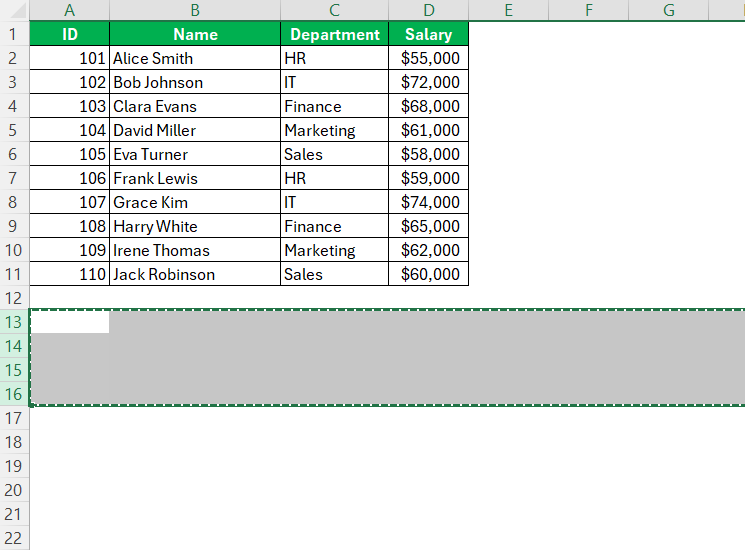
STEP 1: Highlight the row or rows you wish to duplicate by clicking their row numbers. Press Ctrl + C to copy the selected rows.
STEP 2: Click on the row number where you want the duplicate rows to appear. Right-click the chosen row and select “Insert Copied Cells” from the context menu.
This action places the duplicated rows above the selected row.
This method ensures that the copied rows are inserted without disrupting existing data, maintaining the structure and integrity of your spreadsheet. It’s particularly useful for replicating data that needs reapplication across different spreadsheet areas, like repeating categories or template rows. By mastering efficient row duplication, you can avoid repetitive manual entry and enhance your overall productivity.
Advanced Tips & Tricks
Managing Large Data Sets
Managing large datasets in Excel requires strategic planning and effective techniques to maintain data integrity and perform efficient operations. Here are some best practices:
- Use Filters: Implement filters to sort and view specific portions of your dataset without altering the entire spreadsheet. This helps focus on relevant data subsets.
- Utilize PivotTables: Create PivotTables for summarizing, analyzing, and exploring large quantities of data. They provide a dynamic view that can draw insights from extensive datasets quickly.
- Employ Conditional Formatting: Highlight critical data patterns or anomalies using conditional formatting, which visually organizes information and aids in identifying trends.
- Optimize Formulas: Use efficient formulas and functions that minimize processing time. Ensure calculations are streamlined to prevent computational delays on large datasets.
- Leverage Data Validation: Apply data validation rules to maintain data accuracy and consistency, reducing the risk of errors and ensuring only relevant data entries.
By adopting these techniques, you gain better control over large datasets, leading to enhanced data navigation, analysis capabilities, and overall efficiency in managing complex spreadsheet operations.
Common Mistakes to Avoid
When inserting multiple rows in Excel, a few common mistakes can disrupt your workflow. First, avoid selecting the wrong number of rows; make sure to highlight the exact number of rows you intend to add, matching the selection with your desired addition. Another frequent error is not verifying the data alignment post-insertion. Newly added rows might shift formulas or data, causing potential inaccuracies.
Additionally, inserting multiple rows without checking for potential impact on formulas and references can lead to errors in calculations. Always ensure that formulas and data references adjust accurately to accommodate the new rows. Lastly, relying solely on manual insertion can be inefficient, especially with large datasets, so it’s beneficial to utilize automated methods and shortcuts whenever possible.
FAQs
How do I insert rows without overwriting?
To insert rows in Excel without overwriting existing data, first select the entire row(s) above which you want the new rows. Right-click the selection and choose “Insert” or use the Ribbon’s “Insert Sheet Rows” option. This action shifts existing rows down, creating space for the new ones without affecting your current data.
Can I add multiple rows in a table?
Yes, you can add multiple rows in an Excel table. To do this, select the number of rows you want to add below the last row of the table. Right-click and select “Insert Rows” from the context menu, or use the “Insert” option in the Ribbon’s “Cells” group. Excel will extend the table to include the new rows.
What are the best shortcuts for row insertion?
The best shortcuts for row insertion in Excel are:
- Ctrl + Shift + ‘+’: Quickly inserts a new row above the selected row.
- Ctrl + ‘-‘: Removes selected rows, clearing space.
- Alt + I, R: Accesses the insert menu to add a row.
- Alt + H, I, R: From the Ribbon, navigates to insert a row under the Home tab.
These shortcuts enhance efficiency by minimizing the need to navigate menus for simple tasks.
Will inserting rows mess up my formulas?
It can—if you’re not careful. Inserting rows might shift your referenced cells or ranges, so it’s essential to double-check formulas post-insertion. Use structured references or named ranges where possible to avoid breakage. Excel is smart, but it’s not psychic—so always verify your formulas still point where they should.
Can I duplicate existing rows instead of just adding blank ones?
Yes, and it’s easy. Select the row(s) you want to duplicate, press Ctrl + C, then right-click the target location and choose “Insert Copied Cells.” This places the copied data above the selected row without disturbing existing content. It’s a handy method for repeating categories, templates, or formatting.
John Michaloudis is a former accountant and finance analyst at General Electric, a Microsoft MVP since 2020, an Amazon #1 bestselling author of 4 Microsoft Excel books and teacher of Microsoft Excel & Office over at his flagship MyExcelOnline Academy Online Course.

