When formatting data in Excel, borders are often added to improve readability. However, copying borders without affecting the content or other formatting can be confusing. In this tutorial, we will explore how to copy and paste borders in Excel using built-in tools and advanced methods. This ensures your worksheets remain clean, professional, and consistent.
Key Takeaways
- Borders improve readability by separating rows, columns, and sections of data.
- Excel allows you to copy only the border formatting without overwriting cell values.
- Pasting borders is done through the Paste Special options.
- Advanced users can automate border copying with VBA macros.
- Sample workbook includes examples of border formatting techniques.
Table of Contents
What is Border Copy and Paste in Excel?
Border copy and paste in Excel refers to the ability to duplicate only the cell border formatting from one range of cells to another. Unlike a full copy, which transfers data, formulas, and formatting, Paste Special can isolate and apply just the borders. This feature is particularly useful when preparing reports, invoices, or dashboards where consistent styling is important.
How to Copy and Paste Borders in Excel
Step 1: Add Borders to Your Data
Suppose you have a table of sales data:
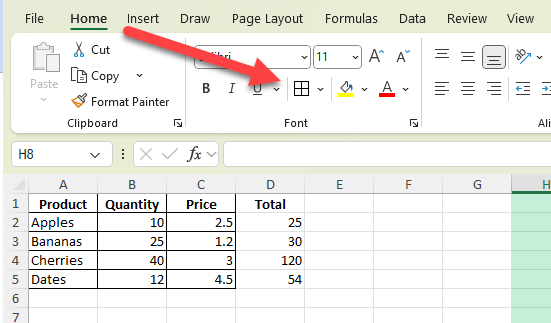
Apply borders using the Borders tool in the Home tab.
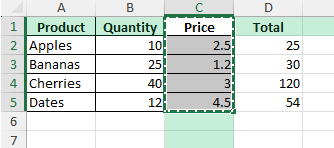
Step 2: Copy the Source Range
Select the cells with the desired border formatting. Press Ctrl+C or right-click and choose Copy.
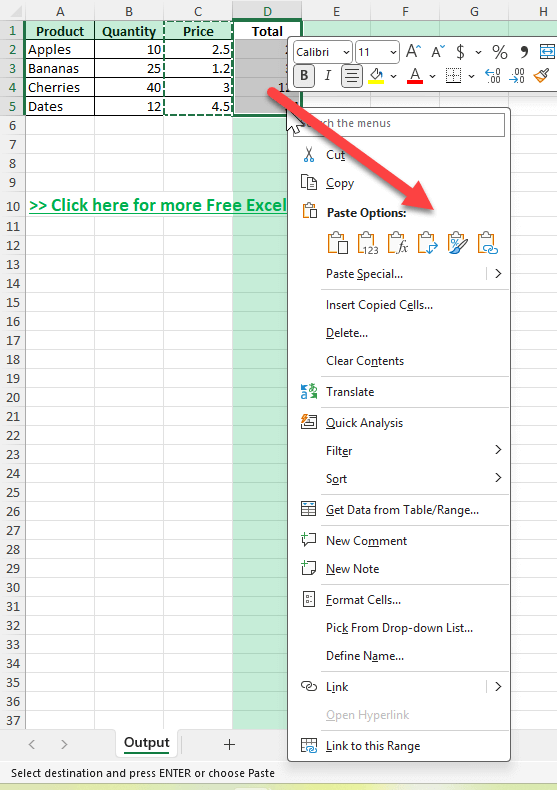
Step 3: Use Paste Special for Borders
Go to the destination cells where you want the borders. Right-click, choose Paste Special, and select Formats. This applies only formatting, including borders, without altering data or formulas.
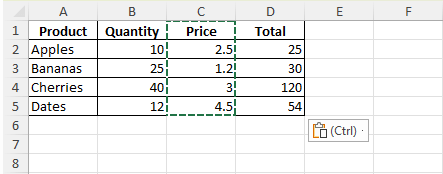
Step 4: Verify the Results
The borders are applied to the destination cells, while the original content remains unchanged.
Common Mistakes and How to Fix Them
Copying full cells instead of formats: This overwrites destination values. Always use Paste Special → Formats.
Forgetting merged cells: Borders may shift when applied to merged ranges. Unmerge before applying.
Inconsistent styles: Ensure consistent border width and color by applying the same formatting across ranges.
Not checking print preview: Some borders may not appear as expected in print. Always preview before finalizing.
Bonus Tips and Advanced Scenarios
Use Conditional Formatting: Instead of manually copying borders, apply rules that highlight ranges with borders when conditions are met.
Automate with VBA: Use macros to copy only borders across sheets. For example:
Sub CopyBorders()
    Range("A1:D5").Copy
    Range("F1:I5").PasteSpecial Paste:=xlPasteFormats
End Sub
Apply Custom Border Styles: Use thick or double lines for headers, thin lines for details.
Combine Borders and Shading: Apply both for enhanced readability in dashboards or forms.
Reuse Templates: Save border styles in a template workbook for consistent formatting across multiple reports.
Use Cases for Copying and Pasting Borders
Copying and pasting borders in Excel is more than just a formatting trick. It allows users to maintain consistency, save time, and ensure professional output across many types of workbooks. Below are detailed examples where this technique is especially valuable.
1) Financial Reports
Context: Financial statements, budgets, and variance reports often span multiple worksheets. Consistency in table presentation helps readers quickly understand data and reduces misinterpretation.
How to use in Excel:
Create a bordered table on one sheet with headers, subtotals, and totals clearly defined.
Copy this format and paste it onto other sheets using Paste Special → Formats.
Apply the same border style for rows like “Net Profit” or “Total Expenses” across reports.
Benefits:
Ensures reports look uniform and professional across departments.
Makes it easier to compare figures side by side in presentations or printouts.
Reduces time spent manually recreating consistent table borders.
2) Invoices
Context: Invoices often include product lines, totals, and signatures. Clear borders provide structure and credibility to the document, especially when shared with clients.
How to use in Excel:
Design a bordered table for invoice items and totals.
Use Format Painter or Paste Special to apply this border template to other invoice sheets.
Apply double-line borders for totals to distinguish them from regular rows.
Benefits:
Maintains a polished and professional look across all invoices.
Ensures critical values such as totals and taxes are visually separated.
Saves time for businesses producing many invoices in Excel.
3) Dashboards
Context: Dashboards often combine charts, KPIs, and tables in one view. Borders can help highlight key sections, making the dashboard more readable.
How to use in Excel:
Draw borders around KPI blocks to separate them visually from raw data tables.
Use Paste Special to replicate border styles across multiple dashboard sections.
Apply bold or thick borders to emphasize target metrics or summary values.
Benefits:
Makes dashboards more intuitive by grouping related elements together.
Improves presentation quality when dashboards are shared with management.
Helps users focus on critical data rather than searching through cluttered sheets.
4) Data Entry Forms
Context: Data entry templates often require users to fill in only specific cells. Borders provide visual guidance for input areas, reducing mistakes.
How to use in Excel:
Create a bordered grid around cells designated for user input.
Copy and paste borders across multiple forms to ensure consistency.
Use thick borders or color-coded outlines for mandatory fields.
Benefits:
Guides users to the correct cells for input, minimizing errors.
Speeds up data entry by clearly showing where information should be entered.
Provides a polished and user-friendly appearance for shared forms.
5) Printable Worksheets
Context: When printing Excel tables, borders ensure that rows and columns remain clearly visible on paper. Without borders, printed data can appear disorganized or confusing.
How to use in Excel:
Apply thin borders around entire tables for clean printed output.
Copy consistent border formats from one sheet to another using Paste Special.
Check Print Preview to ensure borders display correctly on paper.
Benefits:
Makes printed worksheets easier to read and interpret.
Ensures professional quality for reports shared in meetings or with clients.
Saves time by avoiding the need to reapply borders on each worksheet.
FAQ
Can I copy only borders without other formats?
No, Excel groups borders under the “Formats” category. Copying only borders without font, color, or fill is not possible without VBA.
Does Format Painter copy borders?
Yes, Format Painter copies all formatting, including borders.
Will pasting formats overwrite existing colors?
Yes, Paste Special → Formats will overwrite destination formatting, including fills and fonts.
Can I automate border copying?
Yes, with VBA macros you can target only the border styles for copying.
Do borders affect formulas?
No, borders are purely visual and do not impact calculations.

John Michaloudis is a former accountant and finance analyst at General Electric, a Microsoft MVP since 2020, an Amazon #1 bestselling author of 4 Microsoft Excel books and teacher of Microsoft Excel & Office over at his flagship MyExcelOnline Academy Online Course.


