In today’s fast-paced digital world, efficiently organizing data within Excel is crucial for productivity. One common challenge many face is optimizing data presentation by entering new lines within a cell. This seemingly simple task can enhance readability, improve data analysis, and streamline workflows. But fear not, as I will guide you through various techniques on how to enter within a cell and boost your spreadsheet skills.
Key Takeaways:
- Use Alt + Enter to manually insert new lines inside a cell.
- Turn on Wrap Text to let Excel automatically fit content within the cell.
- Use CHAR(10) in formulas for automated line breaks.
- Apply Find & Replace with Ctrl + J to insert line breaks after specific characters.
- These techniques can drastically improve the readability and structure of your spreadsheets.
Table of Contents
Step-by-Step Guide on How to Enter within a Cell
Employing “Alt + Enter” for Quick Access
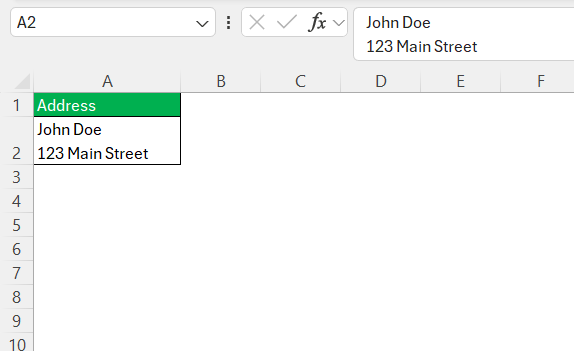
The “Alt + Enter” shortcut is one of the simplest ways to create a new line within an Excel cell without moving out of it. To use this method, click on the cell where you want to input text, type the desired text, and at the spot where you want the new line to start, press “Alt + Enter.”
This action breaks the text flow, moving the cursor to a new line within the same cell. This technique is particularly useful for quickly inputting multiline data, allowing for rapid transitions from one line to the next without interrupting the flow of data entry. It’s an effective solution I find invaluable for immediate formatting needs, ensuring organized and clear data presentation.
Utilizing the Wrap Text Feature
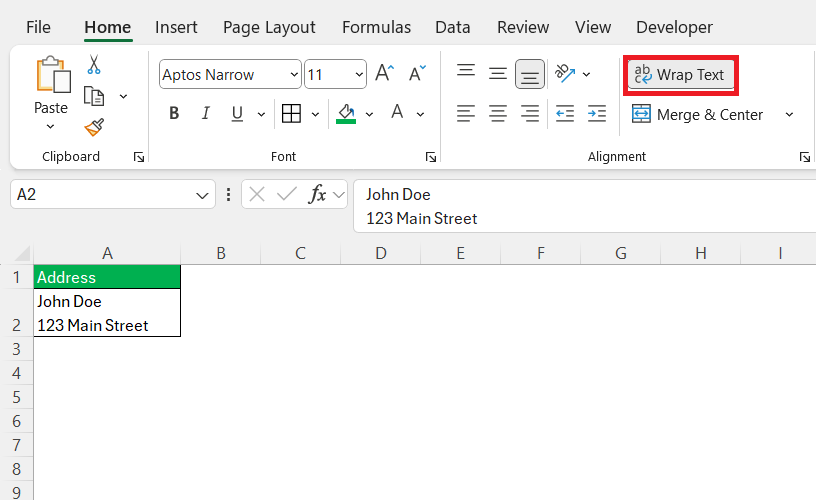
The Wrap Text feature in Excel is a handy tool when you want text to automatically fit within a cell’s boundary. When enabled, it automatically adjusts cell content to fit within the cell’s width, creating new lines as needed. To use this feature, first select the cell(s) containing the text you want to modify. Then, go to the Home tab on the ribbon and click on the Wrap Text button.
This adjusts your data presentation, making longer text entries visible at a glance without manual line breaks. Although Wrap Text doesn’t give you precise control over where new lines occur, it’s ideal for ensuring no content is hidden, saving time on resizing columns frequently. This feature is especially beneficial for users managing extensive text data, ensuring everything stays neatly within the cell structure.
Adding Multiple Line Breaks for Clarity
Sometimes, I need to break text into clearly segmented parts within a single cell, like steps in instructions, multiline comments, or grouped tags. Manually, this is again achieved using Alt + Enter, repeated after each section.
But there’s also a formulaic method using:
=TEXT1 & CHAR(10) & TEXT2 & CHAR(10) & TEXT3
The CHAR(10) function represents a line break in Excel. When combined with &, it allows me to merge different text elements with line breaks in between.
To see the result properly, remember to enable Wrap Text on the target cell!
This method is particularly useful when I’m pulling data from multiple fields or auto-generating summaries. It keeps everything organized in one place — clean, readable, and neatly stacked. Applying multiple line breaks efficiently can transform how information is consumed, especially in professional settings requiring detailed data layouts. It’s a technique I continually rely on for clarity and effectiveness in spreadsheet communication.
Advanced Methods for Custom Line Placement
Creating Line Breaks After Specific Characters
Creating line breaks after specific characters can help in organizing data by predefined markers or separators, making it more readable and structured. For instance, if you have a text string that contains semicolons as separators, you can insert line breaks following each semicolon. In Excel, this can be achieved through the “Find and Replace” feature.
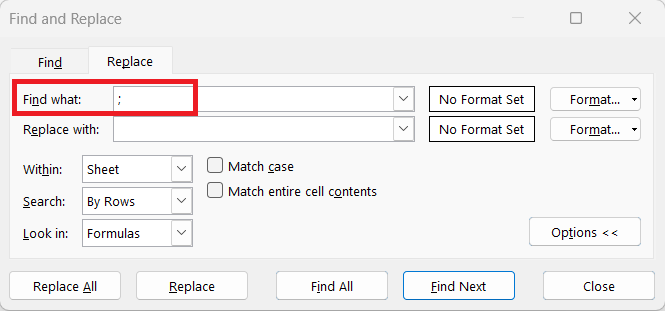
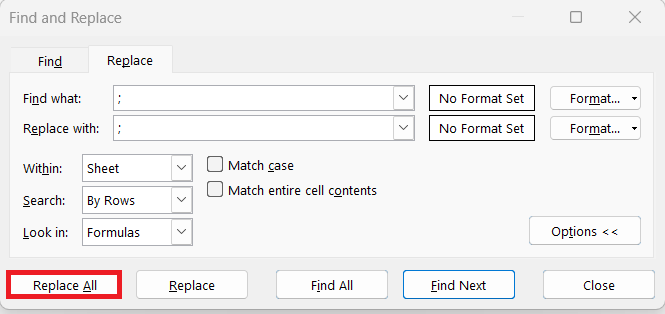
Start by selecting the cell range where you want to insert line breaks. Then use the shortcut “Ctrl + H” to open the Find and Replace dialog box.
In the “Find what” field, enter the character after which you want to add a line break (e.g., “;”).
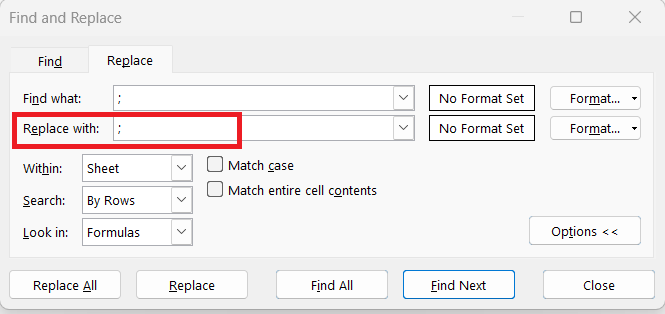
In the “Replace with” field, enter the character followed by a line break. To do this, type the character and then press “Ctrl + J” to insert the line break.
Finally, click “Replace All” to apply the changes.
The result will look like this:
Using this method enables quick, organized formatting without manually editing each cell. It’s a highly effective technique for managing data cleanly, especially when importing text with uniform separators.
FAQs
Why isn’t my line break visible even after using Alt + Enter or CHAR(10)?
If your line break isn’t showing up, the most common reason is that Wrap Text is not enabled on the cell. Excel needs Wrap Text activated to display content across multiple lines within a single cell. Without it, the new line character exists but appears as a blank or continuation of the current line. Simply go to the Home tab > Wrap Text to fix the issue.
Can I automate line breaks when importing data into Excel?
Yes, you can automate line breaks by combining Excel formulas with CHAR(10) or using Power Query during the import process. For instance, if your imported data uses delimiters like semicolons, you can use SUBSTITUTE(A1, “;”, CHAR(10)) to convert them into line breaks. Always remember to enable Wrap Text on the target cells for the result to appear correctly. This method streamlines bulk formatting and is ideal for cleaning up exported reports.
Is there a way to insert line breaks after specific words or patterns?
Yes, you can use the Find and Replace feature with Ctrl + H to insert line breaks after specific characters or words. In the “Find what” field, enter the delimiter (e.g., ;), and in “Replace with,” type the same character followed by Ctrl + J (which inserts a line break). This works well when dealing with structured strings like tags, item lists, or notes. It helps you maintain consistent formatting without writing custom formulas or macros.
Will adding line breaks affect Excel formulas or cell references?
Line breaks do not affect the cell’s value in terms of calculations or references — Excel treats the entire multiline content as one string. However, functions like LEN, SEARCH, or MID will count line break characters as part of the string. So, while visual presentation improves, your formulas might need slight adjustments to account for CHAR(10) if you’re parsing text. Always test your formulas after formatting for line breaks.
How can I cleanly revert line breaks back to separators if needed?
If you need to reverse the formatting, you can use Find and Replace again, replacing Ctrl + J with your desired separator like ; or , . Press Ctrl + H, type Ctrl + J into the “Find what” field (it will look empty), and enter your separator in the “Replace with” field. This restores your data to a single-line format for exporting or reprocessing. It’s a quick way to toggle between readable and compact views depending on the task.
John Michaloudis is a former accountant and finance analyst at General Electric, a Microsoft MVP since 2020, an Amazon #1 bestselling author of 4 Microsoft Excel books and teacher of Microsoft Excel & Office over at his flagship MyExcelOnline Academy Online Course.

