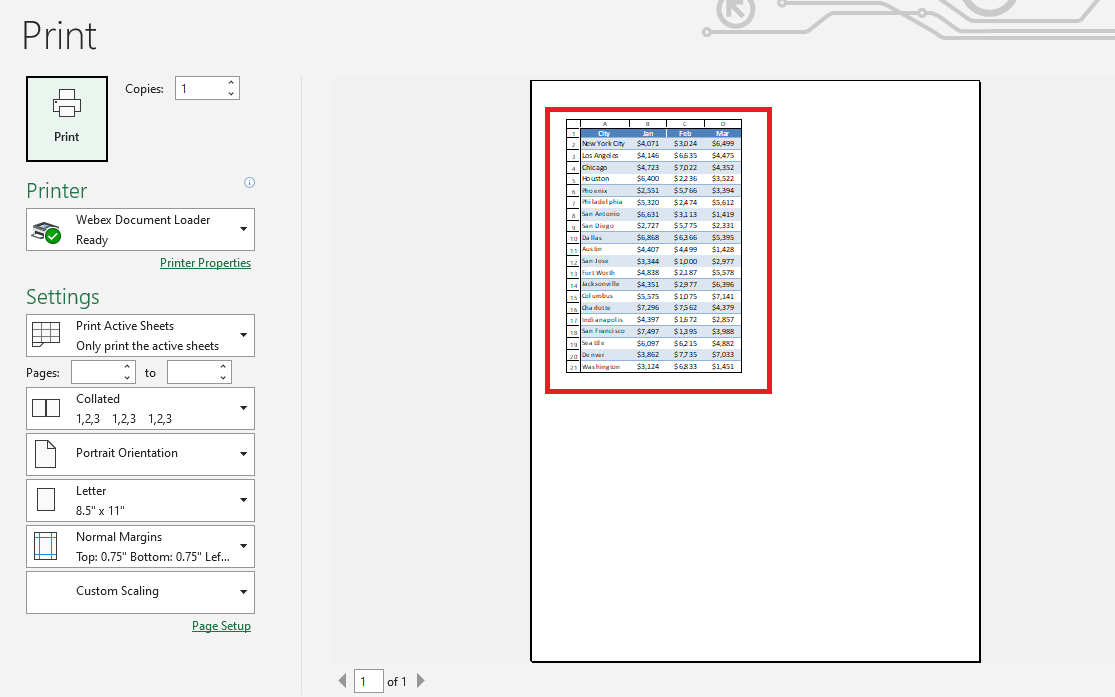
If you have a large data file with headers on the top, you can freeze the columns to easily view the entire table without losing sight of the headers. But the freeze feature will not be applied when you try to print the file. Let’s try to understand each of these methods one by one!
Key Takeaways
-
Repeat Rows and Columns for Clarity – Ensure key headers are visible on every printed page for easy reading.
-
Access Through Page Layout Tab – Use the Page Layout tab and click Print Titles to set repeating headers.
-
Set Rows to Repeat at Top – Choose one or more rows to repeat at the top of each printed page.
-
Set Columns to Repeat at Left – Choose one or more columns to repeat on the left side of every page.
-
Improves Multi-Page Reports – Keeps context consistent when printing large tables or reports across pages.
Table of Contents
Repeat row on every page
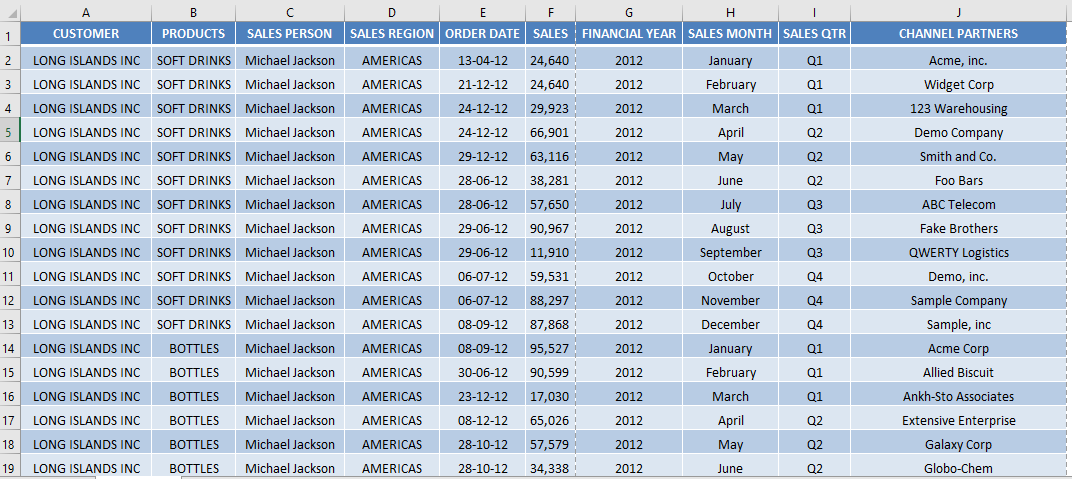
If you have a large worksheet that spans over multiple pages, you can easily print the first row of the data as headers in Excel on every page.
Follow the steps below to print a row of every page:
STEP 1: Go to Page Layout tab > Select Print Tiles
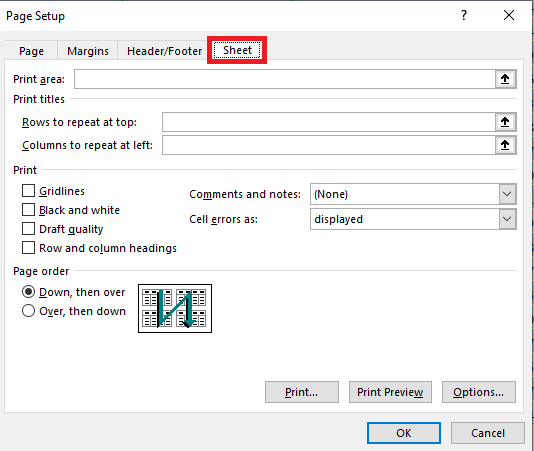
STEP 2: In the Page Setup dialog box, select Sheet.
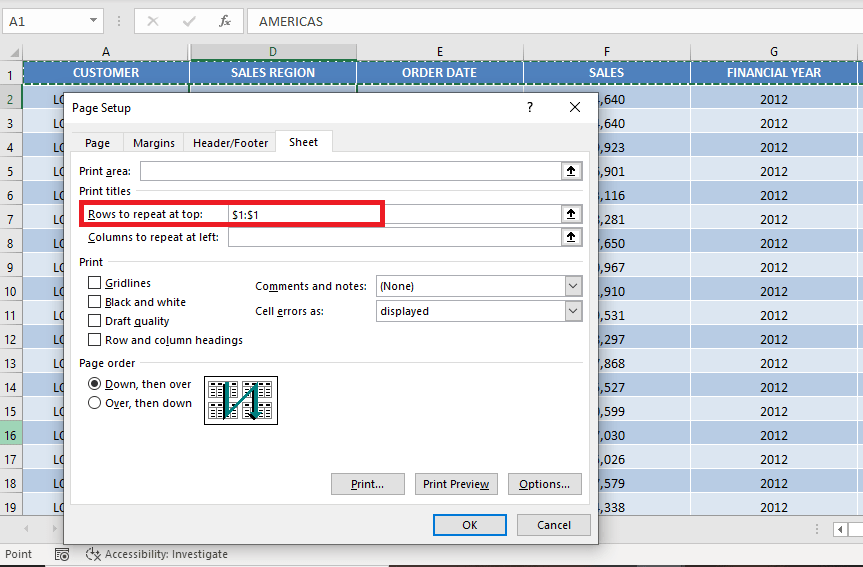
STEP 3: Select the collapse dialog box and pick the row you wish to repeat.
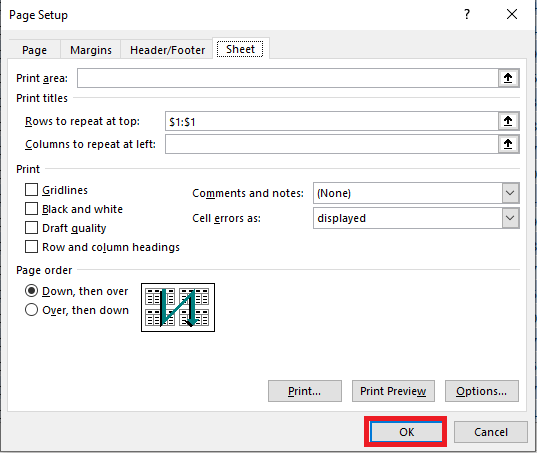
STEP 4: Click OK.
STEP 5: Press Ctrl + P to open Print Preview.
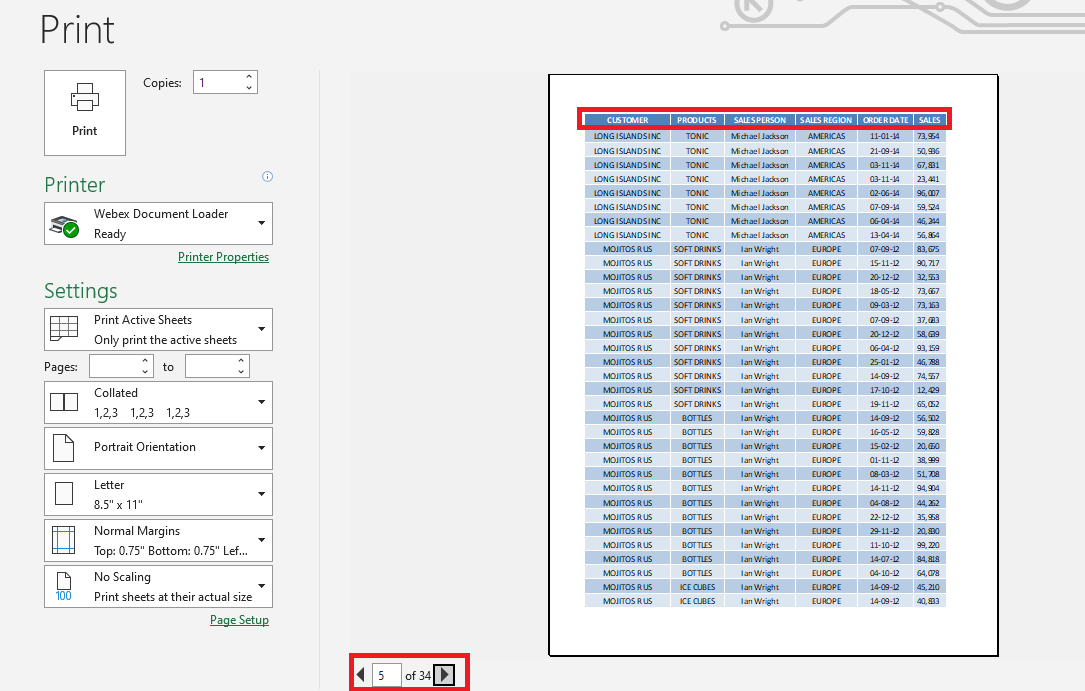
As you can see we are on page 5 but the 1st row is still visible!
Repeat column on every page
When your Excel worksheet has multiple columns and is spread across several pages, you can fix the first column.
Follow the steps below to fix the first column when printing:
STEP 1: Go to Page Layout > Select Print Tiles
STEP 2: In the Page Setup dialog box, select Sheet.
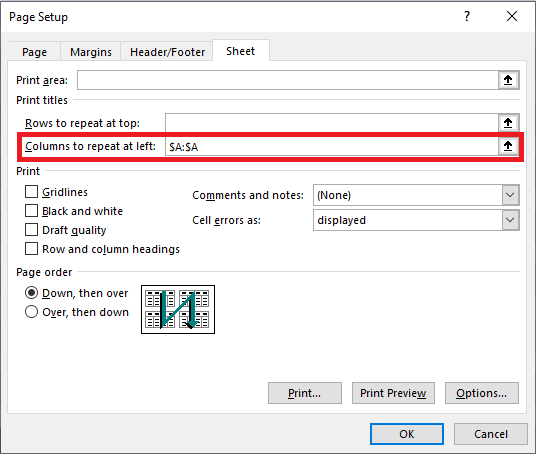
STEP 3: Select the collapse dialog box and pick the column you wish to repeat.
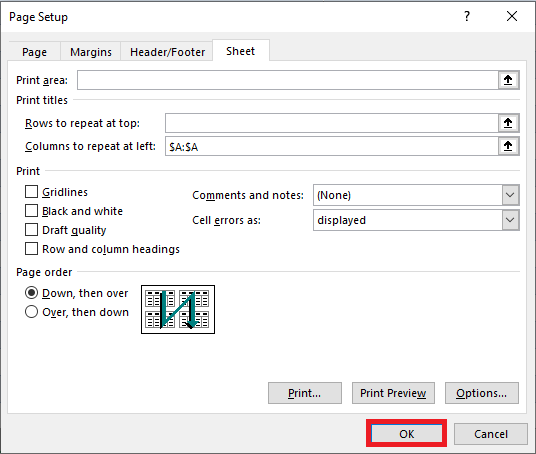
STEP 4: Click OK
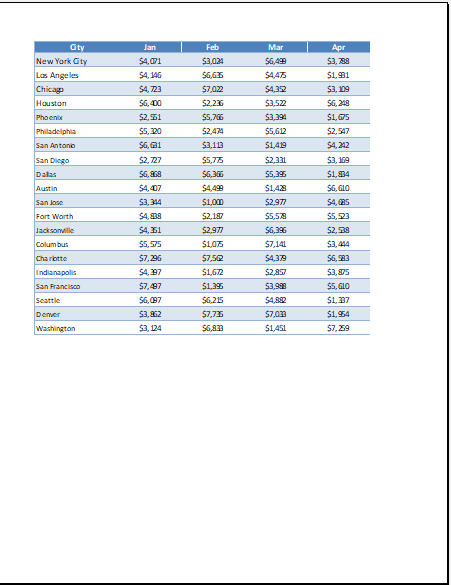
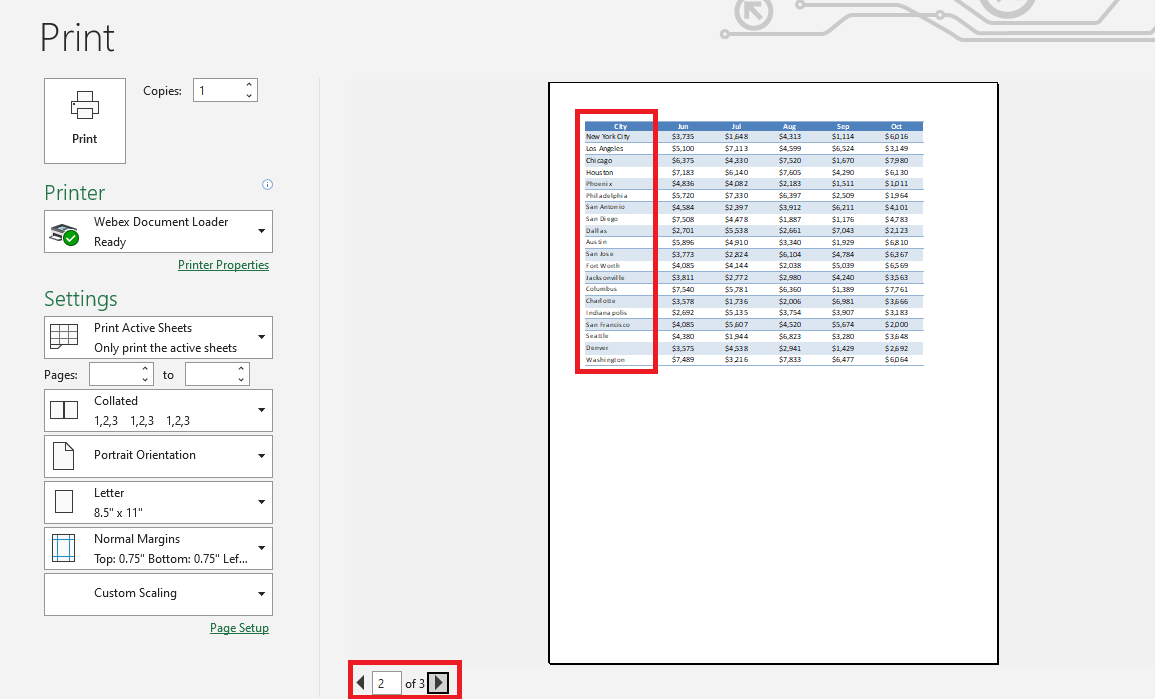
And it’s done! Column A is still visible when you go to page 2.
Print row numbers and column letters
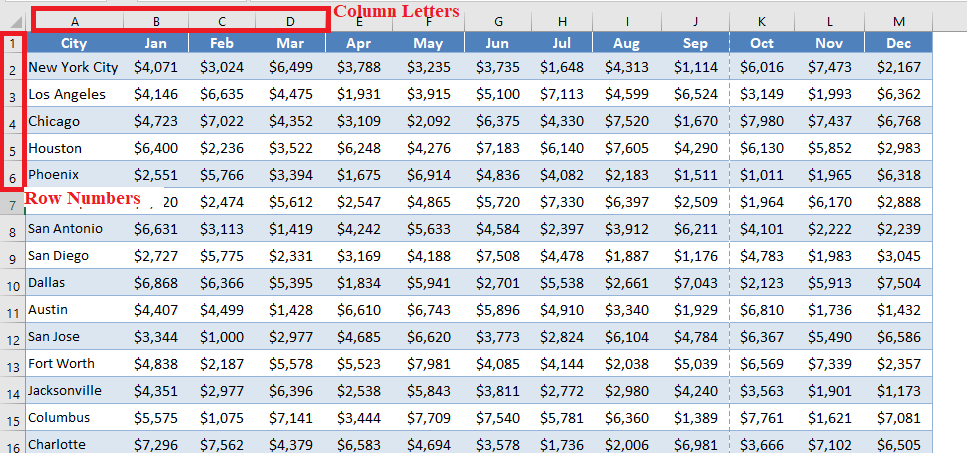
Excel denotes the worksheet’s columns as letters (A, B, C, etc) and rows as numbers (1, 2, 3, etc). But when you try to print your worksheet, it is not visible at all.
You can easily print numbers and column letters by following the steps below:
STEP 1: Go to Page Layout > Select Print Tiles
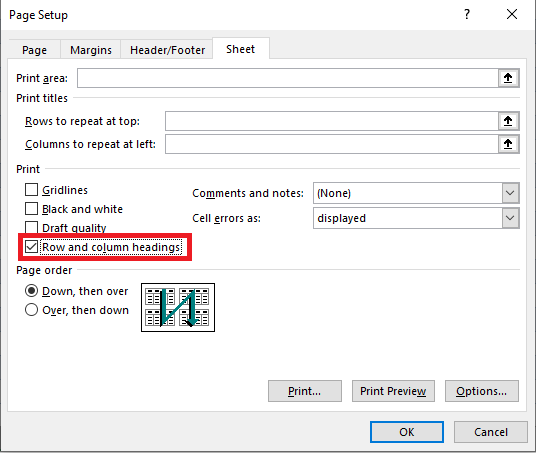
STEP 2: In the Page Setup dialog box, select Sheet.
STEP 3: Check Row and column headings
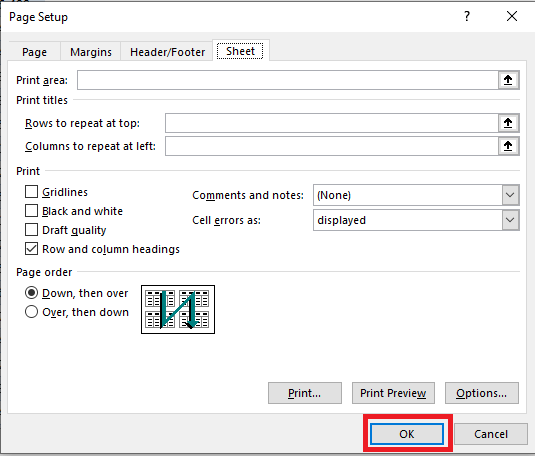
STEP 4: Click OK.
STEP 5: Press Ctrl + P to view Print Preview.
The row numbers and column letters will be displayed in the print preview section!
Frequently Asked Questions
Where do I find the option to repeat headers when printing?
Go to the Page Layout tab and click on Print Titles in the Page Setup group.
Can I repeat both rows and columns?
Yes, you can set rows to repeat at the top and columns to repeat on the left simultaneously.
Why don’t my headers show on every page when printed?
You may have forgotten to set the rows/columns under Print Titles before printing.
Can I preview how it will look before printing?
Yes, use Print Preview under File > Print to confirm your settings.
Does this work in all versions of Excel?
The feature is available in most modern versions of Excel, including Excel 2010 and later.
Conclusion
Now you can easily add Excel header row, Excel column headers, and row-column headings on every page when you print your worksheet.
Click here to learn what customization you can do before you print your document!
John Michaloudis is a former accountant and finance analyst at General Electric, a Microsoft MVP since 2020, an Amazon #1 bestselling author of 4 Microsoft Excel books and teacher of Microsoft Excel & Office over at his flagship MyExcelOnline Academy Online Course.

