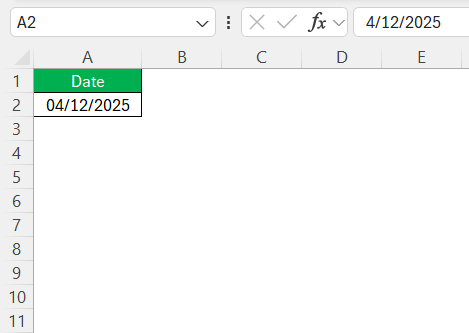
In an increasingly globalized world, maintaining consistency in data formats is essential, especially in spreadsheets. When working with Excel, the way dates are formatted can significantly impact the accuracy of data interpretation and analysis. The US date format, typically represented as MM/DD/YYYY, can sometimes clash with formats set by your local regional settings. By understanding how to adjust these settings within Excel, I can ensure that my data is presented accurately and is easily understood by others who also rely on this standardized format.
Key Takeaways:
- Excel uses your system’s regional settings to decide date format, so US users often see MM/DD/YYYY.
- Inconsistent date formatting can break formulas, exports, and even simple sorting.
- You can switch to US format globally via Control Panel or locally via Excel Options.
- Custom date formats help tailor presentations without changing system settings.
- The
DATEVALUEfunction saves the day when dates are stuck as text.
Table of Contents
Understanding US Date Format in Excel
Default Regional Settings Explained
Excel often defaults to the regional settings of my computer’s operating system. This means that if my system is configured for a region outside the US, dates in Excel might be formatted differently, like DD/MM/YYYY, which can lead to confusion when sharing documents across borders. These settings are crucial because they dictate not only the date format but also numerical and currency formatting, influencing how data is entered, displayed, and even calculated. Therefore, it’s beneficial for me to be aware of these defaults to ensure that my spreadsheets communicate the intended information accurately.
Importance of Correct Date Formatting
Correct date formatting in Excel is vital for data integrity and analysis. When dates are formatted inconsistently, it can lead to misinterpretation, errors in calculations, and faulty data exports or imports. For instance, incorrectly formatted dates might not sort properly or could result in faulty time-sensitive analyses. By ensuring that dates align with the US format, I can facilitate clearer communication, avoid potential errors in collaborative environments, and maintain a reliable standard that others can easily recognize and use. Proper formatting ultimately supports the accuracy and efficiency of my work with data.
Changing Regional Settings in Excel
Step-by-Step Guide from the Control Panel
To adjust the regional settings from the Control Panel and apply the US date format, I can follow these steps:
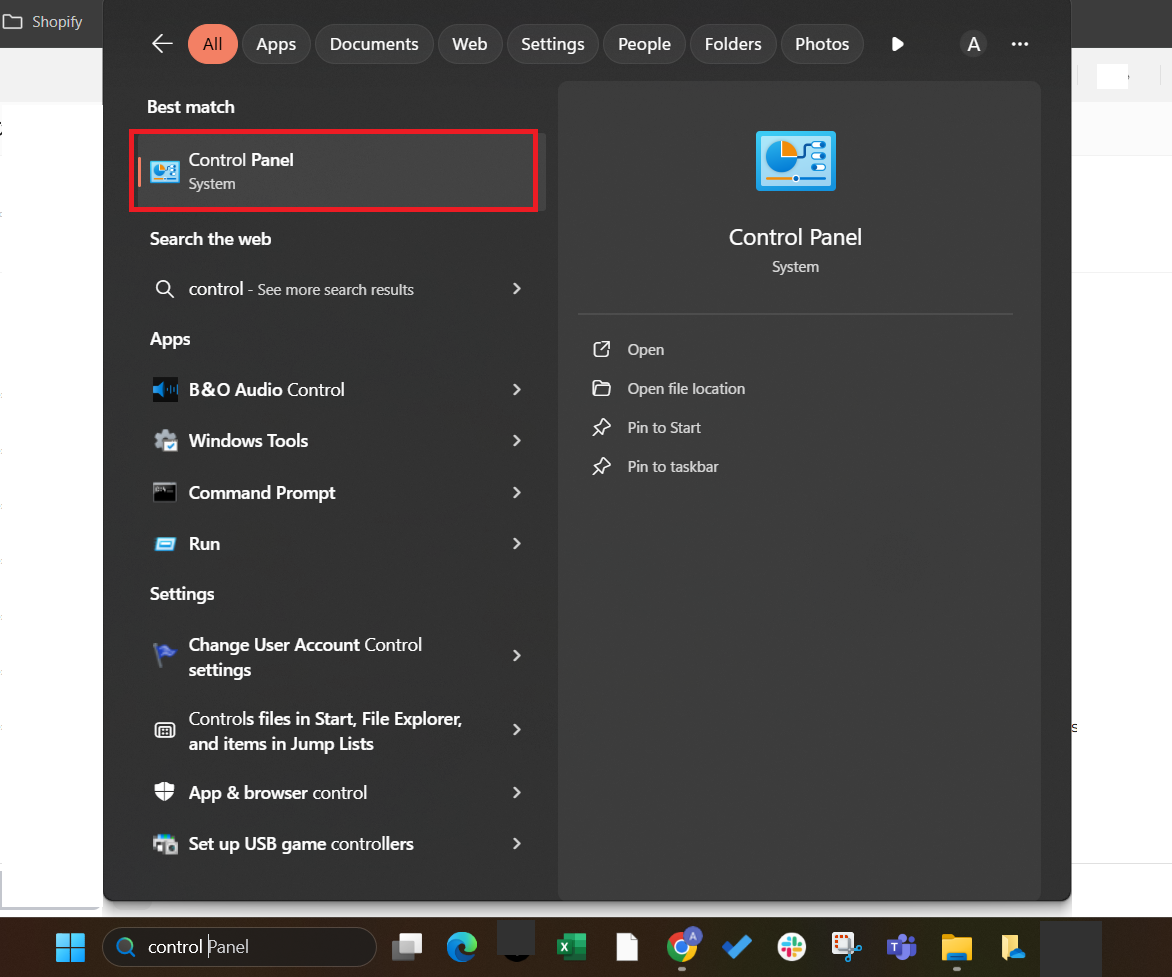
STEP 1: Click on the Start menu and search for “Control Panel.” Select it from the list of options.
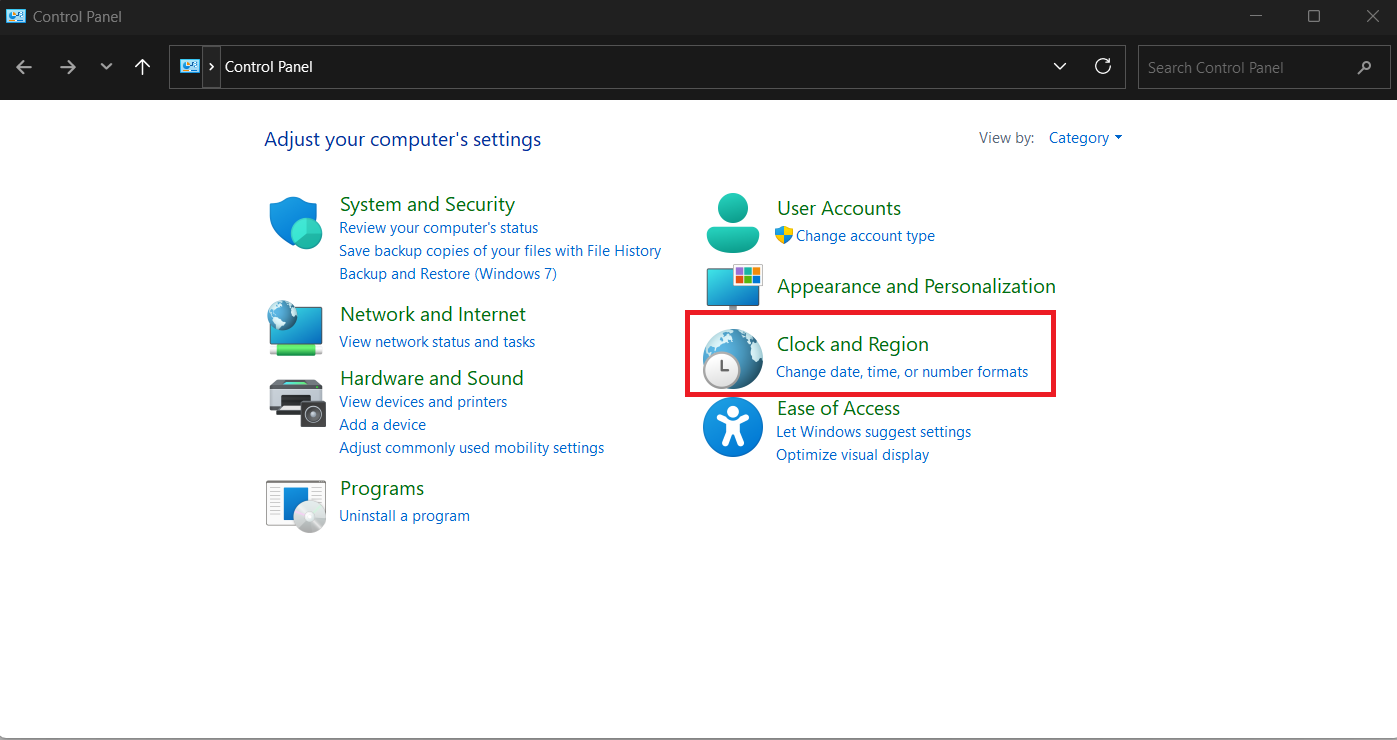
STEP 2: Once in the Control Panel, search for “Clock and Region” and select the option that appears.
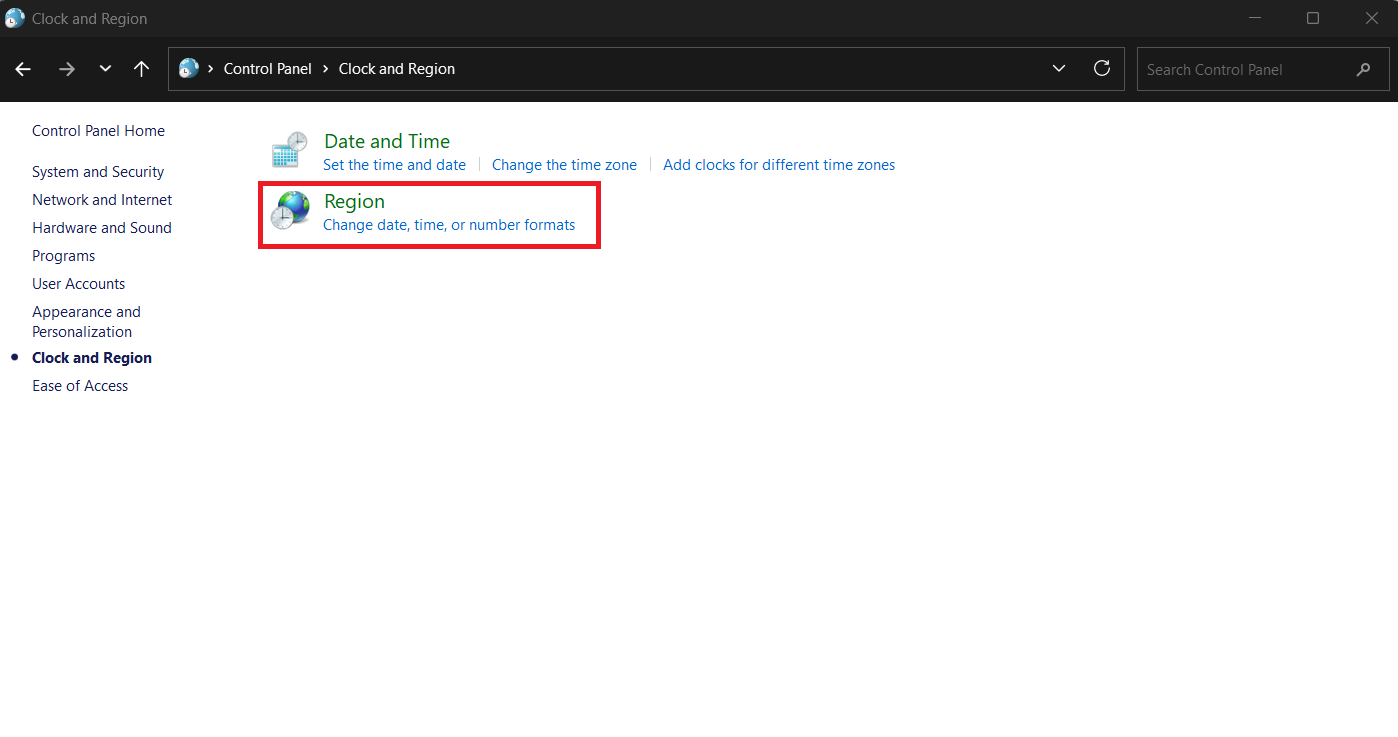
STEP 3: Select Region.
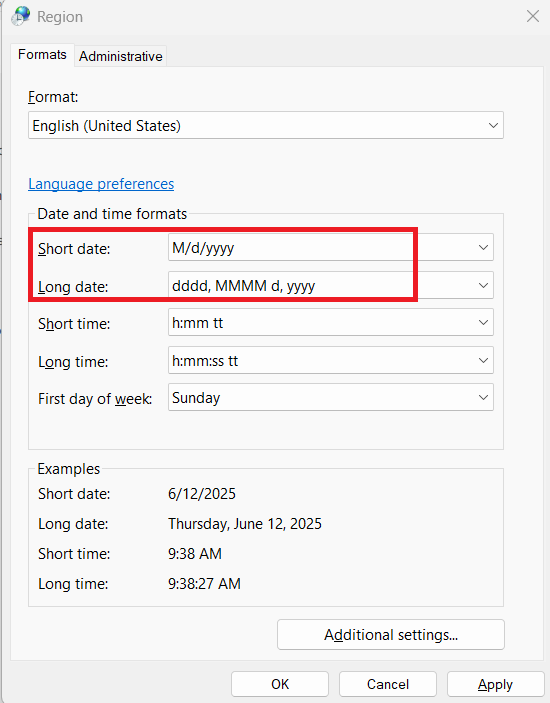
STEP 4: In the Region settings window, click on the “Formats” tab to view current settings. From the “Format” dropdown menu, select “English (United States)” to apply US-specific date formats. Click “Apply” and then “OK” to confirm your changes, ensuring the new date format is active.
This method changes the settings globally for any new Excel file and other programs relying on the system’s region configuration. It assures me that when I enter or view dates, they will adhere to the US standard, reducing potential miscommunications or data mishandling.
Adjusting Settings within Excel Options
Adjusting the US date format directly within Excel helps to ensure consistency without altering my system’s general settings. By following these steps, I can set my preferred date format for Excel spreadsheets:
STEP 1: Click on “File” in the top menu, then select “Options” from the side menu.
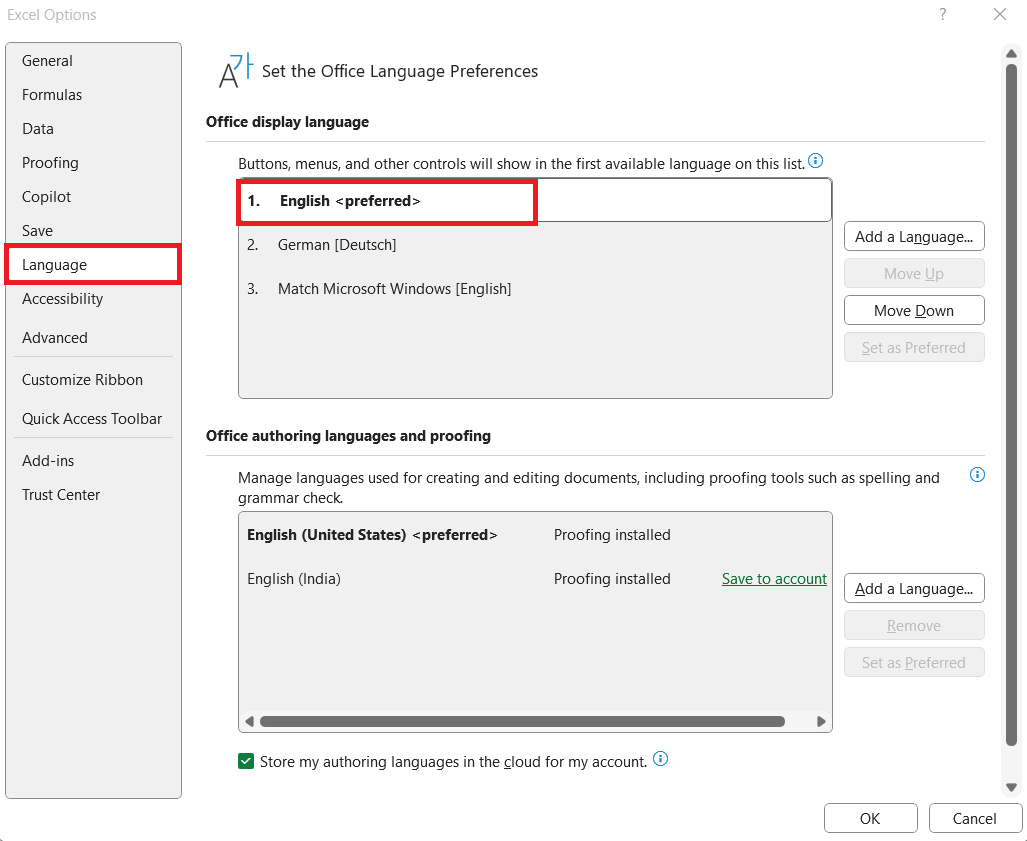
STEP 2: Within the Options dialog box, select “Language” from the list on the left. Choose “English (United States)” for the language setting connected to regional numbers and dates.
By doing this, I ensure that my Excel environment uses the US date format for tasks like data entry, sorting, and calculation. This approach is ideal when working with colleagues who require consistent formatting across all shared documents without impacting other applications on my device.
Customizing Date Formats for Clarity
Creating a Custom Date Format
Creating a custom date format in Excel allows me to tailor date displays to meet specific needs, enhancing readability and utility. Here’s how I can set up a custom date format:
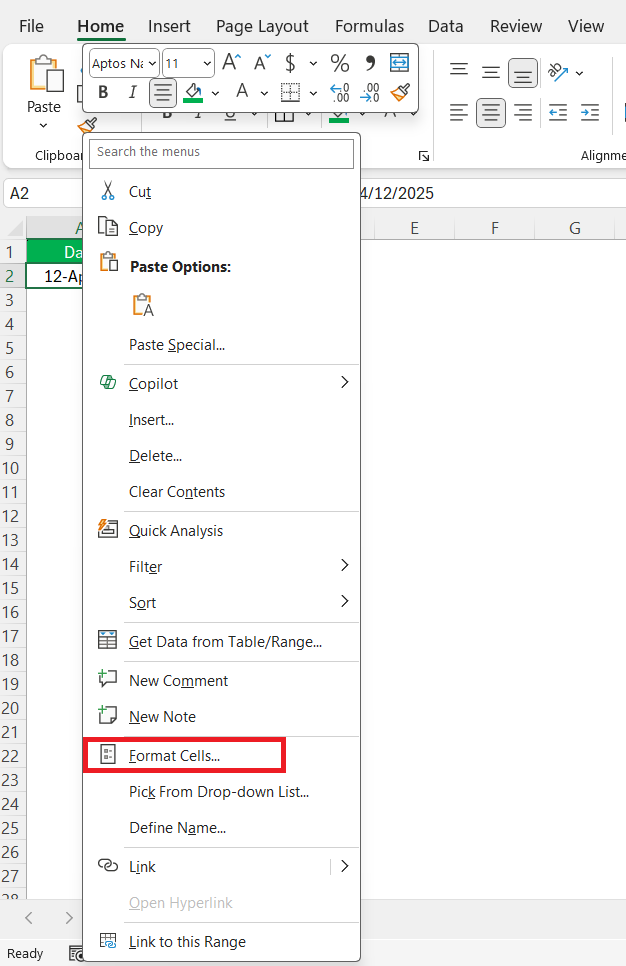
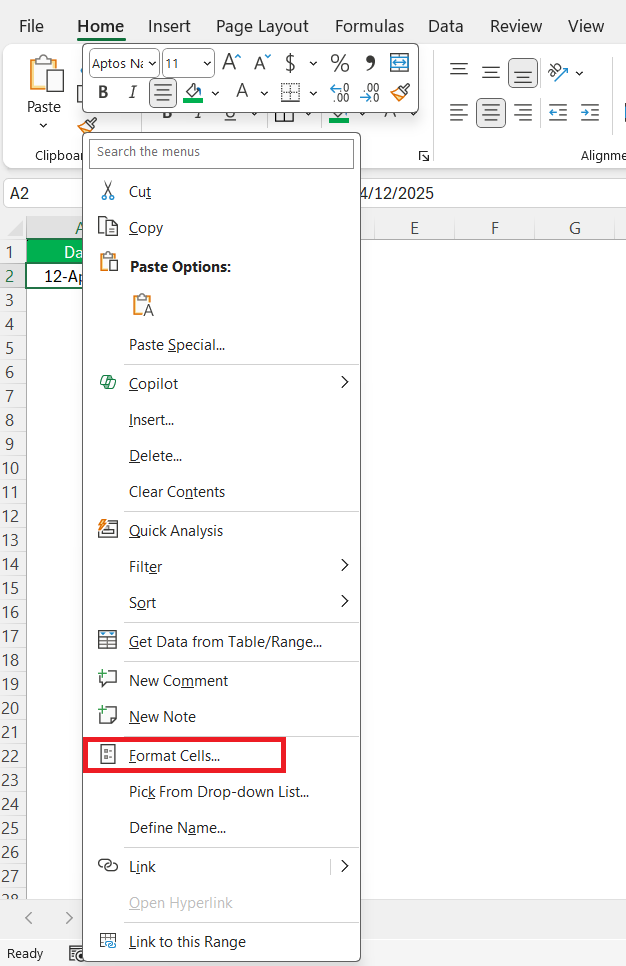
STEP 1: Highlight the cells containing the dates you want to format (entire column or specific ranges). Right-click the selection and choose “Format Cells,” or press Ctrl + 1 to open the dialog box.
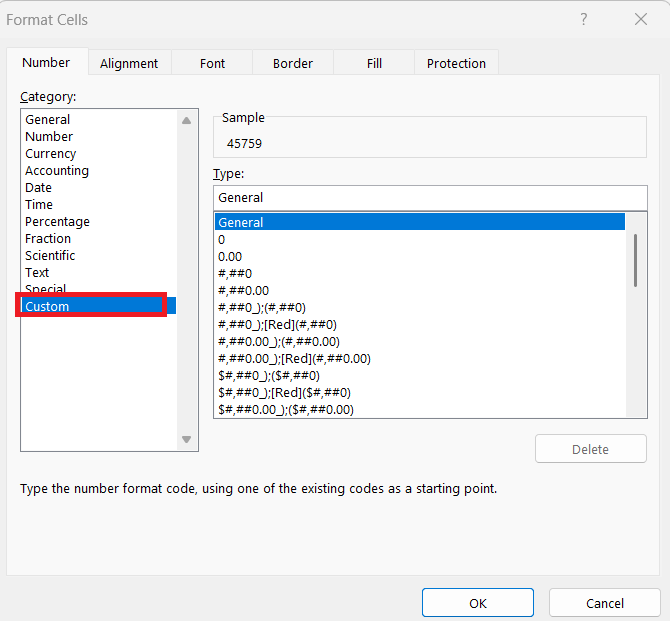
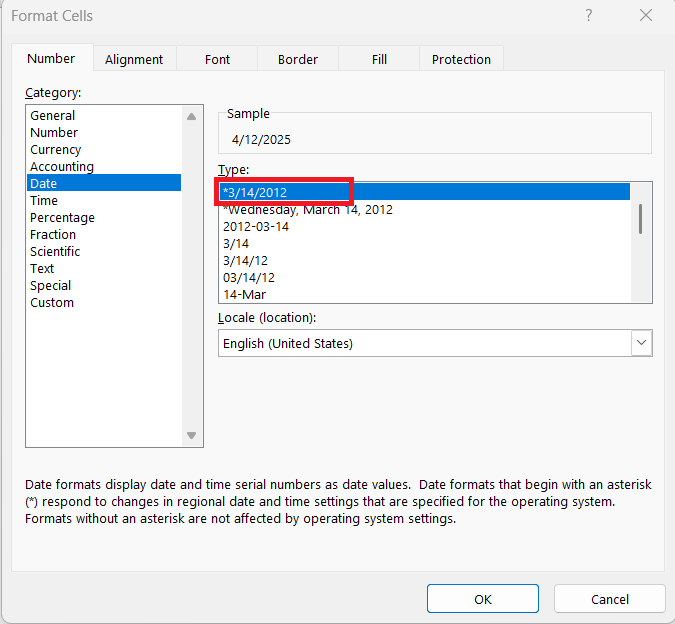
STEP 2: In the Format Cells window, go to the “Number” tab and select “Custom” from the list on the left.
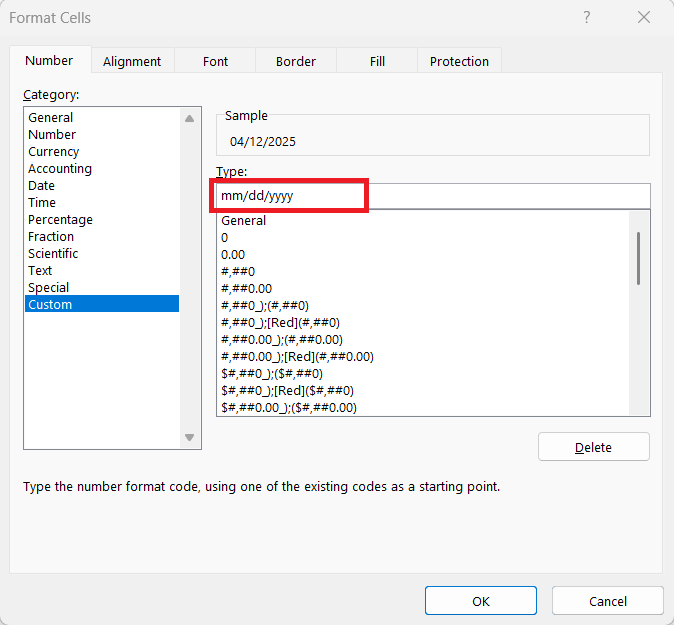
STEP 3: In the “Type” field, enter your desired format (e.g., mm/dd/yyyy, dd-mmm-yyyy, or yyyy/mm/dd).
STEP 4: Click “OK” to apply the changes—the dates will now follow your custom format.
By creating a custom format, I ensure my data is presented in a way that maximizes clarity for any specific project or audience requirements. My custom settings remain localized and do not affect the global date format preferences, allowing me flexibility in how data is displayed on a case-by-case basis. This capability is particularly useful when I work on projects targeting diverse audiences who might benefit from a specific date presentation style.
Applying Formats Using the Format Cells Option
Applying formats using the Format Cells option in Excel allows me to quickly standardize the date display for enhanced readability and consistency. Here’s a concise guide on doing this effectively:
STEP 1: Highlight the cell range or column that contains the dates you want to format. Right-click the selected cells and choose “Format Cells,” or press Ctrl + 1 to open the Format Cells dialog.
STEP 2: In the “Number” tab, select “Date” from the Category list and choose a standard format like 3/14/2023 or March 14, 2023.
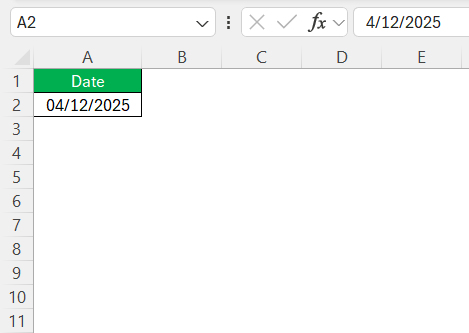
STEP 3: Click “OK” to apply the selected date format to the cells.
By using this straightforward method, I ensure that my dates are consistently formatted, making my spreadsheet more professional and easier to interpret for anyone reviewing the data. It’s a quick yet powerful way to maintain data presentation standards across all of my Excel documents.
DATEVALUE Formula
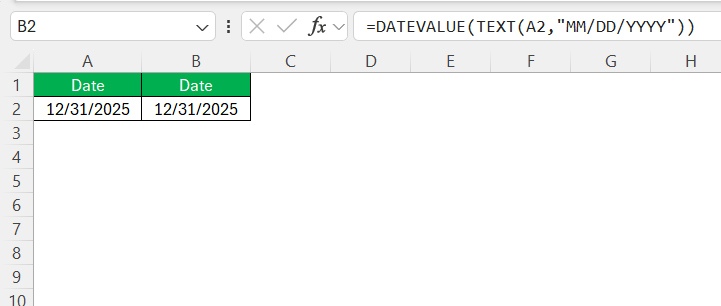
Sometimes I get data dumped in text format. For example, “12/31/2025” might show up as a text string, not a real date. To convert that:
=DATEVALUE(TEXT(A2,”MM/DD/YYYY”))
Now Excel treats it as a real date. And I can sort, filter, and do date math like a boss.
Common Mistakes I Learned to Avoid
- Entering a date like “07/04/2025” on a system using the DD/MM/YYYY format can result in Excel misinterpreting it as April 7th instead of July 4th. This kind of mismatch can throw off entire datasets.
- Copying and pasting dates from websites or Word documents often brings in hidden formatting that can silently break your spreadsheet. What looks like a date might actually be plain text behind the scenes.
- Assuming that Excel will automatically detect and correct your date format is a mistake. Excel is literal—it reads what it’s given and won’t second-guess your input.
- Exporting a file to CSV without properly formatting the date columns first can cause chaos when the file is opened in different systems. Dates may be misread, flipped, or turned into gibberish depending on the regional settings of the recipient’s computer.
FAQs
Why does Excel sometimes show the wrong date when I type it in?
Excel relies on your system’s regional settings to interpret dates. If your system is set to a format like DD/MM/YYYY, typing “07/04/2025” will be interpreted as April 7 instead of July 4. This causes major confusion in shared or global workbooks. Always check and adjust your settings or use custom formats to avoid such mix-ups.
How do I permanently switch to the US date format in Excel?
To change date format globally, go to your Control Panel → Clock and Region → Region → Formats tab → set to “English (United States).” This will apply the US format across all programs, including Excel. If you prefer to keep your system settings intact but change Excel only, go to Excel Options → Language → select “English (United States).” Both options ensure MM/DD/YYYY consistency in your files.
What’s the easiest way to apply the US date format in a spreadsheet without changing system settings?
Use the Format Cells dialog in Excel: select your cells, press Ctrl + 1, go to the “Date” category, and pick a US-style format like 3/14/2023. This change applies only to selected cells and is perfect for one-off spreadsheets or collaborative projects. It’s quick, effective, and doesn’t impact other applications. For custom formats (like yyyy/mm/dd), switch to the “Custom” category.
What’s the benefit of using a custom date format in Excel?
Custom formats give you more control over how dates appear, such as dd-mmm-yyyy for clarity or yyyy/mm/dd for sorting. This is especially useful when catering to international clients or working with large datasets that need to be human-friendly and machine-readable. It keeps the actual date value intact while changing how it’s displayed. Plus, it doesn’t mess with your system or workbook-wide settings.
How can I fix dates that show as plain text in Excel?
If a date appears as a text string, Excel won’t recognize it for sorting or calculation. Use the formula =DATEVALUE(TEXT(A2,"MM/DD/YYYY")) to convert the text into a real date Excel understands. Once converted, you can perform all typical date operations like subtraction, sorting, and filtering. This is a lifesaver for data imported from websites, Word, or raw text files.
John Michaloudis is a former accountant and finance analyst at General Electric, a Microsoft MVP since 2020, an Amazon #1 bestselling author of 4 Microsoft Excel books and teacher of Microsoft Excel & Office over at his flagship MyExcelOnline Academy Online Course.

