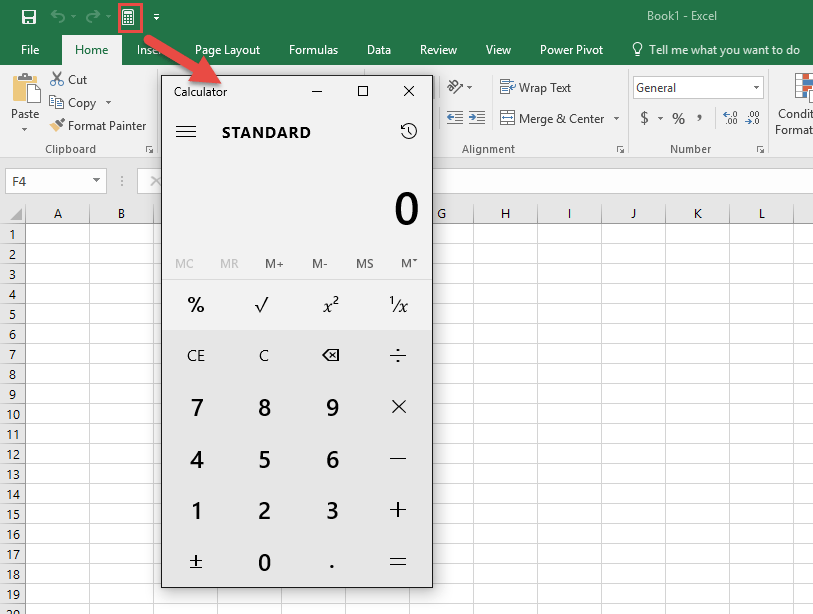

You might have found using the Windows in-built Calculator in Excel when you want to do some quick and basic calculations that did not require formulas. Many of the times, the Calculator app and Excel go hand-in-hand.
Did you know that instead of scrambling for the Calculator Application, you can actually have a Calculator in Excel itself!
Excel has a lot of customizations and one handy tool is to include the Calculator in Excel toolbar.
You can literally place it on your Excel window, and it is very easy and handy to open it whenever needed:
Adding Excel Calculator to the Quick Access Toolbar would save you a lot of time and could prove to be extremely helpful.
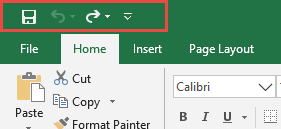
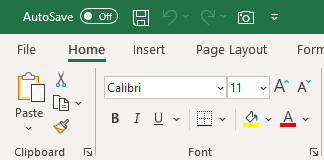
Quick Access Toolbar (QAT) is located at the top-left portion of the Ribbon where you can access the commonly used functions and commands of Excel. To learn more about how to use QAT, go through the tutorial here.
By default, the only options available in QAT are Save, Undo, and Redo. But, it can be customized individually by Excel users. So, if you are one who frequently uses Calculator App with Excel. Adding a calculator to your QAT would be a perfect step!
In this tutorial, you will learn the following:
How to Add Calculator to QAT
The steps for how to create a calculator in Excel are very straightforward. They are outlined below:
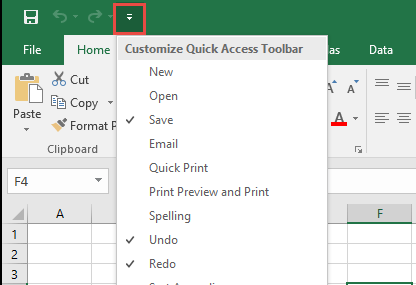
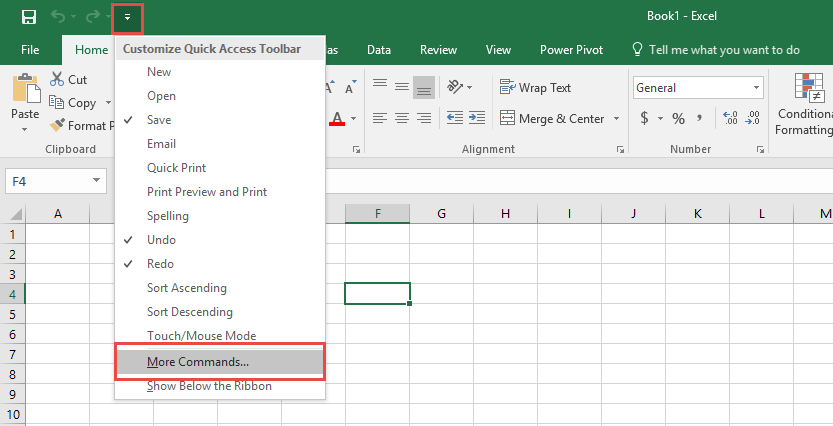
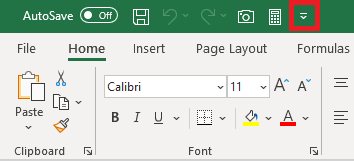
STEP 1: Go to the top-left corner of the Excel Ribbon and click the down arrow on the Excel Toolbar.
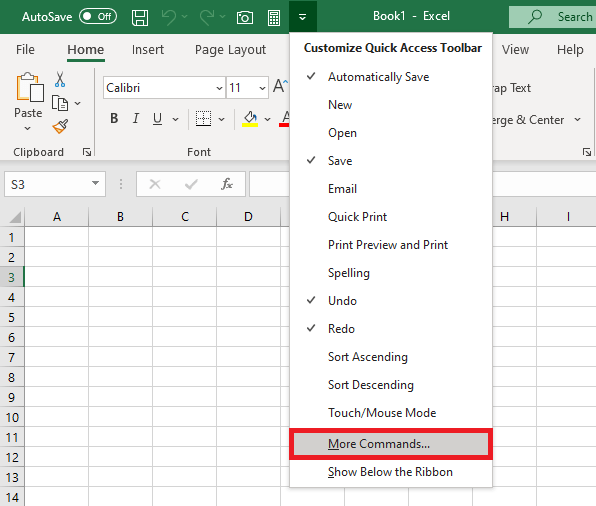
STEP 2: From the drop-down menu, select More Commands from the list.
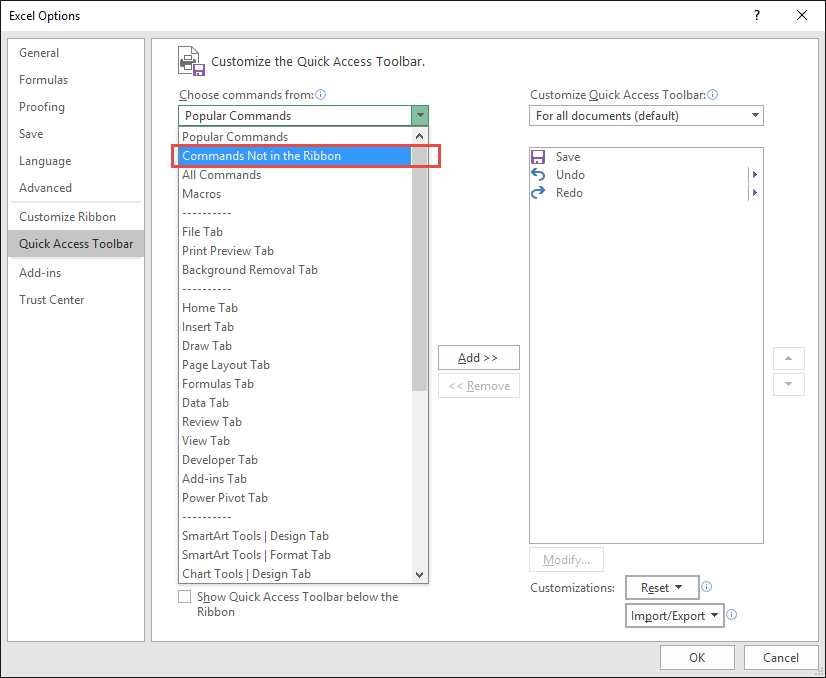
STEP 3: Select Commands Not in the Ribbon.
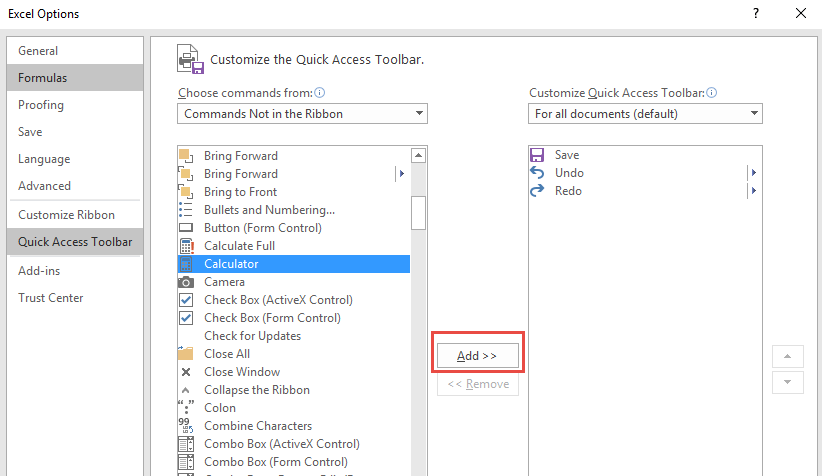
STEP 4: Scroll down and select Calculator. Click Add.
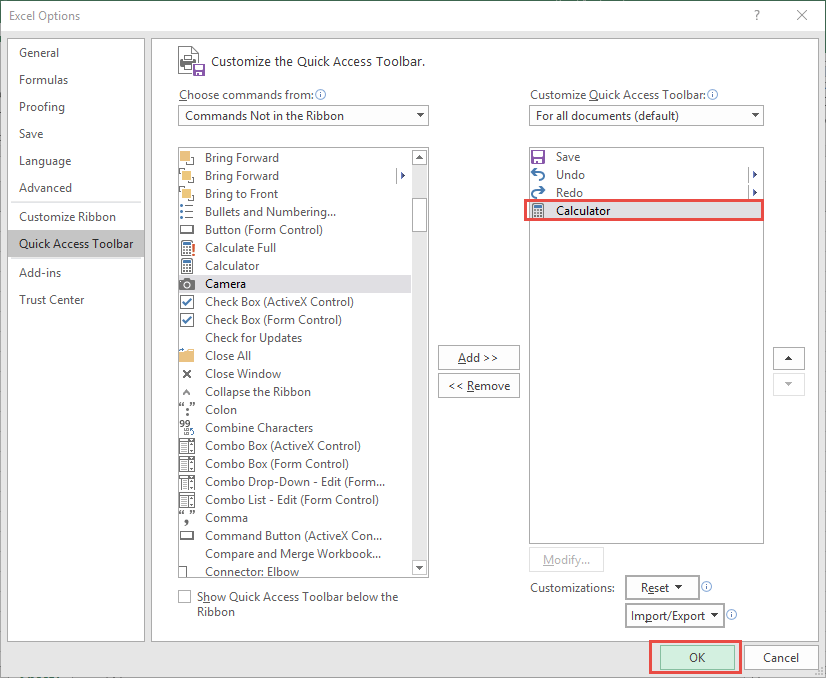
STEP 5: Click OK.
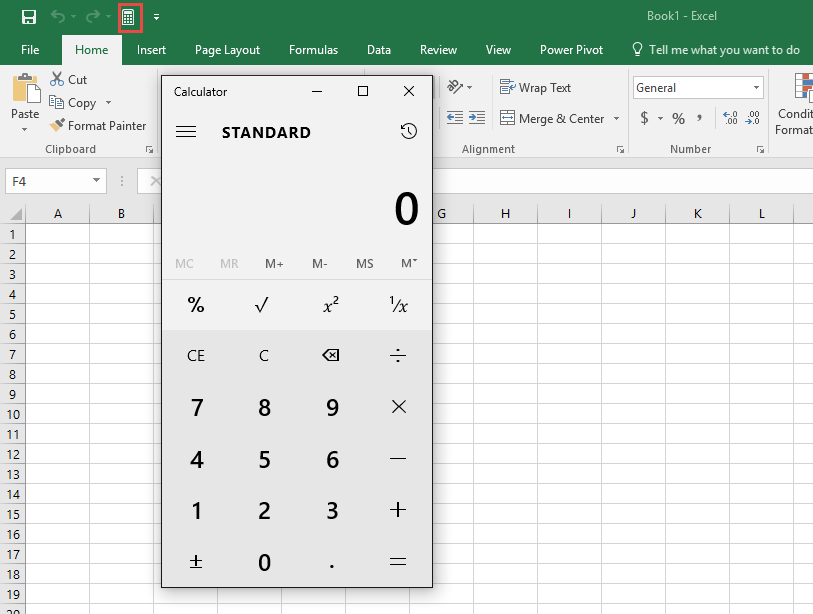
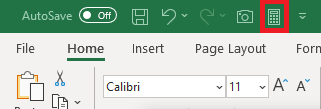
STEP 6: Your Calculator icon is now ready.
This will add the Calculator option to the Excel Quick Access Toolbar. Give it a try!
How to Remove Calculator from QAT
Now that you know how to make a calculator in excel, you should also learn how to remove it from the QAT. Follow the steps below to do so:
STEP 1: Go to the top-left corner of the Excel Ribbon and click the down arrow on the Excel Toolbar.
STEP 2: From the drop-down menu, select More Commands from the list.
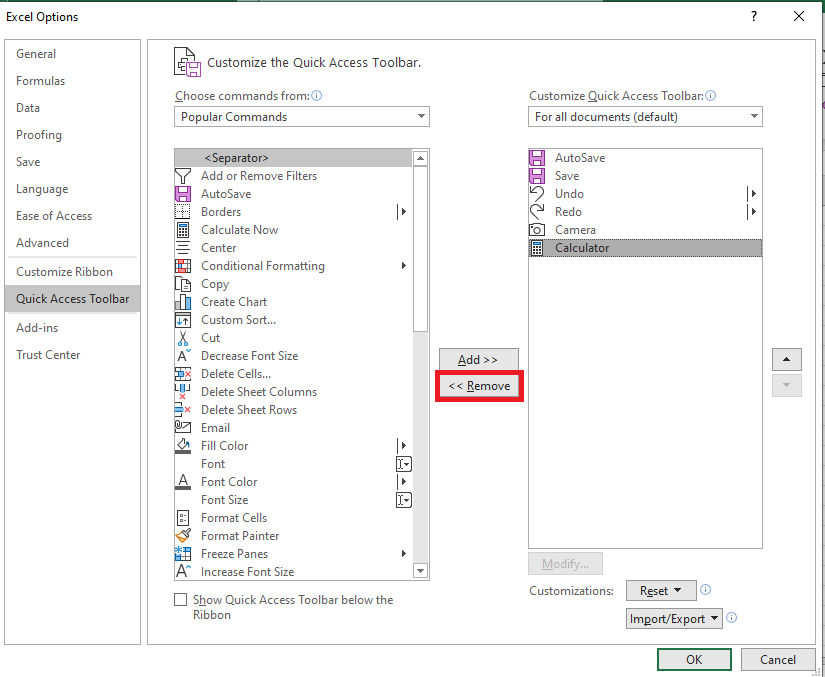
STEP 3: Under Customize Quick Access Toolbar, select Calculator and click on Remove.
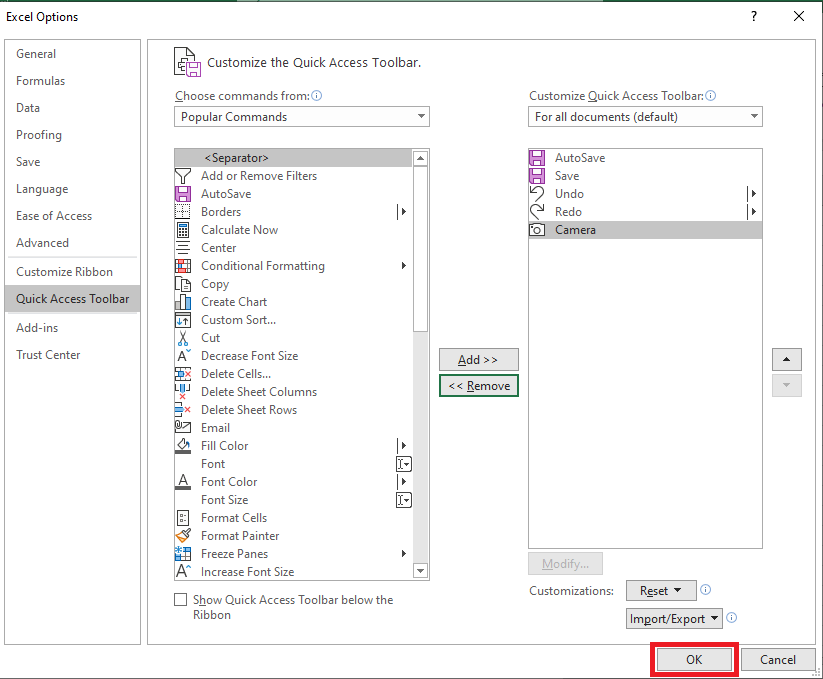
STEP 4: Click OK.
This brings us back to the original QAT composition.
How to Use Calculator in Excel
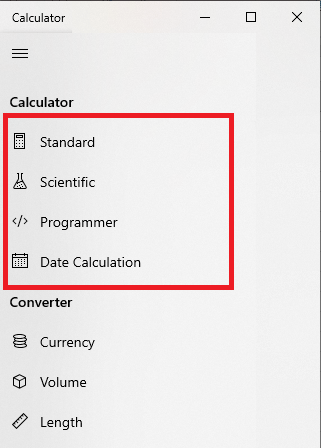
This calculator tool is an extremely useful tool and does a lot more than just addition and subtraction. There are 4 modes available to use – Standard, Scientific, Programmer, and Date Calculation.
- Standard – It is used for basic math calculations like add, subtract, divide, multiple, finding square root, calculating percentages, and working with fractions.
- Scientific – It is used for functions like log, modulus, exponent, trigonometric degrees, sin, cos, tan, etc.
- Programmer – It is used to switch between different number systems—binary, decimal, hexadecimal, and octal.
- Date Calculation – It is used to calculate the difference between two specific dates.
Now, let’s give it a try and learn how to use a Calculator in Excel.
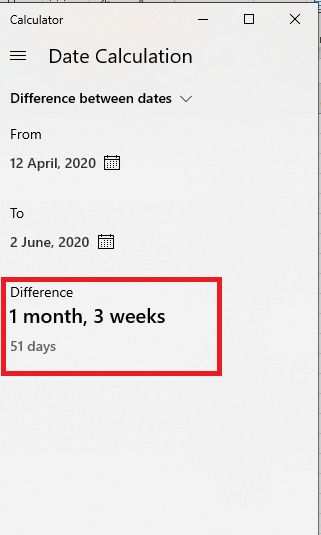
Say, you have to input the difference between two dates – 12th April 2020 and 2nd June 2020 in cell A2 without using any Excel formulas.
Step 1: Click on the calculator icon in QAT
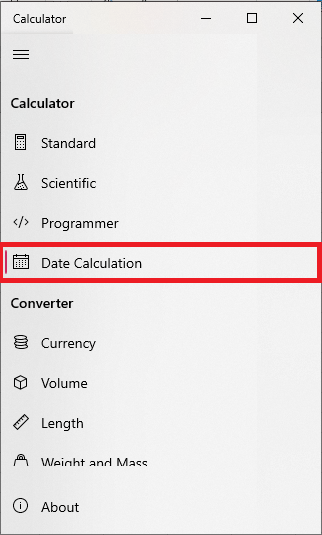
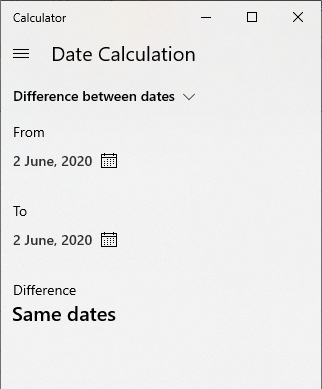
Step 2: Click on the menu button at the top left and then select Date Calculation.
Step 3: Insert the two dates – 12th April 2020 and 2nd June 2020
Step 4: The difference between the two dates will be displayed.
Conclusion
In this tutorial, you have learned how to add a calculator in Excel toolbar and use it alongside with Excel. You can also use the calculator using macros instead of adding it in the Quick Access Toolbar.
Further Learning:
- How to Add a Macro to the Quick Access Toolbar Ribbon in Excel
- Quick Access Toolbar
- Mastering Excel Skills from Basic to Advanced
Make sure to download our FREE PDF on the 333 Excel keyboard Shortcuts here:
You can learn more on how to use Excel by viewing our FREE Excel webinar training on Formulas, Pivot Tables and Macros & VBA!


Bryan
Bryan Hong is an IT Software Developer for more than 10 years and has the following certifications: Microsoft Certified Professional Developer (MCPD): Web Developer, Microsoft Certified Technology Specialist (MCTS): Windows Applications, Microsoft Certified Systems Engineer (MCSE) and Microsoft Certified Systems Administrator (MCSA).
He is also an Amazon #1 bestselling author of 4 Microsoft Excel books and a teacher of Microsoft Excel & Office at the MyExecelOnline Academy Online Course.


