Sometimes, when you are sharing an Excel Pivot Table with your colleagues, you do not want the other user(s) to change the Pivot Table layout and format. What you can do is learn how to lock pivot table and only allow the user to select the Slicers. This makes your report interactive and secure from Excel novices.
Key Takeaways:
- You can lock a PivotTable to prevent users from making any changes.
- You can make the slicers clickable by unlocking them.
- Filters and slicers work on a protected sheet as well.
- Password protection allows you to share files without any worry.
- Macros can refresh PivotTables without unlocking them.
Table of Contents
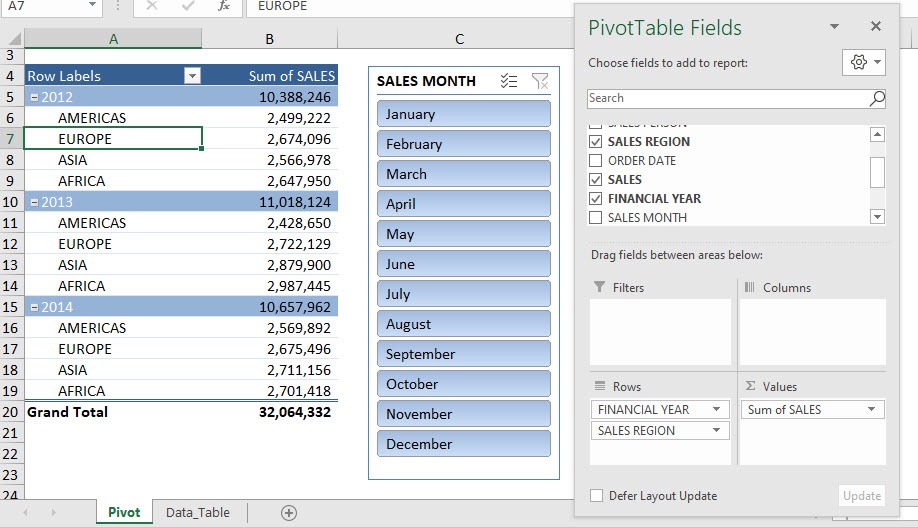
How to Lock Pivot Table but not the Slicers
STEP 1: Click on a Slicer, hold the CTRL-key, and select the other Slicers.

STEP 2: Right-click on a Slicer and select Size & Properties.

STEP 3: In the Format Slicer dialog box, uncheck the Locked box.

STEP 4: Go to Review Tab > Protect Sheet.

STEP 5: Uncheck the Select Locked Cells and Check the Select Unlocked Cells.

STEP 6: Enter a password and press OK.
STEP 7: Re-enter the password and press OK.

Download workbook – unlocked Lock-the-workbook-Unlocked.xlsx
Download workbook – lockedLock-the-workbook-Locked.xlsx (Password to unlock: myexcelonline)
This completes the tutorial on how to lock pivot table format and how to lock slicers in Excel!
Overcome Common Issues
Allowing Filtering and Slicer Connections
You can allow users to filter or use slicers while keeping the PivotTable locked.
- Right-click on the slicer.
- Go to Size and Properties.
- Deselect the Locked checkbox.
After the slicer has been unlocked, you can use it easily.
Refreshing Data of Protected Sheet
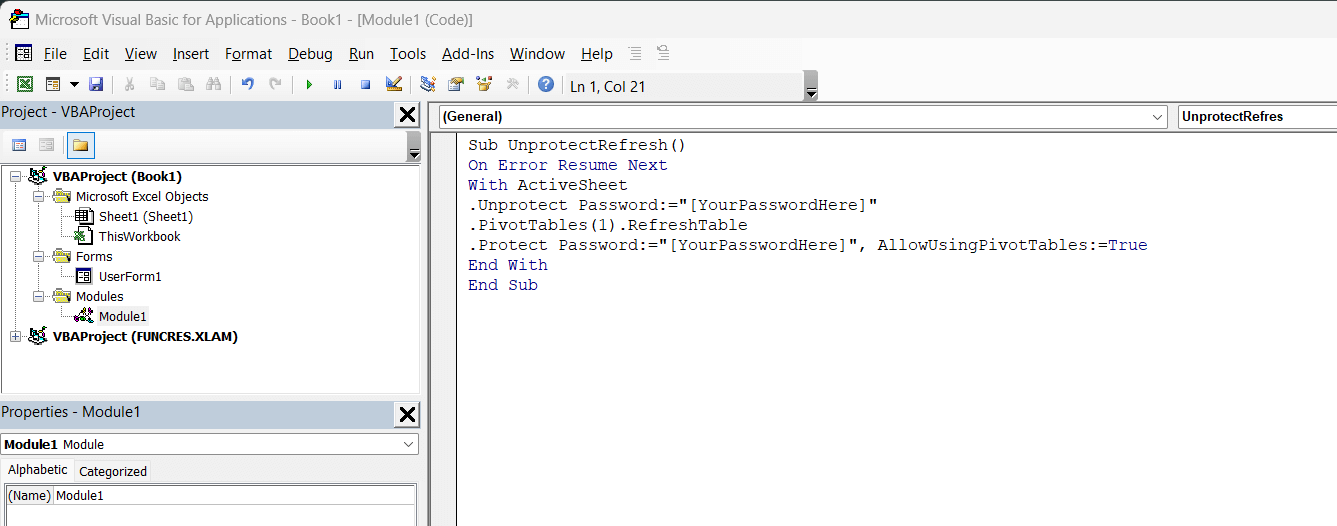
It may not be possible to refresh the Pivot Table of a protected sheet. But you can use a macro to briefly remove protection from the sheet, refresh the Pivot Table, and then immediately reprotect the sheet.
You can use this macro to refresh the PivotTable of protect sheet:

Common Issues and How to Fix Them
Error Messages
If you see an error message while editing a Pivot Table, it means that the table is locked. To overcome this, you need to unlock the table and then make the changes.

Go to the Review tab and click on Unprotect Sheet. Now, you can make your changes and then reapply the protection.
Limitations
Filters and Slicers stop working when the worksheet is protected. But you can fix this by changing the settings:
- Check that the Use PivotTable & PivotChart option is ticked.
- Unlock the cells that are linked to the slicer and pivot.
- Uncheck the Lock option in the Size and Properties menu of the slicer.
These simple steps can prevent the issue and help you to keep everything moving smoothly.
FAQs
How to add filters to a Pivot table that is protected?
You can add filters to a Pivot Table located in a worksheet that is protected.
- Go to the Review > Protect Sheet
- In the dialog box, make sure that the Use PivotTable & PivotChart option is checked.
- Set a password if required.
- Click OK.
How to Lock the Pivot Table but keep Slicers unlocked in Excel?
To be able to lock the Pivot Table but keep the slicer unlocked, follow the steps below:
- Right-click on the PivotTable
- Select Format Cells
- Check the Locked option
- Right-click the Slicer
- Choose Size and Properties
- Uncheck the Locked option
- Go to the Review tab and select Protect Sheet
This method allows the slicer to be used while keeping the pivot table locked.
How to apply different protection levels to Multiple PivotTables?
Yes, you can apply different protection levels for multiple pivot tables in the same workbook. You need to configure each Pivot table separately before applying protection. Once you apply the protection, each table will follow its own rule.

John Michaloudis is a former accountant and finance analyst at General Electric, a Microsoft MVP since 2020, an Amazon #1 bestselling author of 4 Microsoft Excel books and teacher of Microsoft Excel & Office over at his flagship MyExcelOnline Academy Online Course.


