Did you know that you could print out a specific area in your spreadsheet? Yes that’s right, you can use Excel Macro to just print the selected area you have chosen! You get to save some printer ink in the process as well! I explain how you can do this below step by step!
Key Takeaways:
- Automated Print Area Setup: Macros can dynamically define and set a specific range as the print area, eliminating the need to manually select the area each time before printing.
- Customizable Printing Preferences: With VBA, you can customize print settings, such as orientation, margins, or scaling, to ensure the selected area prints exactly as needed, saving time on formatting adjustments.
- Streamlined Workflow for Repeated Tasks: Using a macro to print selected areas is ideal for repetitive tasks, such as generating standardized reports or printing specific sections of a worksheet, enhancing efficiency and consistency.
Table of Contents
Quick Overview:
What does it do?
Copy Source Code:
Sub PrintTheSelectedArea()

'Print out a copy of your selected area
Selection.PrintOut Copies:=1

End Sub
Final Result:

STEP 1: Go to Developer > Code > Visual Basic

STEP 2: Paste in your code and Select Save. Close the window afterwards.

STEP 3: Let us test it out! Select the area that you only want to print.
Open the sheet containing the data. Go to Developer > Code > Macros

Then make sure your macro is selected. Click Run.

With this, you have printed out the selected area only!
Locking & Securing Your Print Area
Preventing Changes to Your Carefully Set Print Areas
When you’ve invested time in setting up the perfect print area in Excel, you want to ensure it remains intact. That’s why preventing others from altering your print area settings is crucial. A neat trick is to use a bit of VBA magic. By adding a Workbook_BeforePrint event handler, you can enforce your print areas just before printing. This way, even if someone changes the print area, once they hit ‘Print,’ your original settings will silently snap back into place! Imagine this as your print area bodyguard, stealthily maintaining the boundaries you’ve set, so your documents always come out looking just right.
Using Excel Features to Maintain Data Integrity
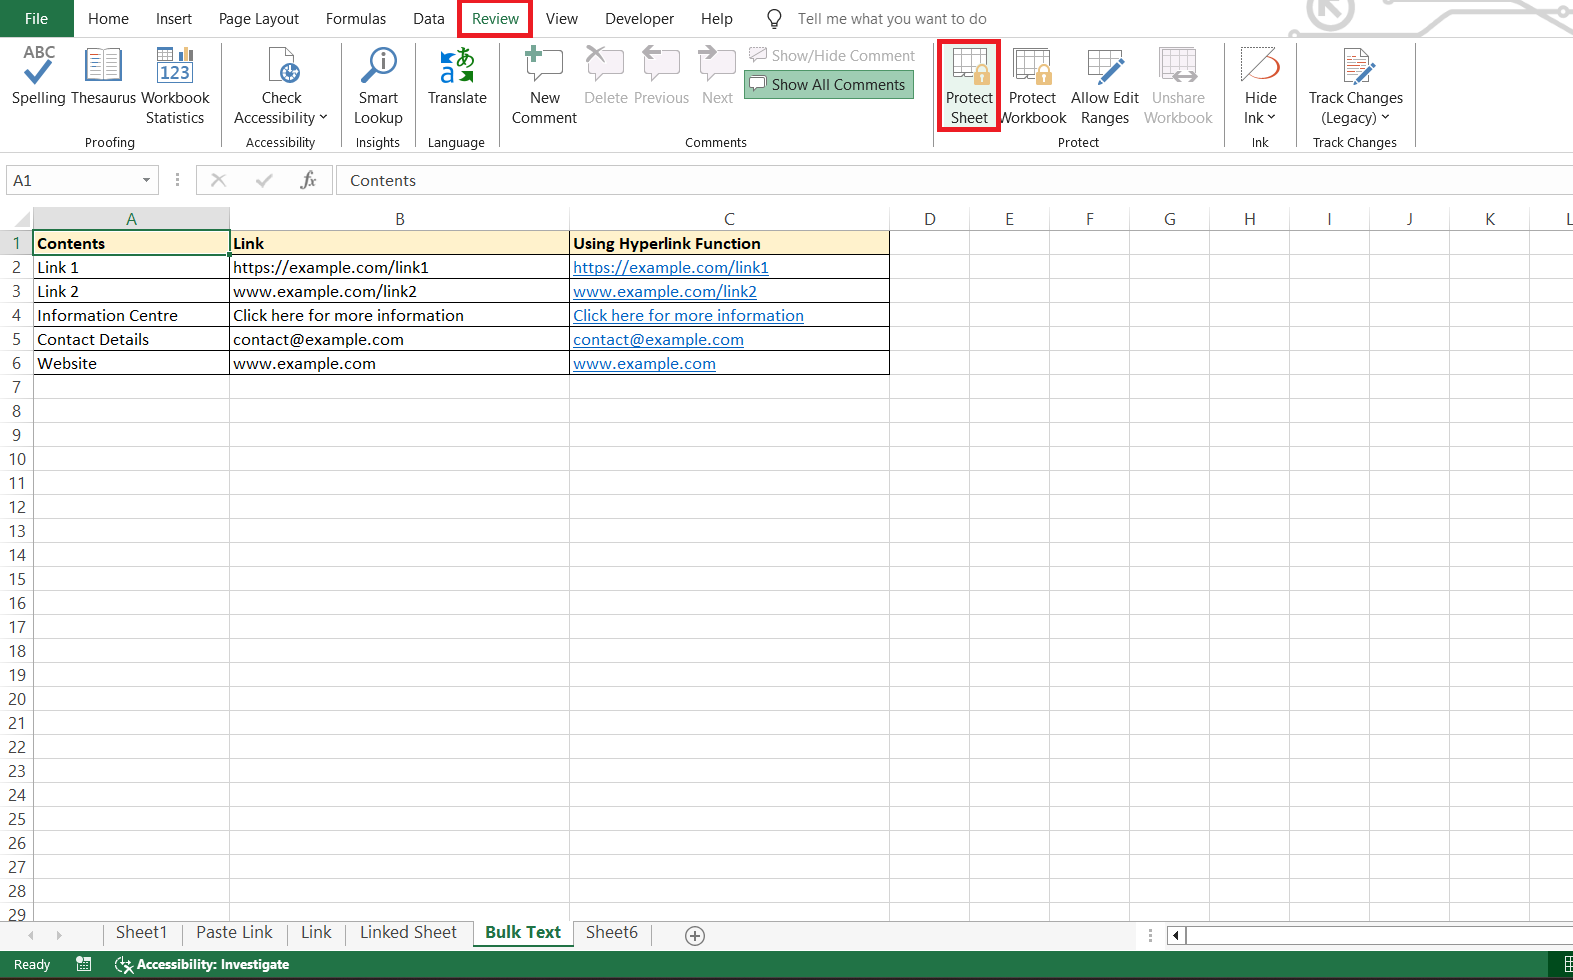
Maintaining data integrity when dealing with print areas in Excel is vital, especially when you’re sharing your work. Excel offers features such as protecting your worksheet, which can help you safe-guard your settings. By going to the “Review” tab and selecting “Protect Sheet,” you can restrict users from making changes to the worksheet, which includes modifying the print area. You can also use data validation to reinforce the structure of your data input, thus ensuring that the print area only captures the correct data range. These steps not only protect your print area but also ensure the consistent quality and reliability of your printed materials.
Resolving Common Print Area Issues
Handling ‘Print on Several Pages’ Dilemma
Dealing with the ‘Print on Several Pages’ dilemma in Excel can be puzzling, but it’s an easy fix once you know what to do. If the content you’ve selected for printing is too large for a single page, Excel will automatically split it across multiple pages. To keep everything snug on one page, first try to minimize all margins to near-zero. If that doesn’t do the trick, head over to ‘Page Setup,’ then under ‘Scaling,’ select ‘Fit Sheet on One Page.’ It’s like telling Excel to put on its glasses; suddenly, it sees how to adjust everything to fit perfectly on one page without spilling over.
Ensuring Complete Data Printouts
When it comes to ensuring complete data printouts, you’ll want to check your column widths and scaling settings. Sometimes, columns are too wide, and your data may seem to play hide and seek on the printed page. To coax all columns into the spotlight, try making your margins narrower — you can find this under ‘Page Setup.’ Alternatively, play around with the scaling options. ‘Fit All Columns on One Page’ is often the winning ticket, bundling all your data neatly onto a single page. It’s like a group hug for your columns, making sure no data is left behind when you hit print.
Frequently Asked Questions
What is the Easiest Way to Set a Print Area in Excel?
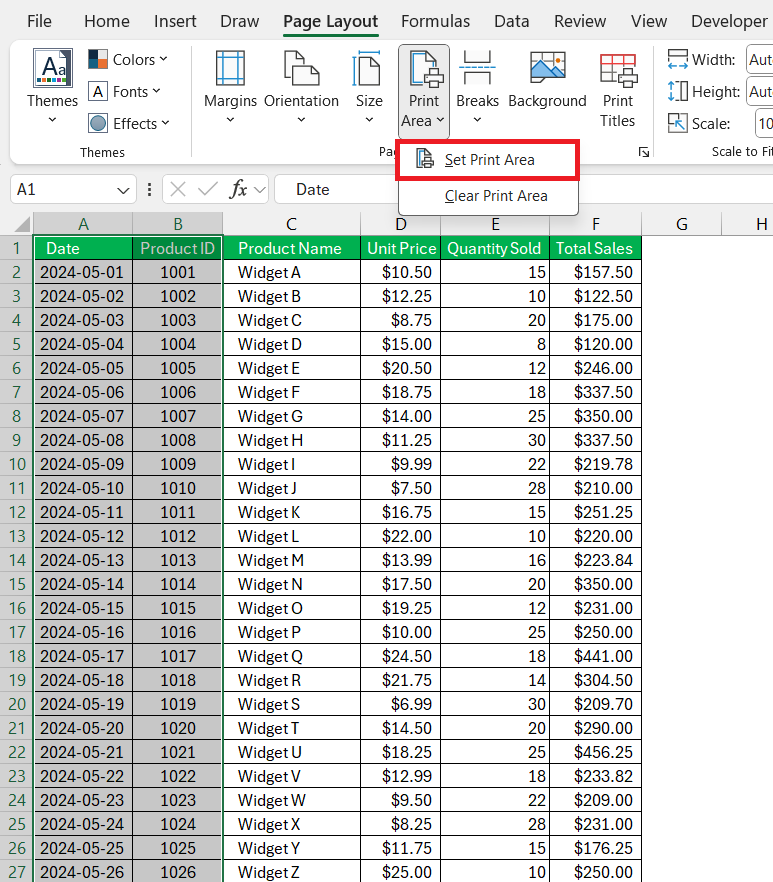
The easiest way to set a print area in Excel is to select the range you intend to print, go to the ‘Page Layout’ tab, choose ‘Print Area’ in the ‘Page Setup’ group, and then click ‘Set Print Area’. This quick action tailors the printing focus just to your selected data, as if you’re spotlighting the star of the show.
Can You Save a Print Area as Part of an Excel Macro?
Absolutely! You can save a print area as part of an Excel macro. By recording a macro while setting up a print area, Excel remembers your preference. The next time you need the same area printed, just run the macro, and it’s déjà vu for your spreadsheet, printing exactly what you want.
How Do You Define Multiple Print Areas in Excel?
To define multiple print areas in Excel, hold down the ‘Ctrl’ key and click to select the various ranges you want to print separately. Then, with your ranges highlighted, go to ‘Page Layout’, click on ‘Print Area’, and choose ‘Set Print Area’. Excel will treat each selected range as its own page in print preview, giving each one their moment in the limelight.
Are There Any Pitfalls When Printing Selected Areas with Macros?
When printing selected areas with macros, you might encounter some pitfalls. For instance, if your macro isn’t set up properly, it could print the wrong area or none at all. Also, bear in mind that macros can be sensitive to changes in your worksheet structure—move a column or a row, and your macro may need a tweak to catch up. So, always have a close look before you leap into printing, and ensure your macros are adjusted to any new changes in your spreadsheet layout.

Bryan
Bryan Hong is an IT Software Developer for more than 10 years and has the following certifications: Microsoft Certified Professional Developer (MCPD): Web Developer, Microsoft Certified Technology Specialist (MCTS): Windows Applications, Microsoft Certified Systems Engineer (MCSE) and Microsoft Certified Systems Administrator (MCSA).
He is also an Amazon #1 bestselling author of 4 Microsoft Excel books and a teacher of Microsoft Excel & Office at the MyExecelOnline Academy Online Course.


