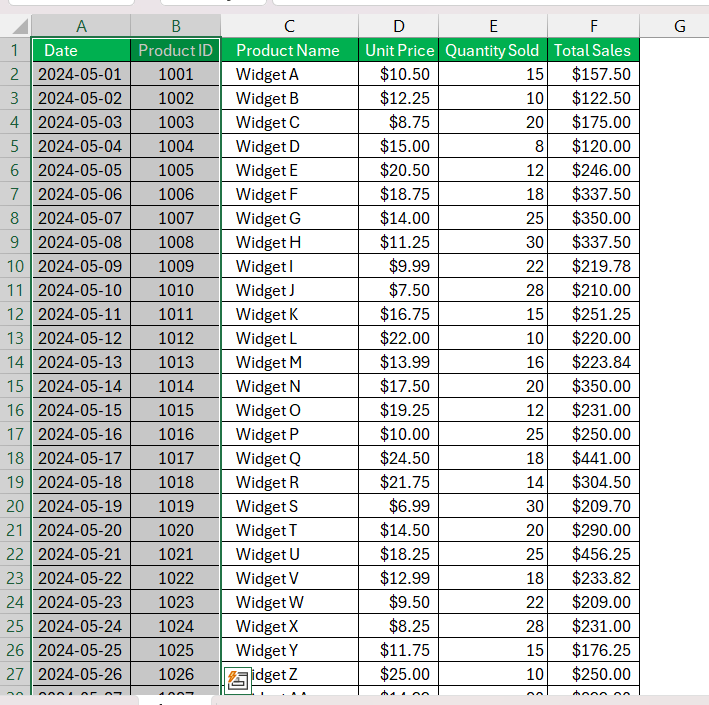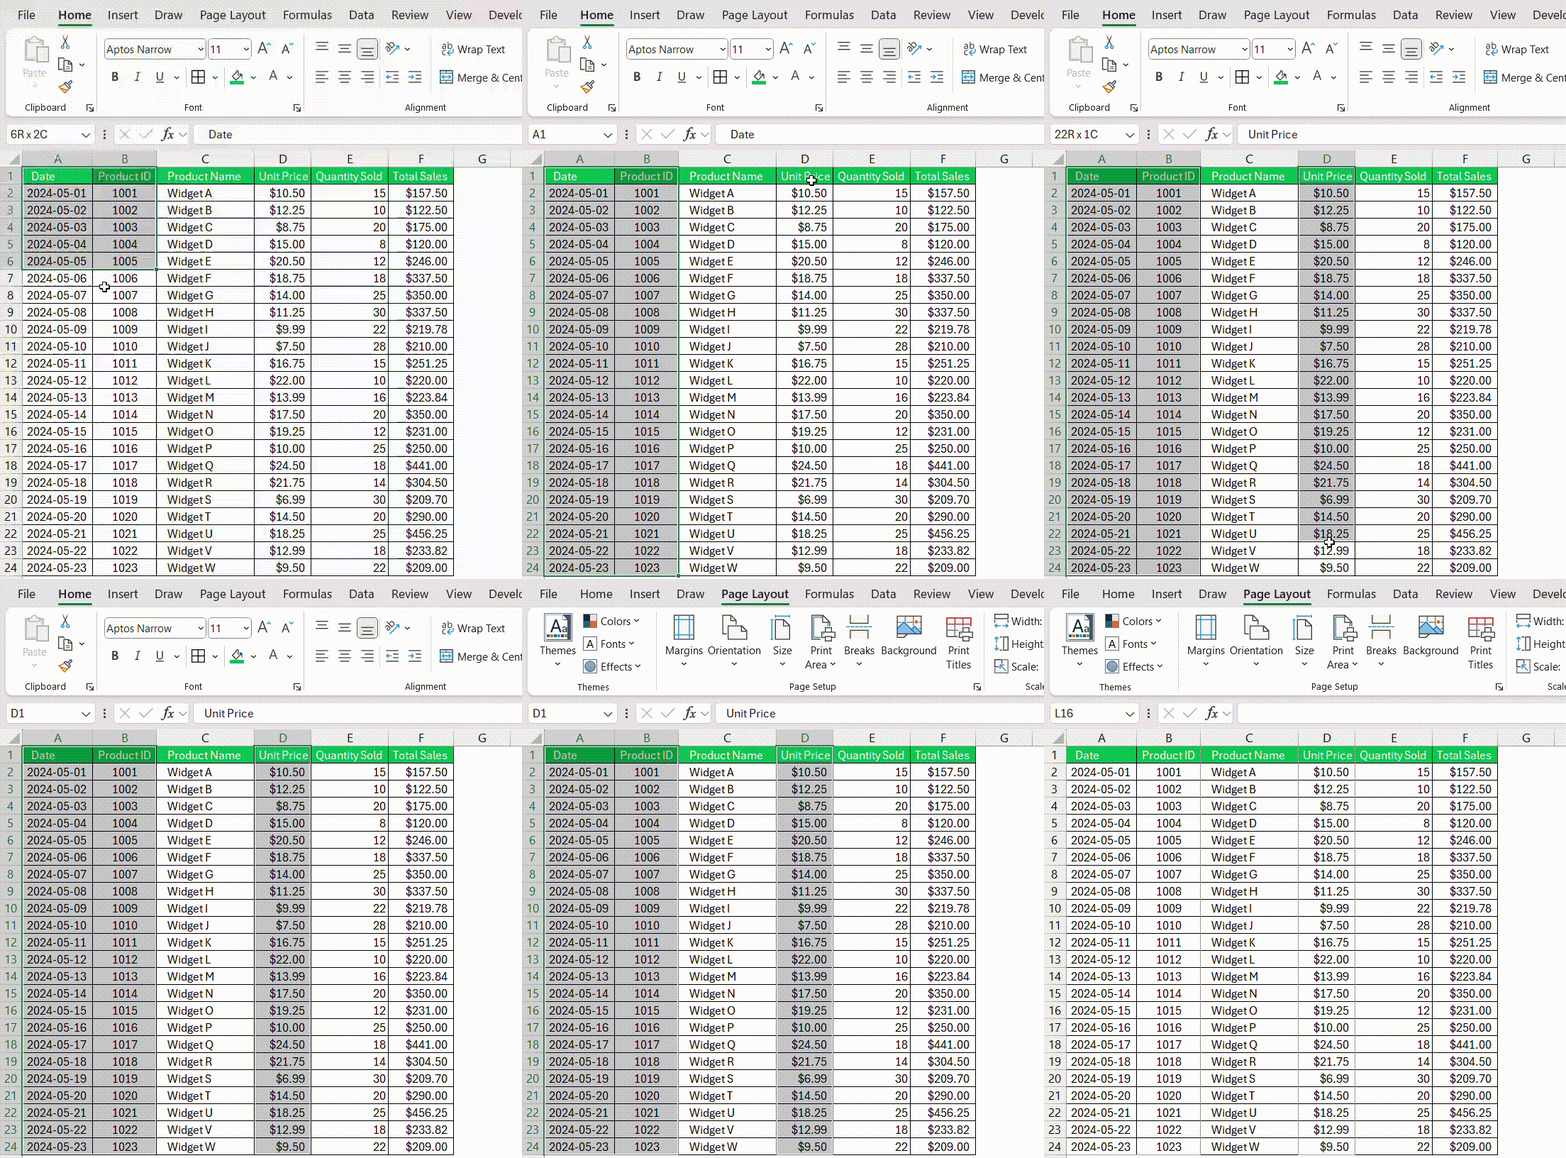

Microsoft Excel’s print area feature is a convenient tool for specifying parts of your spreadsheet for printing. It helps streamline printing by focusing solely on relevant information, thus saving resources and enhancing clarity.
Key Takeaways:
- Efficient Printing: Setting a print area ensures only necessary cells are printed, saving paper, ink, and time.
- Easy Setup: Utilize the ‘Set Print Area’ feature under the ‘Page Layout’ tab to quickly define your print area.
- Keyboard Shortcuts: Speed up the process with shortcuts like Alt + P + R + S, perfect for proficient Excel users.
- Customization Options: Customize page breaks, scaling, and multiple print areas for tailored printing solutions.
Table of Contents
Introduction to Excel Print Areas
The Basics of Print Area in Excel
Excel’s print area feature is a handy tool that allows you to designate specific parts of your spreadsheet for printing. When working with extensive datasets, setting a print area ensures that only relevant information makes it onto the physical page.
Why Setting a Print Area is Beneficial
Setting a print area in Excel can make your life easier in numerous ways. By focusing on only the necessary cells, you sidestep the waste of resources, printing only what’s truly required. This not only saves paper and ink, cutting down on costs, but it also provides a clearer, more reader-friendly output.
When you dictate where the page breaks fall, awkward splits that carve your data awkwardly across multiple pages are avoided. If you’re dealing with vast worksheets, defining your print area is crucial for maintaining legibility and coherence, making it easier for your audience to follow and interpret the data. Overall, defining a print area is a simple step towards more efficient, cost-effective, and professional spreadsheet management.
Quick Methods to Set Your Print Area in Excel
Using the Set Print Area Feature
Setting up a print area using the ‘Set Print Area’ feature is a breeze. Just select the cells that you wish to include in your printout.
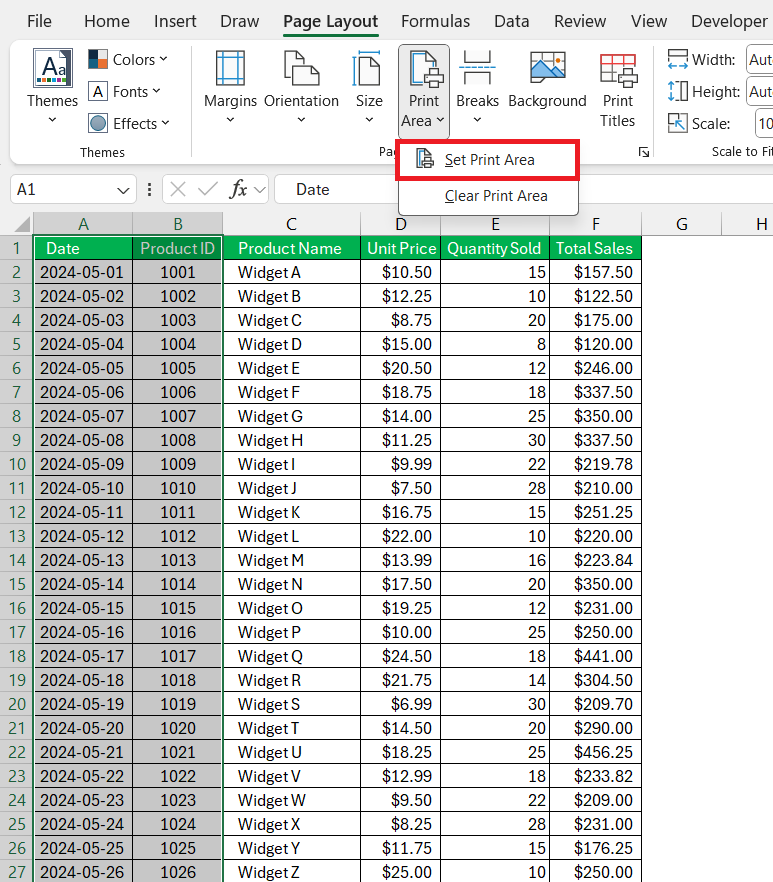
Navigate to the ‘Page Layout’ tab at the top of Excel, and click on the ‘Print Area’ icon in the Page Setup group. From there, simply select ‘Set Print Area’.
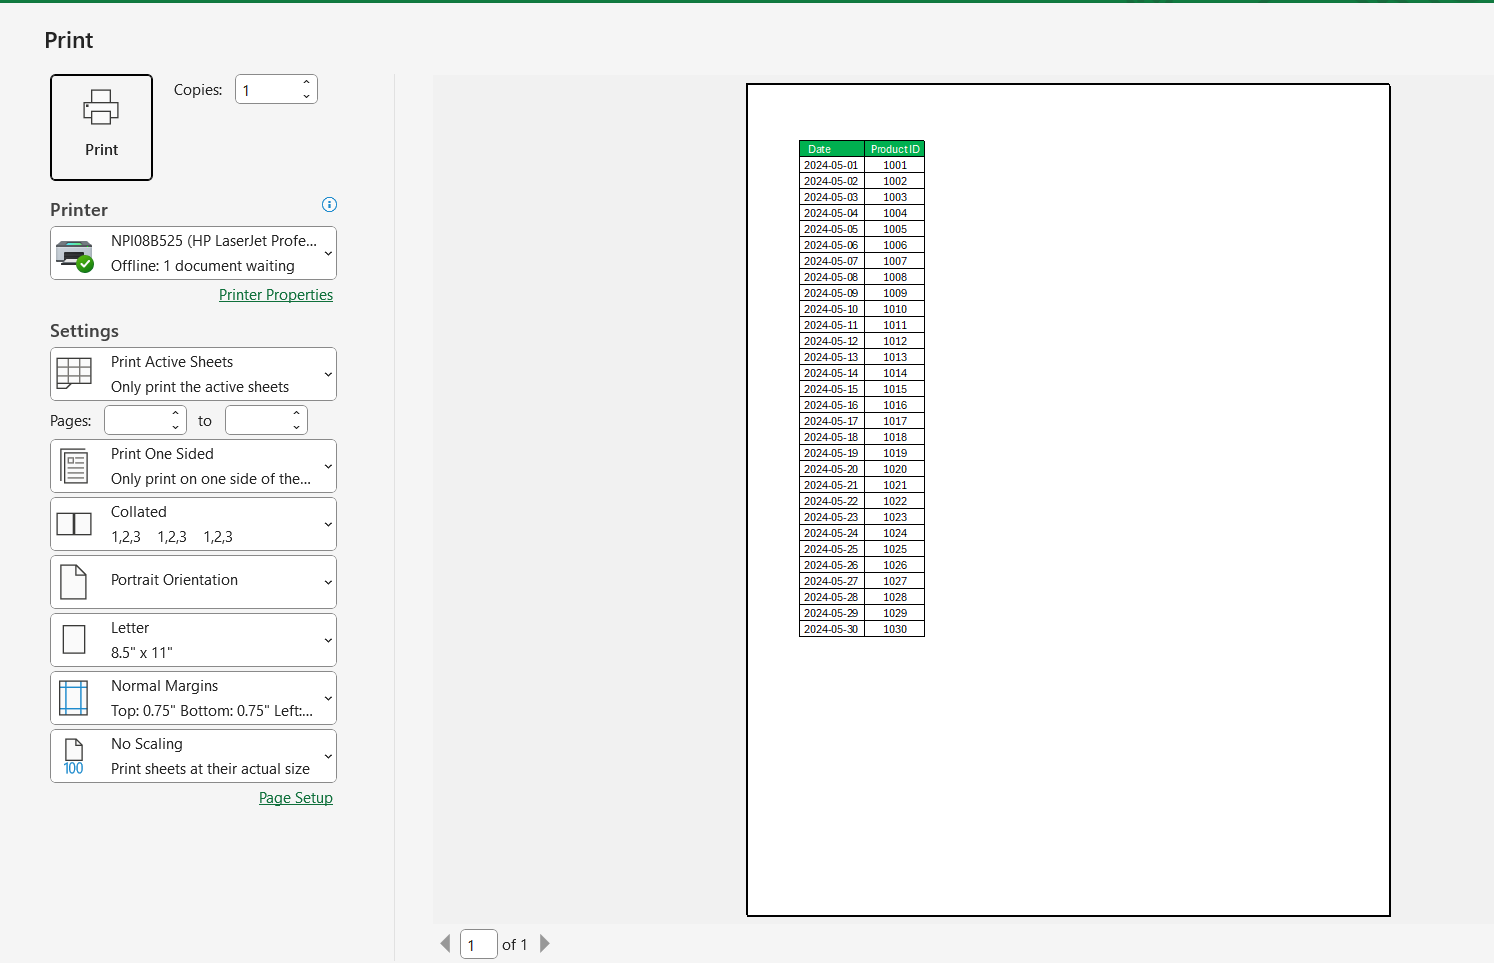
Now, your selected cells are designated as the print area, ensuring that when you hit print, only those cells are outputted on paper. To further optimize your printing process, you can also press Ctrl + P to open the print preview and settings, getting you ready to print or adjust settings in no time.
This method is incredibly useful when you want to print specific data from a spreadsheet without; all the excess details. Also, once you’ve set your print area, Excel remembers it, so the next time you open your spreadsheet and need to print, you can do so right away. Handy, isn’t it?
Keyboard Shortcuts to Save Time
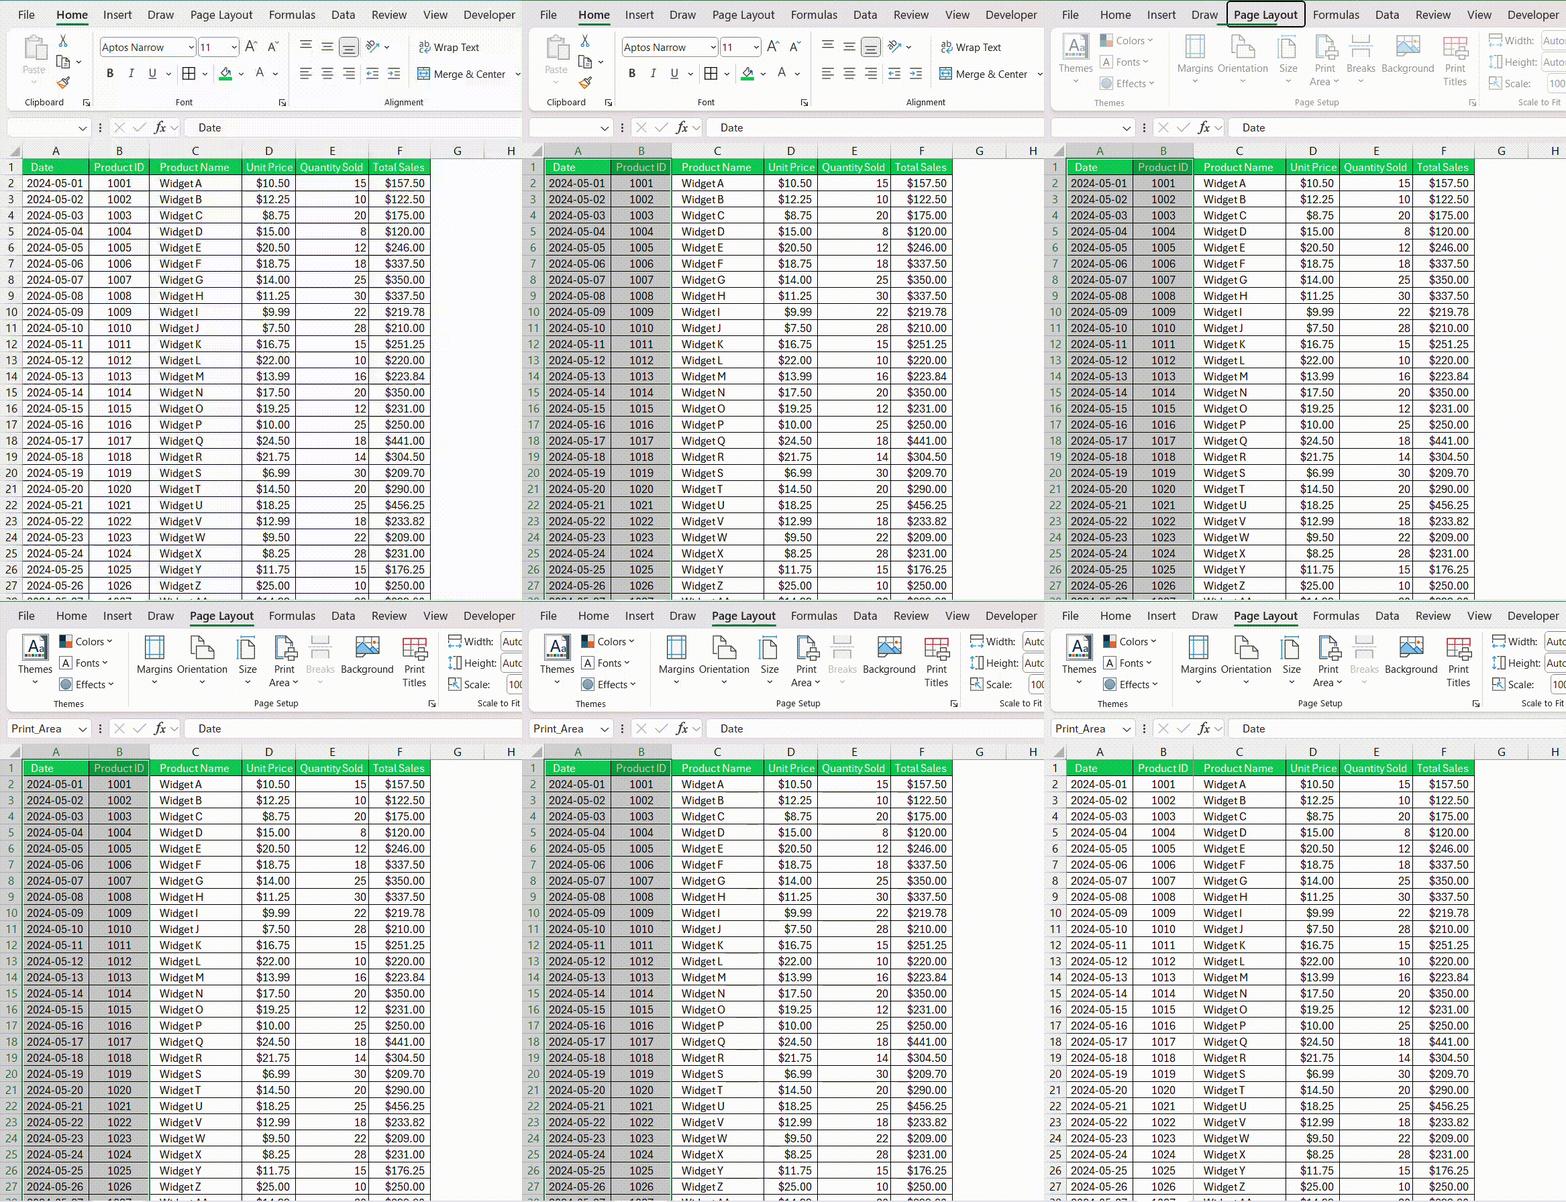
To save even more of your precious time, Excel has keyboard shortcuts that can make setting your print area even faster. One nifty shortcut to remember is Alt + P + R. Just select the cells you want to include, then hold down the Alt key, and sequentially press P and R and then S. This lightning-quick method sets your selected range as the print area without navigating through the tabs.
Keyboard shortcuts are the go-to for proficient Excel users aiming to streamline their workflow.
Advanced Tips for Customizing Your Excel Print Output
Defining Multiple Print Areas
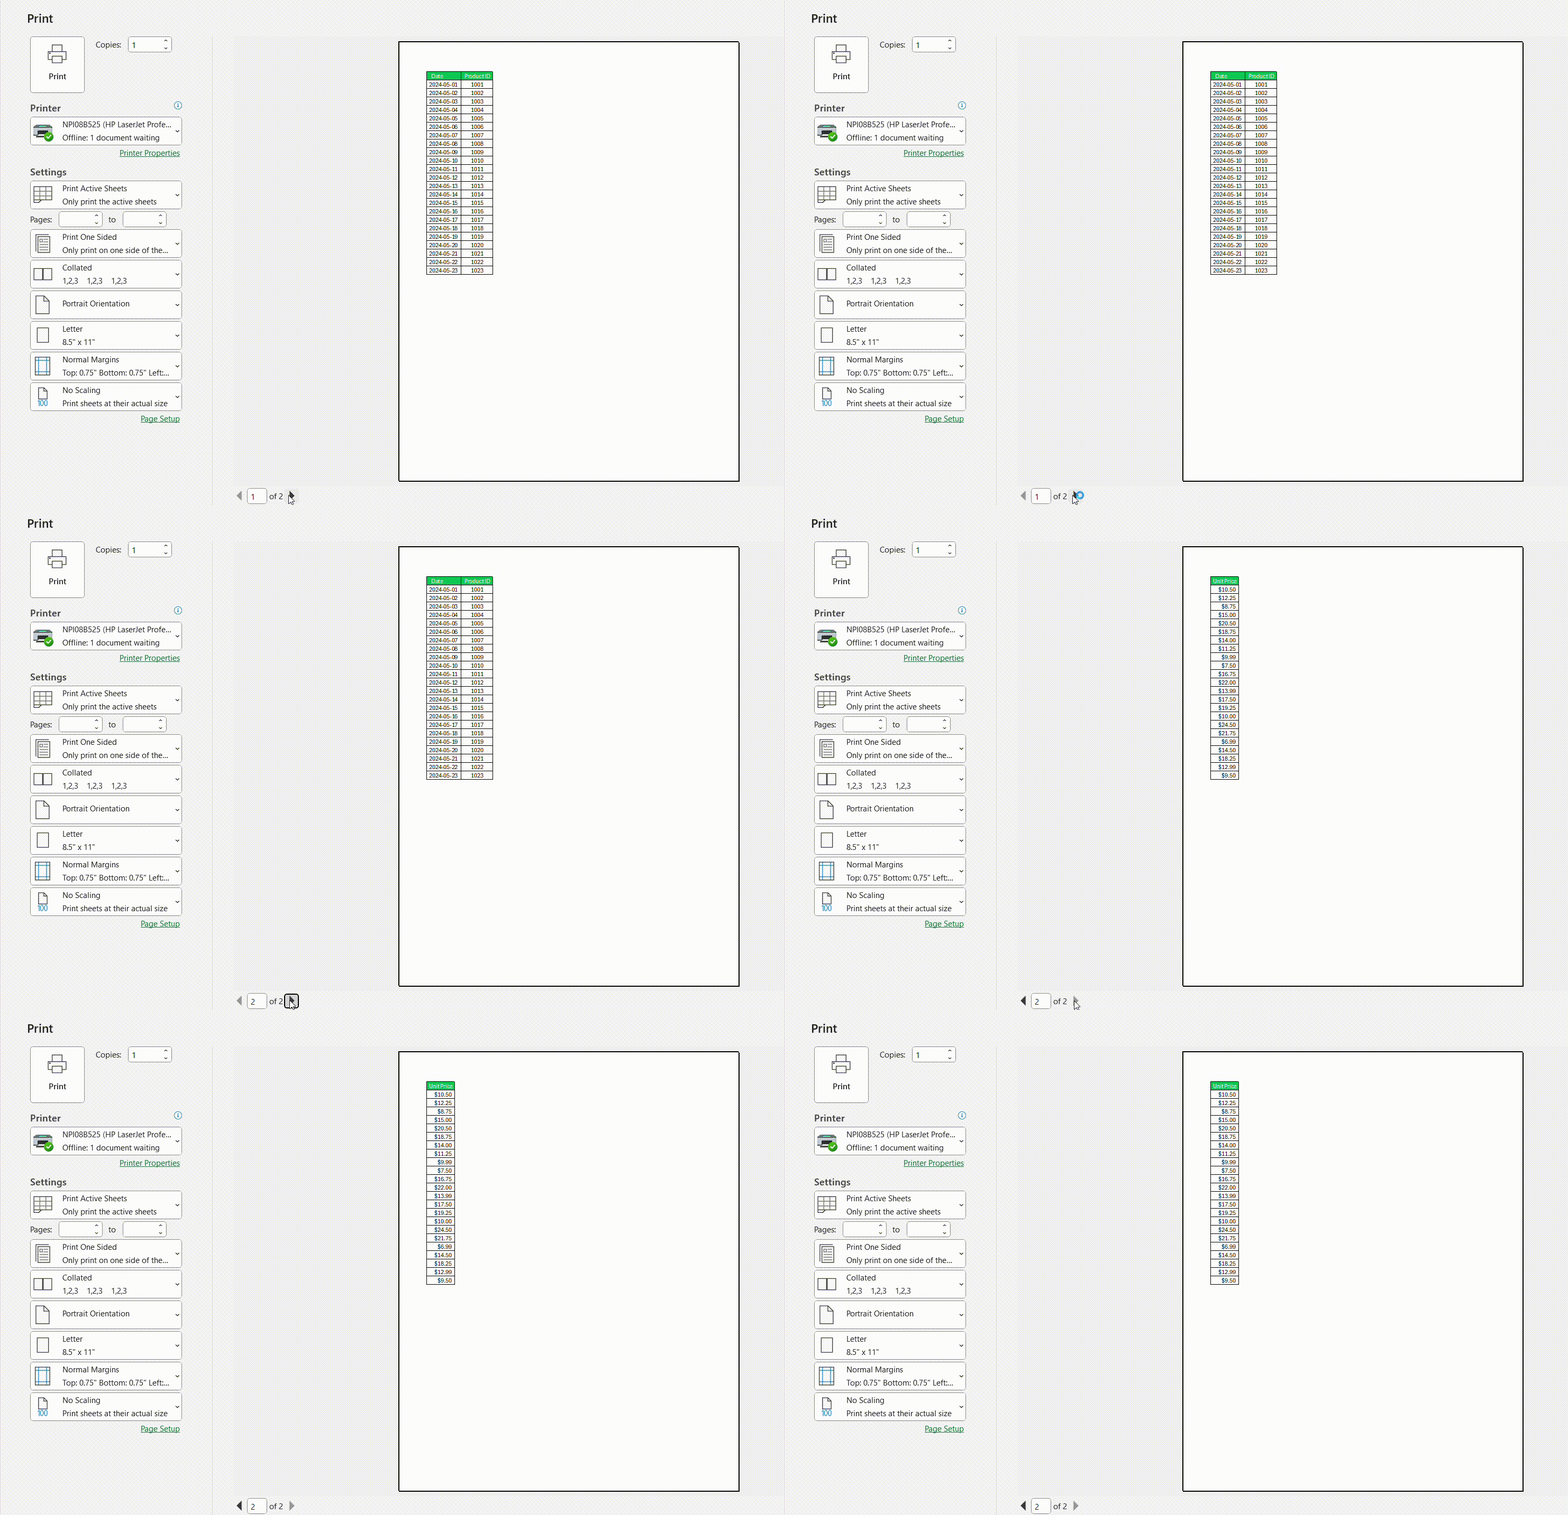
When it comes to defining multiple print areas in your Excel sheet, the process is not much different from setting a single area. Start by selecting your first range of cells, then hold down the Ctrl key as you click to select additional ranges.
After making your selections, hold down the Alt key, and sequentially press P and R and then S.
Voilà, you’ve now set multiple print areas in your worksheet, which will save you the hassle of printing them individually.
Each of these will be printed on a separate page. This technique is ideal when you have distinct sections of data that require individual focus. This feature is particularly useful when preparing several reports or data summaries that need to be presented or filed separately.
Adjusting Page Breaks and Scaling Options
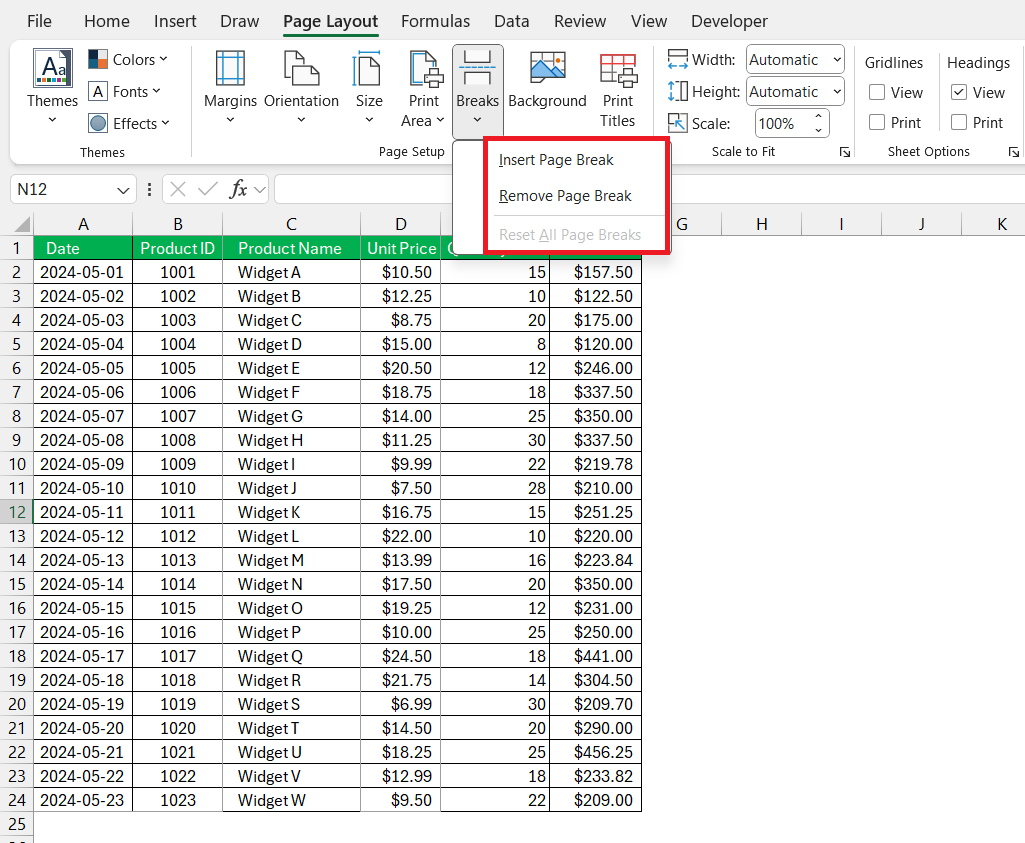
Excel automatically breaks up the page based on the margins and other page settings, but there’s room for you to tailor these page breaks to better suit your needs. To do this, you can use the ‘Breaks’ option within the ‘Page Layout’ tab. Here, you’ll have the option to insert, move, or remove manual page breaks. This flexibility allows you to control exactly where your printed content will be divided across pages.
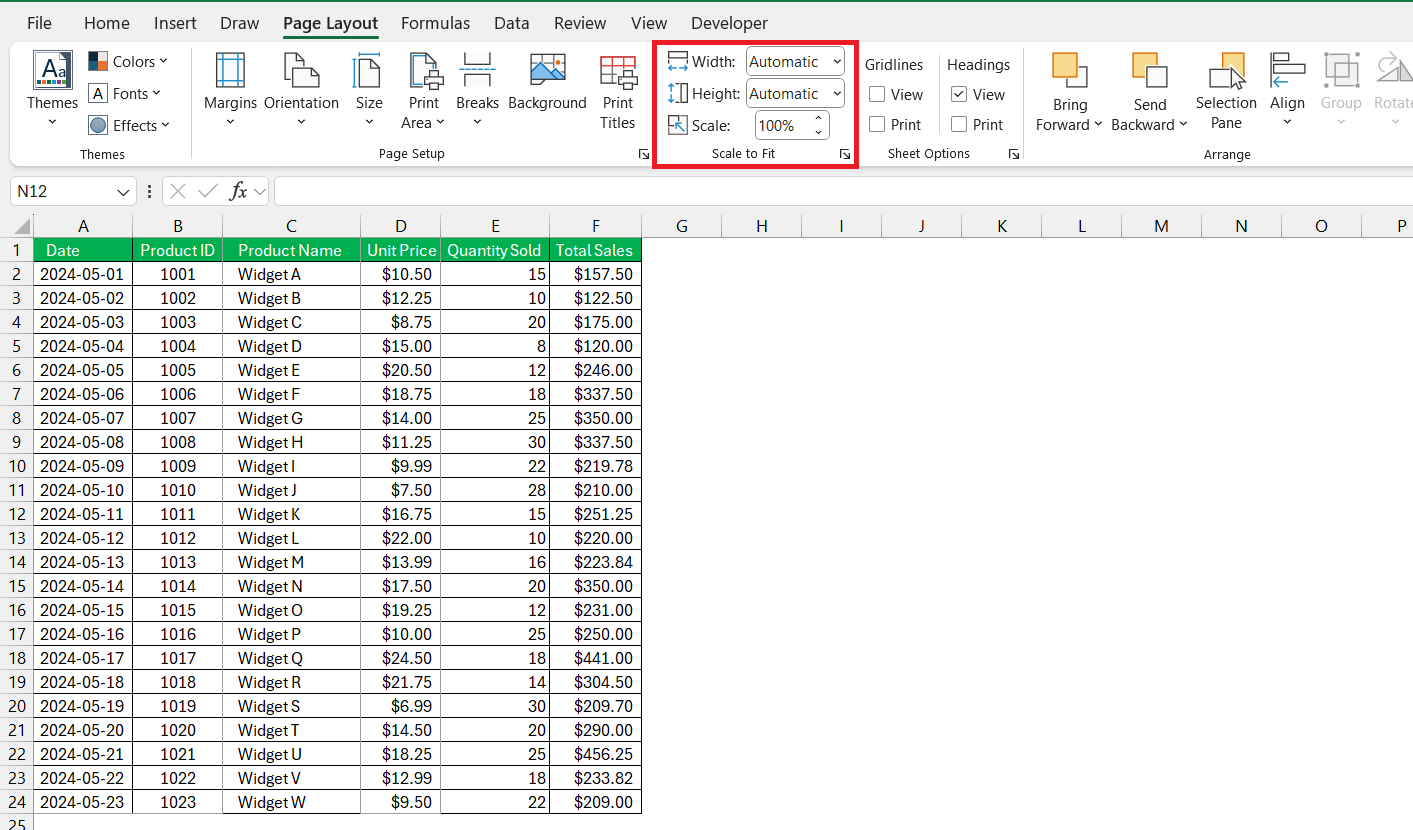
For scaling options, Excel provides features to shrink or enlarge your printout so that it fits your desired layout perfectly. You’ll find these options under ‘Page Layout’, where you can adjust the ‘Scale to Fit’ settings. If you want everything on a single page, you might choose ‘Fit to 1 page’. You can also set custom scaling by adjusting the width and height down to a percentage that fits your pages the way you want.
When you’ve finished making adjustments, be sure to preview your worksheet to see exactly how your printout will look. Doing so will confirm that your layout and scaling adjustments create the desired result on paper.
Troubleshooting Common Print Area Issues
Overcoming Challenges with Gridlines and Hidden Cells
Encountering issues with gridlines not showing up in your printed documents can be frustrating. To fix this, simply ensure the ‘Print‘ checkbox under ‘Gridlines’ in the ‘Sheet Options’ group of the ‘Page Layout’ tab is selected. This ensures your printed output mimics the grid structure visible on your screen, valuable for clear data presentation and reference points.
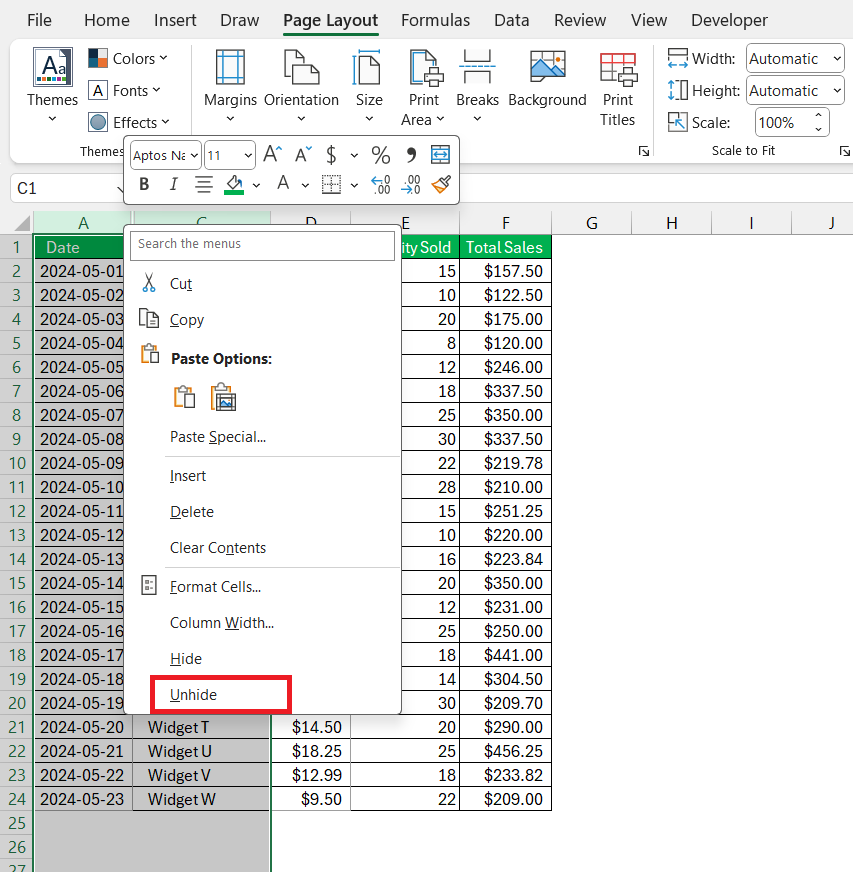
Hidden rows and columns also pose common challenges while printing. If portions of your data are disappearing from the print-out, remember that Excel does not print hidden rows or columns. You need to unhide them first by selecting the headers surrounding the hidden rows or columns, right-clicking, and choosing ‘Unhide‘.
What to Do When Excel Won’t Recognize Your Set Print Area
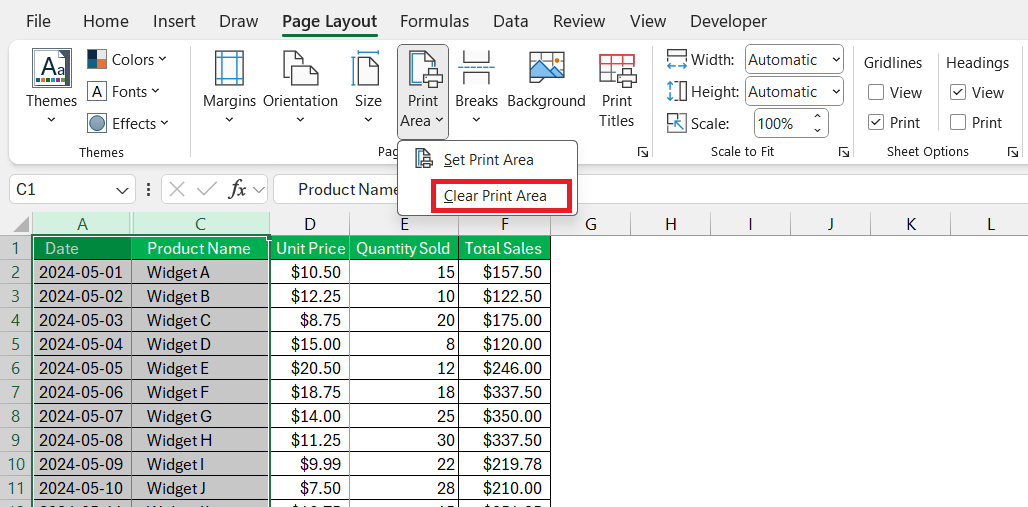
If Excel is not recognizing your set print area, the solution generally revolves around clearing and redefining it. Navigate to the ‘Page Layout’ tab, select ‘Print Area’ in the ‘Page Setup’ group, and click on ‘Clear Print Area’. This action will remove any existing print areas, allowing you to start afresh.
Once cleared, select the desired range of cells and go through the process of setting the print area again by choosing ‘Set Print Area’ from the ‘Print Area’ dropdown menu. Often, this resolves the issue. However, if problems persist, check for any external links or macros that might be affecting the print area settings.
Frequently Asked Questions on the Set Print Area in Excel
How do I print only certain areas in Excel?
To print only certain areas in Excel, you can set a print area by selecting your desired cells, clicking on the ‘Page Layout’ tab, and then choosing ‘Print Area’ followed by ‘Set Print Area’. This selection will be what prints out, allowing you to focus on specific data.
Can I Use a Shortcut to Quickly Set a Print Area?
Absolutely! To quickly set a print area in Excel, after selecting the cells you want to print, you can use the keyboard shortcut Alt + P + R + S. This sequence, pressed one key after another, will instantly define your selected range as the print area.
How Do I Print My Entire Workbook, Ignoring the Set Print Area?
To print your entire workbook, bypassing any set print areas, head to ‘File’, then ‘Print’, and under ‘Settings’, change the option from ‘Print Active Sheets’ to ‘Print Entire Workbook’. Your document will then print every sheet in its entirety.
Why Does My Printout Split Across Multiple Pages?
Your printout may split across multiple pages if it exceeds the size of the paper. To correct this, adjust the print area or modify the scaling settings in the ‘Page Layout’ tab, selecting ‘Fit Sheet on One Page’ or customizing margins and orientation.
How to Include Additional Cells into an Existing Print Area?
To include additional cells into an existing print area, select the new cells you want to add, then go to ‘Page Layout’, click ‘Print Area’, and choose ‘Add to Print Area’. Your print range will now include these extra cells. Remember, if they’re non-adjacent, they’ll print on a separate page.


John Michaloudis is a former accountant and finance analyst at General Electric, a Microsoft MVP since 2020, an Amazon #1 bestselling author of 4 Microsoft Excel books and teacher of Microsoft Excel & Office over at his flagship MyExcelOnline Academy Online Course.


