Free Practice Workbook
When you print a large worksheet in Excel, the row headers appear on the first page only. Excel has a feature called Print Titles that lets you print the top row on every page. This keeps your headers visible and makes the printed report easier to read. In this article, you will learn how to print the top row on every page in Excel.
Key Takeaways:
Table of Contents
Master Excel Print Settings for Headers
How to Print Top Row of Every Page
STEP 1: Jump into the fray by selecting the “Page Layout” tab in the Excel ribbon—it’s your gateway to customization.

STEP 2: Look for the “Page Setup” group, and click on the small arrow tucked in the corner. This is where the magic happens, opening up the Page Setup dialog box.

STEP 3: Now, switch gears and click on the “Sheet” tab within the dialog box to reveal the Print Titles section.
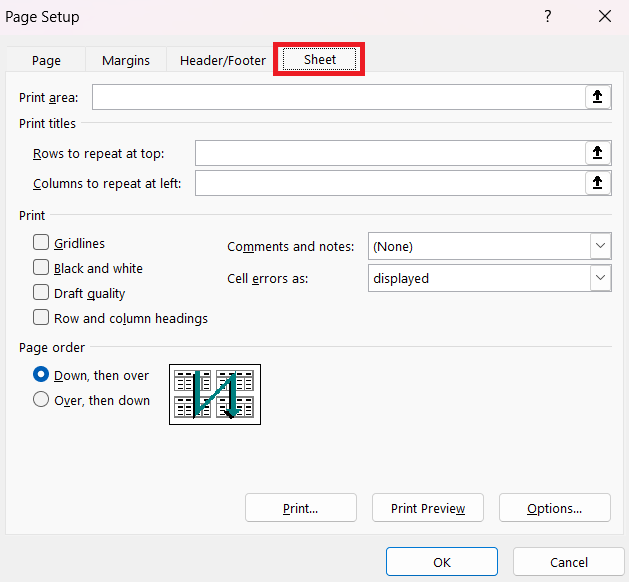
STEP 4: In Print Titles, click on “Rows to repeat at top.” Then, select row 1 by clicking on the row number. Hit Enter, and you’re golden!
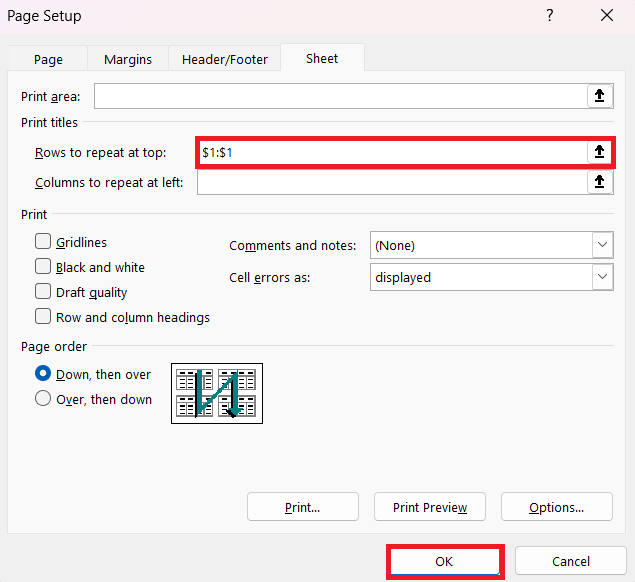
To make sure you’ve nailed it, press Ctrl+P for a sneak peek in the Print Preview window. Your Excel sheet should proudly display row 1 at the top of every page. Just like that, you’re now a print settings whiz!
Print Multiple Rows as Your Header
STEP 1: Start your expedition in the trusty “Page Layout” tab. This is your command center for all things layout.

STEP 2: Bring out the “Page Setup” dialog box by clicking its little arrow in the corner of the “Page Setup” group.

STEP 3: In the dialog box wilderness, navigate to the “Sheet” tab.
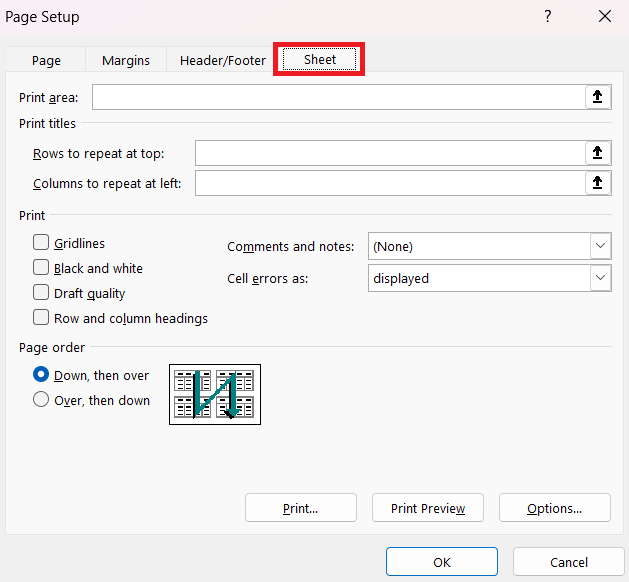
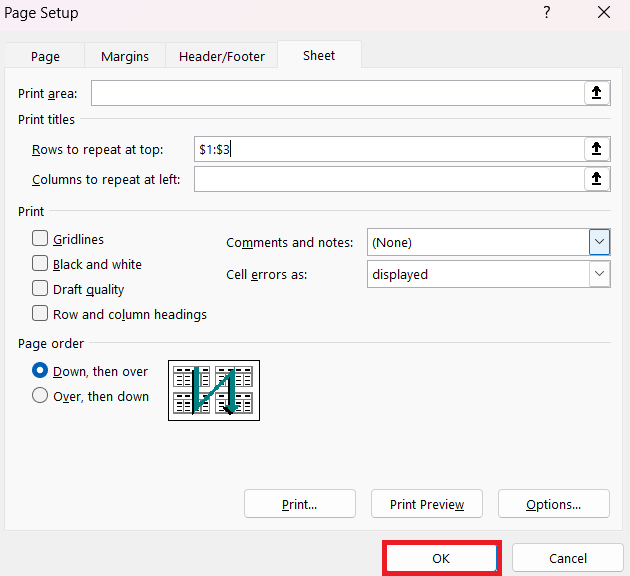
STEP 4: Click on the “Rows to repeat at top” input box. Next, select the multiple rows for your header (e.g., rows 1 to 3). Excel understands your quest and registers it as $1:$3.
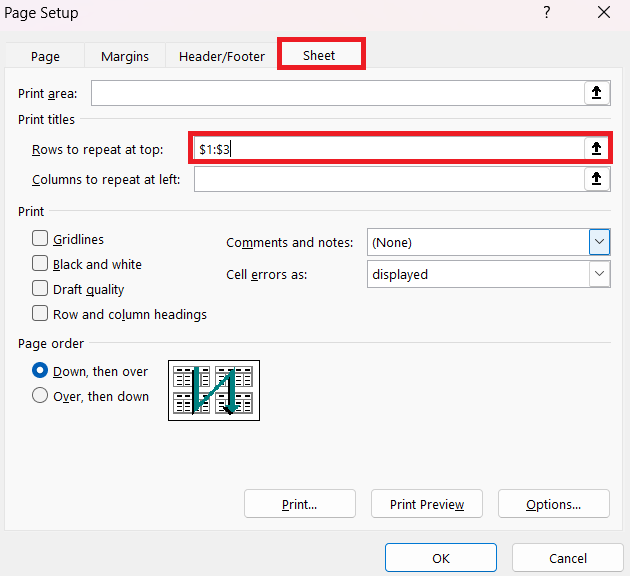
STEP 5: Click “OK” and you’re ready to stamp your masterful header across all pages.
Use VBA to Set a Row to Repeat at the Top of Every Printed Page
STEP 1: Open your Excel workbook and press “Alt + F11” to open the VBA editor.

STEP 2: In the VBA editor, right-click on any of the items listed on the left side (e.g., Sheet1, Sheet2) in the project explorer window, and choose “Insert” > “Module”. This will insert a new module where you can write your VBA code.
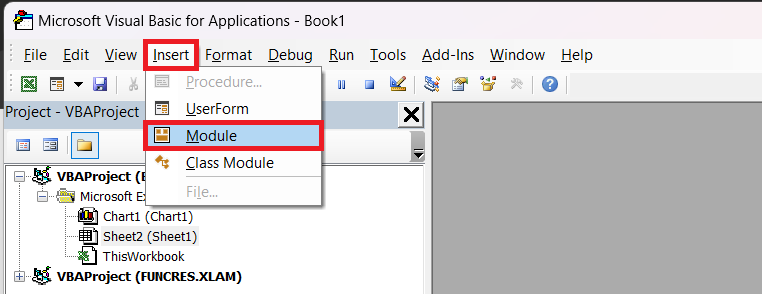
STEP 3: In the module window, paste the following VBA code:
Sub Print_Header_On_Every_Page()

' Define the rows to repeat at the top

ActiveSheet.PageSetup.PrintTitleRows = "$1:$1"

End Sub

STEP 4: Close the VBA editor and save your Excel workbook to ensure that the VBA module is saved along with it.
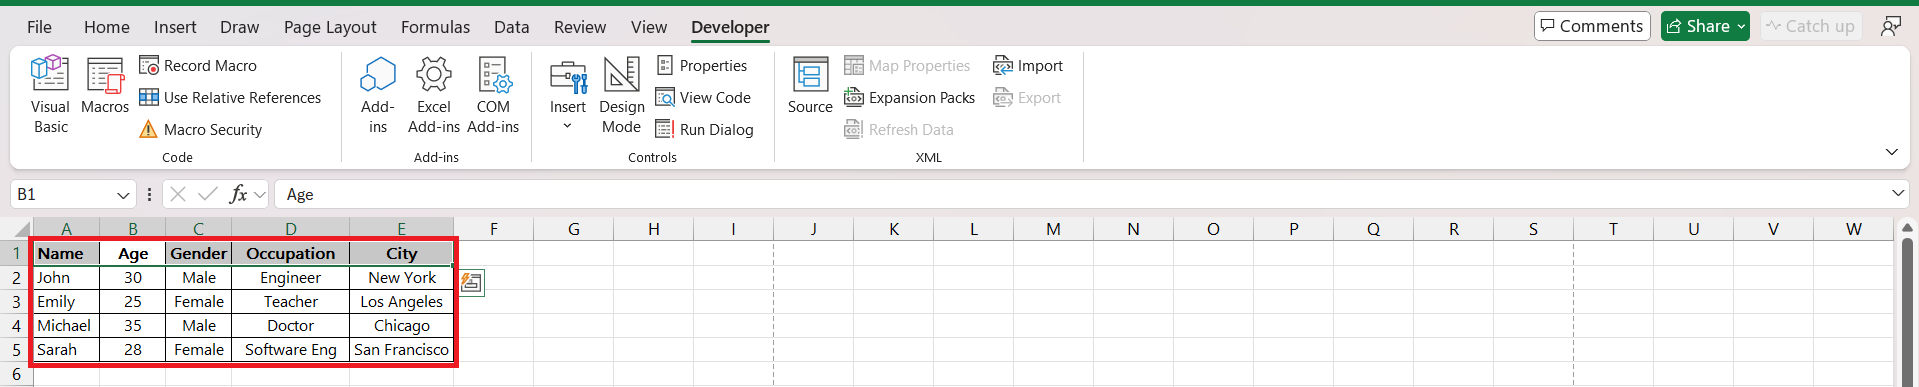
STEP 5: You can now run this macro to ensure that the top row prints on every page. To do this, go back to Excel and press “Alt + F8” to open the “Run Macro” dialog. Select “Print_Header_On_Every_Page” from the list and click “Run”.
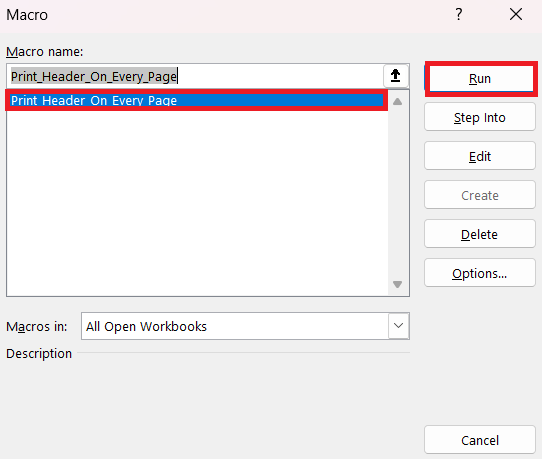
By following these steps, you’ve applied a VBA macro that ensures the top row of your Excel sheet prints on every page. This macro can be reused whenever needed.
FAQs
How to repeat the header row across pages in Excel?
To repeat the header row across pages in Excel,
- Go to the Page Layout tab
- Click Print Titles
- In the Page Setup dialog, enter your header rows in the “Rows to repeat at the top” box
- Click OK
How to keep a header on all pages in Excel when scrolling?
To keep a header visible on all pages in Excel while scrolling
- Click on the View tab
- Choose Freeze Panes
- Select Freeze Top Row
Why is my header not printing on every page in Excel?
If your header is not printing on every page in Excel, it’s likely because the ‘Print Titles’ setting has not been specified. To correct this:
- Go to the Page Layout tab
- Click on Print Titles
- Set the correct rows within the “Rows to repeat at the top” field
Can I repeat columns, not just rows, on every page when printing?
Yes, you can repeat columns on every page when printing in Excel. Under the “Page Layout” tab, click “Print Titles” and use the “Columns to repeat at left” box in the Page Setup dialog to select the columns to repeat. This ensures they’ll appear on each printed page.
How to Print Excel rows on separate pages?
To print Excel rows on separate pages, you’ll first need to insert page breaks between the rows. Click the row where you want to start a new page, go to the “Page Layout” tab, and then click “Breaks” > “Insert Page Break.” Repeat for each row you want to start on a new page.

John Michaloudis is a former accountant and finance analyst at General Electric, a Microsoft MVP since 2020, an Amazon #1 bestselling author of 4 Microsoft Excel books and teacher of Microsoft Excel & Office over at his flagship MyExcelOnline Academy Online Course.

 30 Days - Full Access