
Producing address labels can be cumbersome, but combining the power of Excel and Word streamlines the entire process. Excel offers the simplicity of entering and organizing large datasets, whereas Word specializes in the design and print aspect. When you merge these two applications, you’re able to swiftly create and print a bulk of personalized mailing labels for any occasion. Whether sending out wedding invitations or managing a direct mail campaign, the merge feature is incredibly valuable.
Learn about Excel with our Free Microsoft Excel Online Course!
Key Takeaways
- Ensure that your Excel spreadsheet is set up correctly with properly labeled columns for a seamless transition into Word using the mail merge feature.
- Utilize the cross-compatibility of Microsoft Office by importing the data from your Excel spreadsheet into Word, arranging it for label printing.
- Follow the mail merge procedure in Word to automate the transfer of data from Excel and create organized, print-ready address labels or other label types.
Who Benefits from Quick Address Label Printing?
Learning how to quickly print Excel labels with Word is a game-changer for both individuals and businesses alike. For small business owners who need to ship products, event planners with guest lists to manage, or even busy individuals sending out holiday cards, the ability to print multiple labels with ease saves time and reduces errors. It’s especially beneficial for those who manage large quantities of mailings regularly, ensuring uniformity and professionalism with every envelope that goes out.
Table of Contents
Step-by-Step Preparation for Your Labels
Organize Your Data in Excel
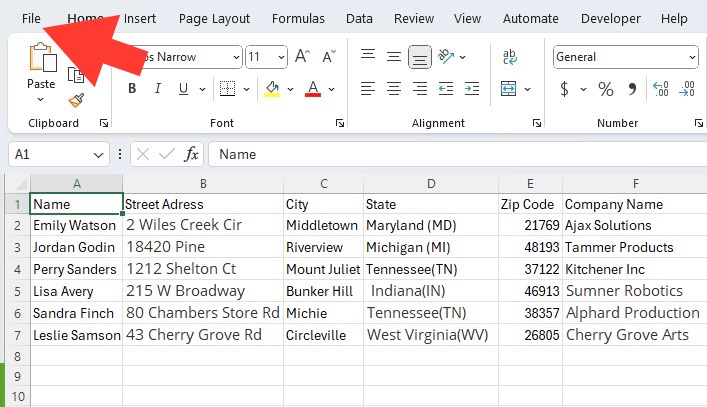
STEP 1: Begin by gathering all your data in one Excel sheet, ensuring each piece of information is correctly categorized in its corresponding column. This is essential to prevent formatting mishaps or returned mail due to incorrect address labels. Typical columns include Title, First Name, Last Name, Street Address, City, State, and Zip Code, all neatly organized to ensure a smooth transition to Word during the Mail Merge. Remember to clean your data by checking for duplicates, typos, or missing entries—this preps your dataset for an effective Mail Merge process.
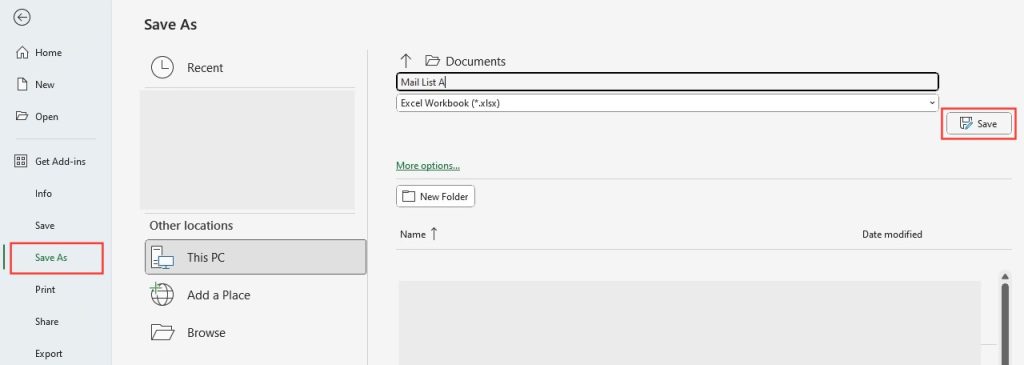
STEP 2: Save the file.
Connecting Your Excel Spreadsheet with Word
To let your Word document and Excel spreadsheet work hand in hand, you need to establish a connection between them.
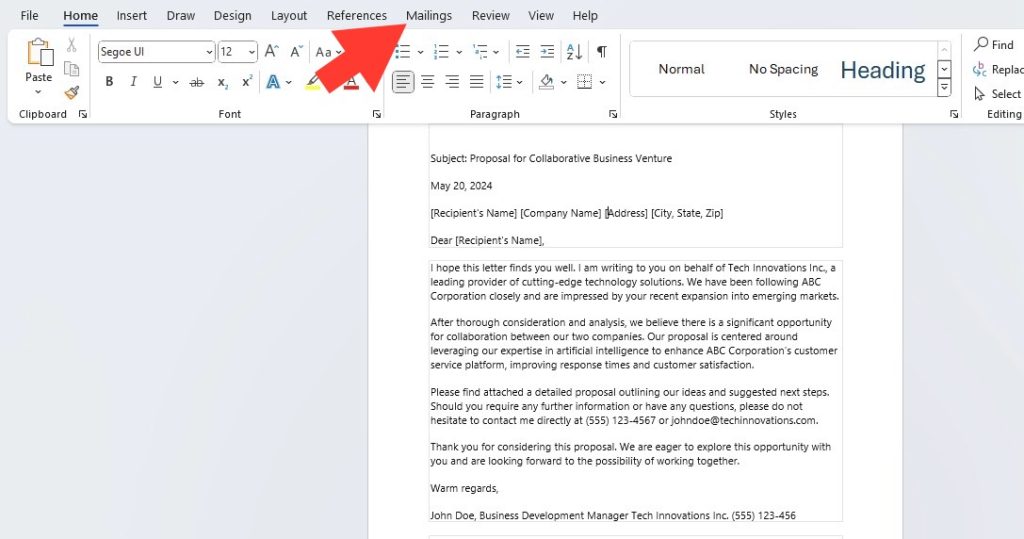
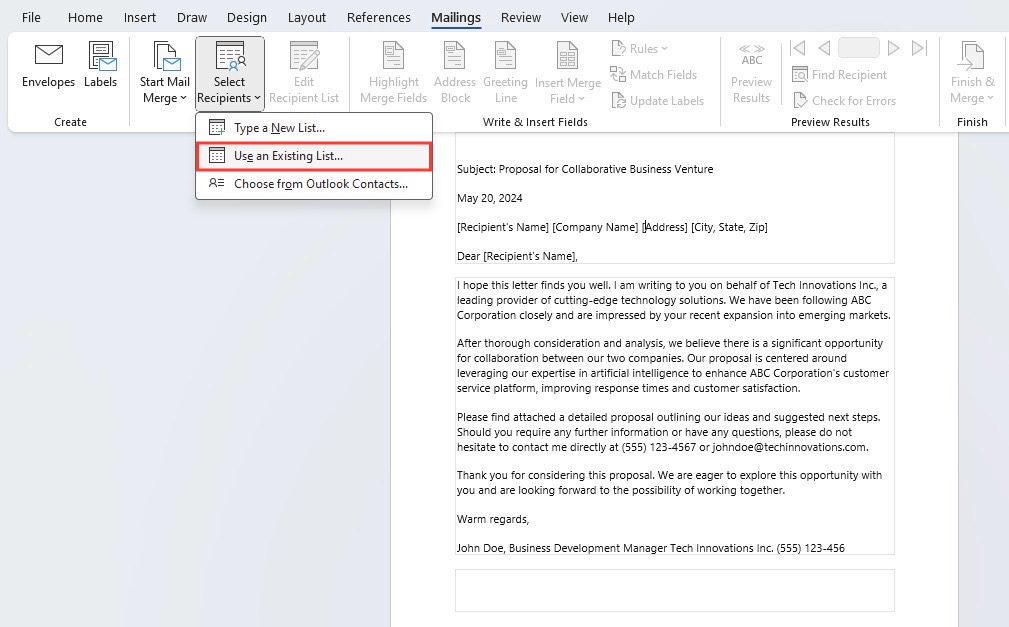
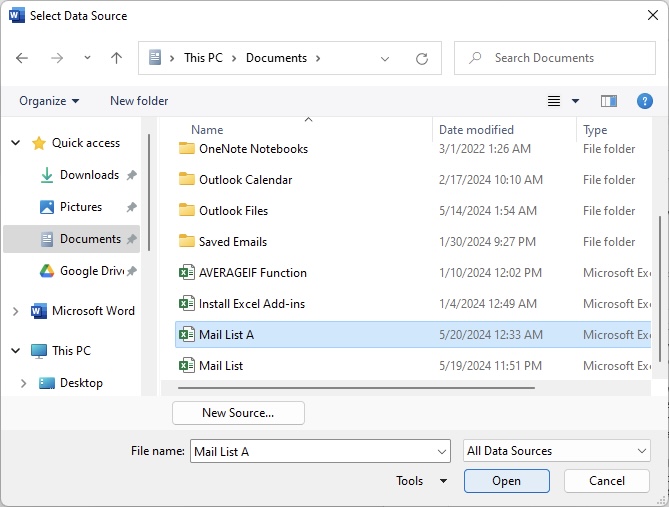
STEP 5: In Word, under the ‘Mailings’ tab, you’ll find ‘Select Recipients’. Click this and choose ‘Use an Existing List’ from the options given. This action will bring up your File Explorer, guiding you to select the Excel file with your organized data.
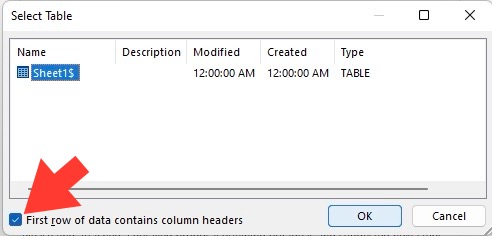
STEP 6: Upon selecting the correct file, click ‘Open’. Subsequently, a ‘Select Table’ dialog box will emerge, where you make sure you tick off the ‘First row of data contains column headers’ if it’s not already selected, then click ‘OK’. Your labels are now linked to your Excel data, gearing you up for the next step: the actual mail merge.
Adding the Right Fields for a Perfect Address Block
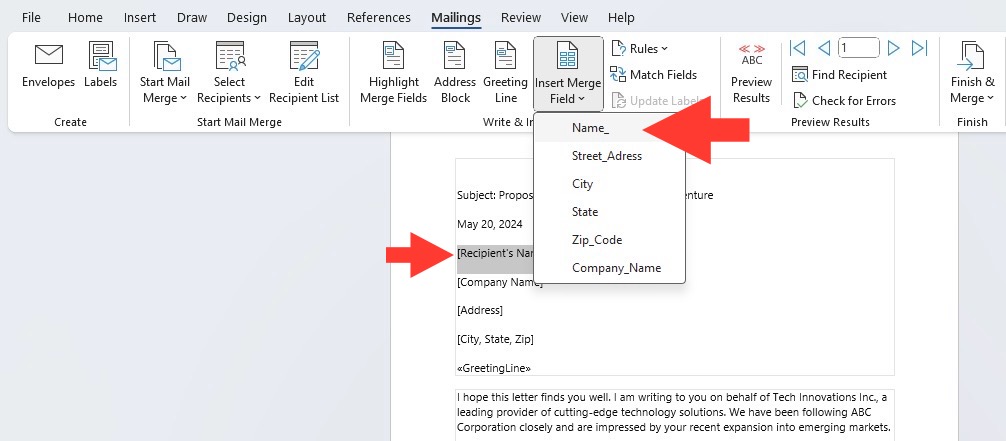
To create a well-formatted address block, you’ll now insert the right fields from your Excel data into the first label of your Word document.
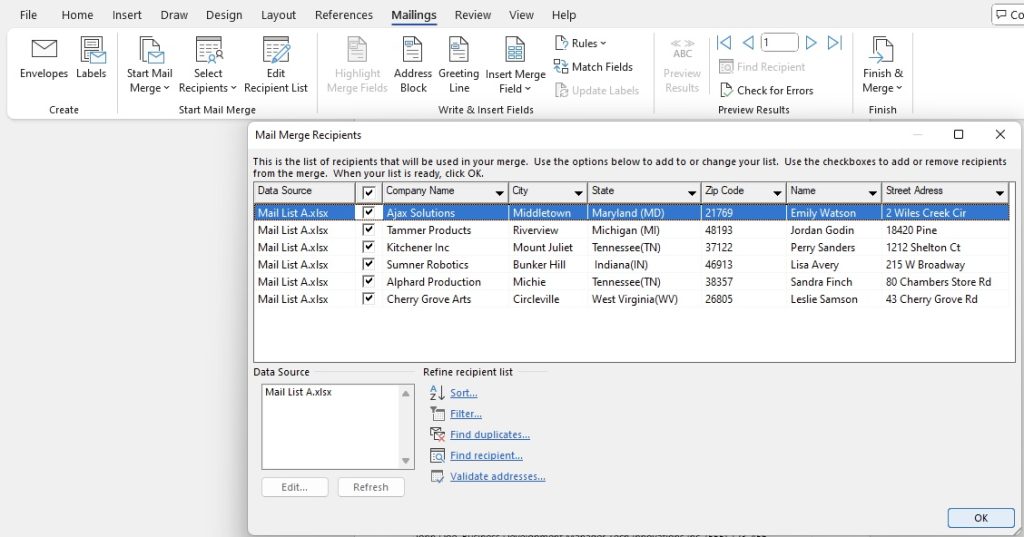
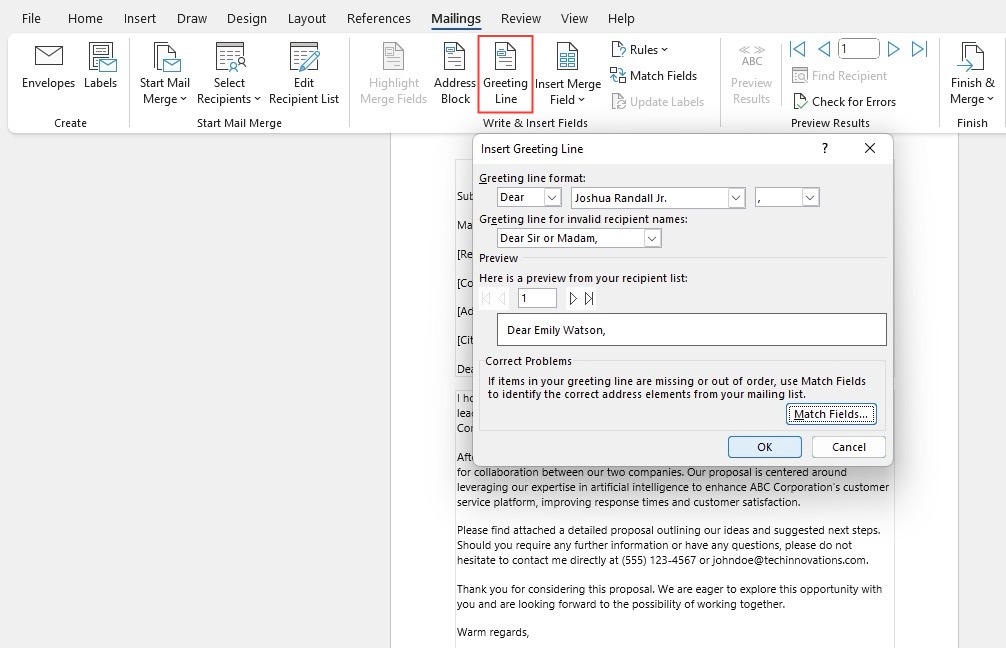
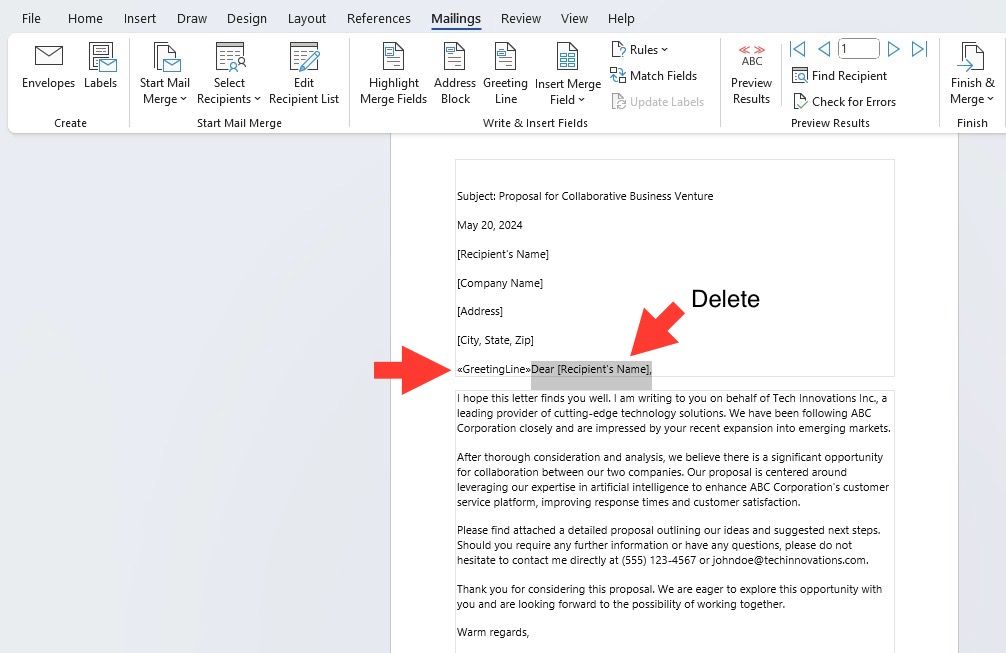
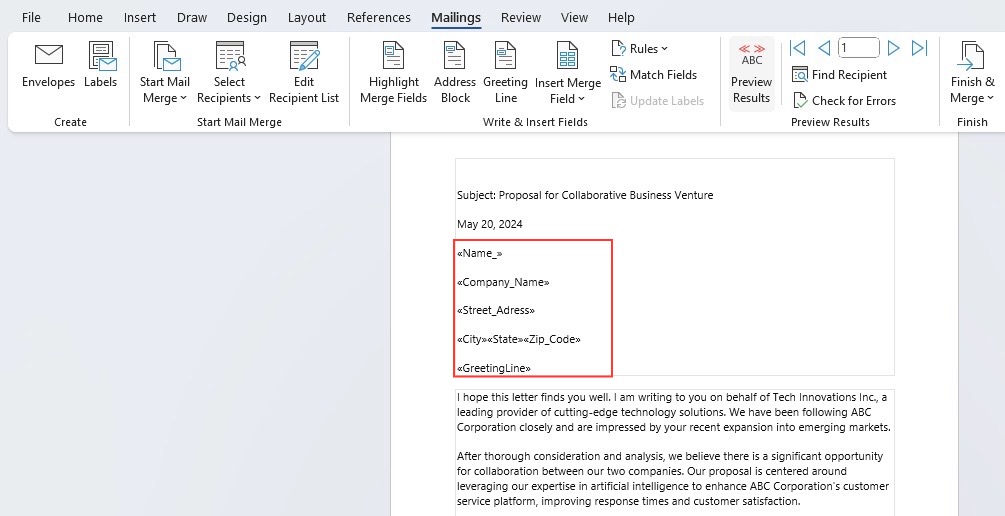
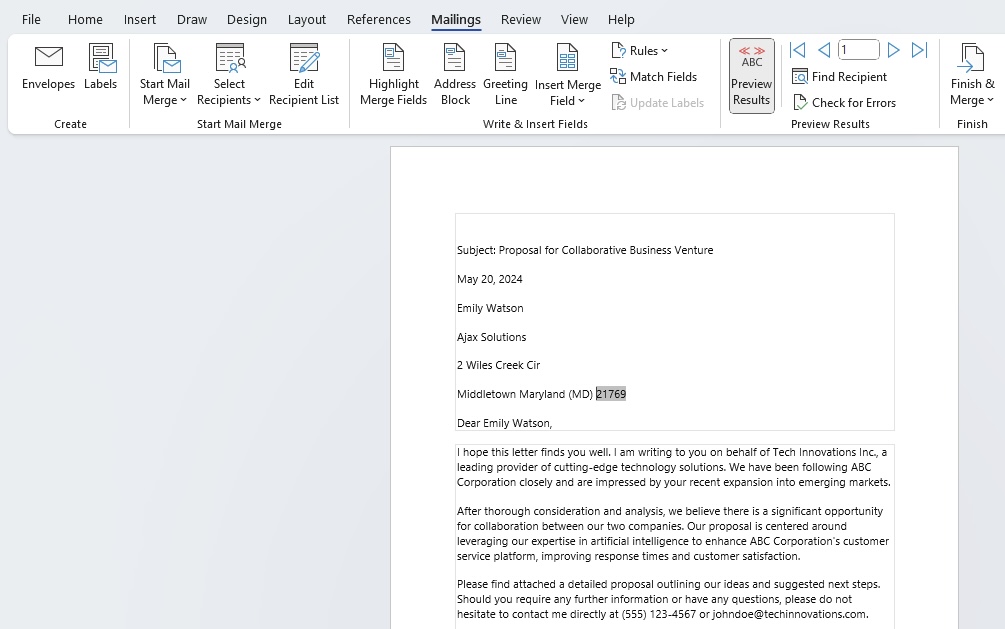
STEP 7: Click on the ‘Address Block’ or ‘Greeting Line’ option in the ‘Mailings’ tab and then hit ‘Match Fields’ in the pop-up window to make sure the Excel column headings correspond with the address elements Word expects to find, such as ‘First Name’, ‘Last Name’, and ‘Address’. Any discrepancies can be aligned using the drop-down arrows. Once aligned, confirm by clicking ‘OK’, and you’ll see <> appear on your first label. By selecting ‘Update Labels’, this action is replicated across all labels, setting the stage for the actual merging process. Make sure to preview one last time to ensure everything is as it should be.
Personalizing Labels with Custom Designs
Injecting a bit of personality into your address labels can set you apart. Whether you want to incorporate a company logo, a family crest, or simply a touch of color, Word allows for customization beyond text. You can insert images or graphics by clicking on ‘Insert’ and selecting ‘Pictures’ or ‘Shapes’. Make sure you format the images to sit neatly on the label without obscuring the text. Use the ‘Wrap Text‘ feature for text alignment and consider adding borders or color fills for contrast. Just remember to exercise restraint—while a picture is worth a thousand words, on a label, clarity is king.
Preview, Print, and Preserve Your Project
Ensuring Accuracy with Mail Merge Preview
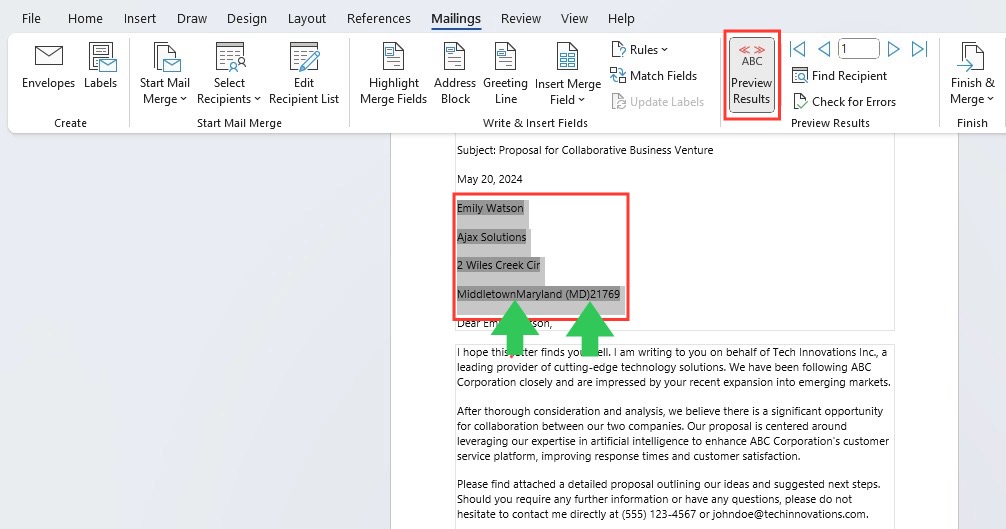
Before hitting print, double-checking each label’s accuracy can save you from costly mistakes. Use the ‘Preview Results’ button in Word’s ‘Mailings’ tab to flip through each label. This gives you a real-time glimpse of how your final product will look and allows you to catch any formatting issues or data errors before they become a problem. Pay close attention to spacing, punctuation, and alignment. If you spot something amiss, the ‘Find Recipient’ feature helps you locate and edit specific entries directly. This crucial step ensures that once you do decide to print, you’re doing so with confidence.
The Final Step: Printing Your Masterpiece
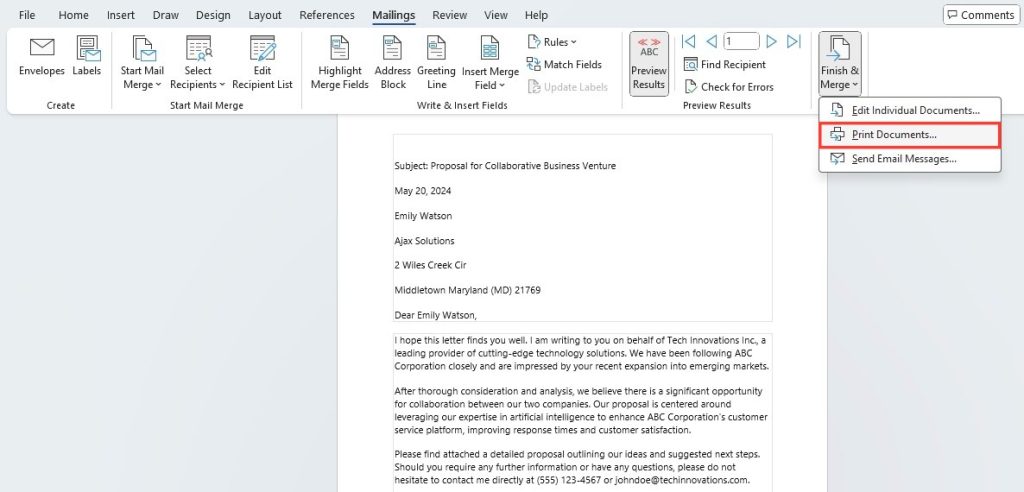
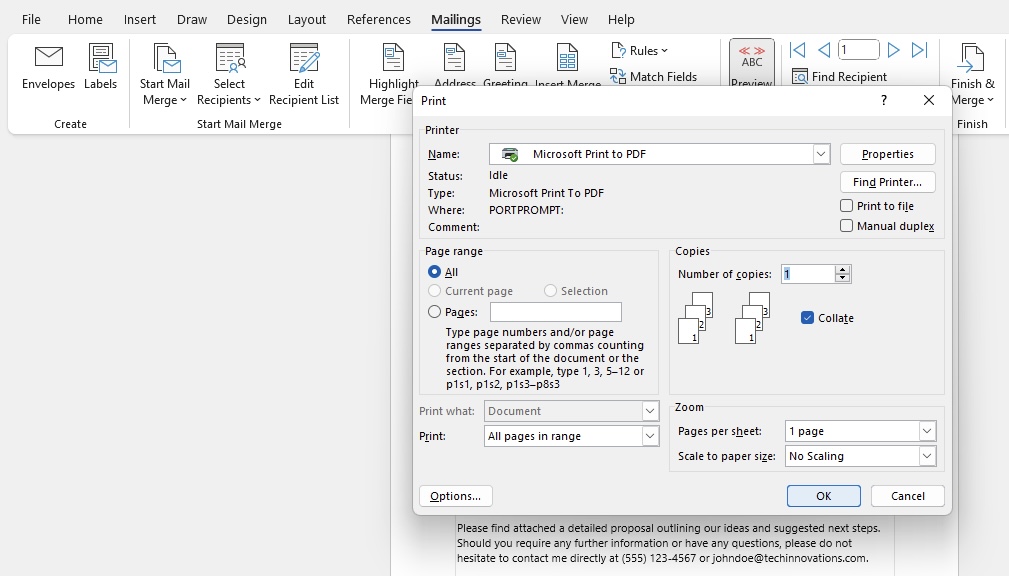
Now for the grand finale—printing your labels! To avoid wastage and ensure everything looks spot-on, you might want to first print a single page. Navigate to ‘File’, then ‘Print’ and choose ‘Print Current Page‘ or a specific range if you’re using ‘Custom Print. This test run lets you verify that the labels align with the sheets and that the design meets your expectation. If the test page is a success, you can breathe a sigh of relief and go on to print the remaining labels. Should you encounter any troubles, it’s not the end of the world; you can always ask for support or order custom printed labels to be shipped to you. But let’s stay optimistic—after previewing and careful setup, your labels are likely to emerge just as you envisioned them.
Troubleshooting Common Issues
Why Won’t My Image Appear in Word?
If you’re scratching your head because your image isn’t showing up, don’t fret—it’s usually a simple fix. First, make sure the image is not too large; resize it if necessary. Also, check that you’ve inserted the image into a document layer that allows it to be visible, and confirm it’s not behind the text or another object. Compatibility issues can sometimes occur, so ensure your image file is not corrupted and is in a compatible format, such as JPEG or PNG. Last but not least, Word’s ‘Picture Tools’ can be quite handy for adjustments, so don’t hesitate to play around with different settings.
How to Fix Misaligned Labels After Printing
When your labels are playing a game of hide and seek with the correct alignment, take a deep breath—there’s always a way to coax them back into place. Start by revisiting your printer settings; sometimes selecting the ‘Labels’ or ‘Heavyweight’ paper option can make all the difference. Check margins and page settings in Word to make sure they coincide with your label sheets. If you’re still not having any luck, manually adjust the cell borders in your Word template ever so slightly until you find that sweet spot where everything lines up. Patience is key—print a test page on regular paper to compare against the label sheet held up to the light for precise tweaks, and you’ll be back on track in no time.
Advanced Techniques and Tips
Generating Unique QR Codes for Labels
For a modern twist on your labels, consider the high-tech elegance of QR codes. These can be used for a variety of purposes, from redirecting to your digital business card to offering exclusive deals. You can generate unique QR codes using online tools where you input the desired URL or text. After generating, download the QR code image, and insert it into your labels in Word just as you would with any graphic. Ensure each QR code’s readability by keeping it clear and adequately sized on the label, and voilà—you’ve just added a snazzy, interactive element to your snail mail.
Saving Your Label Setup for Future Use
Saving your label setup in Word isn’t just a time-saver; it’s a future you saying ‘thanks’. After perfectly aligning and designing your labels, go ahead and save your document as a Word template by selecting ‘File’ > ‘Save As’ and choosing ‘Word Template’ from the file type options. The beauty here is that when you need to print labels again, you can open your template, connect to your updated Excel list, and print with the same flawless settings. It’s a smart move that encapsulates your hard work and keeps consistency across all your mailing efforts.
FAQ Section
How do I format an Excel spreadsheet for mail merge?
For a successful mail merge, format your Excel spreadsheet with clear, descriptive column headers such as ‘First Name’, ‘Last Name’, and ‘Address’. Each row should correspond to one label, with no blanks disrupting the dataset. Ensure text fields like Zip Codes are set to ‘Text’ format to keep leading zeros. Regularly clean your data for accuracy.
Can I print different addresses on each label using Excel and Word?
Absolutely! Mail Merge in Word can dynamically print different addresses from your Excel list onto each label. Just set up your spreadsheet with unique data per row and use the Mail Merge feature in Word to link and insert these fields into your label document.
What should I do if the labels are not printing correctly?
If your labels are not printing correctly, check that you’ve selected the proper label template and paper size. Compare a test print to your label sheets, check printer settings for accuracy, and adjust margins or cell sizes in your Word document as needed.
How can I create a custom layout for my mailing labels?
To create a custom layout for your mailing labels in Word, go to ‘Mailings’ > ‘Labels’, select ‘Options’, choose ‘New Label’, and set your desired dimensions. You can add images, adjust fonts, and modify the layout to your preference. Save this as a custom template for future use.


John Michaloudis is a former accountant and finance analyst at General Electric, a Microsoft MVP since 2020, an Amazon #1 bestselling author of 4 Microsoft Excel books and teacher of Microsoft Excel & Office over at his flagship MyExcelOnline Academy Online Course.


