Introduction to Microsoft Word 365 Tutorial
In this introductory tutorial, we will be providing you with some of the features of Microsoft Word 365.
- Starting Word
- File Options
- Home Options
- Insert Options
- Layout Options
- Review Options
- View Options
- Searching for Commands
Watch it on YouTube and give it a thumbs-up!
Let’s look at each of these features in Microsoft Word one by one!
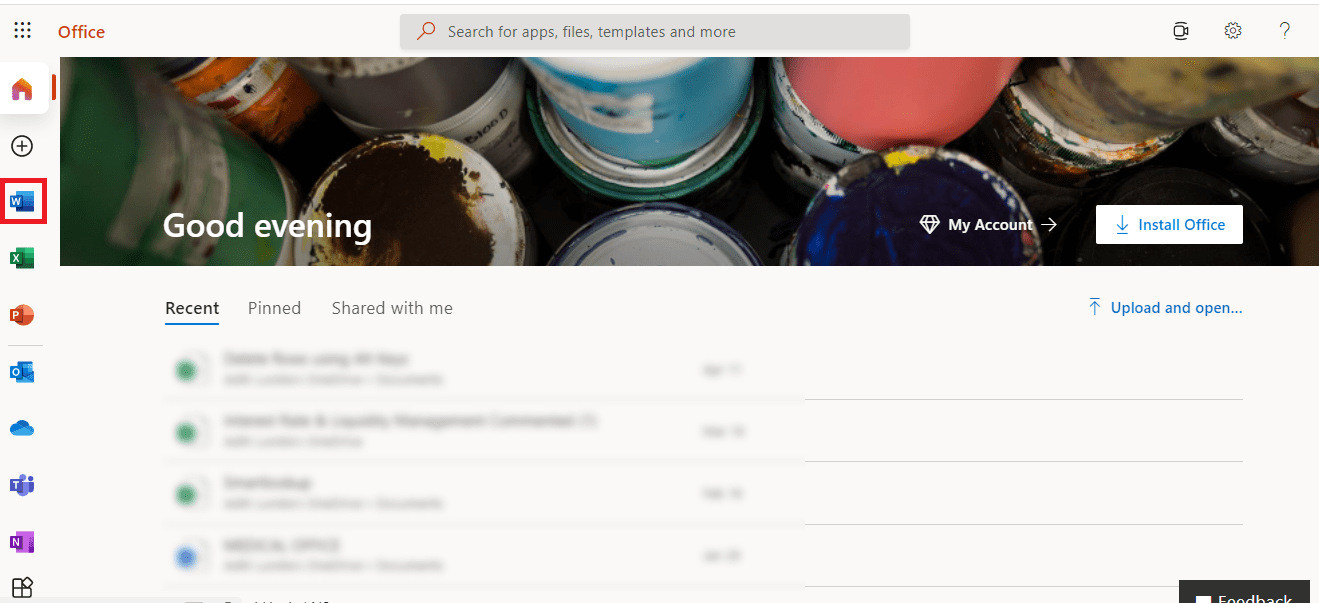
There are two ways in which you can open MS word on your system.
- Click on the MS Word icon pinned to your taskbar.
![]()
OR
- Type “Word” in the search bar of your taskbar. Click on the MS Word icon.

Upon opening, you would be greeted by the Home screen of MS word. Let’s break this down.

On the left side of the screen are different menus like Home, New, and Open. The Home tab is open by default.

Here you have several options for starting up your own document. The first and most widely used type is the blank document. But MS word also provides a plethora of different types and templates to choose from, depending on the purpose of your document.
There are main three options that are useful under the File > Home – Recent, Pinned, and Shared with Me.
- Recent – Go to File Tab and then click on Recent, you will find the recent documents that have been opened.

- Pinned – Under the Pinned option, there are important documents that you have pinned and want to view often.

You can pin documents by going to Recent and clicking on the pin icon next to the file that you want to pin.

- Shared with Me – Shared with Me shows files that have been shared on OneDrive.

Moving on to the next menu – New.
Here you can find the different types of templates provided by Word. The templates range from resumes to calendars, to greeting templates and brochures. You can choose the appropriate template for yourself and start your document with a pre-made and structured design.

Moving on to the Open menu, you can find a list of recently opened documents. This list contains more files than the one in the Home menu.

You can click on Browse to find any document on your computer.

Clicking on OneDrive will show the documents that have been shared with you.

Further down, on the left side of your screen, you will find the Account menu, which shows the details of your Microsoft Office subscription.

The Options menu can be used to change different settings of MS word, most commonly used to change various default settings.

This entire page can also be accessed through the File tab after you have opened your word document. Clicking on the File tab, you will be able to access different options like
- Save
- Save as
- Export
- Share
Now that you have opened up a document and started typing, you are starting to realize that you need formatting for your text to stand out. Here the Home tab will help you.
On the Home ribbon, you have different options to customize your text. Some of the commonly used features of the Home tab are:
- Changing the font by choosing any style from the drop-down menu.

- Bold, italicize, underline or strikethrough words/sentences.

- Highlight any word/sentence or change the color of the font.

- You can indent or outdent your text.

- Changing the text justification to left, right, or center.

- Change the spacing between paragraphs.

- Add bulleted or number points, in one layer or multi-layered.

The Home tab also offers you to dictate the text instead of typing it. Clicking on the Dictate button will start the process. Word will automatically type out whatever you dictate. Click on the Dictate button again to stop the process.

Let us move towards the Insert tab now.
Here, you can insert a table into your word document. This can be very helpful if you want to present data in your document.

You can easily and quickly insert a table just by selecting the number of columns and rows from the given matrix under the Table drop-down button.

The table also offers all the formatting options available in the Home tab. You can bold your table headers or change their font color, add color fills to your rows, adjust the alignment of your text, and much more to make your table look pleasing as well as clean.

The table border drop-down menu also offers various customization such as thickness and color for your table’s external and internal borders.

Clicking on the Pictures icon will let you insert pictures into your word document. You can easily change the size of the image by dragging it from the corner and adjusting its size to your liking. The alignment of the image can also be changed to the right, left, or center.

You can also insert Shapes, Icons, 3D models, SmartArt, Charts and Screenshots using the Illustrations section under Insert Tab.

In the Insert ribbon, you can also find the option to insert page numbers in your document by clicking on the Page Number drop-down button. You can add the page number at the bottom of the page, the top of the page, or anywhere as per your requirements.

You can also insert Header and Footer to your document by clicking on these dropdowns.

Let’s move ahead to the Layout tab.
Here, you can change the size of your margins from the Margins button. The default size is 1 inch margin all around.

The customize option under the Margins drop down menu gives you access to change your margins freely.

You can also change the orientation of your document from portrait to landscape by clicking on the Orientation button.

The Size button allows you to change the size of your paper to letter, A4, A5 and many more.

Many a time, people want to manually insert a page break so that certain information is displayed in a separate page. You can add a page break by:
- Clicking the area from where you want to insert the page break
- Click on Layout > Breaks > Page

Let’s head on over to the Review tab.
A commonly used function here is the Thesaurus. Selecting a particular word and clicking on Thesaurus will give you a list of different words that can be used in place of the word you selected. This is a very helpful tool to make your paper sound better and remove any monotonous usage of simple words.

To insert a suggested word, just click on the down arrow beside the word and click insert.

You can also find the Word Count button here, which shows you the number of words in your document.

This can also be viewed on the status bar, which is at the bottom of your screen.

Let’s check out the View tab next.
You can zoom in or out of your document by simply clicking on the Zoom button and entering the amount of zoom in that you want. The default view is on 100%.

Clicking on the Multiple Pages button, you can view the different pages in your document side by side. This can also give you a tough estimate as to how your document would look like when it’s printed.

Clicking on One Page will take you back to the regular view.

You can click on the Switch Windows button to navigate to any other Words document that you have opened. Pressing Alt + Tab can also help you switch between Word documents.

Lastly, if you ever forget these tools and instructions, there is a search bar at the top of your screen, which can also be accessed by pressing Alt + Q. You can type any command here, such as Bold, and it will give you the Bold option.

This is a very helpful tool to initially work your way through MS Word until you get more familiar with it.
Hopefully, you now have a fair idea of how to use Word. You can always refer to this article if you want to brush up on your basics again.
Click here to download 101 Free Word Templates that you can use and customize!

You can learn more about how to use Excel by viewing our FREE Excel webinar training on Formulas, Pivot Tables, and Macros & VBA!
How to Write a Term Paper in Microsoft Word with Footnotes, Bibliography, and Table of Contents

Writing a term paper is an integral part of every student’s life and Microsoft Word is here to make your life easier in this field. It presents you with a lot of tools for stress-free writing as well as professional formatting for writing a term paper in Microsoft Word. You can include a table of contents, add endnotes and footnotes, add a bibliography, headings and titles, and much more.
If you are about to write a term paper and thinking of using MS Word, then keep reading!
In this tutorial, we will be providing you with a brief overview of some of the features of Microsoft Word 365 that can be used when writing a term paper:
Watch it on YouTube and give it a thumbs-up!
One of the most important aspects of writing a term paper is references. So let us start with the References tab of MS Word.
Referencing quotes in your paper can be a challenging task. Fortunately, you can easily add them to your term paper in Microsoft Word. You can add references to quotes in two ways:
Endnotes
Endnotes appear at the end of your entire paper. You can click your cursor after the quote where you want to add endnotes and then go to References > Insert Endnote.

A reference tag will appear after your quote in the form of a superscripted number, which corresponds to your endnote number. You can easily add your reference in the endnotes.

Footnotes
Suppose you want to show a particular reference at the end of the page in which the quote is written, then you can choose to add a footnote.
Simply click your cursor after the quote and then go to References > Insert Footnote.

This will insert a footnote at the bottom of the page. You will similarly see a superscript number at the end of the quote that corresponds to your footnote number.

The difference between a footnote and an endnote is at a footnote is at the bottom of the page while an endnote is at the bottom of the entire term paper.
When adding citations and bibliography, a general style to follow is the APA style for technical papers and MLA format for humanities. MS Word is very helpful in this regard, as it gives you a list of different styles to choose from. You can set your style by –
- Go to References
- In the Citations & Bibliography block, click on the Style drop-down menu
- Select the style you want

Now you can add your citations to your term paper in Microsoft word by following these steps –
- Go to References > Insert Citation
- Click on Add New Source

This will open up a window with different placeholders asking for different information like name of author, title, year, type of source, etc. This part makes writing bibliographies in MS Word super easy.
You can add all your citations one by one by clicking on Add New Source and filling out the details.

Now that all your citations are entered, you might get confused as to how to show these in the proper format in your bibliography. But this is where MS Word takes care of all your problems.
To insert your bibliography simply –
Place your cursor at the end of your paper, where you want your bibliography.
Go to References > Bibliography drop-down menu > Insert Bibliography.

Doing the above steps will automatically enter all your citations in the chosen style.

Hence you no longer need to worry about the chronology or the format of the bibliography.
You can even edit your previously entered sources by –
- Go to References
- Click on Manage Sources
This will open a window that shows all the sources that you have entered.

You can click on any of the sources and click on Edit to edit its information.

The bottom of the window also shows a preview of the source that you have currently clicked on.

Inserting a table of contents in MS Word is a process that will generate an automatic table, and in that process, your paper will also be formatted in such a way that your chapters and subsections stand out.
Going to the Home tab, you will find a Styles block having different styles like Normal, Title, Heading 1, etc. You can apply these styles by selecting your text and clicking on the style you want.

Now, you can turn the title of your paper to Title style, which will make it stand out from your regular text.

The auto-generated table of contents in MS Word only shows Text that is entered in the Heading style. It does not show Normal or Title styles.
So just change the style of your chapter heading to Heading 1, your chapter section headings to Heading 2 style, sub-section headings to Heading 3 style, and so on.

You will notice that while doing so, the heading texts now appear different from the rest of the text in your paper. Hence your headings are also standing out now, giving a more aesthetic look to the entire document.
Now to enter the table of contents –
- Place your cursor where you want the table, generally at the start of the paper.
- Go to References
- Click on the Table of Contents drop-down menu and select an automatic table format.

Now you will see that a table of contents is generated with page numbers

If you add further changes to your paper, just go to References > Update Table.

You will be presented with two options:
- Update page number only – This will only update the page number of the chapters and sections that are already displayed in the table. A new heading will not be added to the table.
- Update entire table – This will update the entire table, including new sections and headings.

Another amazing feature of the table of contents is that if you Ctrl + Click on any heading, you will be transported to the start of that heading. This feature is especially helpful in navigating long papers.
To improve the quality of your paper, you can use the Thesaurus tool. It gives a list of similar words that you can use instead of the one written in your paper. To use this tool simply :
- Go to the Review tab.
- Select a particular word and click on Thesaurus

To insert a suggested word, just click on the down arrow beside the word and click insert.

The Word Count button is also present in the Review ribbon, which shows you the number of words in your document.

This can also be viewed on the status bar.
![]()
In the end, you should always check the grammar of your paper. Go to Home > Editor, which will go through your paper and show any spelling or grammatical errors.

It will show the number of spelling and grammatical errors, and you can click on any one of these categories and go through all the errors while making any changes if necessary.

It even shows a score based on the type of your paper, ranging between Formal, Professional, and Casual. If you change the category from Formal writing to Casual. The score will be updated.

Next, we have a section on Corrections that points out the number of spelling and grammar errors present in your paper. The red underline denotes spelling errors whereas the blue double underlined line denotes grammar errors.

Summary
In this article, we went over how to create endnotes and footnotes, create a bibliography and table of content, do a grammar check and word count, and use the editor option in Microsoft Word.
Using these helpful features of Microsoft Word, you can ace writing your term paper!
Click here to download 101 Free Word Templates that you can use and customize!
You can learn more about how to use Excel by viewing our FREE Excel webinar training on Formulas, Pivot Tables, and Macros & VBA!
How to Get Microsoft Word for FREE with Windows 10

MS Word has become an indispensable tool for anybody, be it students, working professionals, and many more. From simple document writing to creating full-fledged reports, brochures, and letterheads, MS Word is something that any person should have. Today, let us see how we can get Microsoft Word for free in a perfectly legal way!
You can use MS Word for free in either online or offline mode. Let us explore the online route first!
Watch it on YouTube and give it a thumbs-up!
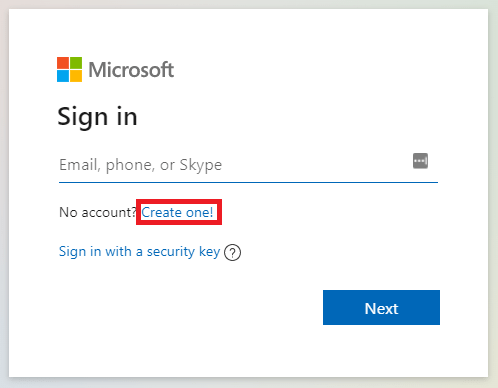
To use MS Word for free online, we need to go to www.office.com. Here, you would be able to see the option of Sign In.
Now sign in with your Microsoft ID.
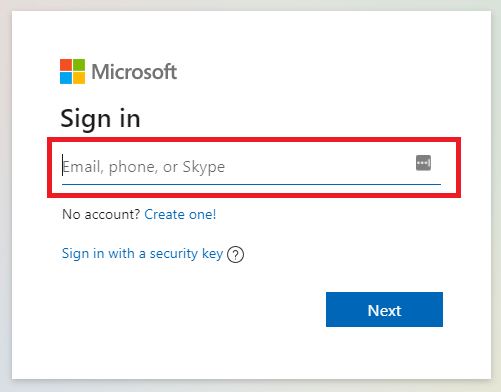
In case you do not have a Microsoft ID yet, just create one by clicking on the Create one.
While signing in, you will be prompted to choose the profile you want to sign in with. Just choose your desired account and sign in.

Once you have created and signed in, you will be greeted by the Home page that shows all the recent documents that you have opened, be it MS Word, Excel, or Powerpoint.
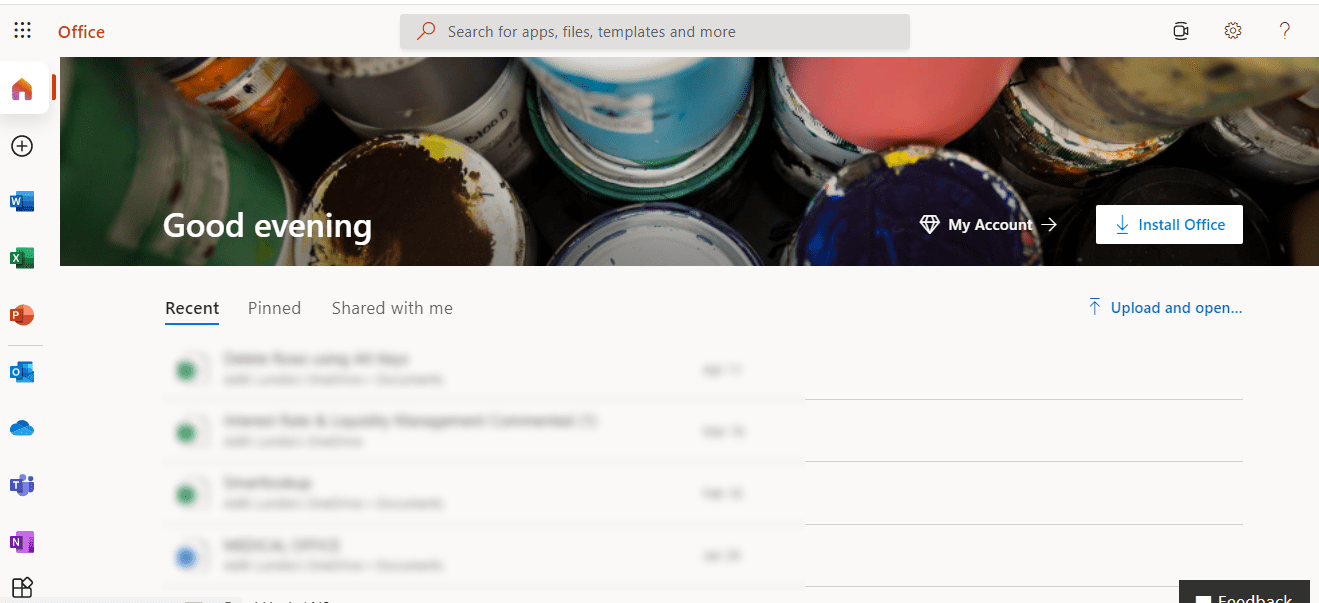
On the vertical ribbon located on the left side of the page, You will find the first option as Home, which is the default first page upon logging in.
Just click on the MS Word icon in the ribbon.
You will be able to see a very familiar sight, as the home screen of MS Word online is quite similar to what you would find on your PC.

Here you can open up any previously saved work or you can start a new document. You can even start with a template depending on the type of document that you want to create. You can freely type out your document and edit it, and once you close the document, the changes will be saved automatically.
On the top left of the screen, you will be able to see that your document is saved to OneDrive.

If you click on that bar, you will be able to change your file name.

Now you might be wondering that these files are being saved on OneDrive, but what if you wanted them on your device. Well, that is easy to accomplish as well! Just open the file you want to save and :
- Go to File.
- Click on Save as.
- Click on Download a Copy.

Following this process, your browser will download a copy of the file onto your device. You can visit the particular folder where your downloads are stored and access your file from there.
So this was the entire process of using MS Word online for free. Now let’s explore the offline version!
The alternate way of using MS Word for free is as follows:
- Go to the search bar on your taskbar.
- Type Office
- You will see the Office app, which is the free version of MS Office. Click on it.

This will bring up a similar look as to the home page we saw in the online version, instead, this is actually on your device. In case you are unable to go online, this is a good version to use.
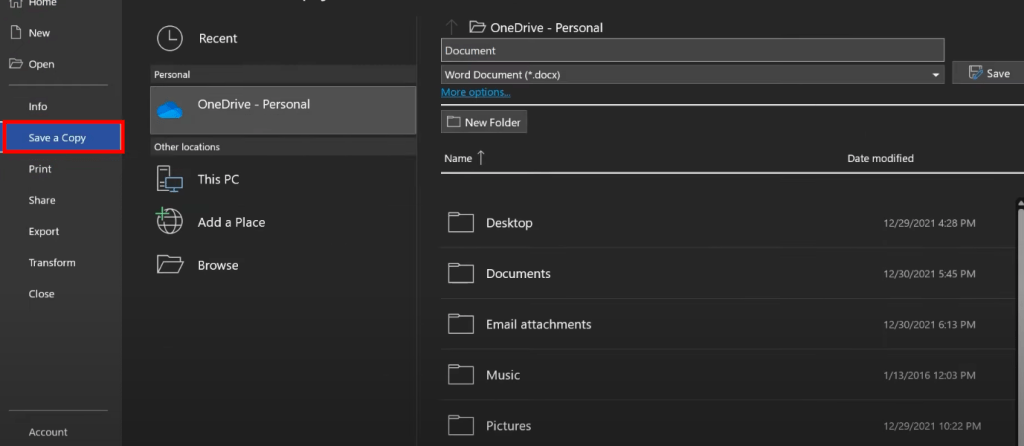
The app will open up with the Home screen, showing recent documents that you have opened. On the left vertical ribbon, click on the MS Word icon, and the Home page of MS Word will open. Here you can open up a previous document you have already worked on, start a blank new document or choose different templates, depending on your work. Your work will be saved to OneDrive, or you can save a copy by going to File > Save a Copy.
Another interesting approach to using MS Word for free is available if you are a student, teacher, or administrator for a school. You can follow the steps below:
- Go to www.microsoft.com/education.
- Click on the Products drop-down menu.
- Click on Office 365.

Scroll down and enter your school email ID.
Click on GET STARTED.
One thing to note is that the school ID must end in “.edu” to access MS Office for free.

So now that we have explored how to access MS Word for free, you can now easily use it to level up your dissertations, projects, papers, or any other document that you need to work on.
Hope you find this article useful and informative for you!
Click here to download 101 Free Word Templates that you can use and customize!
You can learn more about how to use Excel by viewing our FREE Excel webinar training on Formulas, Pivot Tables, and Macros & VBA!
How to Create a Resume in Microsoft Word in UNDER 5 Minutes

Having a perfect first impression is very important in this rapidly advancing world. In the corporate world, your resume is the first impression that a company gets about you. An outstanding resume has the potential to open doors because it:
-
- Catches the attention of employers and recruiters
- Sells your most vital talents and accomplishments.
You can easily create a resume in Microsoft Word. You won’t even have to use a template to complete this task. So let’s see how to create a resume in MS Word in just 5 minutes!
Watch it on YouTube and give it a thumbs-up!
So, a resume can be divided into 4 major topics, namely – Contact information, Experience, Skills, and Education.
Let’s start the resume with your contact information. Following aesthetic formatting, you should center align your text. Now you can enter information about yourself like:

- Your name
- Your phone number
- Your email address
- Your address (State, City, Street, and Zipcode)
Once you have entered your information, go to the next line and left-align your text once again. Write down the remaining sections for your resume.
Follow up the contact information with an Experience section.
Go to Insert and click on the 2×1 table from the menu bar under the Experience section title.

The first column of the table will be of the dates you’ve worked and the second column will be of Job Title, Company & City / State.

Make sure to bold the text “Job Title” so as to add emphasis to it. Press Ctrl + B to make any text!

In the second column, press Enter to go to the next line and then click on the bullets icon from the Home toolbar at the top. This allows you to enter your experience in a bulleted list format.

Once you have finished entering the details of your last job, you can press the Tab button to insert a new row.

To add details of other previous jobs that you had, simply copy the text in the first row and paste it into the second row. This way you can easily follow the format and just edit the text as you want.

Let’s move to the Skills section.
You can similarly insert a table to highlight your skills.
- Go to Insert and click on the table from the menu bar under the Skills section title.
- You can select the number of columns according to your need. Let’s go with a simple 4×1 table.
- Go to Home and click on the bulleted list icon.


Now, you can enter the skills that you have picked up. Decide the number of skills that you want to display per column, and then move on to the next column.
Once you have entered your skills, it’s time to enter your Education details.
Following our previous format, we will insert a table to highlight our education details:
- Go to Insert and click on the 2×1 table from the menu bar under the Education section title.
- In the left column, you can enter the year you graduated.
- In the right column, you can enter details such as Degree Name, School Name, City, State, and Awards.
- Make sure to bold the Degree name so as to add emphasis. You can press enter and add any awards that you might have received.

Next, you can hit Tab to insert a new row, where you can enter any certificates or any other degrees or programs that you may have.
Now that the basics of your resume are complete, we can move on to formatting the resume to make it look more attractive.
Under the Experience title, select your table, and go to Home > Borders > No Borders. This will give a cleaner look to your resume. You can apply these same steps to the tables under the Skills and Education titles as well.

You can select your name and increase its size by going to Home > Font size and increasing it. You can even select a different font for your name to highlight it.

You can select your section titles (Experience, Skills, and Education) and insert the Top and Bottom borders by going to Home > Borders. This will give a nice segmented view to your resume and make each section stand out.

You can also select the table under your Experience title and hover your mouse over the center bar until you get the left and right arrows.
You can hold down the left mouse button and drag it to the left to have more room for your experience and less room for the dates.

You can do the same for your Education table as well.
Your resume will have a proper alignment as you have used tables, and it will be easy to edit in case of any additions in the future as well.
Once you have finished these basic formatting, you will notice that your resume now has a clean and concise structure, with important elements gaining the spotlight.

Hopefully, this article has given you insight as to how to build an effective resume, which helps you land your desired jobs!
Click here to download 101 Free Word Templates that you can use and customize!
You can learn more about how to use Excel by viewing our FREE Excel webinar training on Formulas, Pivot Tables, and Macros & VBA!
How to Mail Merge From Excel or Outlook to Microsoft Word – The FASTEST Way

Managing and sending emails to a long list of names and addresses can be a hectic task. Thankfully, MS Word is here to solve your problems and help you work efficiently.
The Mail Merge function in MS Word helps you print or email bulk messages that feel personalized. It just requires a data source for your recipients, using which it will easily combine a word document with your data to create personalized letters.
Now let us start with the process of Mail Merge. Watch it on YouTube and give it a thumbs-up!
A Mail Merge function requires basically two things:
- A document that contains the content of your letter.
- A data source from where you will get all the information about your recipients.
This can be from various sources like MS Excel, a CSV, or even your contacts in Microsoft Outlook. You can also download your contacts from different email programs and use that file as your data source.
Follow the steps below to know how to use Mail merge in MS Word:
- Go to the Mailings tab
- Click on the Start Mail Merge > Step-by-Step Mail Merge Wizard option.

This will open up the Mail Merge Wizard on your screen. Now it is a simple step-by-step process that you need to follow.
STEP 1
- Under the Select document type list, choose the type of document that you want.

- Go to the bottom of the Wizard and click on Next: Starting Document.


STEP 2
Now that the wizard has advanced, the next step is to select or create a starting document.
- You can either use the current document or a template or an existing document as the basis for the mail merge. Choose whichever option you want under Select starting document list.

- Go to the bottom of the Wizard and click on Next: Select recipients.


STEP 3
Now you must decide where you will obtain your list of addresses. You can use an existing list or you could alternatively use Outlook contacts, or manually create your own list.
- Under the Select recipients’ list, Choose the method that you want.
You can choose Select from Outlook contacts if you want to use your contacts on Outlook. You can even choose the Type a new list and manually create a new list for your contacts.

- Click on Browse. Navigate to the file you want and double-click on it. You will get a small window showing the name of the worksheet where all of your data is. Click on OK.
- It will show you a preview of your data. Once checked, click on OK.

- Go to the bottom of the Wizard and click on Next: Write your letter.


STEP 4
Now that you have imported your list of recipients, you need to write your letter. Here you will manage the contents of your letter.
- Click on Address block.
 A small window will open.
 - Choose the format in which you want to display the name of your recipient. You can check out the different options available such as company name or different displays for address as well.
Once you have selected everything according to your needs, click on OK.

- Now you can press enter a few times so that your letter looks clean.
- Now click on the Greeting line in your Mail Merge wizard. Here you can explore the different types of greetings you want. You can choose long formal names or shorter, more personal name formats. Once done, click on OK.
- Go to the bottom of the Wizard and click on Next: Preview your letters.


STEP 5
Now you will be able to preview the different letters that you have created. The placeholders that were inserted in the previous step for address and greeting lines will now be changed and will show the actual data imported from the recipient’s list that you imported.

You can easily click on the double arrows in your wizard under the Preview your letters to navigate between the letters and review your data.
Once you are reviewed your letters, go to the bottom of the Wizard and click on Complete the merge.

STEP 6
It can also happen that you want to edit any particular letter with some personal comments. You can easily do that by
- Click on Edit individual letters.

- Click on OK

- Scroll to the letter you want to edit and type your content.


You will notice that only that particular letter has been edited and the rest are still following the Mail Merge format that you had created.
Quick Tip: You can go to View > Zoom and set it to 25% to view your documents at a smaller size, making it easier to find the one you are looking to further edit.


Hope this article has shown you how simple and efficient it is to use mail merge. Hopefully, you can now easily use this function to optimize your work, or else you can always come back here to brush up on your basics.
Click here to download 101 Free Word Templates that you can use and customize!
You can learn more about how to use Excel by viewing our FREE Excel webinar training on Formulas, Pivot Tables, and Macros & VBA!
Word Tutorial: How to Make a Custom Letterhead in Microsoft Word 365

Letterheads have become an integral part of conveying information, especially in corporate situations. A company’s brand identity is shown by its letterhead.
From logos and basic information to custom graphics, a letterhead grasps the attention of the recipient and creates a recognizable identity for the company. Letterhead can also have used for personal reasons.
The layout of the letterhead can easily be modified for corporate or personal use.
Letterheads can be used for various different reasons like:
- Sending invoices to clients and customers.
- Recording the minutes of a meeting.
- Sending offer letters.
- Sending personal invites like wedding invitations.
So let us see how you can make your custom letterhead in Microsoft Word!
Watch it on YouTube and give it a thumbs-up!
You first need to identify what elements you need to insert into your letterhead. Some of the commonly used elements can be :
Let us now explore how to insert a watermark on your letterhead. A watermark can be a sign of validity, showing confidentiality and restricting the copying of sensitive information.
You can easily follow the steps below to insert a watermark:
- Go to Design.
- Click on Watermark.
- Here you will be presented with preset watermarks, mainly used to protect your data. You can also insert your own watermark by clicking on Custom Watermark.

- In the pop-up window, check the Picture watermark box, and click on Select Picture.
- Browse and select the picture you want as a watermark.
- You can check the Washout box, which will give the picture a faded look in the background. Click on OK.


Once you have completed all the steps, you will see that your selected picture will be visible in the background of your Word document.

The logo immediately catches the eye of the recipient. It is really simple to add a logo in MS Word. Let us see how!
- Go to Insert.
- Click on Pictures.
- Under the “Insert Picture From” list, select This Device.
- From the pop-up window that opens, browse and select your logo.
- Now you can stretch the logo by dragging it from the corner.
- You can also go to Home > Center Align. Now your logo will be on the center of the screen!


Aesthetics play a very important role in letterheads. You can easily grasp the attention of the reader with your letterhead by inserting a few graphic elements.
For that, it is better if you match the colors present on your letterhead to the colors present in your logo.
Let us see how you can get the exact colors in your logo:
Picking Color in Paint
- Go to the Paint app.

- Go to File > Open. Browse and select your logo.
- Go to Home > Color Picker tool.

- Take the tool cursor to the color you want to pick and click on it. You will see that Color 1 is filled with the color you picked.

- Click on Edit Colors and note the Red, Green, and Blue values of the color on the bottom right of the pop-up box.


Now if you want to insert this exact color on your letterhead, you can easily duplicate the red, green, and blue values and get the same color.
Inserting Shapes
A simple way of adding graphic elements to your letterhead is by using shapes. MS Word offers a variety of different shapes that you can fill with color to brighten up your document. Let us see how you can insert shapes into your letterhead:
- Go to Insert > Shapes.
- Under the Shapes drop-down menu, you can select whichever shape you want. Let us go with a simple triangle.

- Click your left mouse button and drag to draw the shape. Once drawn, you can drag the shape and place it wherever you want.


Now let us see how to add color fill to our shapes.
- Select your shape and go to Shape Format.
- Click on Shape Fill. Under the dropdown list, click on More Fill Colors.
- In the pop-up box, under the Custom tab, choose the Color model as RGB.
- Now you can paste the values of red green and blue that you extracted from your logo in Paint.

- You can copy the shape by selecting it and pressing Ctrl+C. Press Ctrl+V to paste the shape.
- You can also rotate the shape by clicking, on the circular arrow on top of the shape, and dragging it. Since we have selected a triangle as our shape, we can fit four triangles into the four corners of our letterhead.


Now you will see that the shapes have the same colors as present in your logo. You can also add other shapes like rectangles and insert more graphical elements to your letterhead and give it a clean and attractive look.

You can add color as per the logo color scheme to enhance the final output of the letterhead.

QR Code
Inserting a QR code into your letterhead will provide the recipient the ease to simply click a photo of the code and go to any links that are encoded in it.
You can, for example, redirect the person to your website via your QR code where they are able to view information about your company and how to your contact details. Let us see how to insert a QR code in MS Word:
- Go to Insert.
- Click on Pictures.
- Under the “Insert Picture From” list, select This Device.
- From the pop-up window that opens, browse and select your QR Code.
- You can reduce the size of the code by dragging it from the corner. Now you can drag and place the QR Code wherever you want on your letterhead.

While you can certainly just start typing on your letterhead, inserting a text box is more flexible and will not mess with your layout. Furthermore, you can easily drag your text box to place it wherever you want.
You can add a text box by following the steps below:
- Go to Insert
- Click on Text Box. Under the drop-down list, select any text box you want and just start typing.

Hopefully, this article has given you a headstart on creating your own letterhead. You can add or reduce the different elements explained here while creating your custom letterhead.
You can always come back to this article in case you want to revisit any concepts!
Click here to download 101 Free Word Templates that you can use and customize!
You can learn more about how to use Excel by viewing our FREE Excel webinar training on Formulas, Pivot Tables, and Macros & VBA!
How to Add Page Numbers to a MS Word Document

MS Word has a great system for inserting and customizing page numbers. Your document becomes more structured and easier to navigate once you insert page numbers in Word.
Page numbers can be placed at the top or bottom of the page, and there are several layouts to pick from. It only takes a few clicks to add page numbers to Microsoft Word documents.
In this article, we will be covering the following topics:
- Inserting Page Numbers
- Changing Location of Page Numbers
- Formatting Page Numbers
- Including Chapter Numbers
- Removing Page Numbers
Watch it on YouTube and give it a thumbs-up!
Let’s see how to insert page numbers in MS Word!
So let us start with the basics and insert a simple page number. To do this, you need to:
- Go to Insert.
- Click on Page Number.
- Select Top of Page.
- Select the side you want the number to be. A common choice is on the right side.

If you have added page numbers to the top or bottom of the page, the Headers & Footers tab of your document will immediately open up, allowing you to make any changes you want.

When you’re ready, press the Close Header & Footer button on the ribbon or double-click anywhere in your document outside the header or footer section to return to your work.

Now you will be able to view your page number at the top of the page! As these page numbers are automated, you won’t have to manually add page numbers again. MS Word will automatically insert the page number on all pages of your document.
As you can see, it only took us a matter of seconds to insert page numbers. Now let us dive into different styles and customizations that you can add to your page numbers.
Let us explore the different positions where you can insert your page numbers!
Changing Location of Page Number
- Go to Insert
- Click on Page Number
- You can select Top of Page.
Here, you can have the page numbers on the Left, Center, or Right side at the top of the page.

or,
- You can select Bottom of Page.
Here, you can have the page numbers on the Left, Center, or Right side at the bottom of the page.


We can now explore the different formats of page numbering that are available to us.
Once you have inserted a page number in your Word document, follow the steps below to format them:
- Go to Insert
- Select Page Numbers
- Go to Format Page Numbers

- In the pop-up window, click on the Number format drop-down menu.
- Choose different formats for your page numbers such as different types of numbers, ABC or roman numerals.


You will notice that once you change the format, all the page numbers in your document change to the new format automatically.

There is another option for inserting page numbers. Let us now understand that option:
- Go to Insert
- Go to Header, and select Edit Header.

You will see that you are inside the header.

- Now you can choose where you want your page number to be. You can do that by going to the Home tab and selecting the alignment you want – Right, Left or Center.

- Now go to Insert > Page Number > Current Position.

- Here you can select different accent bars.


This is what the page number will look like!

Now that we have explored so many different options revolving around page numbers, let’s focus on chapter numbers as well.
You might even want to display your chapter number alongside your page number. Let us see how we can do that.
- Remove your Chapter 1 title.
- Go to the Home ribbon.
- Under the Multilevel List drop-down, select the last one for chapters.

- Repeat the process for all your chapters.

- Now go to Insert > Page Number > Format Page Numbers.
- Select the Include chapter number checkbox.


Now you will see that the page number is showing the chapter number first, and then the page number. The image below is the screenshot of chapter number 1 and page number 3.

You might be confused when there are two chapters on the same page, let us say chapters 1 and 2. The page number would display chapter number as 2. To avoid this, just go to the line before your new chapter and hit Ctrl + Enter. This will insert a page break and the new chapter will start from a new page.
Now your page and chapter numbers will be displayed correctly.
Simple but attractive formatting can also be added:
- Go to Insert.
- Go to Header, and select Edit Header.
- Enter the word “Chapter” before your chapter number.
This will give your document a nice aesthetic look and this new change will be added to all pages automatically.

Having covered all basics for inserting page numbers, let us see how to remove them as well.
Go to Insert > Page Number > Remove Page Numbers.

This will remove all the page numbers in the document.
If you had entered anything else in the header, such as the word “Chapter”, go to Insert > Header > Remove Header.

Hopefully, this article gives you a clear and concise introduction to inserting page numbers into your word document and exploring some of the different options present for formatting it!
Click here to download 101 Free Word Templates that you can use and customize!
You can learn more about how to use Excel by viewing our FREE Excel webinar training on Formulas, Pivot Tables, and Macros & VBA!
How to Save A Word Doc to PDF, Edit a PDF in Word, and Convert an Image with Text to Word

PDFs are a universal format for viewing documents. It has become the go-to standard for exchanging documents and information. PDFs are preferred due to their numerous advantages like:
- Displaying the exact same content, regardless of the operating system it is viewed on
- PDFs allow various types of content, such as text, images, video, audio, etc
- They are a simple mode to view and create documents
- They offer various types of security like watermarks, passwords, or signatures
- They are able to retain high quality even with compact sizes
We cover the basics for saving a Word as PDF file as well as opening an existing PDF in Microsoft Word to edit the information on the PDF. And we also have an exciting BONUS HACK at the end: How to Import a Picture with Text and Change the Picture Text using the PDF Importing function.
Watch it on YouTube and give it a thumbs-up!
MS Word documents can easily be saved as PDFs for easier information sharing, and PDFs can also be edited into word documents. Keep reading to explore these conversion methods.
There are two methods that can be used to save Word as PDF. Let’s look at each method.
Method 1
- Go to File

- Click on Export

- Click on Create PDF button

- Enter a name for your file and choose the location to save it in

- Check the file type and make sure it is in PDF format

- Click on Publish

Now you will see that your document has been saved in PDF format. This will make it easier for you to share your documents with everyone. There is another way to save a document as a PDF file.
Method 2
- Go to File
- Click on Save As

- Under the drop-down menu in Save As Type, select PDF.

This process will also save your document as a PDF.
Just as you are able to export your document as a PDF, you can similarly open up a PDF document as an MS Word file and edit it. Let us follow these steps to open and edit a PDF document in MS Word
- Go to File

- Click on Open

- Click on Browse

- From the pop-up window, browse and open the PDF document you want to edit.

- You will get a message stating that MS Word will convert the PDF into an editable Word document. Click on OK.

Now you will see that your PDF is in an editable state, with different text blocks coming in editable Text boxes. You can now easily edit your PDF.

Now let us dive into a BONUS tip!
Suppose you have an image. Now this image contains a lot of text that you may want to edit, such as a recipe image, an invitation where details need to be edited, or any other image. You can easily change these via MS Word.
Follow the steps below to know-how:
- Open a blank document in MS Word

- Go to Insert > Picture > This Device. Now search and select your image.

- Stretch the image to fit perfectly on the page. It should be big enough so that MS Word can easily recognize the text.

- Go to File > Save As and select Save As Type to be PDF.
This will save your word document containing an image as a PDF. Now follow the remaining steps:
- Go to File > Open > Browse. Search and open the PDF you just created.

- You will get a message stating that MS Word will convert the PDF into an editable Word document. Click on OK.
Now MS Word will have converted the different text blocks in the PDF into easily editable Text boxes.

Now you can edit the text that was present in your image. Make sure to remember this bonus trick. It works especially well when an image contains large chunks of text.
Hope this article was an informative one for you, and it has shown you the different things you can do with a PDF in MS Word, how to create them and how to edit them.
Click here to download 101 Free Word Templates that you can use and customize!
You can learn more about how to use Excel by viewing our FREE Excel webinar training on Formulas, Pivot Tables, and Macros & VBA!

John Michaloudis is a former accountant and finance analyst at General Electric, a Microsoft MVP since 2020, an Amazon #1 bestselling author of 4 Microsoft Excel books and teacher of Microsoft Excel & Office over at his flagship MyExcelOnline Academy Online Course.


