Borders in Excel are often used to improve readability, highlight sections, or separate data. However, sometimes you need to remove borders for a cleaner look or to reset formatting before sharing reports. Excel provides multiple ways to remove cell borders quickly, whether manually or with automation.
Key Takeaways
- You can remove borders using the Ribbon, Format Cells dialog, or keyboard shortcuts.
- The “No Border” option clears all lines applied to a cell range.
- Removing borders does not affect the underlying data or formulas.
- Conditional formatting borders must be removed separately from manual borders.
- VBA macros can remove borders in bulk across sheets or selected ranges.
Table of Contents
What is a border in Excel
A border in Excel is a line applied to the edges of a cell or range to make data more organized or visually distinct. Borders can be applied in different colors, line styles, and thicknesses. While useful, too many borders can clutter a worksheet, which is why knowing how to remove them is essential.
How to remove borders in Excel
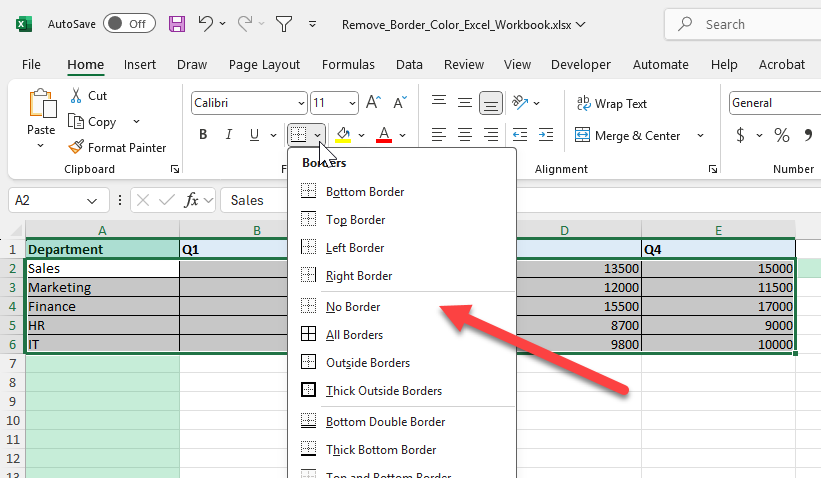
1. Ribbon method:
Select the range with borders.
On the Ribbon, go to Home > Borders > No Border.
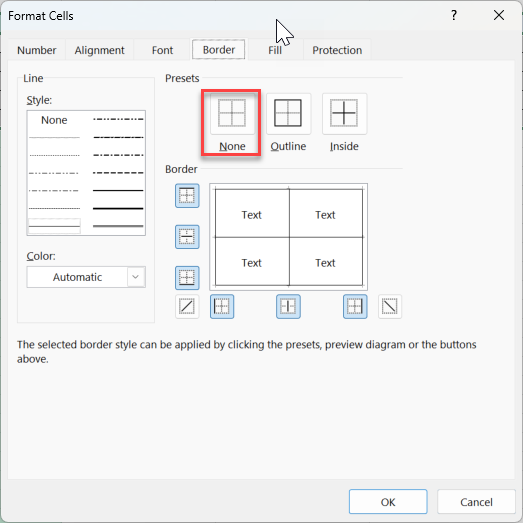
2. Format Cells dialog:
Right-click and choose Format Cells.
Go to the Border tab.
Click None and press OK.
3. Keyboard shortcut:
Alt + H + B + NThis removes borders from the selected range instantly.

Common mistakes and tips
Only selecting part of the range: Borders on unselected cells remain. Always highlight the full range.
Confusing gridlines with borders: Default Excel gridlines are not borders. Removing borders will not remove gridlines.
Conditional formatting: Borders added via conditional formatting must be removed through the Conditional Formatting > Manage Rules menu.
Hidden borders in templates: Pre-formatted templates may reapply borders when copied. Clear formats if needed using Home > Clear > Clear Formats.
Bonus tips and advanced scenarios
Remove borders from entire sheet: Press Ctrl + A to select all, then choose No Border to reset formatting across the sheet.
Use VBA to automate border removal: Run a macro like:
Sub RemoveBordersExample()
    Selection.Borders.LineStyle = xlNone
End Sub
Apply borders selectively: Instead of removing all, use the Format Cells dialog to clear only top or bottom borders.
Power Query cleanup: When importing large datasets, use Power Query which ignores Excel cell borders, ensuring clean raw tables.
Use cases
Report formatting. Remove borders for a minimalist look in dashboards and presentations.
Why it matters: Dashboards often contain charts, KPIs, and summary tables. Too many borders can distract the viewer and make the design look cluttered.
How to do it: Select the relevant tables or cells, then use Home > Borders > No Border. Leave only the key summary cells highlighted with light formatting if needed.
Practical add-on: Apply shading or conditional formatting instead of borders to separate data sections in a modern design style.
Benefit: Makes dashboards easier to read and presentations more professional by emphasizing content rather than formatting.
Data cleanup. Clear borders before exporting data to other systems that do not recognize Excel formatting.
Why it matters: When exporting Excel data to databases, text files, or other software, borders are ignored and can sometimes cause confusion about what formatting was important.
How to do it: Press Ctrl + A to select all data, then choose No Border. If required, also apply Clear Formats for a complete reset.
Practical add-on: Save a “clean” version of the workbook without formatting for system integration while keeping a formatted copy for internal use.
Benefit: Ensures consistency when importing data into SQL, Power BI, or other platforms without carrying over unnecessary formatting.
Template preparation. Strip borders so templates can be reused with fresh formatting.
Why it matters: Templates often need to be used multiple times with different datasets. Old borders can confuse users or interfere with new formatting standards.
How to do it: Clear borders from the base template before saving it. Keep formulas and structure intact but avoid pre-applied cell lines.
Practical add-on: Apply borders only to specific entry areas (such as input boxes) using light dotted lines for guidance.
Benefit: Provides a clean, flexible template that can be customized without manually removing outdated formatting each time.
Shared workbooks. Standardize appearance by removing inconsistent border colors applied by different users.
Why it matters: When multiple team members work on the same workbook, they may apply borders inconsistently, leading to uneven formatting.
How to do it: Select the full sheet, remove borders, and then reapply a consistent style only where needed (such as totals or key figures).
Practical add-on: Create a macro that clears all borders and reapplies a company-approved border style with one click.
Benefit: Improves collaboration by ensuring that reports look consistent and professional across the team.
Printing optimization. Borders may clutter printed reports. Removing them makes hard copies cleaner.
Why it matters: Overuse of borders makes printed pages look crowded and wastes ink. In many cases, gridlines or spacing are enough to guide the reader’s eye.
How to do it: Before printing, select all cells and clear borders. Use Page Layout > Gridlines or subtle shading to maintain readability.
Practical add-on: Use Print Preview to test the difference between bordered and borderless versions. Add headers and footers for clarity instead of relying on borders.
Benefit: Produces reports that are easier to read on paper, conserve ink, and have a professional, uncluttered layout.
FAQ
1. What is the difference between borders and gridlines?
Gridlines are default background lines that appear on all worksheets. Borders are manually applied formatting. Removing borders does not affect gridlines.
2. Can I remove only specific sides of a border?
Yes. In the Format Cells dialog, deselect only the sides you want to remove.
3. Will removing borders delete my data?
No. Borders are purely formatting. Data and formulas remain intact.
4. How do I remove borders applied by conditional formatting?
Go to Conditional Formatting > Manage Rules, edit the rule, and remove the border setting.
5. Can VBA remove borders from the entire workbook?
Yes. VBA can loop through all worksheets and clear borders for all ranges in one execution.

John Michaloudis is a former accountant and finance analyst at General Electric, a Microsoft MVP since 2020, an Amazon #1 bestselling author of 4 Microsoft Excel books and teacher of Microsoft Excel & Office over at his flagship MyExcelOnline Academy Online Course.


