Whenever I work with spreadsheets, there’s no escaping the fact that I have to work with a lot of ranges.
Some of these ranges I have to reuse time and time again to create different calculations!
Good thing there are Named Ranges in Excel!
By using a Named Range, you can make your formulas much easier to understand and maintain.
You can define a name for a cell range, function, constant, or table.
Let us work with the following table below. We want to populate the Euro Amounts and the Sum of the USD columns:
Let us go over how to do this in the tutorial below:
STEP 1: Let us create our first Named Range.
Highlight the USD Amounts and type in the Name Box a name: Amounts
Make sure that there are no spaces. Press Enter.
Let us do the same to our Euro Exchange Rate. Highlight the exchange rate, and type in the Name Box a name: EuroRate
Press Enter.
STEP 2: Let us see our Named Ranges in action!
To calculate the Euro Amount column, type in: =A9 * EuroRate.
This will use our EuroRate Named Range!
Drag your formula below to the rest of the column to get the amounts calculated:
STEP 3: To calculate the sum of the Sum of USD column, type in: =SUM(Amounts).
This will use our Amounts Named Range!
And now you have your total!
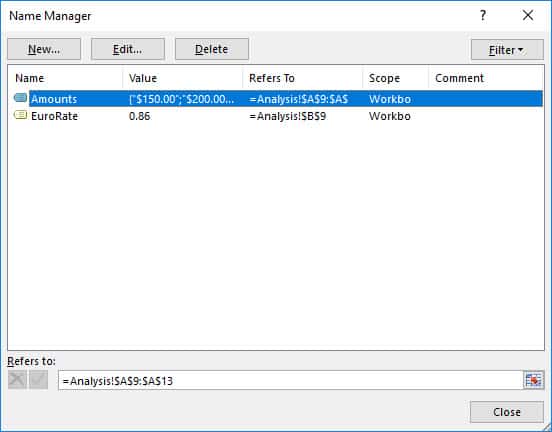
STEP 4: If you want to check all the Named Ranges you created, go to Formulas > Defined Names > Name Manager
You can edit your Named Ranges in here or delete them as well.
How to Create a Named Range in Excel
Helpful Resource:

Bryan
Bryan Hong is an IT Software Developer for more than 10 years and has the following certifications: Microsoft Certified Professional Developer (MCPD): Web Developer, Microsoft Certified Technology Specialist (MCTS): Windows Applications, Microsoft Certified Systems Engineer (MCSE) and Microsoft Certified Systems Administrator (MCSA).
He is also an Amazon #1 bestselling author of 4 Microsoft Excel books and a teacher of Microsoft Excel & Office at the MyExecelOnline Academy Online Course.


