
Key Takeaways:
- Effortless Date Manipulation: EDATE lets you swiftly navigate through time by adding or subtracting months from a given date, simplifying date-related tasks in Excel.
- Precision Parameters: Mastering EDATE involves understanding its parameters: Start_Date and Months. By inputting these accurately, you ensure precise date calculations every time.
- Integration Potential: Combine EDATE with other Excel functions like IF or TODAY to create dynamic formulas tailored to your specific needs, enhancing your data analysis capabilities.
- Advanced Functionality: EDATE shines even brighter when nested with other functions like EOMONTH or WORKDAY, offering advanced solutions to complex date-related challenges.
Table of Contents
Introduction to EDATE Formula in Excel
What is the EDATE Formula?
The EDATE Function is an incredibly handy tool within Excel that simplifies your date-related calculations. This function effortlessly adds a specified number of months to any given date, providing you with a new date, known as a serial date.
Whether you are looking at the past or the future, EDATE is your reliable time machine, instantly taking any date forward or backward by the month count you input.
The Importance of Mastering EDATE
Mastering the EDATE function can significantly enhance your productivity when working with dates in Excel. Whether you’re planning projects, tracking deadlines, or managing monthly reports, EDATE streamlines the process, saving you from manual counting and the risk of errors.
By leveraging EDATE, you gain the capability to automate the handling of dates, ensuring consistent and accurate calculations, which is invaluable in any data management task.
Breaking Down the EDATE Syntax
Parameters for Precision
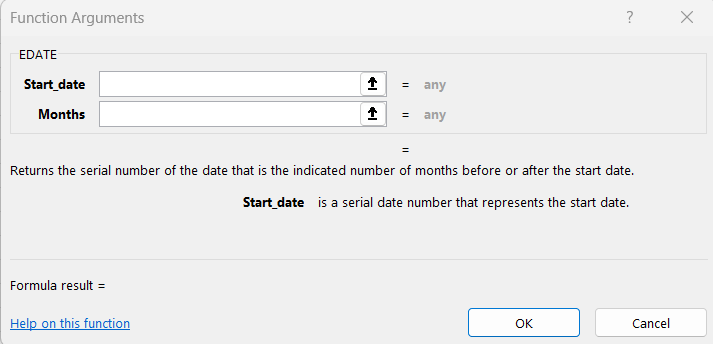
When working with the EDATE function, precision is key, and this is achieved through its parameters. EDATE requires two pieces of critical information:
- Start_Date: The reference date you begin with, in any standard Excel date format.
- Months: An integer representing the number of months you wish to add (positive) or subtract (negative) from the Start_Date.
By precisely defining these parameters, EDATE can reliably calculate the future or past date with exacting accuracy.
Understand Return Values and Data Types
In Excel, when you use the EDATE function and input the correct parameters, the return value you’ll get is a serial number representing a date. Excel stores dates as serial numbers for easier calculations. The number 1 represents January 1, 1900, and increases by 1 for each subsequent day.
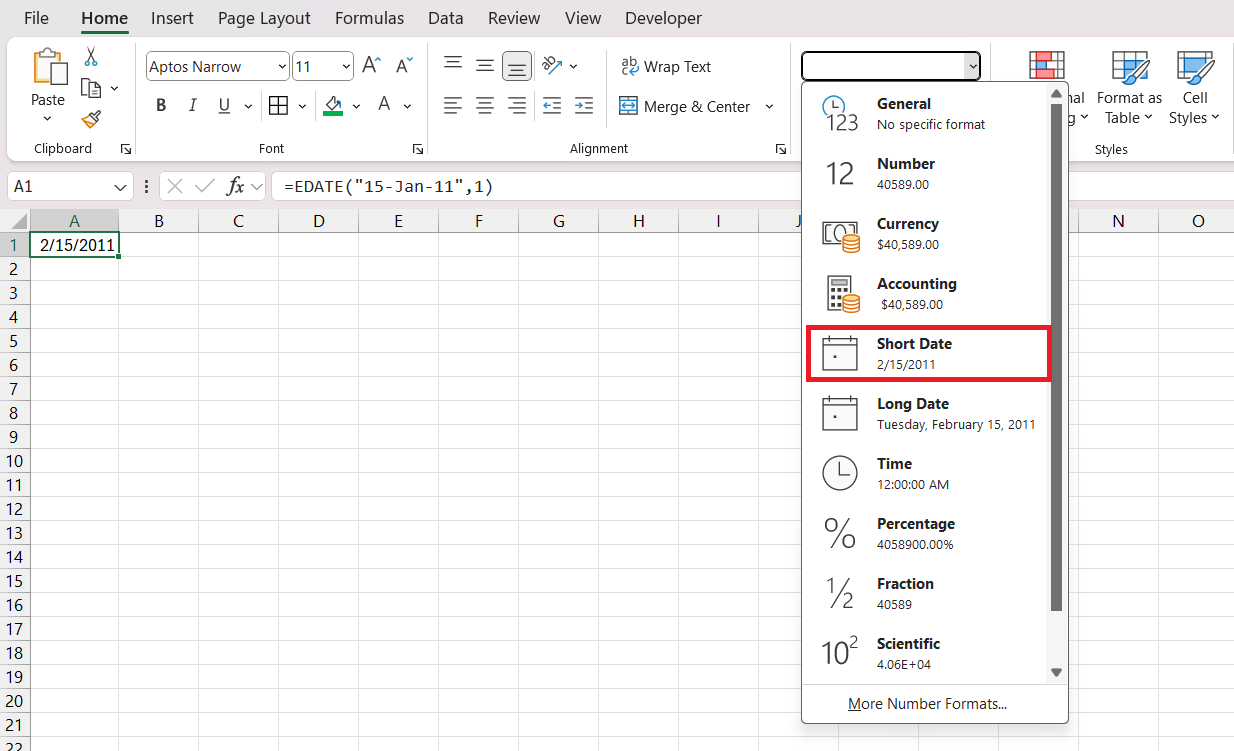
It’s critical to format the cell with the returned serial number as a date to make the result human-readable and maintain the consistency of your data types throughout your spreadsheet.
To format the date, select the cell and go to Home > Number Format drop-down > Short Date.
Practical Uses of EDATE in Excel
Date Calculation Examples
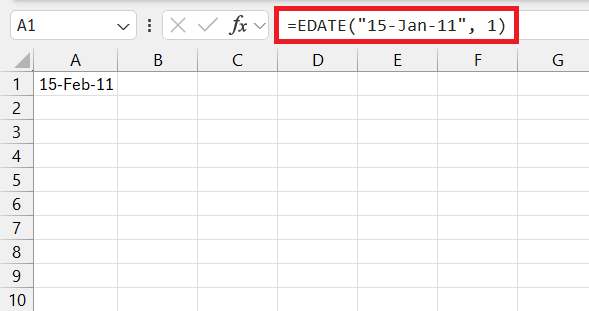
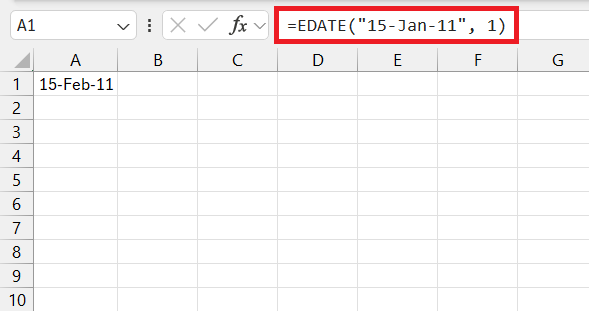
Date calculations using EDATE are straightforward and versatile. For instance, if you want to know the date one month from January 15, 2011, you’d use =EDATE("15-Jan-11", 1) and get “15-Feb-11”.
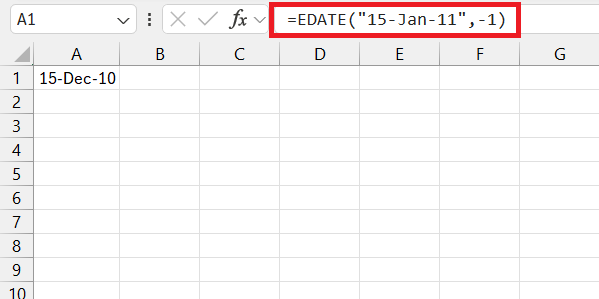
Similarly, if you want to go back in time, =EDATE("15-Jan-11", -1) would return “15-Dec-10”.
This function can be scaled to any number of months, like calculating two months ahead with =EDATE("15-Jan-11", 2) to get “15-Mar-11”. Such examples demonstrate how simple and powerful EDATE is for planning ahead or reviewing past dates.
Integrating EDATE with Other Excel Functions
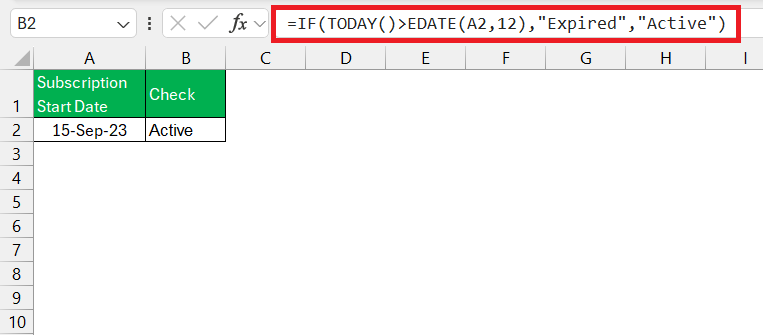
Integrating EDATE with other Excel functions can unleash even greater potential. By coupling EDATE with functions like IF, or TODAY, you create dynamic formulas. For instance, use =IF(TODAY()>EDATE(A2,12),"Expired","Active") to check if a yearly subscription is still valid.
These integrations help you build comprehensive and responsive Excel models tailored to your data analysis needs.
Advanced Scenarios: Combining EDATE with Nested Functions
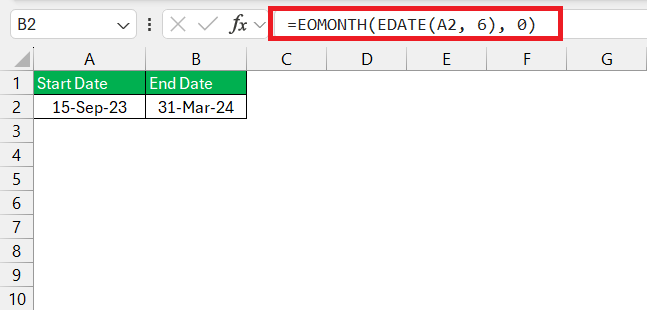
In advanced scenarios, EDATE becomes even more powerful when nested with other functions like EOMONTH. For example, imagine you want to find the last day of the month, six months after the date in cell A2. Use =EOMONTH(EDATE(A2, 6), 0) to get that date.
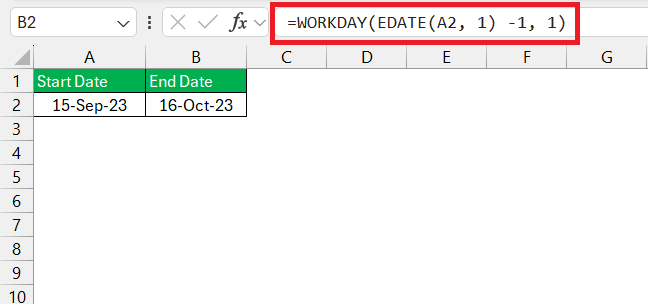
Or, if you need to calculate due dates excluding weekends, you can nest EDATE within WORKDAY: =WORKDAY(EDATE(A2, 1) -1, 1).
These examples exemplify the versatility and depth that can be achieved by combining EDATE with nested functions, turning complex challenges into simple formulae.
Common EDATE Mistakes and How to Avoid Them
Troubleshooting EDATE Errors
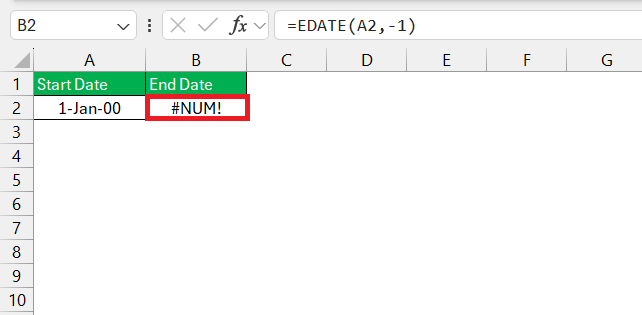
Troubleshooting EDATE errors primarily revolves around ensuring that the arguments provided are valid. If you encounter a #NUM! error, it’s likely because your start_date argument is outside the acceptable range of dates that Excel can handle.
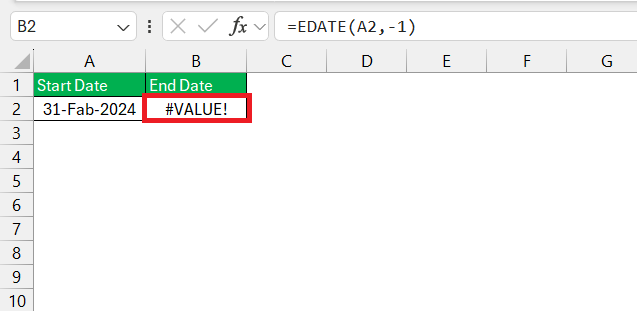
The #VALUE! error usually means your start_date isn’t recognized as a valid date by Excel, or the months argument isn’t numeric.
Double-check your inputs, confirm you’re using a valid date format, and ensure that your months argument is an integer for a smooth EDATE experience.
Tips to Ensure Accurate Date Calculations
To ensure accurate date calculations with EDATE, follow these tips:
- Validate Date Formats: Ensure your dates are in a recognized Excel format before applying EDATE.
- Use Data Validation: Apply data validation rules for cells with dates to prevent incorrect entries.
- Be Mindful of Leap Years: Remember that February calculations in leap years may affect results.
- Test Edge Cases: Check how your formula behaves at month-ends or year-ends to avoid surprises.
Enhance Your Skills with Real-Life EDATE Examples
Setting up a Financial Forecast Model
Setting up a financial forecast model with EDATE allows you to project future financial dates with precision. Start by defining your initial financial event date, then use EDATE to chart recurring financial events like quarterly reports or payment due dates. For projecting one quarter ahead, =EDATE(start_date, 3) will efficiently calculate the date three months forward. This organized approach streamlines forecasting workflows and enhances predictability in your financial models.
Managing Project Timelines with EDATE
Managing project timelines becomes a breeze with EDATE. For project managers, this function can automatically adjust milestone dates as timelines shift. For instance, if your project start date is in cell A2 and you have a milestone set for 6 months later, input =EDATE(A2, 6) in the milestone’s date cell. As the start date changes, your milestones adjust accordingly, ensuring your project plan remains up-to-date and aligned with your schedule.
FAQs on Excel’s EDATE Function
How to use EDATE in Excel?
To use EDATE in Excel, input =EDATE(start_date, months) into a cell, where start_date is the date you want to calculate from, and months is the number of months to add (positive number) or subtract (negative number) from the start date. After entering the function, press Enter to get the new calculated date. Ensure your starting date is in a date format recognized by Excel for the function to work correctly.
How Do I Add or Subtract Months from a Given Date Using EDATE?
To add months to a date in Excel using EDATE, type =EDATE(start_date, number_of_months) where number_of_months is a positive integer. To subtract months, make number_of_months a negative integer. For example, =EDATE("1/15/2023", 3) adds three months, giving you “4/15/2023”, and =EDATE("1/15/2023", -3) subtracts three months, giving you “10/15/2022”.
Can EDATE Be Used to Calculate Expiry Dates and Deadlines?
Yes, EDATE is ideal for calculating expiry dates and deadlines. Simply input the issue or start date in a cell and add the period of validity using EDATE. For instance, =EDATE(issue_date, 12) would give you the expiry date a year from the issue date. This function ensures you track and manage deadlines efficiently with automated, clear, and accurate outcomes.
What Should I Do If EDATE Returns an Error?
If EDATE returns an error, first check the start_date for a valid Excel date format. If the start_date is correct, verify that the months argument is a numeric value without decimals. Errors like #NUM! suggest an argument is outside Excel’s date range; a #VALUE! error indicates non-numeric arguments. Correcting these inputs typically resolves the error.
What is the difference between Edate and Eomonth?
The difference between EDATE and EOMONTH is in the specifics of the date they return. EDATE gives you a date exactly a number of months away from the start date, preserving the day number. EOMONTH, however, provides the last day of the month, a specific number of months away. So, whereas EDATE maintains the day of the month, EOMONTH adjusts it to the month’s end.
John Michaloudis is a former accountant and finance analyst at General Electric, a Microsoft MVP since 2020, an Amazon #1 bestselling author of 4 Microsoft Excel books and teacher of Microsoft Excel & Office over at his flagship MyExcelOnline Academy Online Course.

