This article serves as a guide to leveraging Microsoft Excel‘s date functions for efficient data management, scheduling, and analysis. It illuminates the process of performing date calculations, from basic arithmetic to handling weekends and holidays, and delves into advanced strategies to add and subtract dates in Excel.
Key Takeaways
- Utilize DATE and WORKDAY functions: They are essential for adding days to dates and navigating around weekends and holidays.
- DATEDIF is a hidden gem: It allows for precise differences between dates, offering flexibility with a range of time units.
- EDATE for monthly adjustments: It’s invaluable for adding or subtracting months, streamlining financial planning, or subscription management.
- Custom formats enhance clarity: Excel’s ability to display dates in custom formats can make data more accessible and easier to understand.
Table of Contents
Unlocking the Mysteries of Date Arithmetic in Excel
The Role of Date Arithmetic in Data Management
Date arithmetic is your key to unlocking efficiencies in managing timelines, scheduling, and historical data analysis. Imagine effortlessly calculating the time gap between two events or pushing project deadlines forward with precision. That’s the potent convenience Excel’s date functions offer you.
Preparing Your Spreadsheet for Date Calculations
Before delving into the intricacies of date calculations, setting up your Excel spreadsheet correctly is crucial. It’s like laying down a solid foundation before constructing a building. Here’s what you need to prep:
- A column for your original dates: Whether these are due dates, event days, or initiation dates, have them lined up neatly in a column, properly formatted to display dates.
- A column for the date adjustments: This will hold the magic numbers – the days or months you wish to add or subtract.
- A column for the new dates: Reserve a space where Excel will unveil the results of your date wizardry.
Ensure your date columns are formatted as dates to circumvent potential calculation errors. Right-click on each cell, choose “Format Cells”, select “Date” or “Custom” under the “Number” tab, and pick your preferred date style. This simple step is like giving Excel the secret handshake – and now you’re both in cahoots.
Action Tip: Always double-check your dates’ formatting – it’s the bedrock of reliable and error-free calculations!
Fundamental Techniques for Adding Days to Dates
Utilizing Excel’s DATE Function
The DATE function is your trusty sidekick when you need to perform basic date arithmetic in Excel. It’s simple but incredibly versatile, allowing you to create dates with unparalleled ease. Here’s how you can benefit from it:
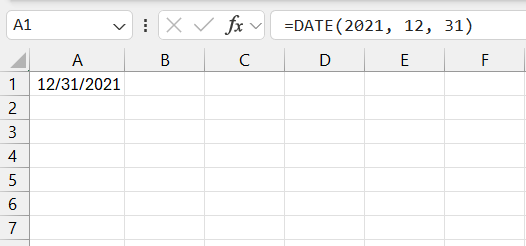
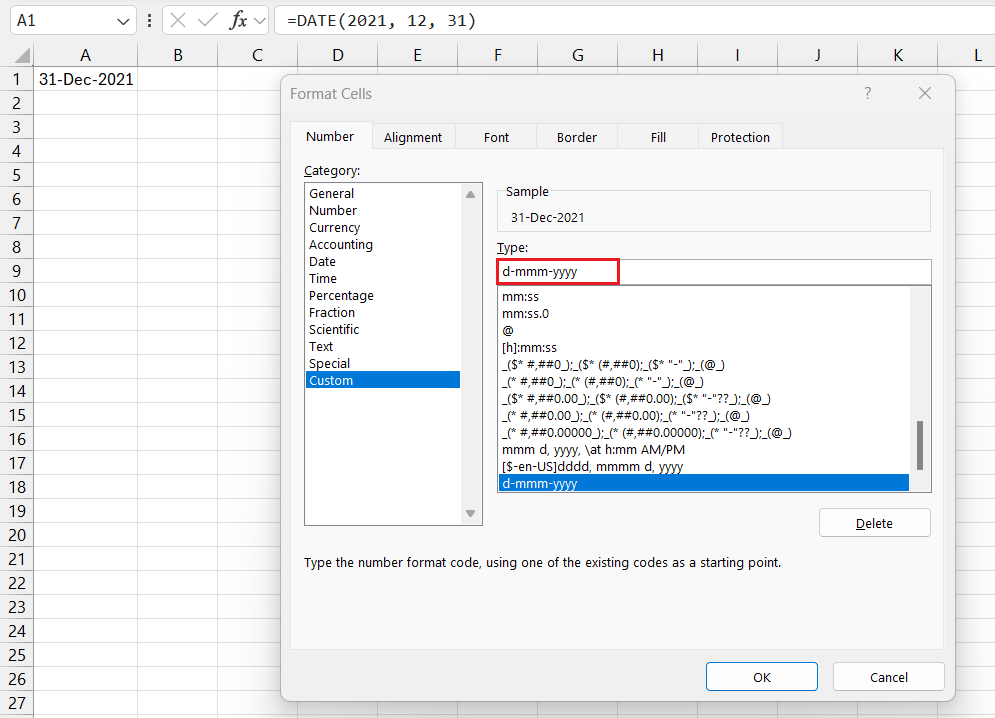
- Custom Date Creation: Input year, month, and day in the DATE function to craft precise dates. Use this formula to construct the last day of 2021.
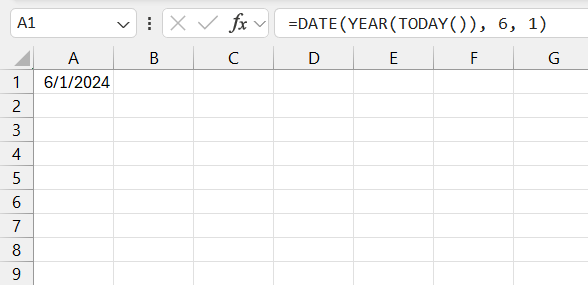
- Current Year Reference: Combine DATE with TODAY to get a date within the current year. Use this formula to get June 1st of this year.
Remember, Excel stores dates as serial numbers, so they may appear confusing initially. Applying the correct date format to the formula cell is like fitting a lens on a camera – it brings clarity to what you’re looking at.
Action Tip: With the DATE function, step into the realm of effortless date creation and modification, crafting the timeline you need with just a few keystrokes.
Handling Weekends and Holidays with WORKDAY
Mastering WORKDAY in Excel means you can navigate around weekends and holidays with finesse when adding days to dates. Here’s how you harness the power of WORKDAY to keep your scheduling on track:
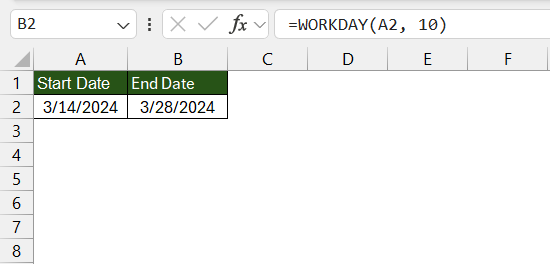
- Contouring Around Weekends: The WORKDAY function automatically skips over Saturdays and Sundays, making it ideal for work-related date calculations. To add 10 business days to a date in cell A2.
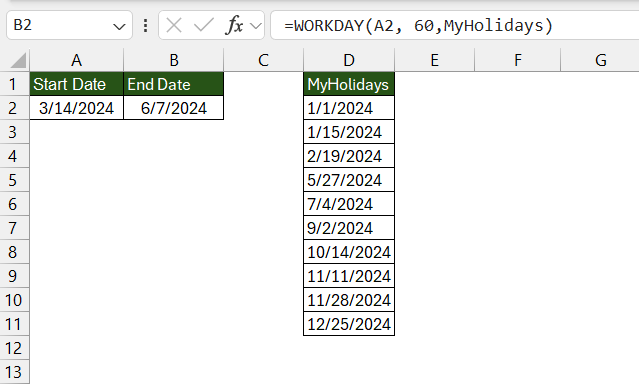
- Incorporating Holidays: Have a list of holidays? Include them in your WORKDAY formula to ensure your date calculations don’t land on these special days.
=WORKDAY(A2, 60, MyHolidays)where MyHolidays is a range name containing holiday dates.
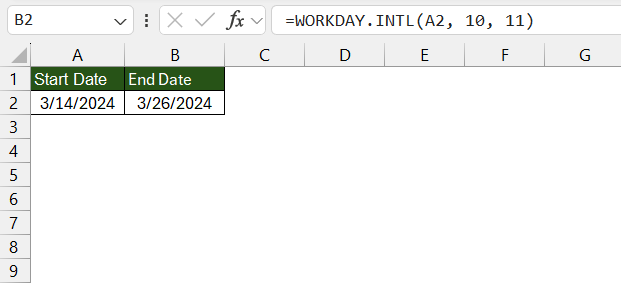
And if your weekends are not the typical Saturday and Sunday, use WORKDAY.INTL to customize weekends. =WORKDAY.INTL(A2, 10, 11) for a schedule where the weekend falls on Friday and Saturday.
Action Tip: Gather your list of holidays before you begin and use WORKDAY to sail past weekends and holidays in your date calculations. And remember, for Excel 2007, stick with the basic WORKDAY syntax minus the INTL.
Advanced Strategies for Subtracting Dates
Decoding Differences with DATEDIF
Embark on a journey through time with the hidden gem of Excel – the DATEDIF function. They might not find it listed among Excel’s functions, but it’s a powerful tool that can help them decode the differences between two dates with precision and flexibility. Here’s how they can employ DATEDIF in their analyses:
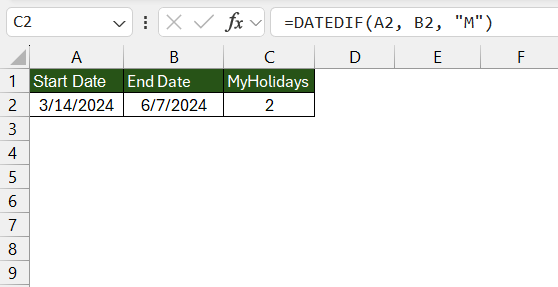
- Range of Time Units: The DATEDIF function breaks down time spans into years (“Y”), months (“M”), or days (“D”), allowing targeted calculations to fit their specific needs.
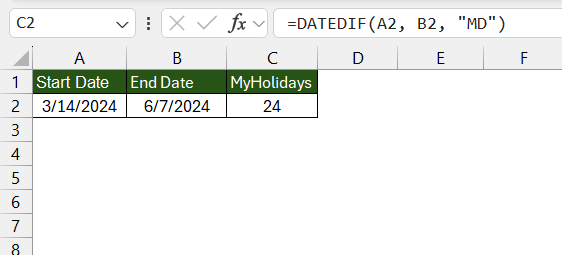
- Complex Date Differences: For more nuanced intervals, one can use “MD” for day differences ignoring months and years, “YM” for month differences ignoring years, and “YD” for day differences ignoring years.
Understanding how to skillfully employ each parameter of DATEDIF can transform the way one manages dated information, allowing for analyses and reporting that were previously labor-intensive or even impossible.
Action Tip: Whether they want to track an employee’s service duration or the time until a project phase is due, DATEDIF serves as their temporal Swiss Army knife, ready for the task at hand.
Subtracting Specific Date Parts like Months and Years
To customize a moment in time, you don’t have to settle for just adding or subtracting days in Excel. One can shape their dates down to the month and the year. Here’s your guide to fine-tuning your dates with precision:
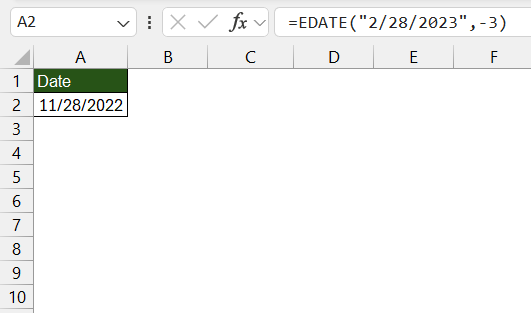
- Subtracting Months: Using the EDATE function, you can easily shift your dates back and forth by months. Simply include a negative number to subtract.
EDATE("2/28/23",-3)winding back the date by 3 months to “11/28/22”.
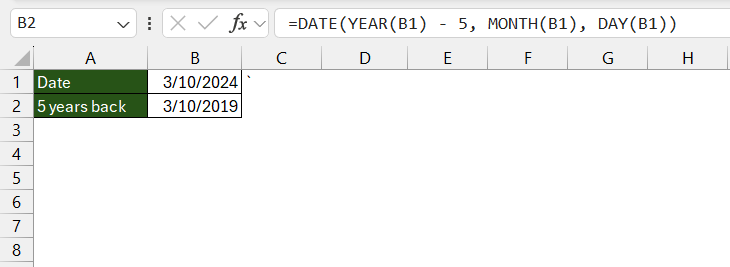
- Subtracting Years: Want to leap across years? The DATE function comes in handy again. Subtract years from a date while keeping the months and days consistent.
=DATE(YEAR(B1) - 5, MONTH(B1), DAY(B1))subtracts five years.
Keep in mind that subtraction can lead to past dates, which will appear perfectly normal in Excel. Time travel in spreadsheets, anyone?
Action Tip: Begin with the end in mind: If they need to find the end date of a warranty or age of an asset, decipher with the DATE function; to roll back on fiscal periods, EDATE will be their tool of choice. Remember, the key to subtraction is a negative number!
Dynamic Date Operations: Adding and Subtracting Months or Years
Monthly Adjustments with EDATE Function
The EDATE function is like having a time machine at your fingertips in Excel, letting you leap from month to month with ease. Whether you’re forecasting future dates or rolling back the calendar, here’s how to harness EDATE:
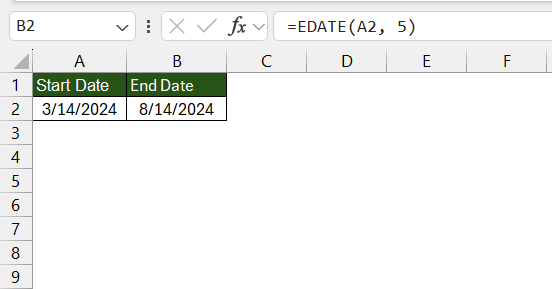
- Forward into the Future: Add a specific number of months to date by entering a positive number as the second argument.
=EDATE(A2, 5)advances the date in A2 by 5 months.
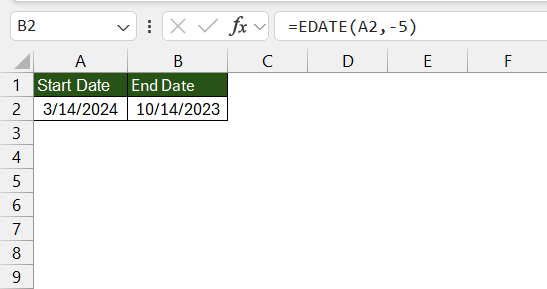
- Rewind to the Past: To subtract months, simply input a negative number instead. It’s that straightforward.
=EDATE(A2, -5)dials the date in A2 back by 5 months.
EDATE provides them with the flexibility of adjusting dates over monthly cycles, indispensable for financial plans, subscription models, or any scenario demanding periodic date shifts.
Action Tip: When they need to adjust dates by months, think EDATE. Positive numbers will propel their dates forward, negative values will reverse them. Expand productivity by avoiding manual counting and potential errors, especially with recurring tasks like monthly reports or payment schedules.
Yearly Insights with YEARFRAC and Other Functions
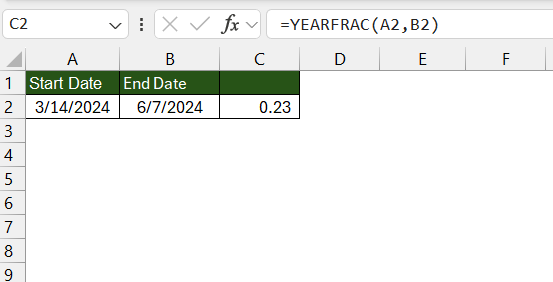
For those times when you need a nuanced grasp of time’s passage through the years, Excel’s YEARFRAC function is just what you need. Understanding the fraction of a year represented by a specific span of days is surprisingly handy. For example, for financial calculations like interest accrual or prorations, YEARFRAC is their analysis ally. Here’s a peek into its potential:
- Calculating Year Fractions: Want to determine how much of a year a certain period covers? The YEARFRAC function shines bright. Input two dates and it spits out the fraction of the year they represent.
=YEARFRAC(startDate, endDate).
Action Tip: Unlock new clarity by using YEARFRAC to convert periods into fractional years for pro-rata or interest calculations. For simpler year-specific adjustments, YEAR with some subtraction is all they need. With these functions, yearly insights are at their command.
Real-World Examples: Practical Applications of Date Arithmetic
Project Deadlines and Timeline Management
Project deadlines and timeline management in Excel are made easier with the application of date arithmetic operations. Here’s how you can stay on top of any project using Excel’s date functions:
- Forecasting Project Deadlines: Calculate future deadlines by adding the expected number of days to a start date using the WORKDAY function to respect weekends and holidays.
- Adjusting Existing Deadlines: If a schedule needs flexibility, use simple addition or the EDATE function for a monthly adjustment.
Think of Excel functions as their project management assistants—they help keep timelines flexible yet under control, ensuring that deadlines are realistic and manageable.
Action Tip: For vivid clarity, pair these functions with conditional formatting to visually highlight upcoming, missed, or completed deadlines. With these tools, they’ll never miss a beat in project management and deadline tracking.
Age Calculations and Anniversary Tracking
Excel isn’t just about crunching budget numbers – it’s also a reminiscence wizard, helping one calculate ages down to the exact day, and keeping track of anniversaries, both personal and professional. Here’s how they can turn back time:
- Calculating Exact Age: The DATEDIF function is their go-to for age calculations. It can provide the age in years, months, and days, distinguishing leap years automatically.
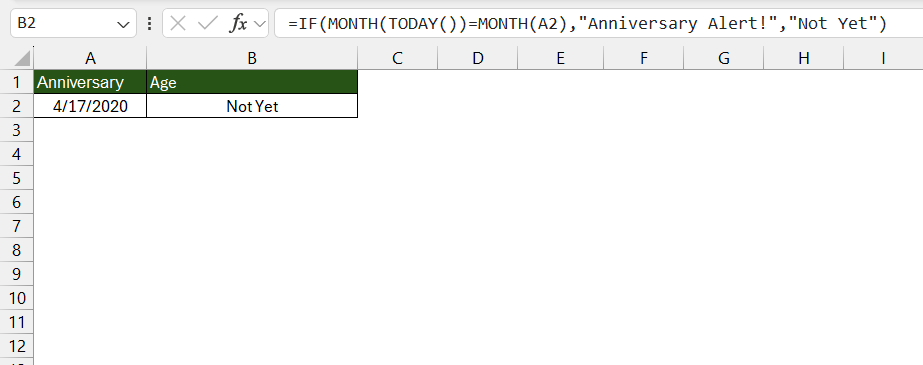
- Tracking Anniversaries: Whether it’s work anniversaries or special events, Excel helps them stay on top of these milestones. One can use DATE alongside TODAY to create reminders or notifications ahead of time.
Let Excel be their partner in making sure they acknowledge and celebrate every important date. With a clever formula, they can be the hero who never forgets!
Action Tip: To make their life even easier, consider setting up conditional formatting rules that automatically highlight upcoming birthdays or work anniversaries in their spreadsheet. One can also create a dynamic list using filters to quickly see what’s coming up next. It’s like setting a digital string around their finger – they won’t forget these important dates.
Excel Magnifying Glass: Formatting the Results
Custom Date Formats for Clarity
Excel is a chameleon when it comes to displaying dates, offering a range of custom date formats to bring clarity and personalization to their spreadsheets. To reveal the perfect date presentation:
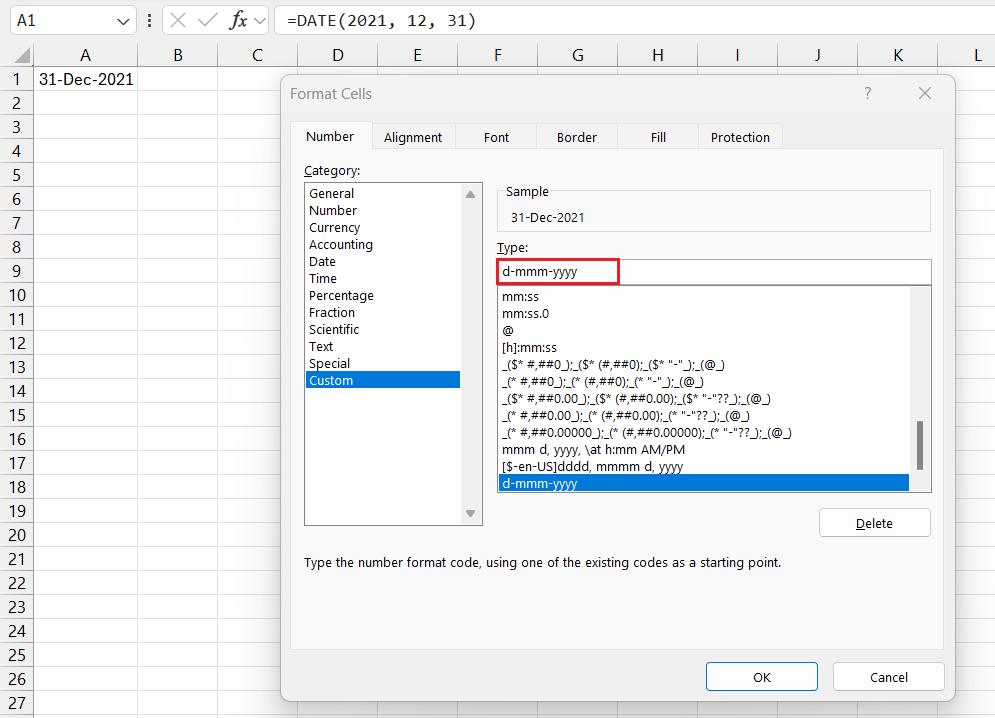
- Applying Custom Formats: Guide Excel into showing dates exactly how they want them by going to “Format Cells” (CTRL + 1) and navigating to “Custom”. From here, they can define their own date format, such as “dd-mmm-yyyy”.
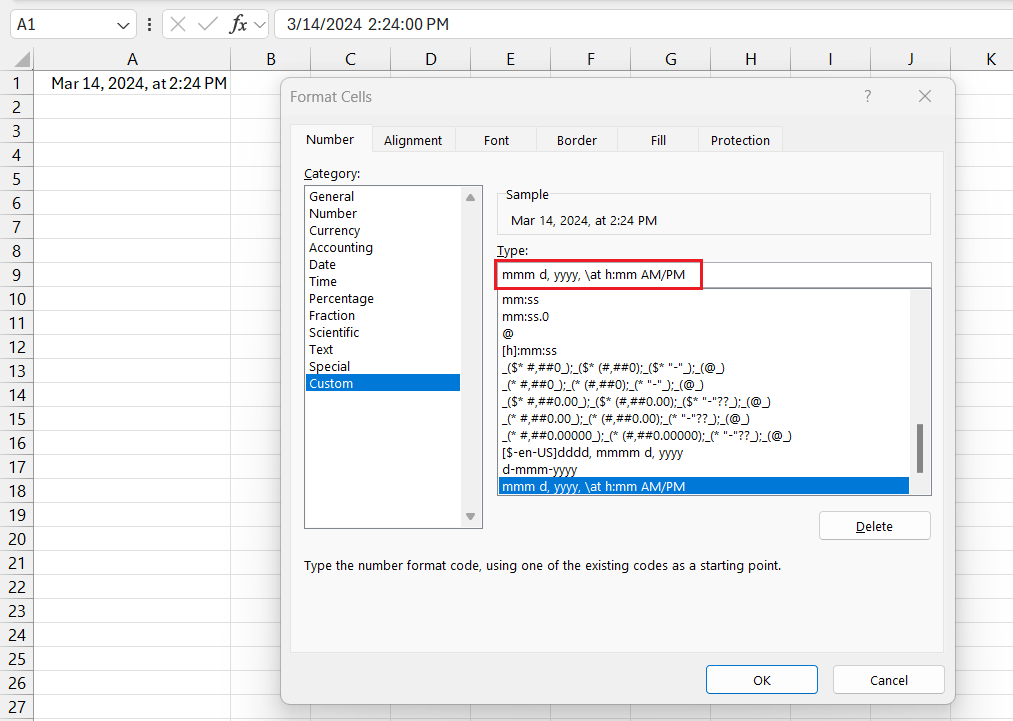
- Creating a User-Friendly Display: Suppose they want the date and time to appear less robotic and more conversational. Custom formats like “mmm d, yyyy, at h:mm AM/PM” give their data a friendly touch.
Excel’s versatility in display formats means you can align the date presentation with the conventions of their region or the preferences of their audience.
Action Tip: To track time across different regions, utilize multiple columns with custom formats reflecting each time zone. This approach serves as a universal translator for dates, ensuring clear communication regardless of geographical boundaries.
FAQ on Mastering Date Arithmetic in Excel
How do I calculate the number of weekdays between two dates?
To calculate the number of weekdays between two dates, use the NETWORKDAYS function. Input the start date and end date, and it will exclude weekends:
=NETWORKDAYS(StartDate, EndDate)
This formula will return the count of weekdays within the range they specify. They can also exclude holidays by adding a list of dates as a third argument if needed.
Can I use date arithmetic to determine someone’s age in Excel?
Yes, you can use the DATEDIF function to calculate someone’s age in Excel:
=DATEDIF(BirthDate, TODAY(), "Y")
This formula will give you the age in years, based on the person’s birth date up to the current date.
How do I calculate the difference between two dates in Excel?
To calculate the difference between two dates in Excel, use the DATEDIF function or simple subtraction:
=DATEDIF(StartDate, EndDate, "D") gives you the difference in days.
Or for a simpler method, just subtract the start date from the end date:
=EndDate - StartDate
This will also return the difference in total days between the two dates.
How do you add and subtract in Excel at the same time?
To add and subtract time in the same formula in Excel, include both positive and negative time values using the TIME function:
=InitialTime + TIME(HoursToAdd, MinutesToAdd, -SecondsToSubtract)
This will add hours and minutes while simultaneously subtracting seconds from the initial time.
How do I autofill dates in excel?
To autofill dates in Excel, enter a starting date, then use the fill handle:
- Drag the fill handle in the corner of the cell across the desired range.
- Release the handle and choose either “Fill Days”, “Fill Weekdays”, “Fill Months”, or “Fill Years” to autofill the selection as needed.
This feature auto-populates dates in the chosen pattern across the selected cells.
John Michaloudis is a former accountant and finance analyst at General Electric, a Microsoft MVP since 2020, an Amazon #1 bestselling author of 4 Microsoft Excel books and teacher of Microsoft Excel & Office over at his flagship MyExcelOnline Academy Online Course.

