Imagine having a well-oiled machine at your desk that keeps your correspondence flawless, your calendar immaculate, and your task list impeccably organized. That’s the magic of a smooth-running Outlook 365 – it’s your virtual assistant, helping you to stay on top of your daily work commitments with ease. When it malfunctions, your workflow hits a snag, resulting in missed deadlines and stress. Knowing how to repair Outlook 365 on Windows 11 is paramount.
Learn about Excel with our Free Microsoft Excel Online Course!
Key Takeaways
- Try simple fixes first for Outlook 365 issues by restarting your computer and the application, or running Outlook in Safe Mode, to address common errors without the need for deeper troubleshooting.
- Utilize built-in repair tools by repairing your Microsoft Office installation through the Control Panel’s ‘Change’ option, opting for a Quick Repair, or using Microsoft Fix It tool for a more automated solution to resolve corrupt files.
- If basic troubleshooting doesn’t work, consider more advanced options like reinstalling Microsoft Office 365 or adjusting firewall settings to ensure Outlook has internet access, or turn to Microsoft Support and Recovery Assistant (SaRA) for dedicated help.
Common Issues with Outlook 365 That Require Repair
Sometimes Outlook 365 can feel like it’s playing hard to get. You may find yourself staring at an error message instead of your inbox, or you might spend your time coaxing an unresponsive navigation pane. Common culprits include the notorious ‘Failed to launch’ error, syncing issues that leave your emails stranded, or profiles that seem corrupt beyond recognition. Not to mention outdated versions of Windows or Outlook that refuse to play nice with your current setup. Let’s not forget those pesky .ost or .pst files that, when corrupted, turn your Outlook into a house of digital cards.
Table of Contents
First Steps Before Repairing Outlook 365
Verify the Version of Outlook You’re Using
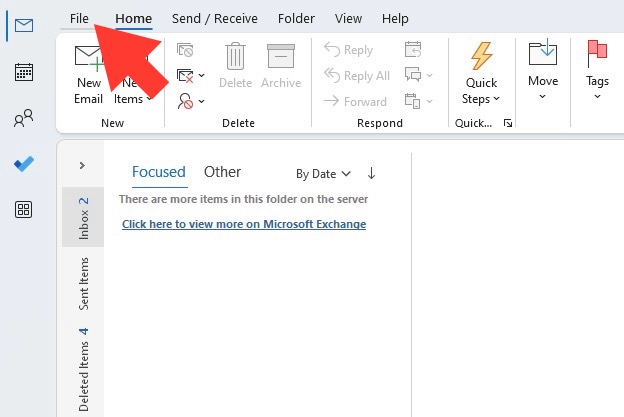
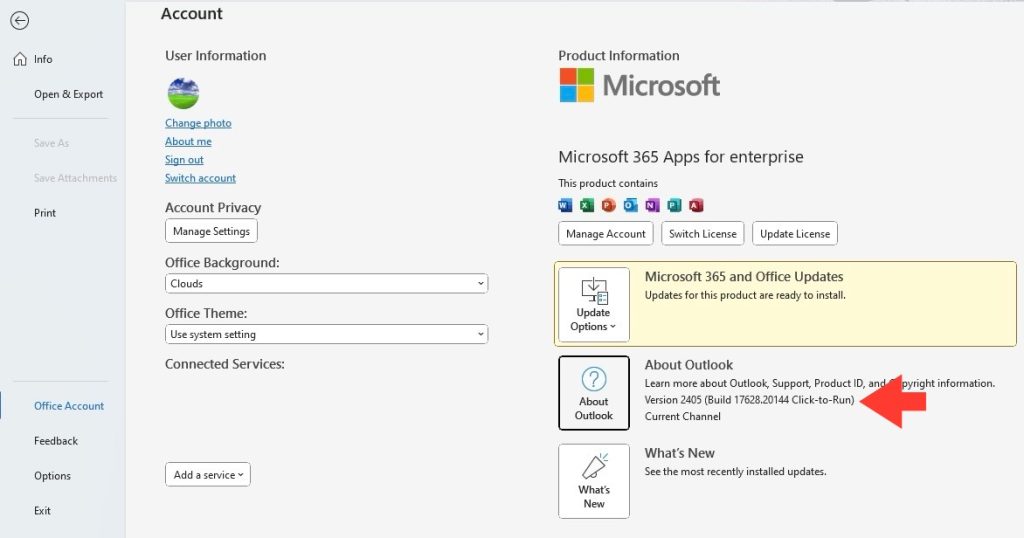
Before you dive into repairs, it’s crucial to know whether your Outlook 365 is from the app store or the classic ISO/Click to Run version. This influences your repair strategy significantly. To verify, launch Outlook, and head to File > Office Account. Your About section holds the key: ‘Desktop Apps’ means you’ve got the App Store version, while ‘Click to Run’ signals an ISO or Click to Run installation. With this knowledge, you can tailor your repair approach and target the problem more effectively.
Performing Preliminary Checks
Before summoning the Microsoft repair cavalry, ensure that Outlook 365 isn’t just having a momentary hiccup. Check if there is enough disk space—Outlook doesn’t take kindly to cramped quarters. Peek at your internet connection as well since it’s the lifeline for Outlook’s emailing capabilities. Don’t forget to scope out your antivirus; sometimes it’s a little too overprotective and ends up barricading Outlook. You’ll also want to see if other Office programs are misbehaving—it could signal a broader issue.
DIY Troubleshooting Methods for Quick Fixes
Tip 1: Restart Computer and Outlook
When in doubt, reboot it out! It’s the oldest trick in the book, but it’s golden for a reason. Giving your computer and Outlook a fresh start can often kick those pesky gremlins out. Close Outlook and power down your computer. Take a breather, maybe grab some coffee, and then turn your system back on. Relaunch Outlook and cross your fingers—if the stars are aligned, this simple act might just have worked its magic.
Tip 2: Run Windows Update
Ensuring your Windows 10 is up-to-date is like giving it a regular health check-up—it can prevent a multitude of issues with Outlook 365. Navigate to ‘Settings’, hop into ‘Update & Security’, and click ‘Windows Update’. Now, hit that ‘Check for updates’ button. If it turns out that new updates are available, install them. Sometimes these updates come with magical powers that resolve Outlook issues without you having to do anything else. It’s a simple measure, but it can save the day.
Understanding Outlook Repairs via Settings
Method 1: Using Microsoft’s Quick Repair Feature
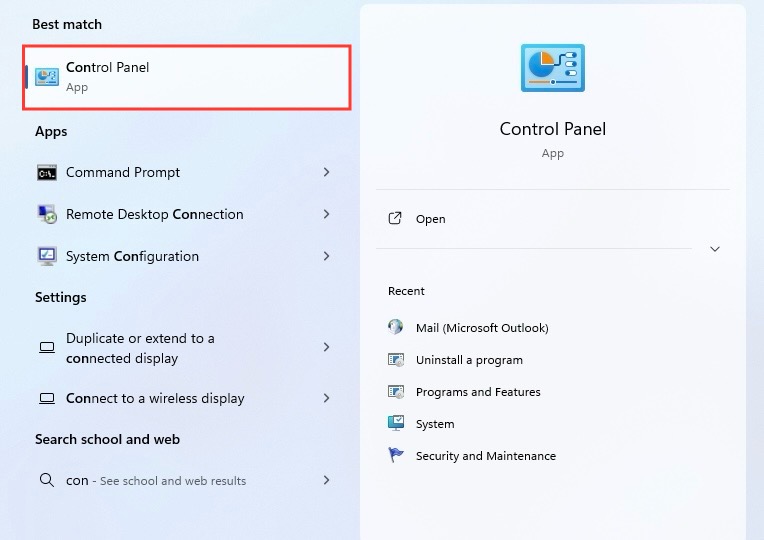
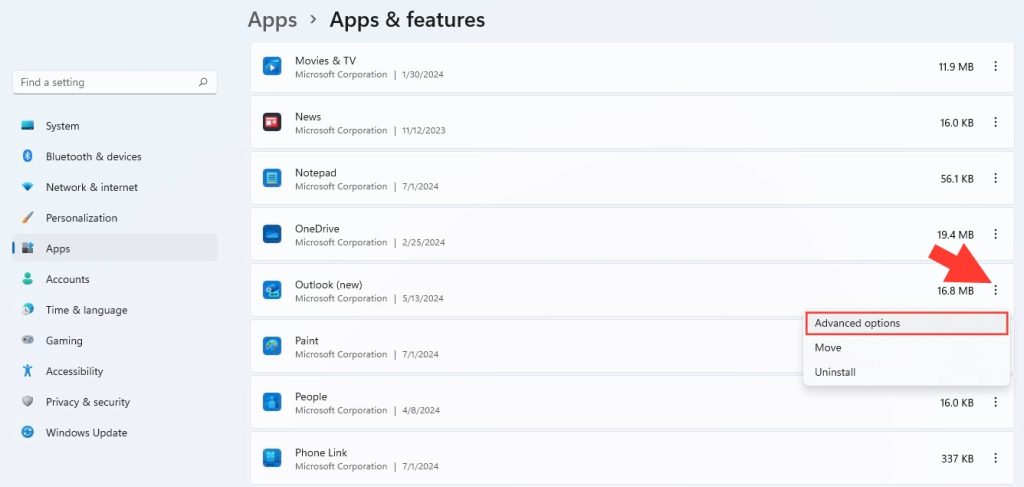
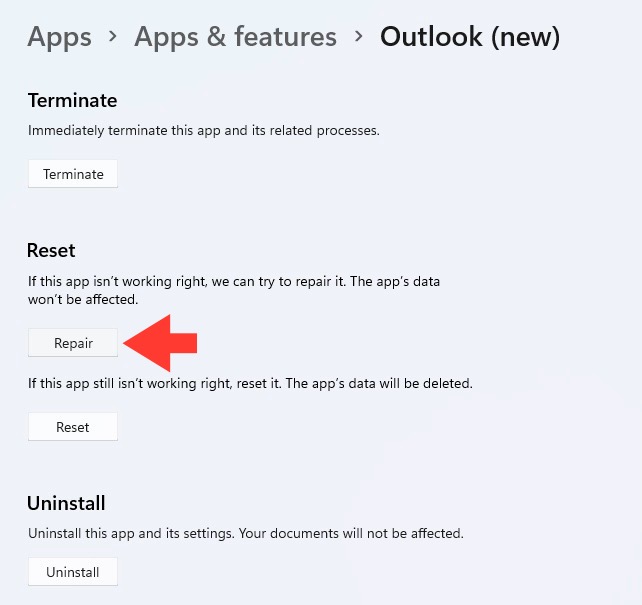
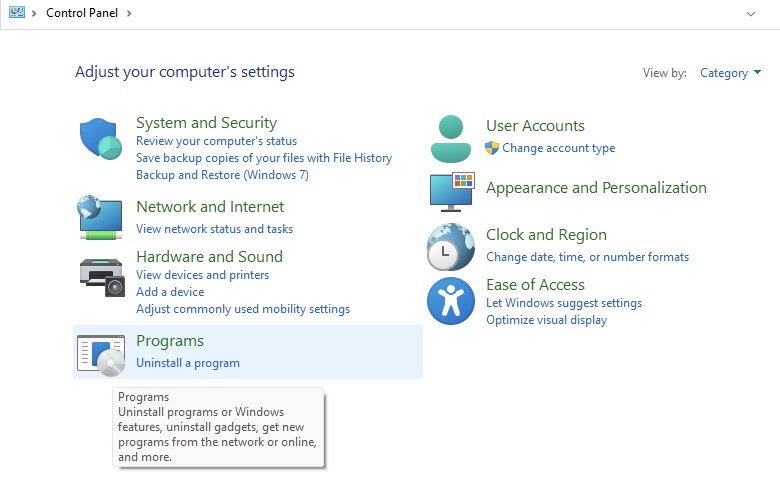
Microsoft has gifted users with a Quick Repair genie, tucked away within the Control Panel. This nifty tool can fix numerous Outlook 365 issues without an internet connection. Navigate to ‘Programs’ in the Control Feature, find Outlook, and choose ‘Change’. Then, simply select ‘Quick Repair’ and click ‘Repair’. It’s a straightforward path that can effectively reshape your Outlook experience without the internet’s help, tackling many common problems with the application.
Advanced Solutions for Persistent Problems
Method 2: Accessing Outlook in Safe Mode
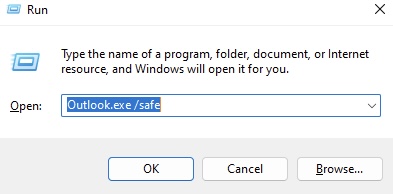
Accessing Outlook in Safe Mode is like stripping it down to its basics: it loads without the frills, avoiding potentially troublesome add-ins or corrupt settings. To enter this digital zen mode, press Windows + R, type Outlook.exe /safe, and hit Enter. If Safe Mode brings calm to the chaos, you can bet an add-in or customization is the culprit. Start Outlook normally and disable add-ins one by few until you find the troublemaker. This could be the key to a peaceful Outlook existence.
Leveraging Third-Party Repair Tools
Tip 6: Free Professional File Repair Tools
Wading through the sea of file issues with Outlook’s .pst and .ost files can be overwhelming, but fear not! Free professional file repair tools are here to throw you a lifeline. Tools like OnlineFile.Repair or FileRepair can work wonders, surgically repairing your files and restoring your data’s integrity. Stellar File Repair Toolkit, another formidable option, brings robust repair algorithms to the table.
Benefits:
- Cost-effective solutions for Outlook file repair.
- User-friendly interfaces for stress-free repair processes.
- Repair files without professional technical skills.
- Save valuable data from corrupted files.
- Reduce downtime that results from waiting on professional repair services.
Cons:
- May not fix all types of file corruption.
- Some tools have limitations on file size or extent of the corruption.
Best for: Users who have a basic understanding of their Outlook data files and prefer to attempt repairs before seeking professional help.
When All Else Fails: Uninstall and Reinstall
Method 3: Step-By-Step Uninstallation and Reinstallation Process
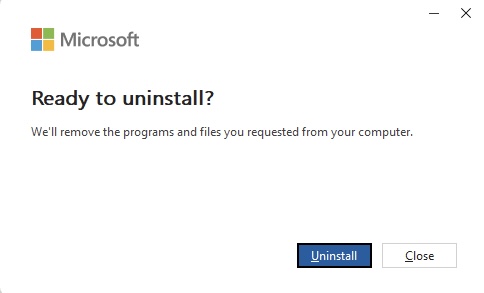
When you’ve hit a wall with all other fixes, it may be necessary to start from scratch. Uninstalling and reinstalling Office can shed any corrupted data clinging to your system. Begin with the Office uninstall support tool, which ensures a clean removal. After downloading and running the tool, follow its prompts to completely remove your Office installations. Once your system reboots, you can then reinstall Office from your Microsoft account, a fresh canvas for your Outlook 365.
Step-by-Step:
STEP 1: Download the Office uninstall support tool.
STEP 2: Execute the tool and select the Office product to uninstall.
STEP 3: Follow the prompts to complete the uninstallation.
STEP 4: Restart your computer upon prompt.
STEP 5: Reinstall Office through your Microsoft account or from the official installation media.
This fierce, scorched-earth tactic should remedy persistent Outlook plagues, but it’s the digital equivalent of a reset button—used only when absolutely necessary.
Tips to Prevent Future Outlook 365 Issues
Keeping Your Software Up-To-Date
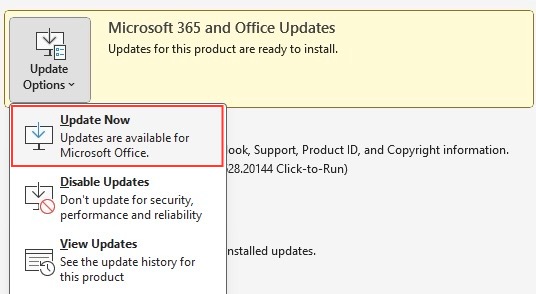
Consider updates as the best defense against the dark digital arts that threaten your Outlook 365. Staying current means you’re armed with the latest arsenal of patches, security enhancements, and stability improvements—weapons to ward off unexpected crashes or breaches. You can enable automatic updates through the Microsoft Office Account settings or check periodically for updates manually. This way, you ensure you’re not missing out on pivotal performance upgrades and shields against cyber threats.
Regularly Backing Up Your PST Files
Backing up your .pst files is like ensuring your digital treasures are safely tucked away in a vault. Regular backups protect your emails, contacts, and calendars from being lost in the void if Outlook crashes or in case of hardware malfunctions. Try to integrate this good habit into your routine, whether it’s weekly or monthly—depending on your usage. You can manually copy your .pst files to a chosen location or employ backup software for a more set-it-and-forget-it approach. Remember, the one backup you regret is the one you didn’t make.
FAQ: Answers to Your Outlook 365 Repair Queries
What are the signs that Outlook 365 needs repair?
If Outlook 365 frequently crashes, displays error messages, struggles to send or receive emails, or has syncing problems, it’s raising red flags that it needs repair. If your calendar or other features are unresponsive or acting erratically, or the application takes an unusually long time to start, these are clear signs that something is amiss and some tender loving care in the form of a software repair might be due.
How can I prevent common Outlook 365 issues in the future?
Keep your Outlook 365 running smoothly by regularly updating both Windows and Office, avoiding suspicious email attachments or links, and maintaining healthy computer habits. Back up your .pst files consistently and monitor your mailbox size to prevent it from becoming unwieldy. Lastly, a keen eye on add-in management – only keeping the necessary ones enabled – can prevent many issues from cropping up.
How do I run a full repair in Outlook?
To run a full repair in Outlook 365 on Windows 10, first, close Outlook. Go to Control Panel, select ‘Programs’, then ‘Programs and Features’, and find Microsoft Office 365 in the list. Right-click and choose ‘Change’, then select ‘Online Repair’. Follow the prompts to complete the repair. Remember, this may take some time, especially for large mailboxes or slow internet connections. After the process is finished, restart your computer to let the changes take effect.
John Michaloudis is a former accountant and finance analyst at General Electric, a Microsoft MVP since 2020, an Amazon #1 bestselling author of 4 Microsoft Excel books and teacher of Microsoft Excel & Office over at his flagship MyExcelOnline Academy Online Course.

