Managing extensive datasets can quickly become overwhelming, but sorting can bring order to chaos. Sort by name in Excel is an essential tool for anyone looking to quickly organize and retrieve data alphabetically. Read on as we delve into the step-by-step process of sorting by name in Microsoft Excel, ensuring your data is neatly arranged and effortlessly accessible.
Key Takeaways
- Proper data organization in Excel is key for analysis and easy navigation; alphabetical sorting aids in this.
- To alphabetically sort names in Excel, select your data and use the “Sort” command under the “Data” tab, choosing “A to Z” or “Z to A.”
- For single-cell names, split them into separate columns using formulas to sort by last name.
- Address common sorting issues like hidden/blank rows/columns and unformatted headers to ensure accuracy.
- Excel’s Custom Sort and “Sort & Filter” dropdowns provide advanced and quick sorting options.
Download the spreadsheet and follow along with the tutorial on How to Sort by Name in Excel – Download excel workbookSort-by-name-in-Excel.xlsx
Table of Contents
Navigating the Basics of Sorting in Excel
The Importance of Data Organization in Excel
Data organization in Excel isn’t just about keeping your spreadsheet tidy; it’s the backbone of data analysis and accessibility. With well-structured data, you unlock Excel’s full potential – from quickly finding information to performing complex statistical analyses. Tailoring your data with alphabetical sorting helps everyone navigate and understand the spreadsheet easily.
Guide to alphabetically sort by name
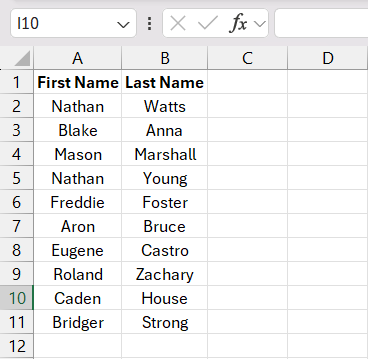
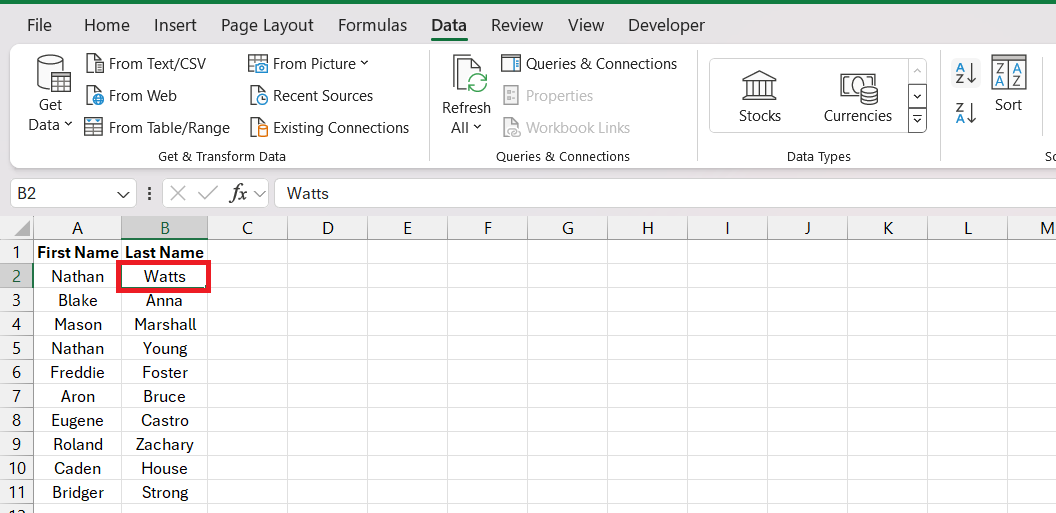
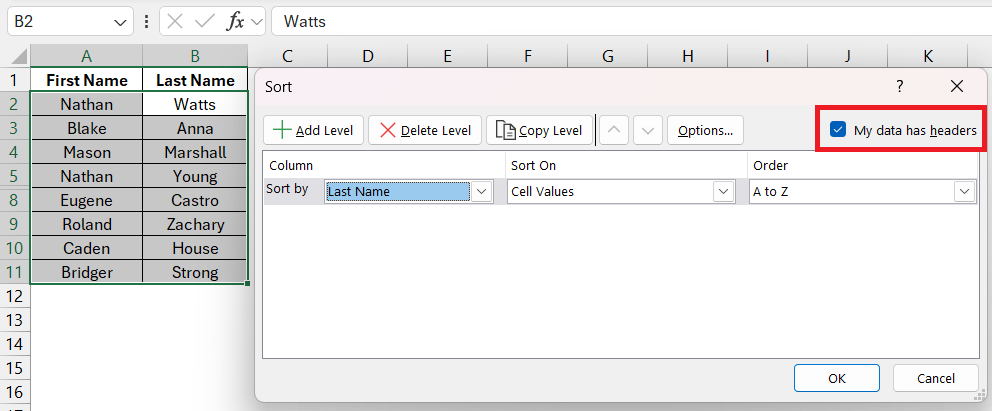
STEP 1: Before you unleash the power of sorting in Excel, you need to select the columns you’re planning to organize.
STEP 2: Clicking and dragging across the header row is a common method, or you can click the top cell and shift-click the bottom cell. Just remember, if your data is in a block or table format without gaps, simply clicking any cell within the column may be enough as Excel is pretty smart about detecting ranges!
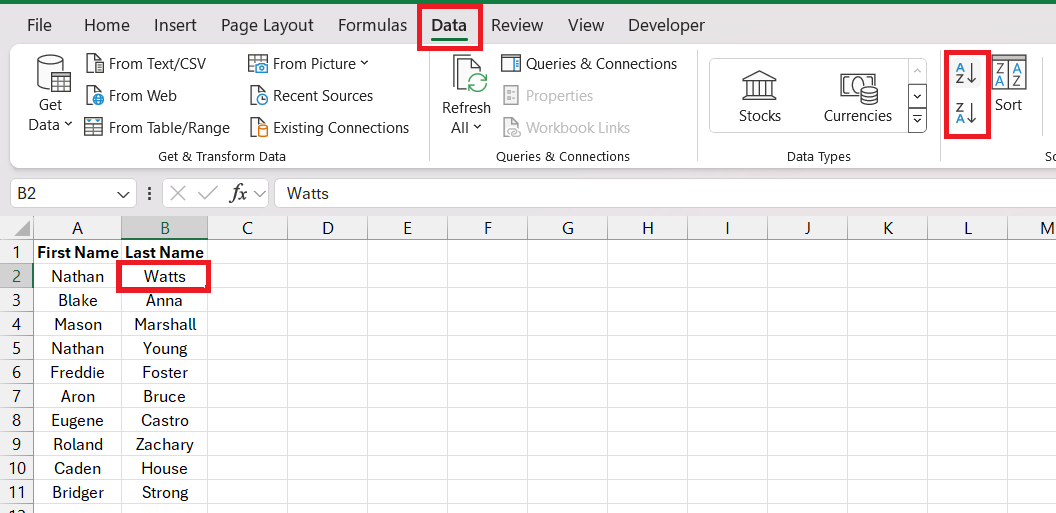
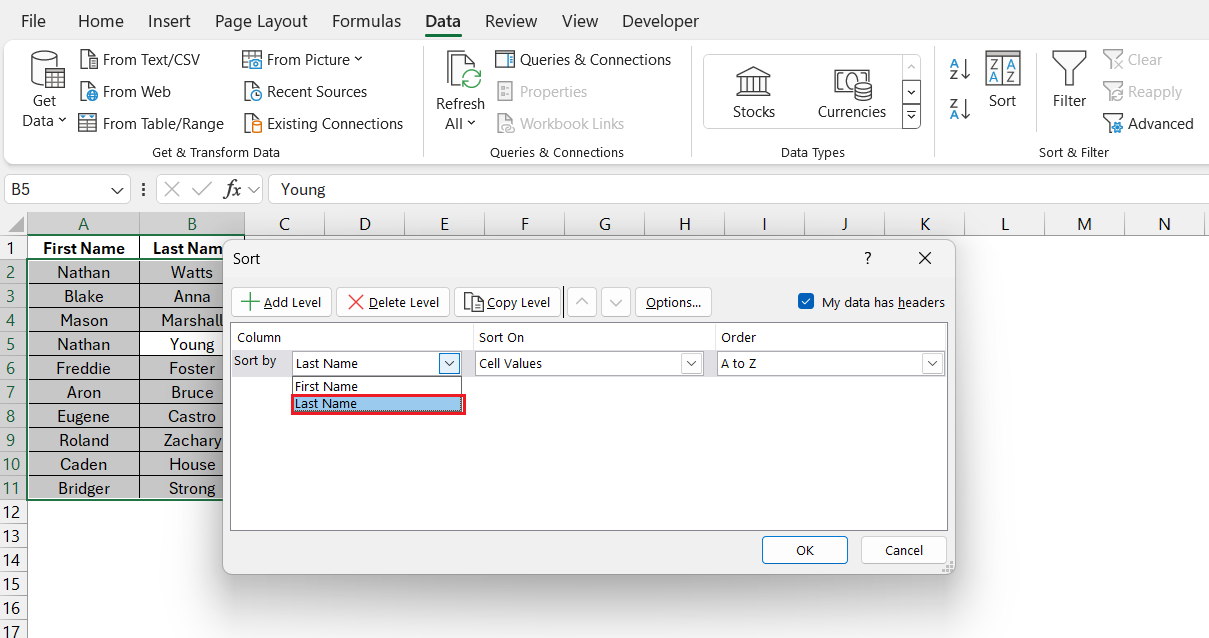
STEP 3: Once you’ve highlighted the desired data, head over to Excel’s ribbon and find the “Data” tab. Here lies the “Sort” command which will be your alphabetic symphony conductor.
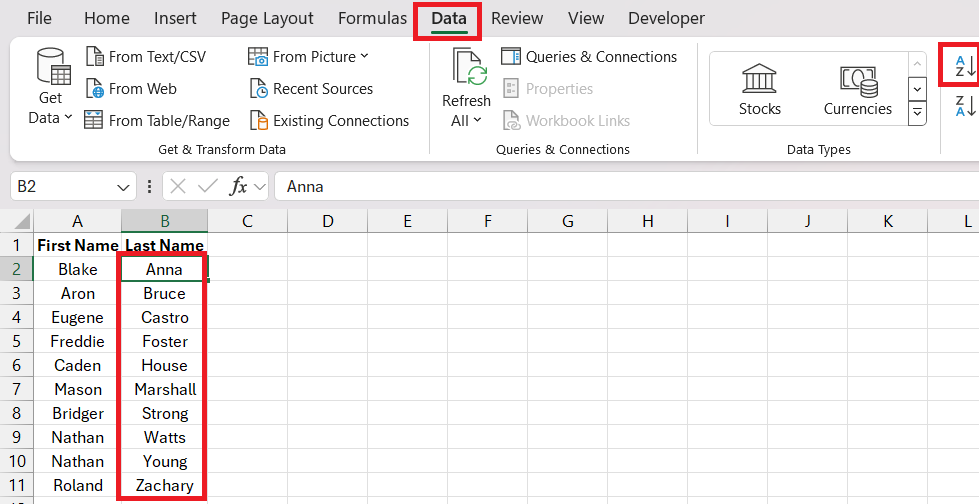
STEP 4: Choose “A to Z” to ascend from Anna to Zachary, or “Z to A” for the reverse. A simple click and your names align obediently. Excel’s ribbon makes sorting an action just as easy as a bow on a present.
Advanced Sorting Techniques
Working with Multiple Names in a Single Cell
Navigating through names clustered in a single cell can be akin to a dance: there’s a rhythm and a pattern to follow. When a full name resides in one cell, you might want to sort by the last name. This necessitates a little Excel manipulation using formulas to split first and last names into separate columns. Why is this useful? It gives you the freedom to analyze, sort, and organize your data based on individual name components.
Sorting by Last Name with Formulas and Functions
To sort by the last name when names are pooled in a single column, a sprinkle of Excel magic with formulas does the trick.
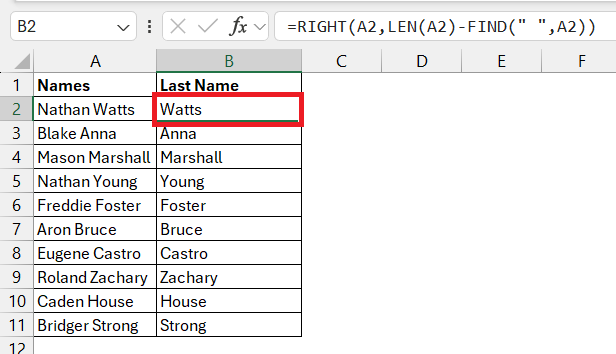
STEP 1: Use the formula =RIGHT(A2,LEN(A2)-FIND(" ",A2)) to pluck the last names out from the full name.
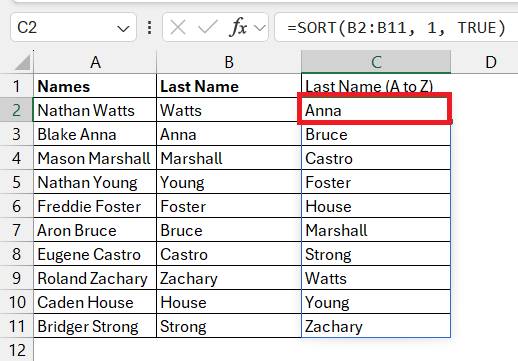
STEP 2: Then, summon the SORT function =SORT(A1:A100, 1, TRUE) to alphabetize by the isolated last names. This Excel sorcery rearranges your list so that “Anna, Bruce” happily sits before “House, Strong.”
Common Challenges and Solutions
Dealing with Irregular Data Formats
Excel’s sorting tools are great, but they might not work well if your data isn’t organized perfectly. Here are two usual problems:
Hidden or Blank Row or Column
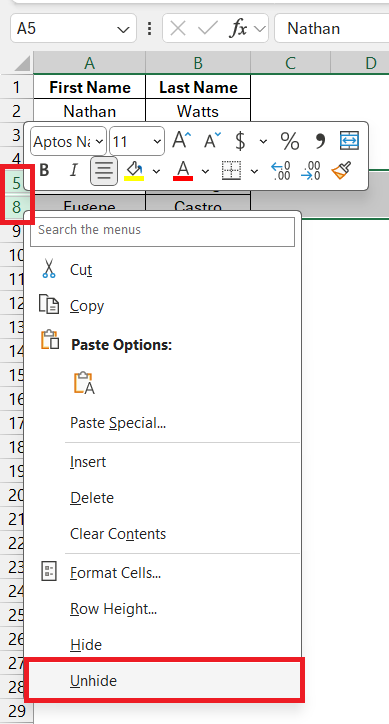
If your data has empty or hidden spots, and you only click on one cell before sorting, Excel will only sort up to the first empty or hidden spot. To fix this, you can remove the empty spots and make sure nothing is hidden before you sort. If there are empty rows (but not hidden ones), you can select the whole table first, then sort it.
Unrecognizable column headers
If the top row of your table looks different from the rest, Excel can tell it’s a header and won’t mix it up when you sort. But if the top row looks like the rest of your data, Excel might get confused and shuffle it into the middle when you sort. To avoid this, just select the data without the top row before sorting. If you’re using the sort window, remember to check the box that says “My data has headers”.
Time-Saving Shortcuts and Tricks
Applying Custom Sort Options
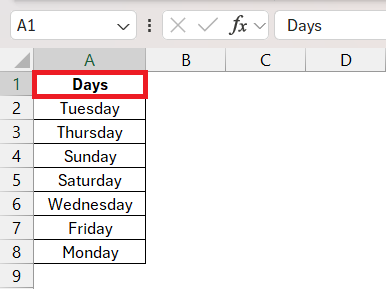
Excel’s Custom Sort options are like having a secret decoder ring for your data. You can create a specific pecking order for your sorting needs, like days of the week or priority levels, which aren’t inherently understood by Excel. Follow these steps:
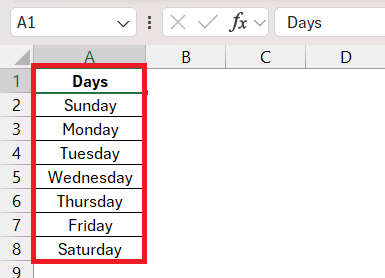
STEP 1: Click on the top of the column which is to be sorted. For example, here click on cell A1.
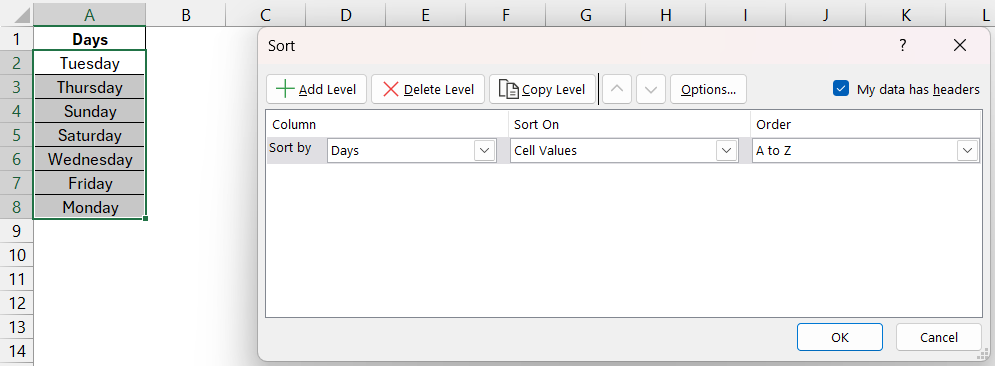
STEP 2: Now go to ‘Sort’ under the Data tab and select ‘Custom Sort’.
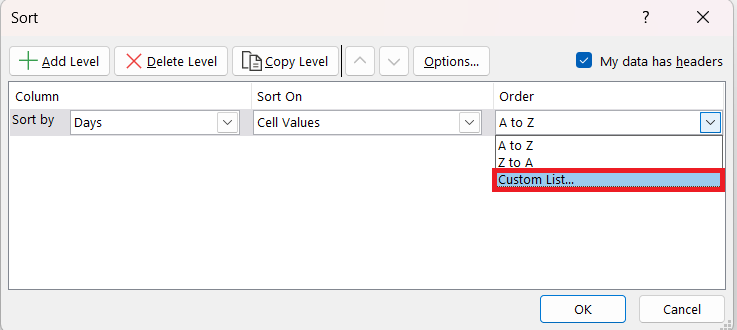
STEP 3: Then, choose the column you want to sort by, and under ‘Order’, pick ‘Custom List’.
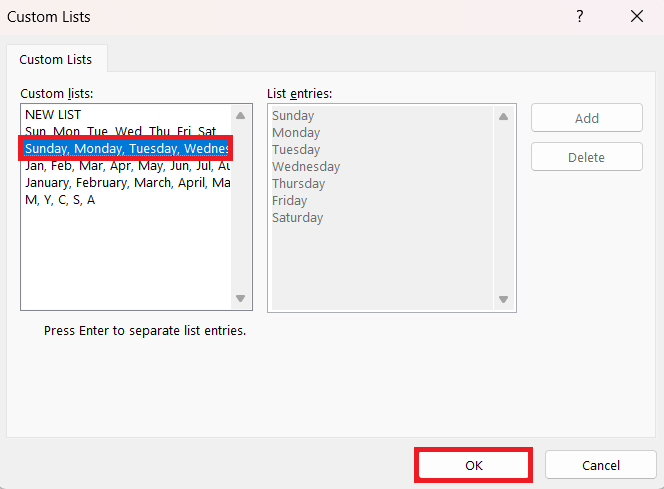
STEP 4: From there, define your unique sorting sequence and watch as Excel sorts it just the way you envisioned. For example, select the day custom list.
STEP 5: Press enter to find the result.
Utilizing the “Sort & Filter” Dropdown for Efficiency
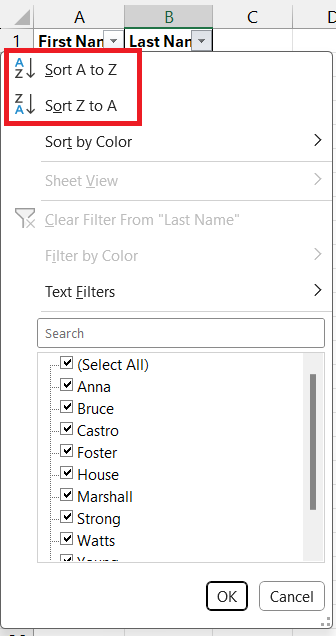
Quick sorting shouldn’t be a chore, and with Excel’s “Sort & Filter” dropdown, it’s a breeze. Right at the tip of your column headers, this handy tool waits for a single click to reveal a quick sort menu. Opt for ‘Sort A to Z’ or ‘Sort Z to A’ without navigating away from your data view. It’s perfect for those straightforward sorts when you need to alphabetize names swiftly and move on to your next task.
Mastering Excel’s Versatility in Sorting
Case Sensitivity and Other Sorting Preferences
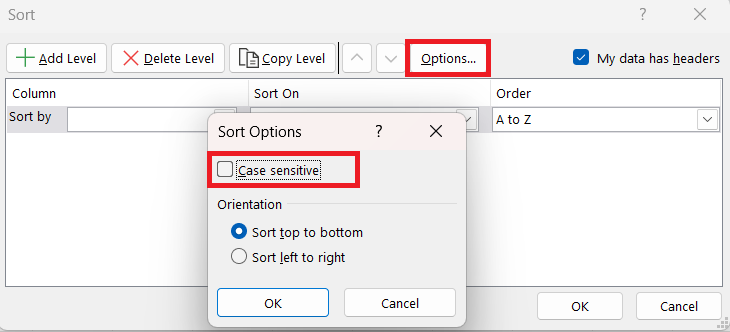
Excel is typically case-insensitive when sorting, treating ‘Aaron’ and ‘aaron’ as equals. However, you can make your sorting case-sensitive for scenarios where capitalization matters (think password lists or product codes). Simply access the ‘Options’ button in the Sort dialog and tick the ‘Case sensitive’ box. Remember, this is a less common need, but it’s there when precision is paramount.
FAQ
How do I sort by name in Excel?
To sort by name in Excel, first select the column containing the names. Then, go to the ‘Data’ tab, click on ‘Sort’, choose ‘Sort by’ your selected column, and under ‘Order’, select ‘A to Z’ for ascending or ‘Z to A’ for descending order. Click ‘OK’ to apply the sort.
How do I filter by name in Excel?
To filter by name in Excel, click the column header containing the names you want to filter. Then, go to the ‘Data’ tab and click on ‘Filter’. Click the dropdown arrow in the header cell, uncheck ‘(Select All)’, and check the names you want to see. Your data is now filtered by the selected names.
How do you auto sort by name in Excel?
To auto-sort by name in Excel, you’d need to apply a VBA script that triggers the sort action each time data changes. Alternatively, for regular auto-sorting without VBA, you can create a table or use an array formula that references the sorted list. As you update your data, the table or formula range automatically sorts the new entries.
How do I alphabetize names that include middle names or initials?
Alphabetizing names with middle names or initials in Excel involves a similar process as sorting by last names. Split the full name into separate columns using Text to Columns or formulas. Once separated, you sort by the column with last names. This keeps the integrity of the full name while sorting alphabetically based on last names.
What is the best way to sort data while keeping rows together?
The best way to sort data while keeping rows together in Excel is by using the ‘Sort’ feature and ensuring ‘Expand the selection’ is chosen when prompted. This option maintains the entire row’s data alignment while sorting the specified column alphabetically or numerically. Always select the entire dataset you wish to sort to preserve data association across rows.
John Michaloudis is a former accountant and finance analyst at General Electric, a Microsoft MVP since 2020, an Amazon #1 bestselling author of 4 Microsoft Excel books and teacher of Microsoft Excel & Office over at his flagship MyExcelOnline Academy Online Course.

