Download our 141 Free Excel Templates and Spreadsheets.
Key Takeaways
- Testing your audio in Microsoft Teams is critical for ensuring clear communication by identifying and resolving microphone and speaker issues beforehand.
- Regular audio checks help prevent disruptions from background noise or echoes, maintaining a professional environment during calls and presentations.
- Conducting an audio test can quickly address any problems, like static or distortion, ensuring all participants are heard clearly during important virtual meetings or client calls.
Avoiding Technical Disruptions
Technical disruptions during a Microsoft Teams call can quickly derail your meeting’s focus and flow. By performing audio checks, you prevent possible interruptions caused by microphone issues, ensuring a smoother, more efficient meeting experience. Think of it as your pre-flight checklist, keeping potential technical hiccups grounded.
Table of Contents
Step-by-Step Guide to Test Your Microphone in Microsoft Teams
Starting Your Mic Test with a Simple Click
Getting started with your mic test in Microsoft Teams is a breeze.
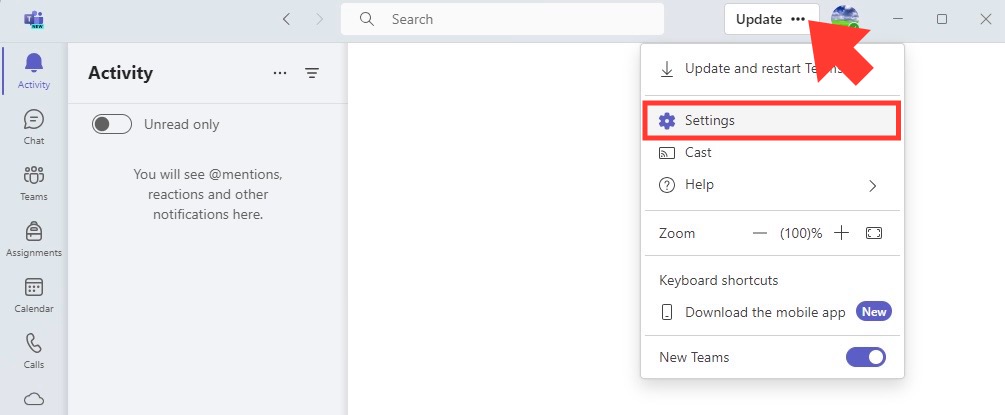
STEP 1: Navigate to the “Settings” by clicking the “…” option next to your profile picture.
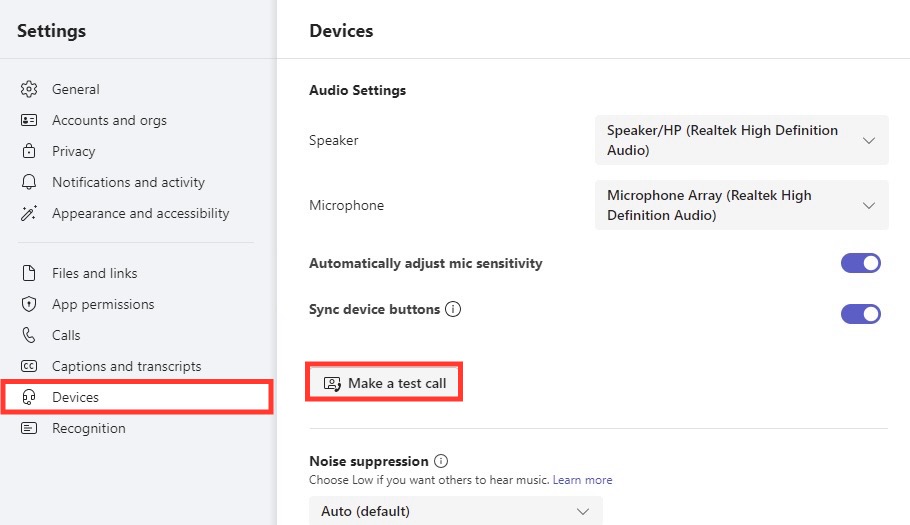
STEP 2: Select “Devices” and then choose the microphone you wish to test.
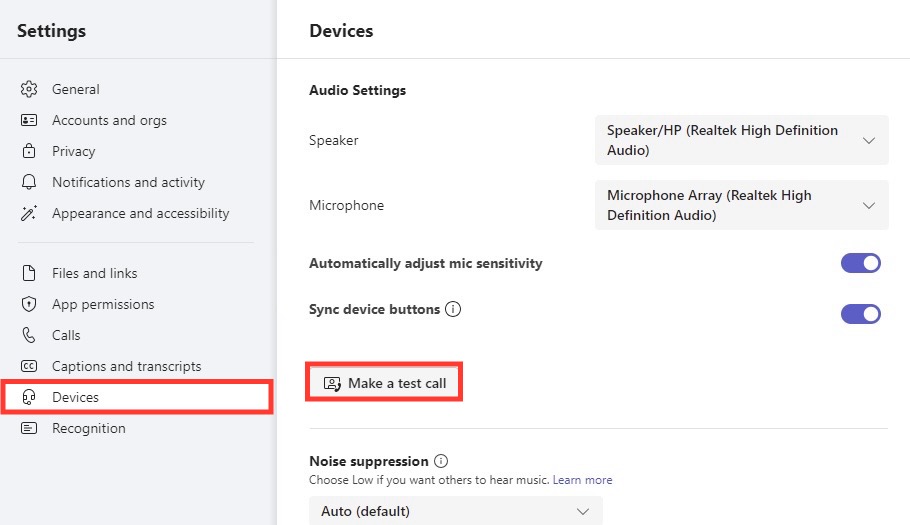
STEP 3: Just one click on the “Make a test call” button and you’re ready to confirm if your audio is clear and crisp. This quick check can save you from unwanted surprises during actual meetings.
Interpreting the Feedback from a Test Call
Once you’ve started a test call, interpreting the feedback is essential. You’ll hear your voice played back to you, which is Microsoft Teams’ way of confirming what others will hear. Listen for any distortions, lag, or static. If everything sounds good, you’re set! If not, you’ll need to tweak your settings or investigate further. Ensuring your audio is impeccable means no misunderstandings or repetitions during important discussions.
Solving Common Audio Mishaps Before Meetings
Updating and Restarting Microsoft Teams
If you’re bumping into audio troubles, it might be time for a quick update and restart of Microsoft Teams. Older versions can harbor bugs that affect sound quality. To update, click on your profile picture and select “Check for Updates.” If an update is available, install it and then restart the app to let the changes take effect. This simple step can resolve many common audio mishaps, making sure your communication lines are as smooth as ever.
Selecting the Right Input Device
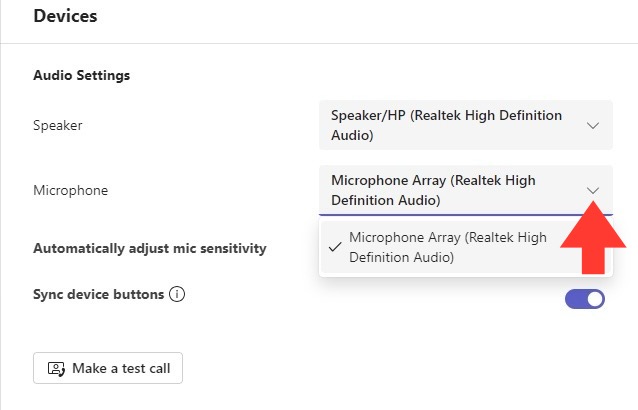
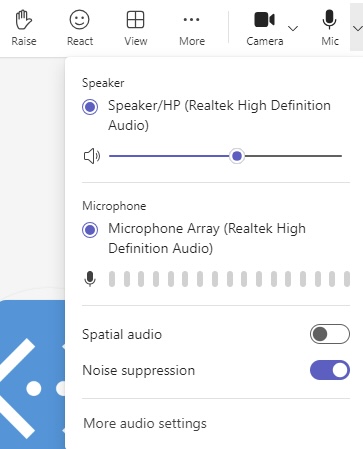
Choosing the appropriate input device in Microsoft Teams is like picking the right instrument for a symphony; it can make all the difference. To select your device, go to “Settings”>”Devices” and under the “Microphone” section, pick from the dropdown menu. Always opt for a device that’s Microsoft Teams-compatible and has up-to-date drivers to avoid audio discordance. Remember, the right tool in the right hands leads to a flawless performance.
Optimizing Your Audio Settings for Better Sound Quality
Adjusting Microphone Levels and Enhancements
To fine-tune your audio input for the perfect pitch, dive into the microphone levels and enhancements. Adjust the volume slider to ensure your voice is neither a whisper nor a shout in the virtual room. If you have the option, experiment with ‘Microphone Boost’ for a clearer projection. Also, consider enabling noise suppression features to reduce background distractions. Balancing these settings perfectly will lead to an impeccable audio presence in your Teams meetings.
Checking the Speaker Output
Just like your microphone, the speaker output is pivotal to your Teams experience. To ensure you don’t miss a single detail, head over to “Settings” and “Devices” in Teams. Here, select your speaker and use the “Test” button to play a sound. If it’s clear and at a comfortable volume, you’re good to go! If not, adjust the slider until you find just the right level. A well-calibrated speaker output means you can catch every nuance of the conversation.
Beyond the Basics: Advanced Troubleshooting Techniques
Dealing with Driver Issues and System Updates
When you’re up against perplexing audio issues, it’s often a sign of driver woes or outdated systems. Staying on top of driver updates is crucial as they are the linchpin connecting your hardware to your software. To update, access “Device Manager” via the Windows search, locate “Sound, video, and game controllers,” right-click your audio device, and choose “Update driver.” Opt for the automatic search for updated software and follow through the instructions.
Navigating Through Platform-Specific Audio Settings
Each platform—be it Windows, macOS, or mobile—has its unique audio settings which can affect how Microsoft Teams functions. On Windows, you can delve into the Sound Control Panel to adjust properties and levels for all audio devices. MacOS users can find similar options in the “Sound” preferences of the System Preferences panel. Meanwhile, on mobile, you generally access these settings through the app’s permissions or your device’s general settings.
FAQ: Your Audio Queries Answered
How Do I Access and Change Audio Settings in Microsoft Teams?
To access and change audio settings in Microsoft Teams, click on your profile picture, select “Settings,” then choose “Devices.” Here, you’ll be able to configure your microphone and speakers for meetings and calls. It’s a straightforward path to clear audio in Teams.
What Should I Do If My Microphone Isn’t Working in Microsoft Teams?
If your microphone isn’t working in Microsoft Teams, start by checking if the correct device is selected under “Settings” > “Devices.” Adjust the volume and test the audio. If it still doesn’t work, try restarting the app or your computer to resolve the issue.
What causes mic echo?
Mic echo can be caused by the microphone being too close to speakers, incorrect settings, or issues with the other caller’s audio setup. Checking and adjusting your audio settings can often eliminate the echo.
Why is my teams audio breaking up?
Audio breaking up in Teams is often due to a poor internet connection, bandwidth constraints, or outdated audio drivers. Ensure a stable connection, update drivers, and check Teams’ audio settings for optimal performance.
John Michaloudis is a former accountant and finance analyst at General Electric, a Microsoft MVP since 2020, an Amazon #1 bestselling author of 4 Microsoft Excel books and teacher of Microsoft Excel & Office over at his flagship MyExcelOnline Academy Online Course.

