This article is a comprehensive guide to mastering the basics and beyond of row height and column width in Microsoft Excel. This article aims to equip you with the skills necessary to enhance your data presentation through proper cell sizing, allowing for a clearer and more professional display of information. From manual adjustments to using Excel’s built-in features, you’ll learn various techniques to improve both functionality and aesthetics in your spreadsheets.
Key Takeaways
- Manual Precision: Learn to manually adjust column widths with your mouse for quick, on-the-fly changes that suit your immediate needs.
- Instant Adjustments: Use the drag and drop method to rapidly modify row heights, saving time and effort when formatting large amounts of data.
- Shortcut Efficiency: Utilize keyboard shortcuts to expedite row and column adjustments, enhancing workflow efficiency for frequent Excel users.
- AutoFit Features: Implement the AutoFit functionality to automatically adjust cells to fit content perfectly, ensuring optimal use of space and readability.
- Consistency and Locking: Set numerical values for row and column sizes to maintain consistency across your spreadsheets and lock dimensions to prevent unintended changes, especially in collaborative settings.
Table of Contents
Getting Started with Excel Formatting
Understanding the Basics of Row Height and Column Width
Before diving into the world of Excel formatting, it’s essential to get a handle on the basics. The row height is the vertical size of a row in an Excel spreadsheet, while column width refers to the horizontal size of a column. They define the space allocated for data inside each cell. Excel typically starts with a default size, but considering the diversity of data types, it’s not a one-size-fits-all scenario.
The Importance of Proper Cell Sizing for Data Presentation
Proper cell sizing is crucial for making your Excel data clear and easily digestible. Whether you’re putting together a report or analyzing figures, resizing cells can make a huge difference. Optimal row heights and column widths ensure that the content is fully visible and presented in an organized manner, enhancing readability. Moreover, it allows for better alignment of tables and charts, facilitating professional and polished data presentation.
Mastering Manual Adjustments
Resizing Columns with Precision Using Your Mouse
Resizing columns with your mouse is straightforward and allows for precision adjustments. Here’s how you can do it:
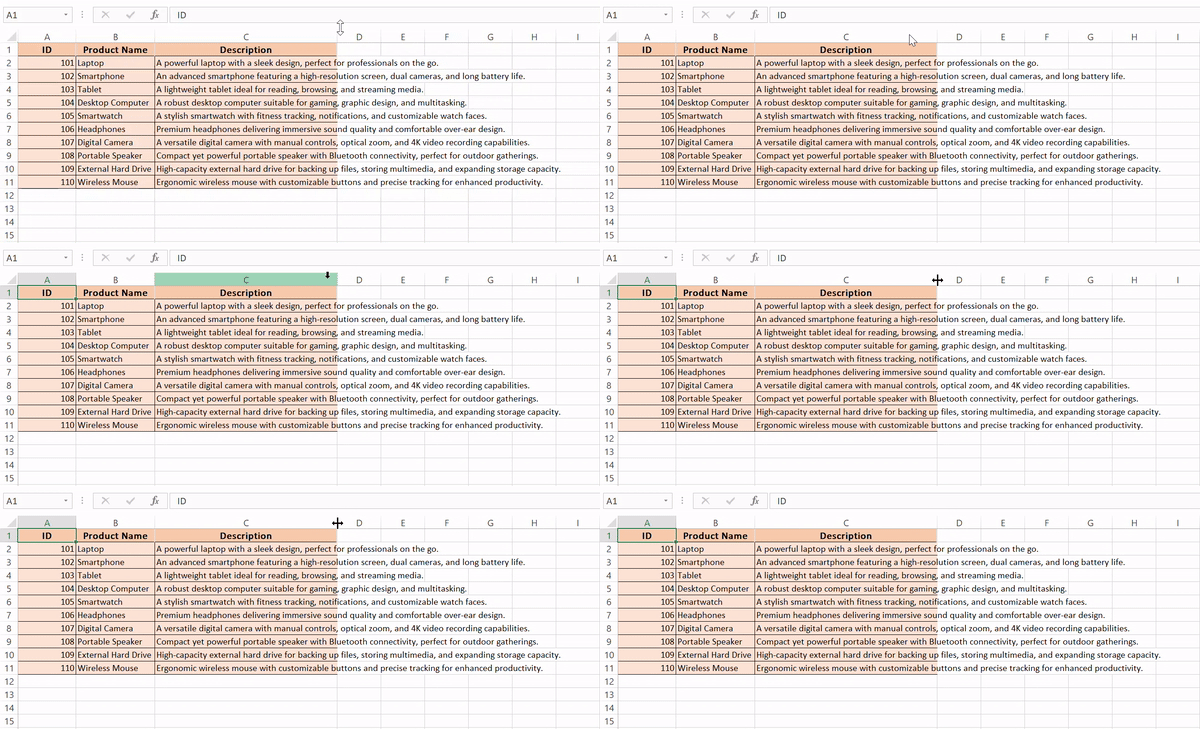
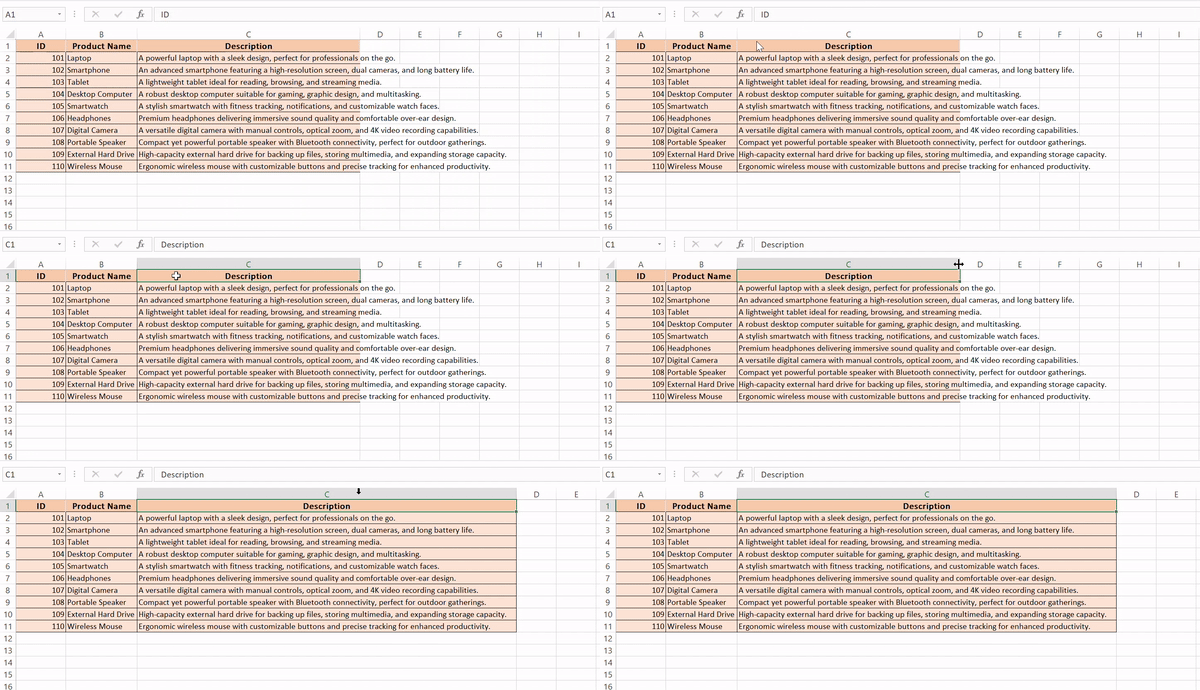
STEP 1: Hover your mouse pointer over the column border you want to adjust until it turns into a double-headed arrow.
STEP 2: Click and hold the left mouse button. Drag the column border horizontally to the desired width. Release the mouse button to set the new column width.
This manual method provides immediate visual feedback and control, making it a go-to technique for quick adjustments. However, remember that manual adjustments might not always keep the sizes uniform, especially when exact measurements are needed.
Changing Row Height Instantly with Drag and Drop
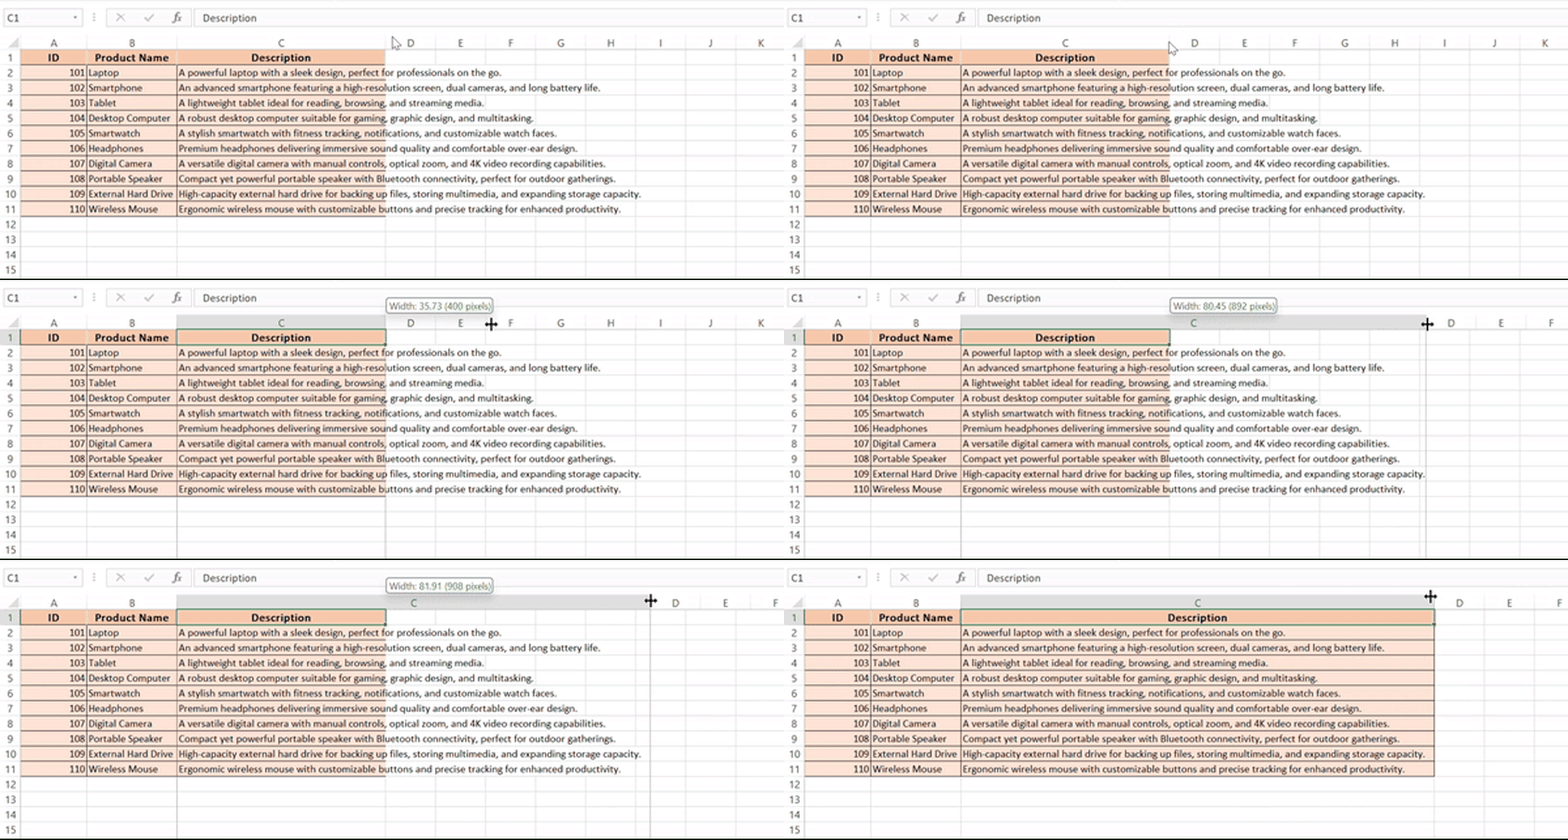
For rapidly changing row height, the drag and drop method is a real time-saver. After selecting the row whose height, you want to adjust, move your cursor to the row’s edge until it turns into a double vertical black arrow. Click and drag up or down to decrease or increase the height, respectively. This instant adjustment provides a visual cue of the row height in pixels as you drag, allowing for quick and responsive formatting. To adjust multiple columns simultaneously, hold down the “Ctrl” key while clicking and dragging the column borders.
It’s great for getting a perfect fit for your data, especially when you are eyeballing the size rather than adhering to specific measurements.
Streamlining with Shortcuts
Keyboard Techniques for Rapid Row and Column Sizing
If you’re a keyboard enthusiast, Excel caters to your preference with keyboard shortcuts that make row and column sizing snappy and efficient. To adjust a column’s width, select the column and press Alt + H, then O, followed by I for autofit or type a numerical value to set a specific width. Similarly, for rows, use Alt + H, O, and then A to autofit row height, or manually enter a value.
These techniques are rapid and help reduce the reliance on a mouse, making them perfect for users looking to streamline their workflow and save time in Excel.
Excel’s Built-In Features to Expedite Formatting
To expedite the formatting process, Excel provides built-in features that work wonders. The ‘AutoFit‘ feature automatically adjusts row height and column width to fit your data perfectly.
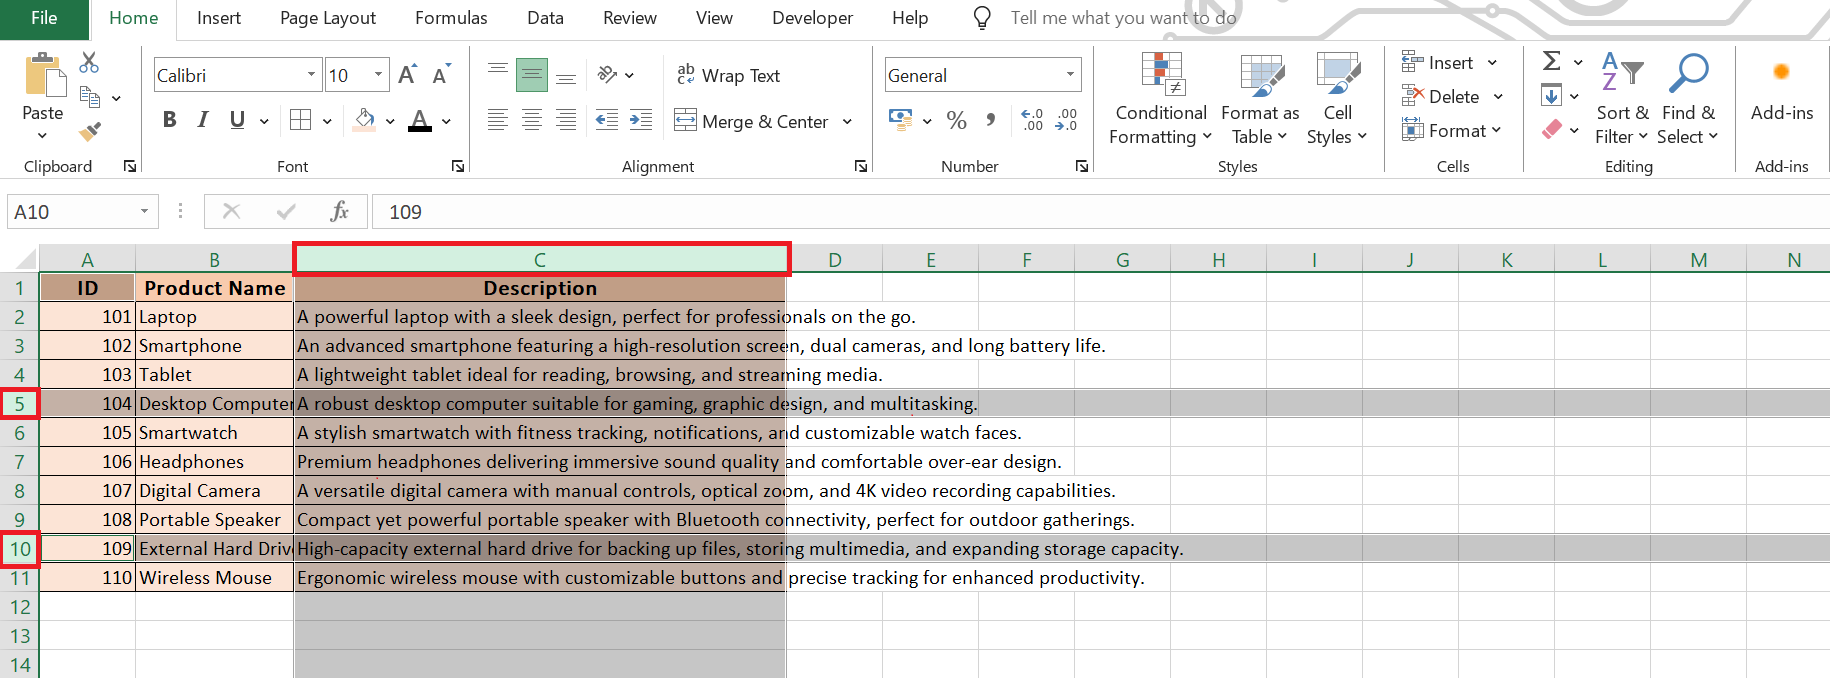
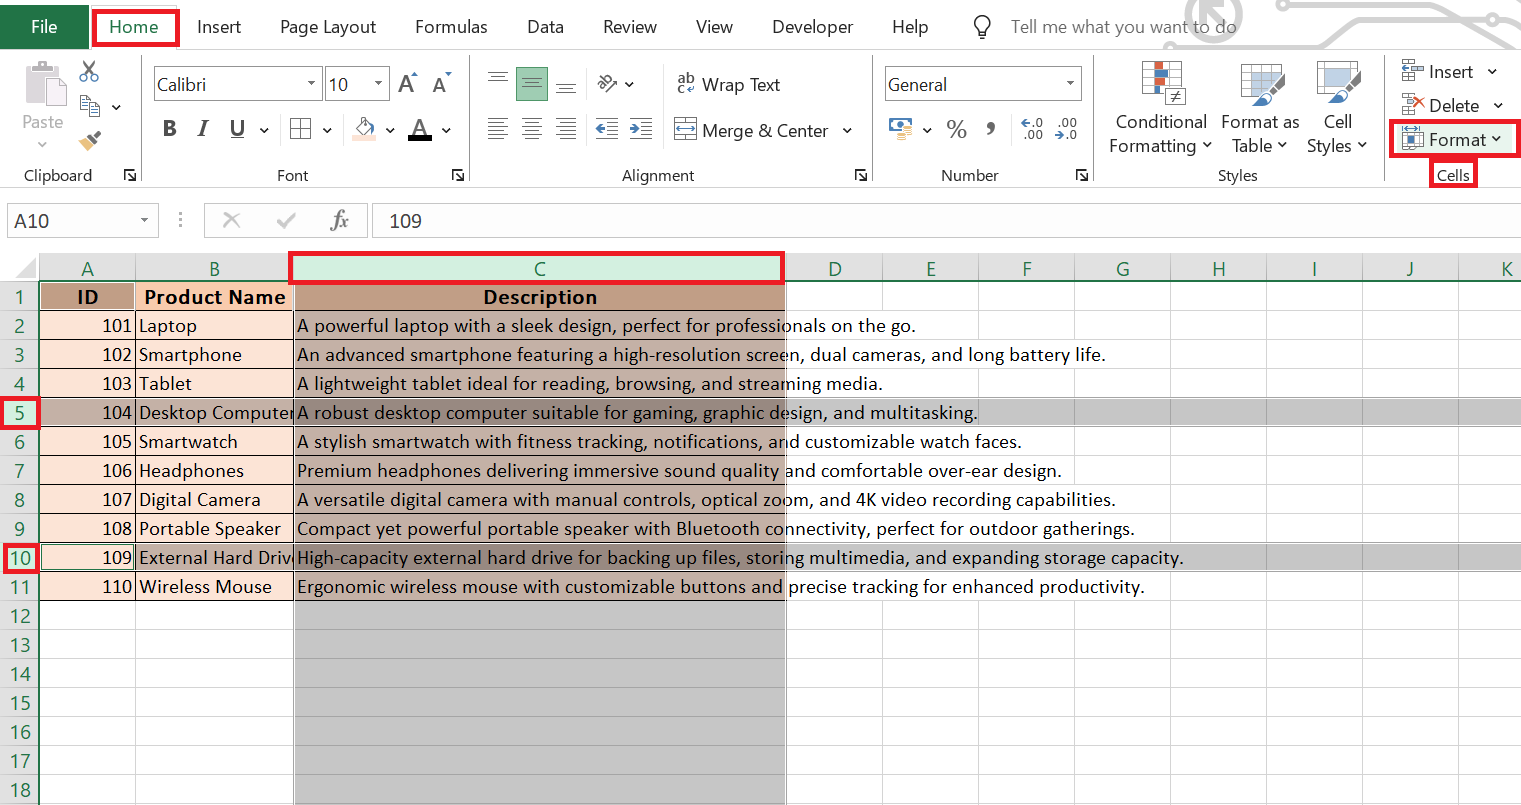
STEP 1: Select the row(s) or column(s) you want to adjust by clicking on the row number or column letter.
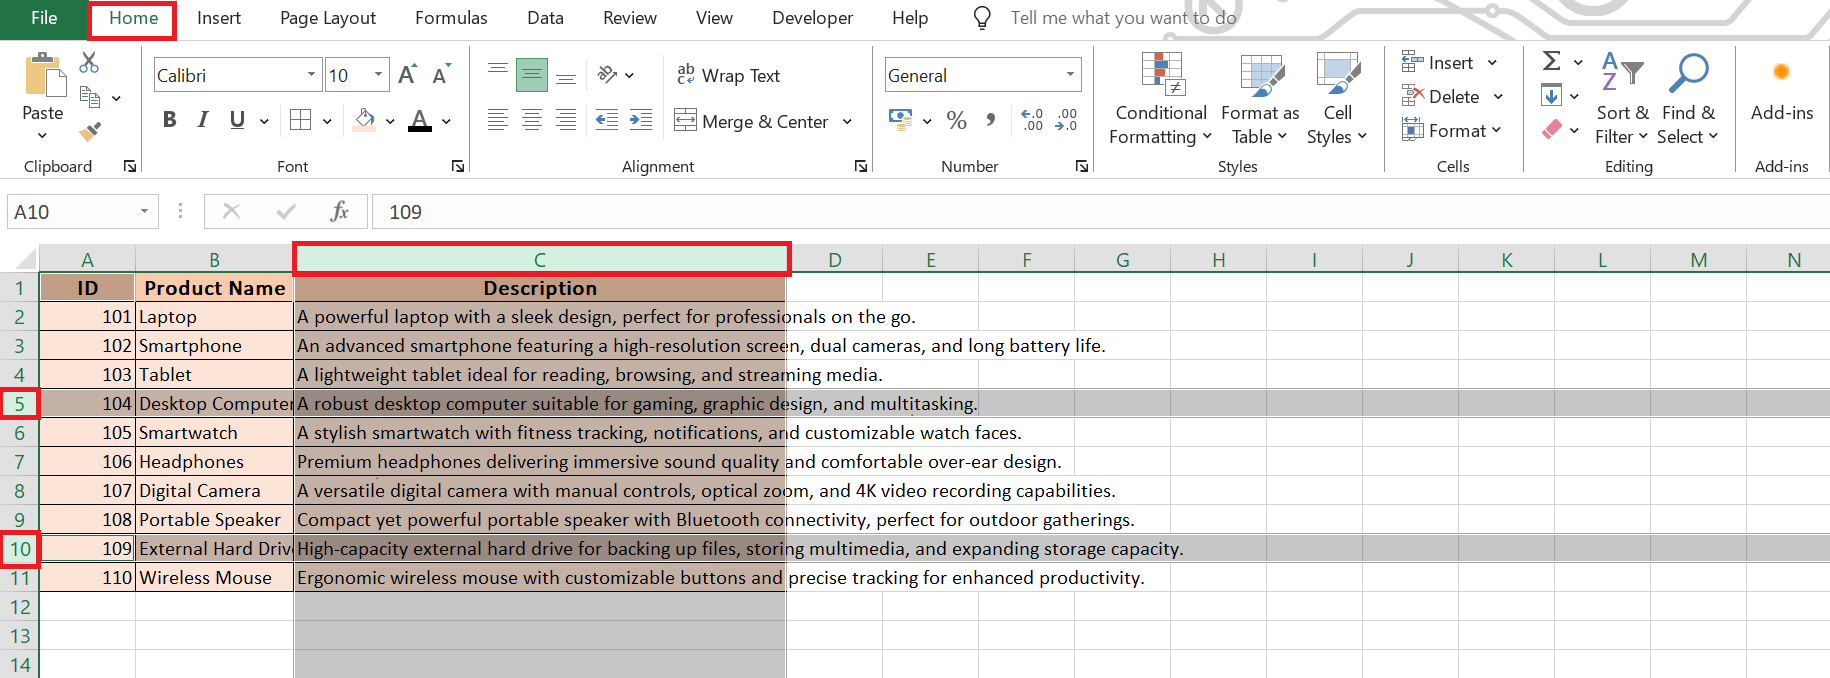
STEP 2: Go to the “Home” tab on the Excel ribbon.
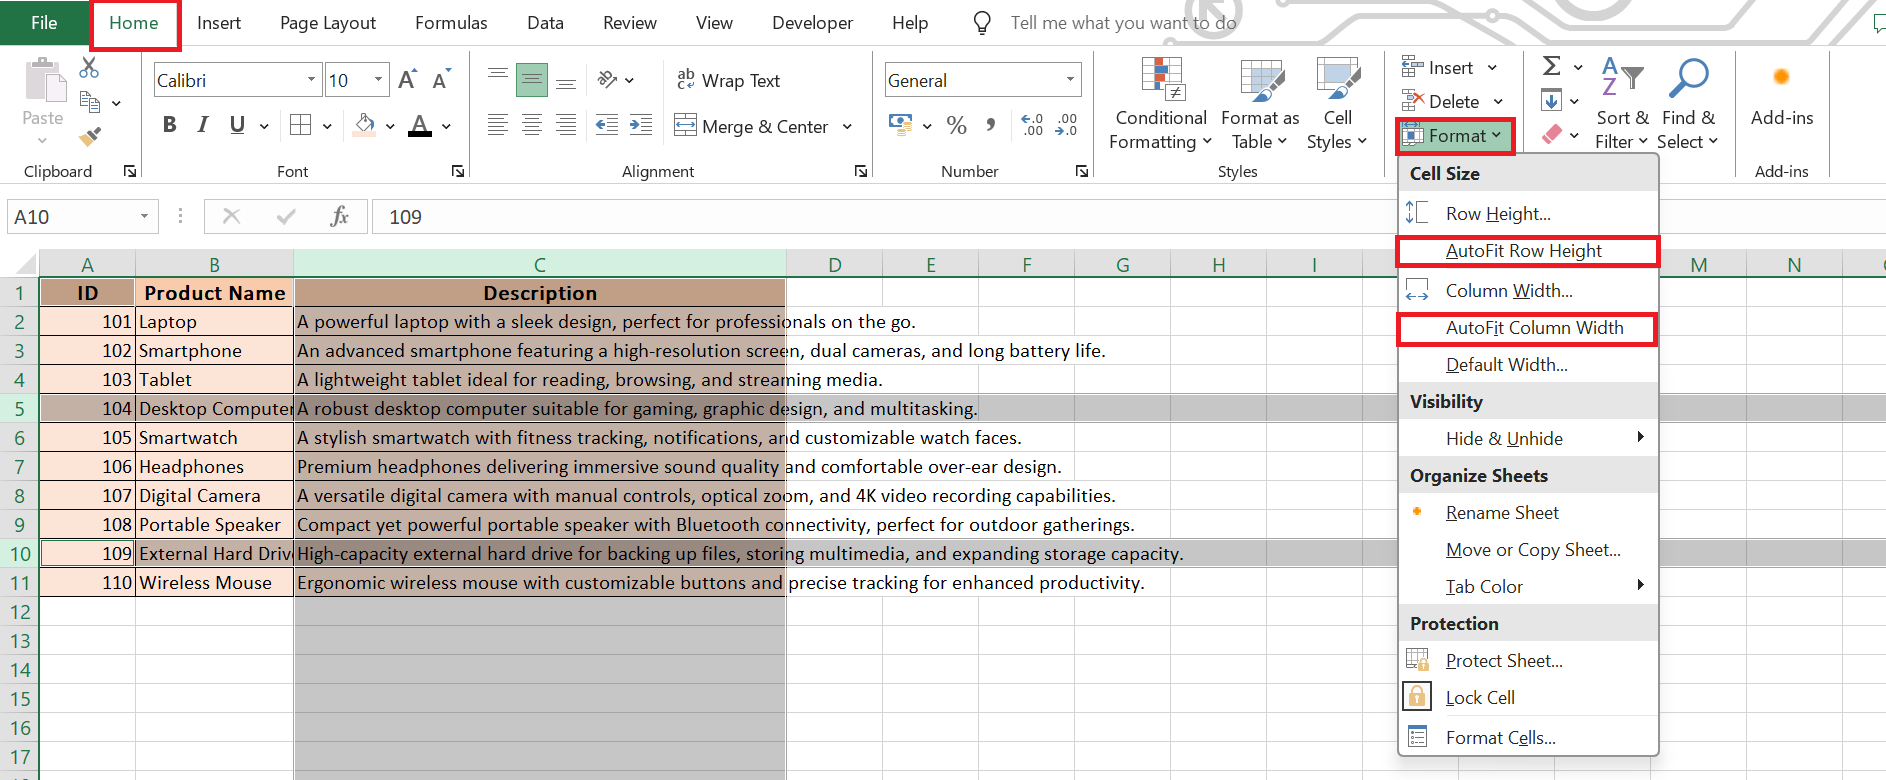
STEP 3: In the “Cells” group, locate the “Format” dropdown menu.
STEP 4: Click on “AutoFit Row Height” or “AutoFit Column Width” to dynamically adjust the selected rows’ heights or columns’ widths based on the content within them.
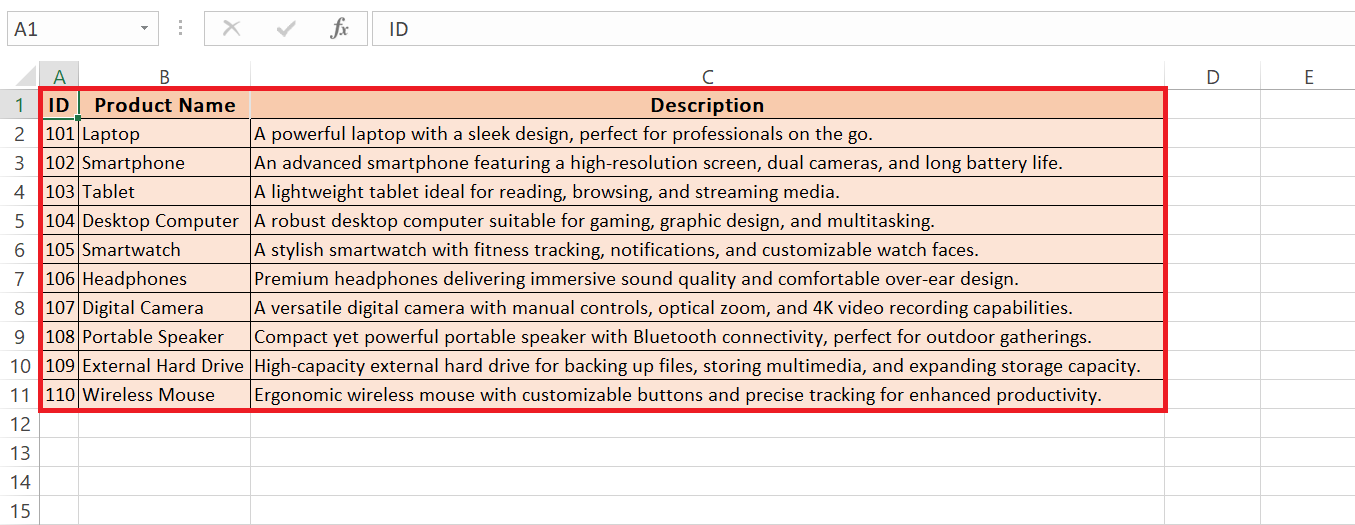
After clicking on the same we see the below result with rows and columns adjusted properly.
These features are particularly handy when dealing with variable data lengths, ensuring your spreadsheet looks tidy and well-organized with minimal effort.
Advanced Excel Adjustment Tactics
AutoFit Magic for Optimal Spacing
AutoFit is like a bit of magic in Excel, offering the perfect solution for when you want your cells to automatically match the size of their contents. Just double-click the boundary of the column or row header, and watch it snap to fit the longest bit of data. This eliminates any guesswork involved in manual adjustments and ensures that all your content is visible without any extra blank space.
It’s the go-to tool for quickly ensuring optimal spacing, whether you’re handling a few cells or an entire dataset.
Setting Row and Column Sizes Numerically for Consistency
For unwavering consistency across your spreadsheet, you may want to set row and column sizes numerically. This precision formatting allows for uniformity, which is especially important in printouts or when prepping files for shared use.
Simply select the rows or columns, then under the ‘Home’ tab, click on the ‘Format’ button within the ‘Cells’ group. Here you can choose ‘Row Height’ or ‘Column Width’ and input your desired numerical value.
Applying numerical values is also a boon for creating templates and ensures that each cell maintains its dimensions regardless of the data entered.
Custom Formatting Tricks
Locking Down Dimensions for Cell Stability
Ensuring that your data maintains its intended format can be achieved by locking down your cells‘ dimensions. This stability is crucial when sharing spreadsheets with others, as it prevents accidental resizing.
STEP 1: To lock column width or row height, first set your desired sizes as explained above.
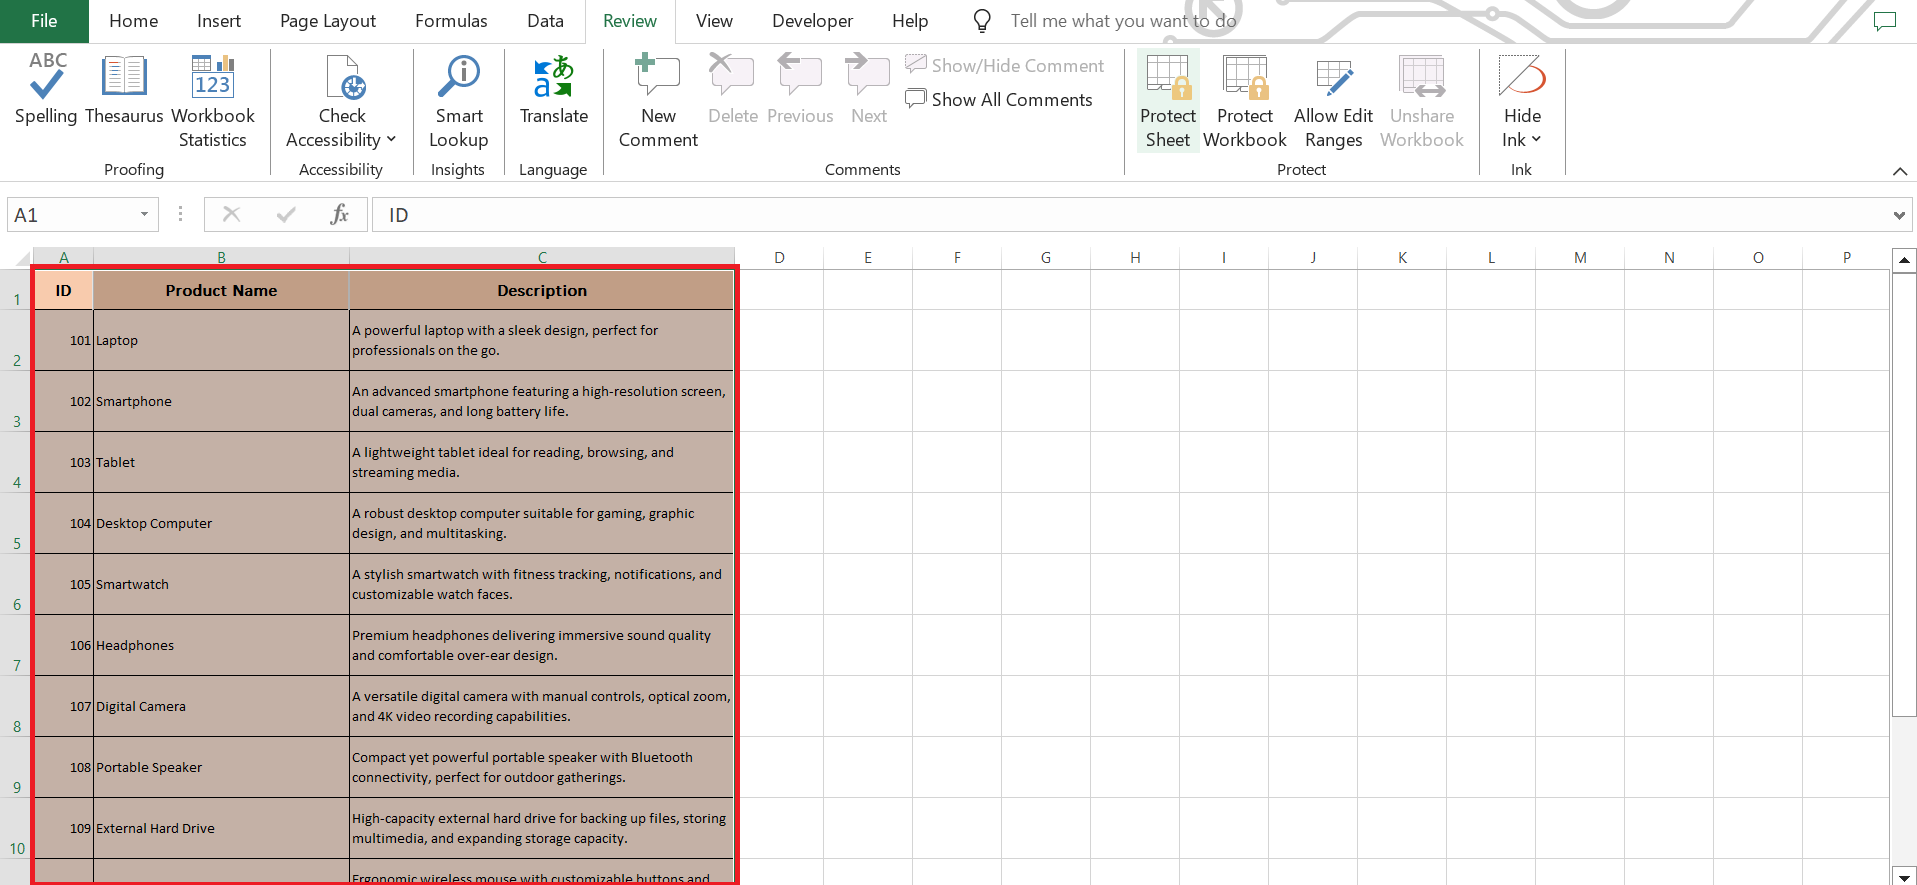
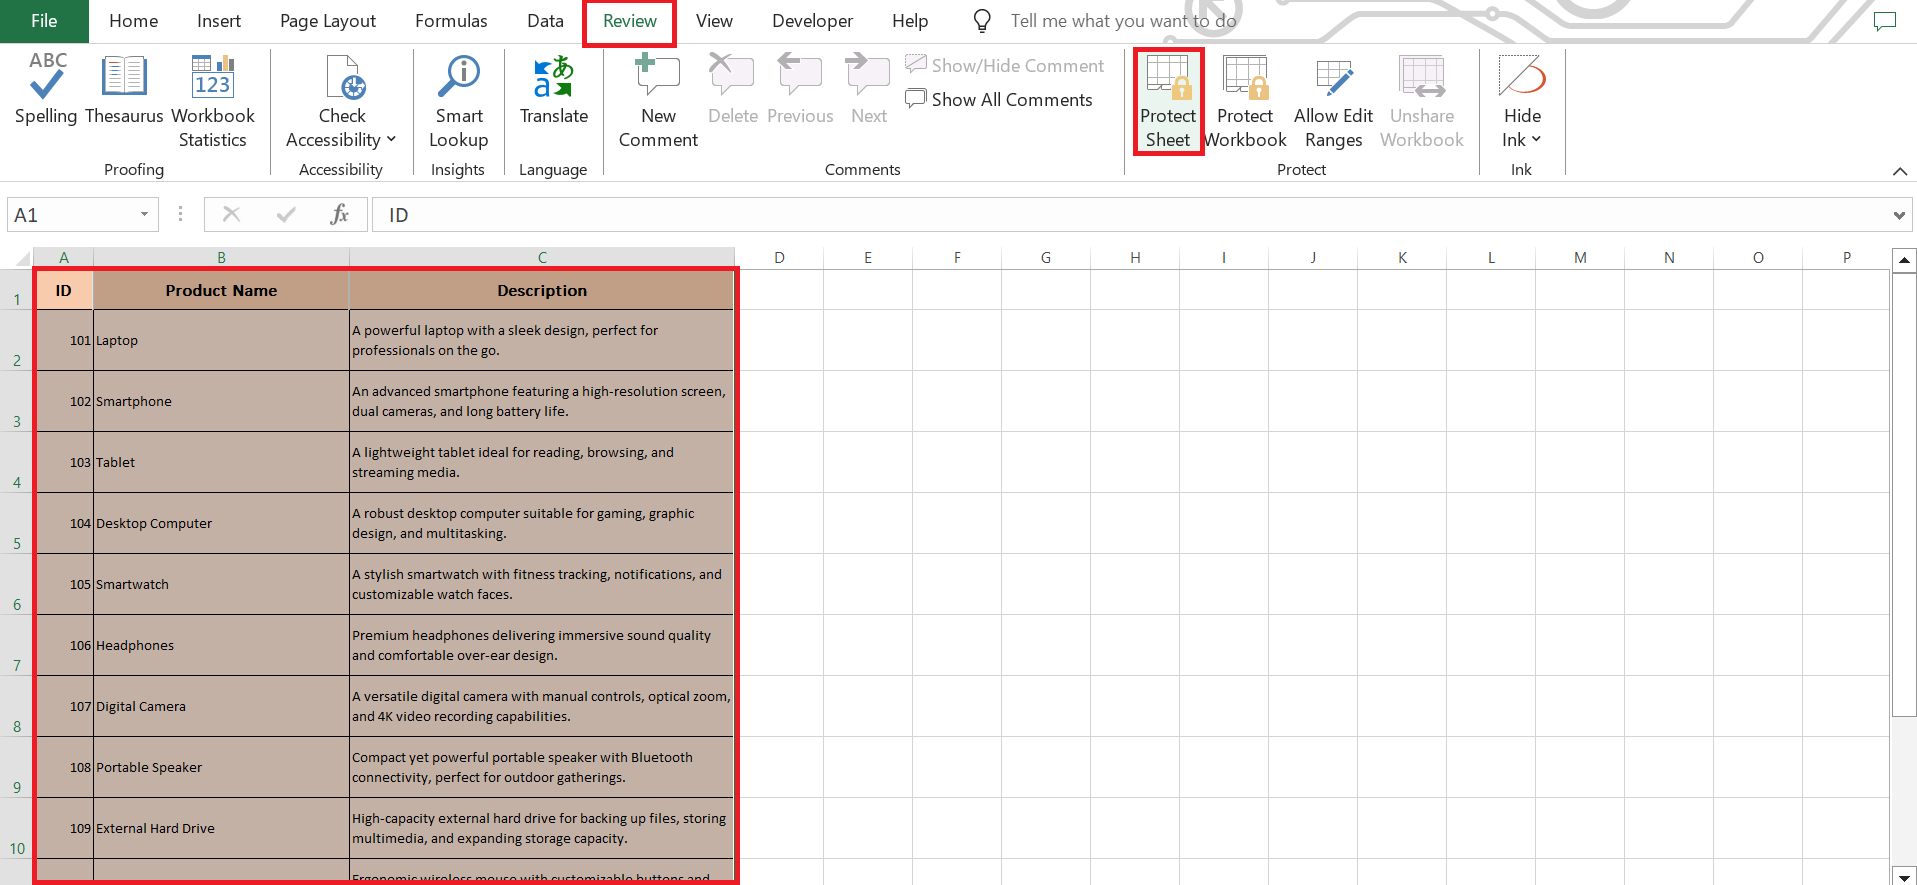
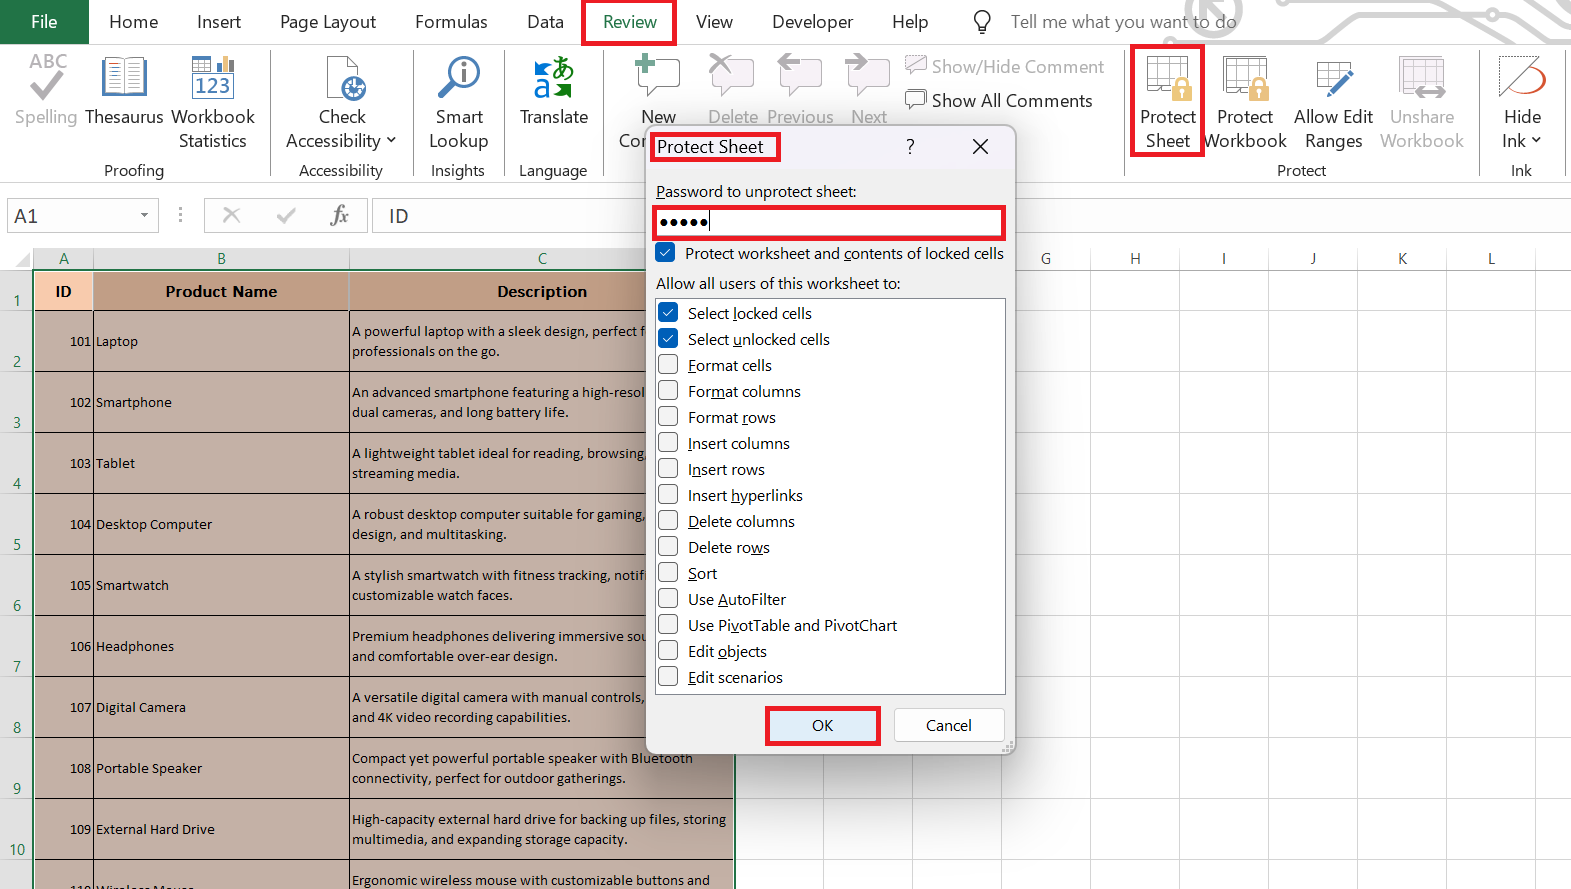
STEP 2: Then, protect your worksheet by selecting ‘Review’ from the Excel ribbon, and clicking on ‘Protect Sheet’.
STEP 3: You can set a password if needed, ensuring your dimensions stay put.
Locking dimensions is particularly valuable in collaborative environments or when a spreadsheet serves as a template for routine tasks.
Tweaking Default Settings for Your Excel Workflow Needs
Customizing Excel’s default settings to match your workflow needs can vastly improve your efficiency. For those who frequently deal with certain data types or specific reporting formats, adjusting the default row height or column width for all new sheets can save time. To change these defaults,
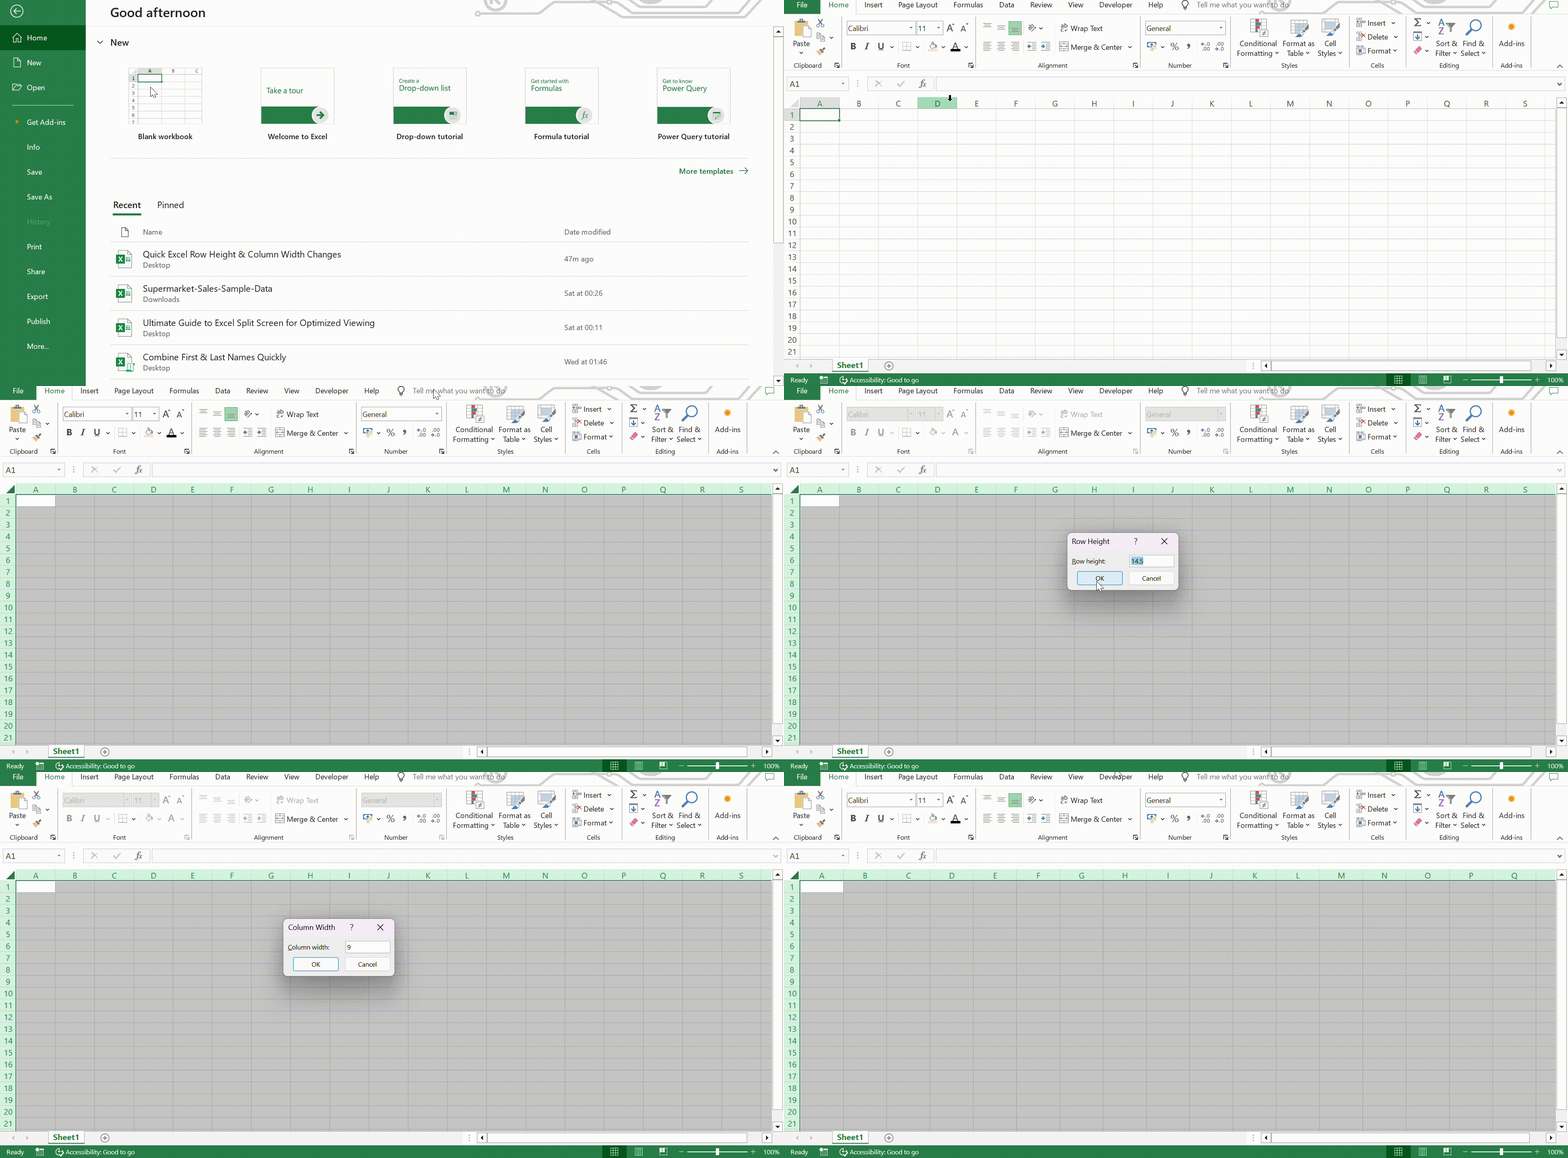
STEP 1: Open a new worksheet, adjust a row or column to your preferred size select the entire sheet, and set that size.
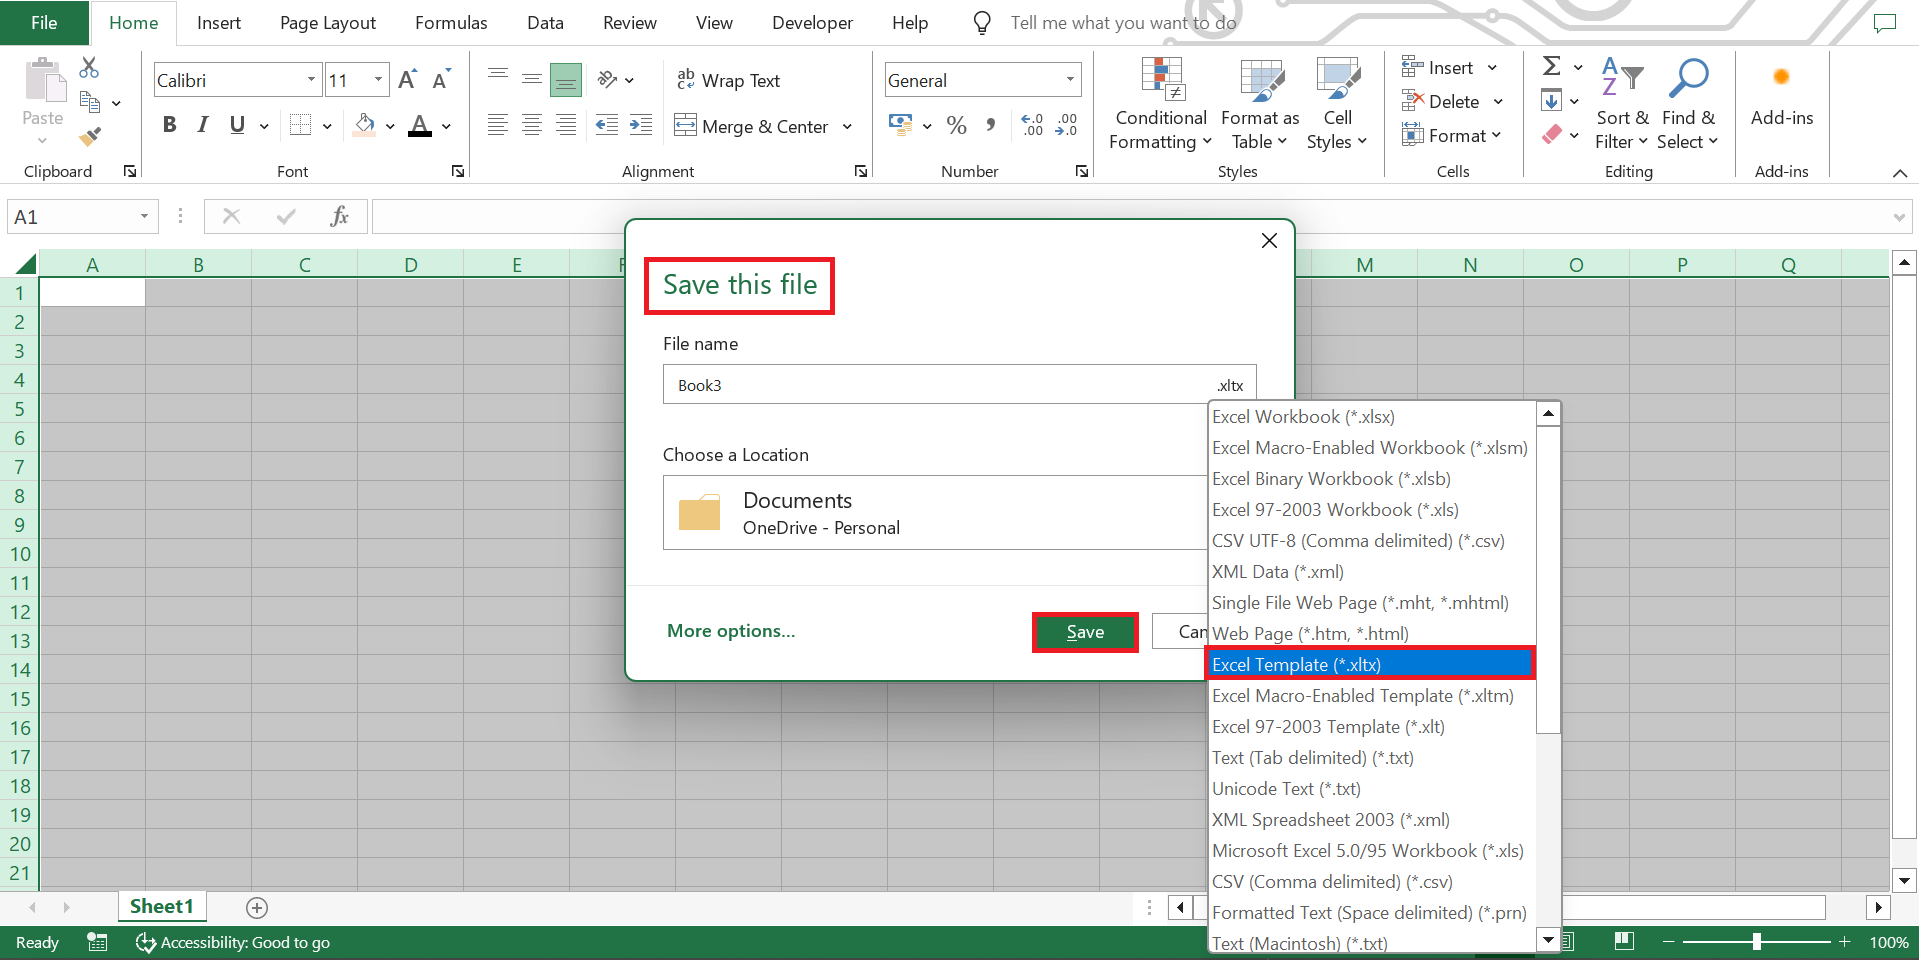
STEP 2: Once done, save this as a template via ‘File’ > ‘Save As’ > ‘Excel Template‘ (*.xltx).
By tweaking these settings once, you streamline your process for future projects, ensuring a consistent starting point every time.
Troubleshooting Common Sizing Issues
Navigating Challenges with Large Data Sets
When you’re juggling large data sets, formatting can become a complex task. Navigating these challenges means being strategic about resizing. For instance, you might find that the AutoFit feature isn’t practical because it can lead to excessively wide columns or tall rows. Selectively resizing sections becomes key. Also, consider using filters or hiding certain rows or columns to manage the visibility of your data without impacting the overall structure.
Remember to save your work frequently when handling large files in case of slowdowns or crashes, which can be more common with heavy data loads.
Addressing Inconsistencies Across Different Excel Versions
Inconsistencies in formatting can arise when files move between different versions of Excel. Features like ‘AutoFit’ might behave slightly differently, or some shortcuts may not be available. To mitigate these issues, familiarize yourself with the version-specific nuances and be prepared to adjust your formatting as needed. For critical spreadsheets, consider saving and sharing in a backward-compatible format and include a ‘ReadMe’ with specifications for users on other versions.
Ensuring clear communication about the version-specific formatting will help maintain consistency, regardless of the Excel version being used.
Enhancing Your Productivity in Excel
Time-Saving Tips for Frequent Formatting Tasks
Maximizing your productivity in Excel often means finding ways to shave off seconds on repetitive tasks. Need to adjust many rows or columns at once? Try selecting them simultaneously and then dragging to resize – they’ll all adjust to the same dimension. Also, don’t forget the power of style sets; define a cell style once, and apply it wherever needed with just a few clicks.
Using these tips regularly can transform your Excel sessions into a more streamlined and efficient experience.
Bonus Excel Shortcuts Every User Should Know
In the Excel universe, shortcuts are like hidden treasures that can expedite your workflow significantly. Remember that Ctrl + Space selects an entire column, and Shift + Space selects an entire row – terrific for quick selections. Use Ctrl + 1 to bring up the Format Cells dialog box where you can dive deep into formatting options instantly. And for those times when you need to repeat your last action, F4 is your trusty ally.
By weaving these shortcuts into your routine, you can navigate Excel with enviable speed and precision.
FAQ Section
Can I set a standard row height for all new Excel sheets?
Yes, you can set a standard row height for all new Excel sheets by customizing a template. Adjust your row height as desired, select the entire sheet, replicate the setting across it, and then save this as a template. Use this template for all new sheets to maintain the standard height.
Is there a quick way to adjust multiple columns or rows at once?
Absolutely! To adjust multiple columns or rows at the same time, select them all first, then drag the boundary of any selected row or column. Adjusting one will automatically resize all the selected ones uniformly.
What is the shortcut for row height in Excel?
The keyboard shortcut in Excel to quickly access the row height dialog box is “ALT + H + O + H.” Simply press these keys in succession, enter your desired row height in the box that appears, and hit “OK” to apply the changes.
What is the normal row height for Excel?
The normal row height in Excel with the default font Calibri 11 is around 15 points, which may vary slightly depending on display scaling. This height comfortably accommodates standard text sizes.
How to adjust row height in excel?
To adjust a row height in Excel, right-click the row number, choose ‘Row Height,’ input the desired value, and press ‘OK.’ Alternatively, use your mouse to drag the row boundary or select the row, go to the ‘Home’ tab, click ‘Format,’ and select ‘Row Height.’
What is the purpose of locking width and height in a spreadsheet?
Locking width and height in a spreadsheet maintains your formatting consistency, ensuring that the visual presentation remains as intended, particularly when collaborating with others or using the spreadsheet as a template.
John Michaloudis is a former accountant and finance analyst at General Electric, a Microsoft MVP since 2020, an Amazon #1 bestselling author of 4 Microsoft Excel books and teacher of Microsoft Excel & Office over at his flagship MyExcelOnline Academy Online Course.

