Mastering the art of cell organization in Microsoft Excel transforms your spreadsheet from a chaotic jumble into a streamlined data powerhouse. Whether you’re dealing with imported data or organizing your lists, knowing how to split cells is essential for clarity and analysis. This guide will walk you through various techniques on how to split cells in Excel.
Key Takeaways:
- Text to Columns Feature: This tool allows you to quickly separate data in a single cell into multiple columns based on delimiters like commas, spaces, or tabs, making data more manageable.
- Using Formulas: For more complex splits, Excel functions such as LEFT, RIGHT, MID, and SEARCH provide precise control over data extraction, allowing for custom solutions tailored to specific needs.
- Splitting Merged Cells: Unmerging cells restores individual cell functionality, enabling detailed data management and sorting without altering the content.
- Flash Fill: This feature detects patterns in your data entry and automatically fills in the rest, making it ideal for splitting data like names or addresses efficiently.
Table of Contents
Introduction to Splitting Cells in Excel
The Basics of Cell Organization in Excel
Gone are the days when organizing data in Excel was a daunting task. Whether you’re a seasoned pro or a rookie, mastering cell organization is the key to turning a spreadsheet from a jumbled mess into a well-oiled data machine. Think of Excel as a labyrinth of rows and columns waiting for you to transform it into a treasure map of information.
When and Why You Should Split Cells
Ever faced the task of staring at a block of data squished together in a single cell? That’s where splitting cells come in, a game-changer for data organization. You might split cells in Excel to separate first and last names, divide addresses into multiple parts, or segregate comma-separated values for better clarity and analysis. It’s all about making sure each piece of your data puzzle sits in the right place, enabling you to sort, filter, and understand your spreadsheet like never before.
Splitting cells can transform your data into something more structured and useful, especially if you’ve imported data from another application that doesn’t quite fit your Excel layout. It’s an essential skill for anyone who regularly works with lists or databases in Excel.
Techniques for Splitting Cells
Using ‘Text to Columns’ for Basic Splits
When you need a straightforward solution to prise apart text in your Excel cells, ‘Text to Columns‘ is your go-to feature. Imagine you’ve got piles of data points lumped together, and you want them to breathe in their individual spaces. By using this crafty feature, you can break down data separated by commas, semicolons, or even spaces.
In essence, ‘Text to Columns’ is a no-fuss tool that swiftly converts a cell’s content into neatly organized columns. Follow the steps below –
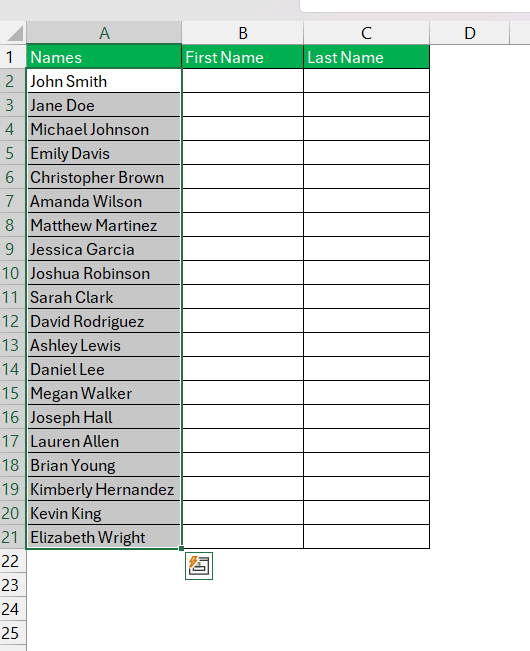
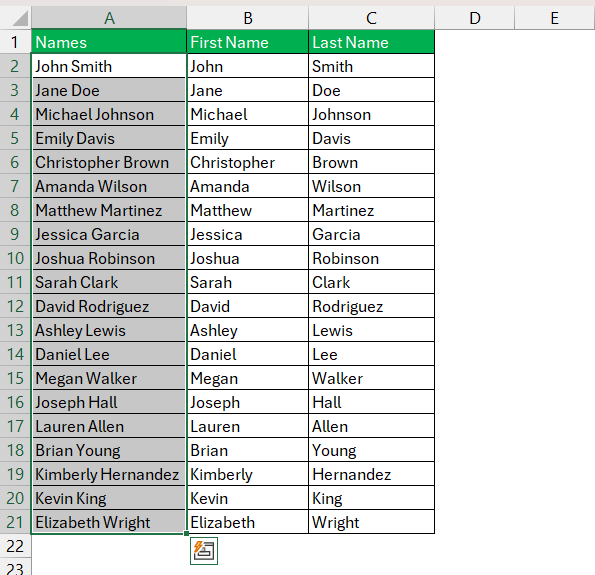
STEP 1: Click and drag to highlight the range of cells containing the data you want to split.
STEP 2: Go to the “Data” tab on the Ribbon. Click on “Text to Columns” in the “Data Tools” group.
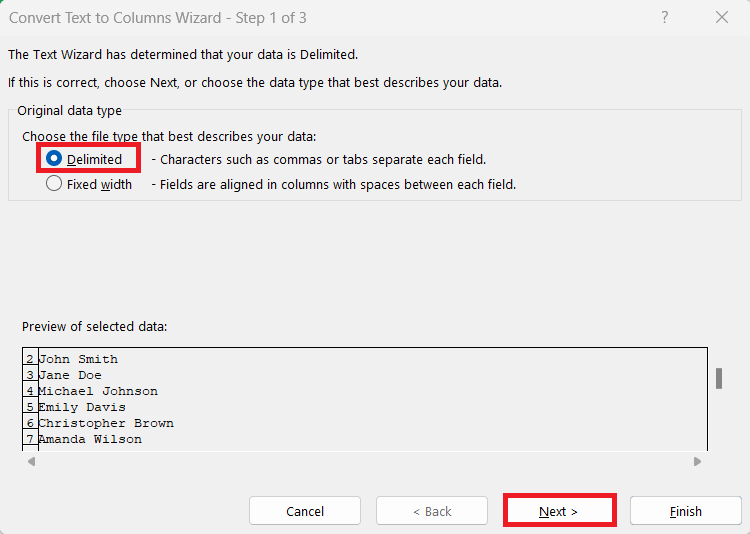
STEP 3: In the Text to Columns Wizard, choose either “Delimited” or “Fixed Width”:
- Delimited: Choose this option if your data is separated by specific characters such as commas, spaces, or tabs.
- Fixed Width: Choose this option if your data is aligned in columns with spaces between each field.
Click ‘Next’.
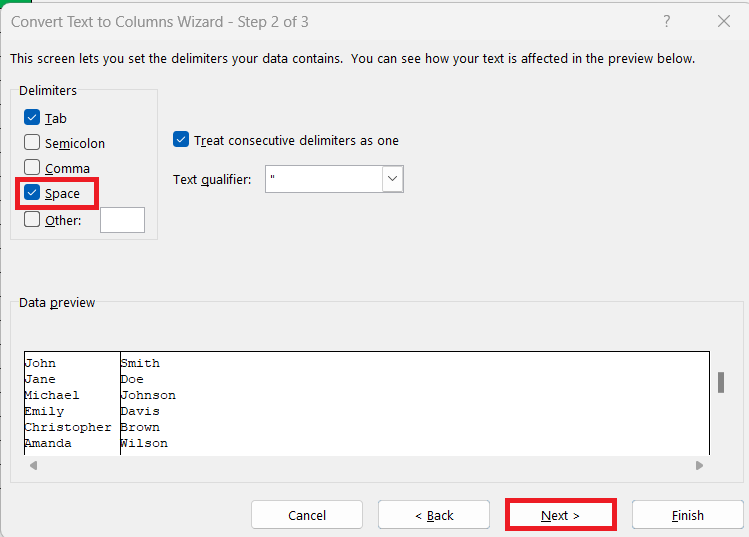
STEP 4: Select the delimiter that your data uses (e.g., Comma, Tab, Semicolon, Space, or Other). You can select multiple delimiters if needed. Click “Next” after selecting “Delimited.”
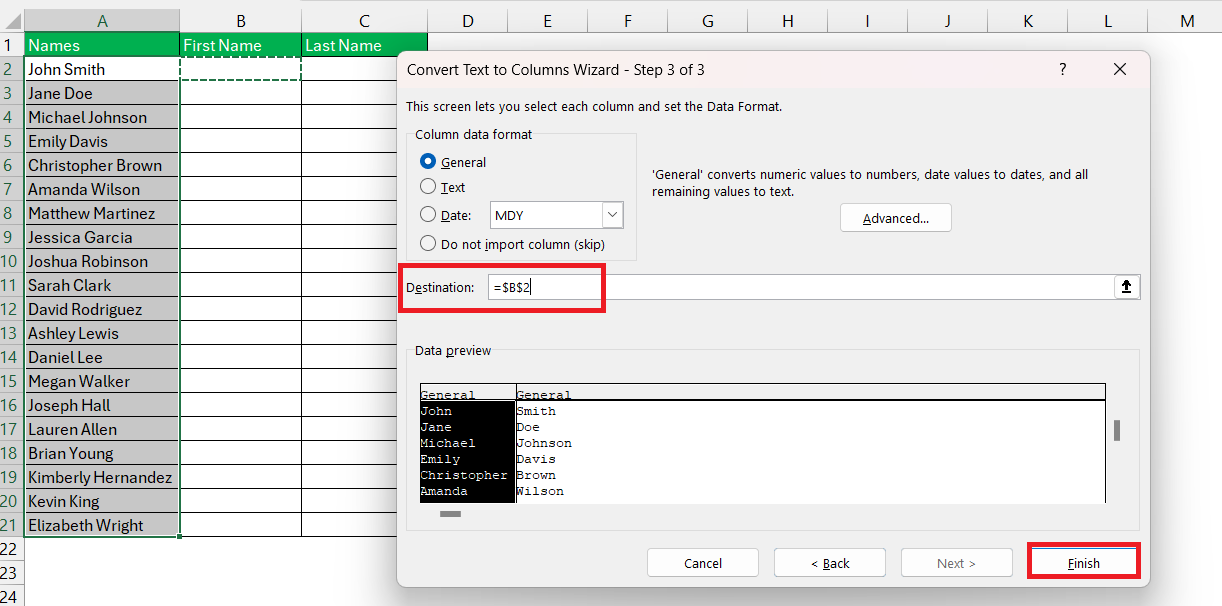
STEP 5: Select B2 as the destination. Click “Finish” to complete the process.
The original data will be split into separate columns based on the criteria you specified.
These steps should help you effectively split your text data into multiple columns using the “Text to Columns” feature in Excel.
Deploying Formulas for Advanced Splits
Diving deeper into Excel’s toolkit, when you need precision and complexity, formulas are your secret weapons. They’re like a Swiss Army knife; capable and intricate, empowering you to slice and dice data according to your very own set of rules. You’re not just splitting text at every comma or space; you’re crafting a custom solution for your specific data conundrum.
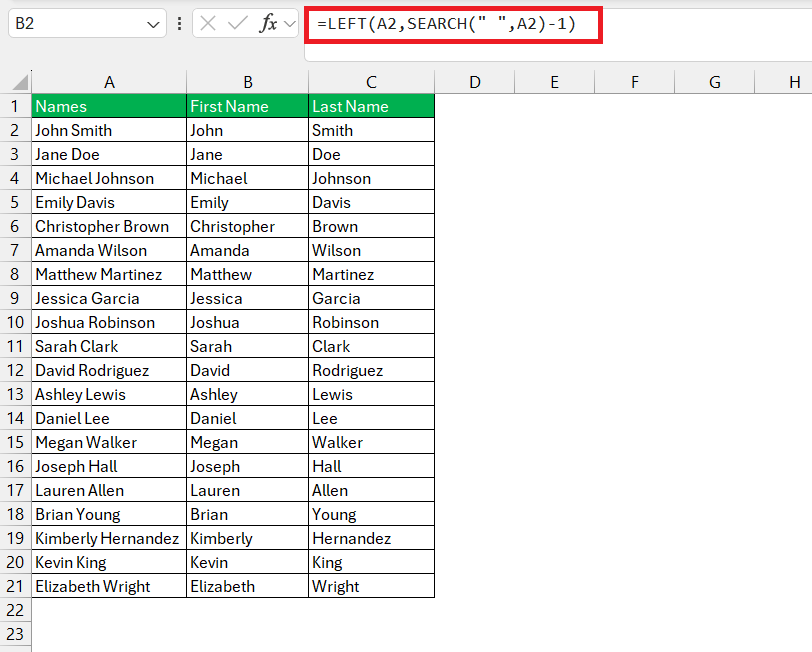
Using familiar functions like LEFT, RIGHT, MID, and SEARCH, you can extricate the exact pieces of text you need. With a sprinkle of creativity and a dash of logic, you can conceive a formula that handles exceptions, conditions, and all the nuances in your data.
You can use this formula to extract the first name –
Splitting Merged Cells into Individual Cells
Splitting merged cells back into their individual form is like unlocking a puzzle — it’s about reclaiming the individuality of data points smushed together. Perhaps in the past, merging made sense for a heading or a special note, but now you need that granular control again for sorting or detailing.
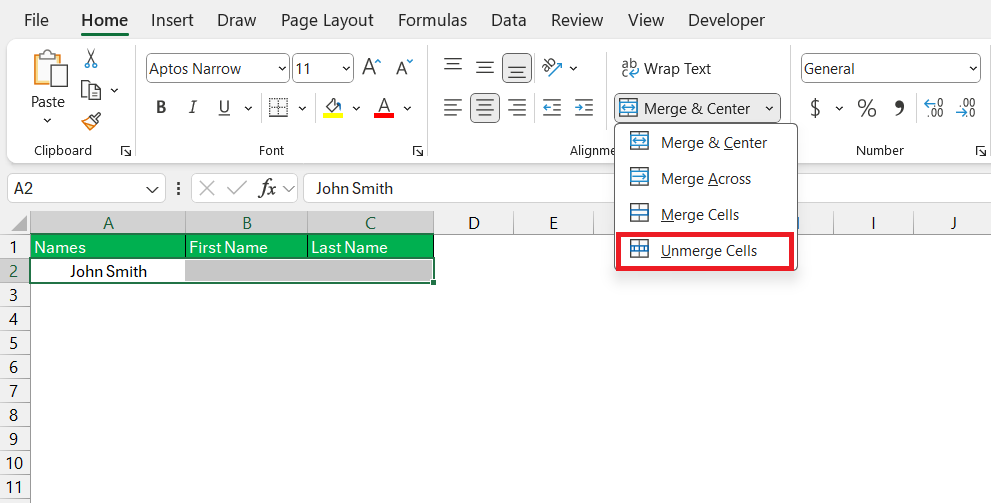
With just a few clicks, you get to reverse the merge: simply select the merged cells, head over to the ‘Merge & Center’ button on the Home tab, and choose ‘Unmerge Cells’.
It’s less about splitting an individual cell and more about releasing several cells that were previously bound together by the merge.
Remember, this won’t affect the content of the cells — they remain intact, just no longer sharing the same space. It’s an essential step to reorganizing your data and gives you back the freedom to manage each cell as you see fit.
Harnessing Flash Fill for Efficient Data Separation
Imagine you’re a magician, and with a wave of your wand — or in this case, the press of a key — you instantly separate a jumbled string of text into neatly organized information. That’s Flash Fill for you, a wizardly feature in Excel that fills out data for you once it detects a pattern in your input. It’s like having a mind-reading assistant who anticipates your needs and acts on them before you even finish asking.
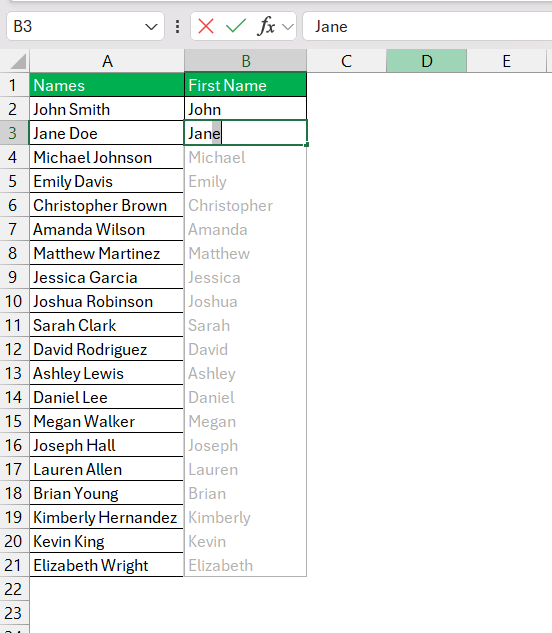
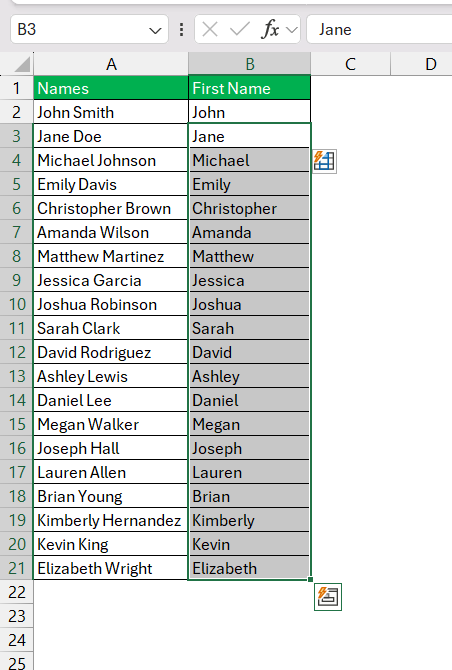
Think of having a list of full names that you want to split into first and last names. Start by typing the first name from the first cell in a new column, and by the time you type a couple more, Excel’s Flash Fill feature kicks in, suggesting the rest of the first names.
If it’s got the pattern right, hit the Enter key, and watch as all the corresponding data falls into place.
This feature is particularly handy when dealing with data split unevenly, such as different length names or addresses.
FAQ Section
What is the shortcut for split cells in Excel?
The shortcut for splitting cells in Excel doesn’t exist as a direct key combination. Instead, you’ll first select the cells you want to split, then press ‘Alt’ followed by ‘A’ to open the Data tab, and ‘E’ to select the ‘Text to Columns‘ wizard. It’s a quick way to jump to the right tool without reaching for your mouse.
How Can I Split a Cell Without Losing Data?
To split a cell without losing data, use Excel’s ‘Text to Columns’ feature or ‘Flash Fill’. These tools allow you to divide the cell’s content into multiple cells based on specific delimiters or patterns without discarding any of your valuable information.
How do I split a single cell into multiple rows in Excel?
To split a single cell into multiple rows in Excel, you can use the ‘Text to Columns’ feature followed by ‘Transpose’. First, split the cell horizontally using the delimiter of your choice, then copy the resulting cells and use ‘Paste Special’ with the ‘Transpose’ option to arrange them into rows.
Is There a Way to Batch Split Multiple Cells at Once?
Yes, you can batch split multiple cells at once using the ‘Text to Columns’ feature. Simply select all the cells you want to split and apply the feature with your chosen delimiter. Excel will process all selected cells in one go, neatly splitting them according to your specifications.
How to split cells in Excel vertically?
To split cells in Excel vertically, you’d typically adjust the column widths to create the impression of vertical division, as Excel cells are fundamentally structured in rows and columns. However, for content purposes, you can use ‘Text to Columns’ to split the data horizontally across columns, then transpose the data to set it vertically into rows.
John Michaloudis is a former accountant and finance analyst at General Electric, a Microsoft MVP since 2020, an Amazon #1 bestselling author of 4 Microsoft Excel books and teacher of Microsoft Excel & Office over at his flagship MyExcelOnline Academy Online Course.

