Microsoft Excel‘s ability to manage date formats offers a bridge between simplicity and complexity, catering to both basic and advanced user needs. By understanding Excel’s default date settings and mastering custom dates to mm yy format, users can ensure their data is clear, consistent, and aesthetically pleasing, enhancing both functionality and collaboration.
Key Takeaways
- Excel pulls default date formats from the system’s regional settings, which can be seen and changed in the Format Cells dialog box.
- Custom date formats are essential for clarity, uniformity, and adherence to specific reporting standards, making data analysis and presentation more effective.
- Built-in date format options provide a quick way to change date presentations, with a vast array of styles available from the Home tab.
- Crafting custom formats, like MM YY, allows for focused data presentation, ideal for summaries and tracking over time without altering the underlying data.
Table of Contents
Introducing Excel Date Formats
Understanding Excel’s Default Date Settings
In Excel, dates can take several shapes and forms, depending on how users wish to display them. Understanding the default date settings is crucial before tailoring them to specific needs. Essentially, Excel pulls these default formats, short and long, from your system’s regional settings.
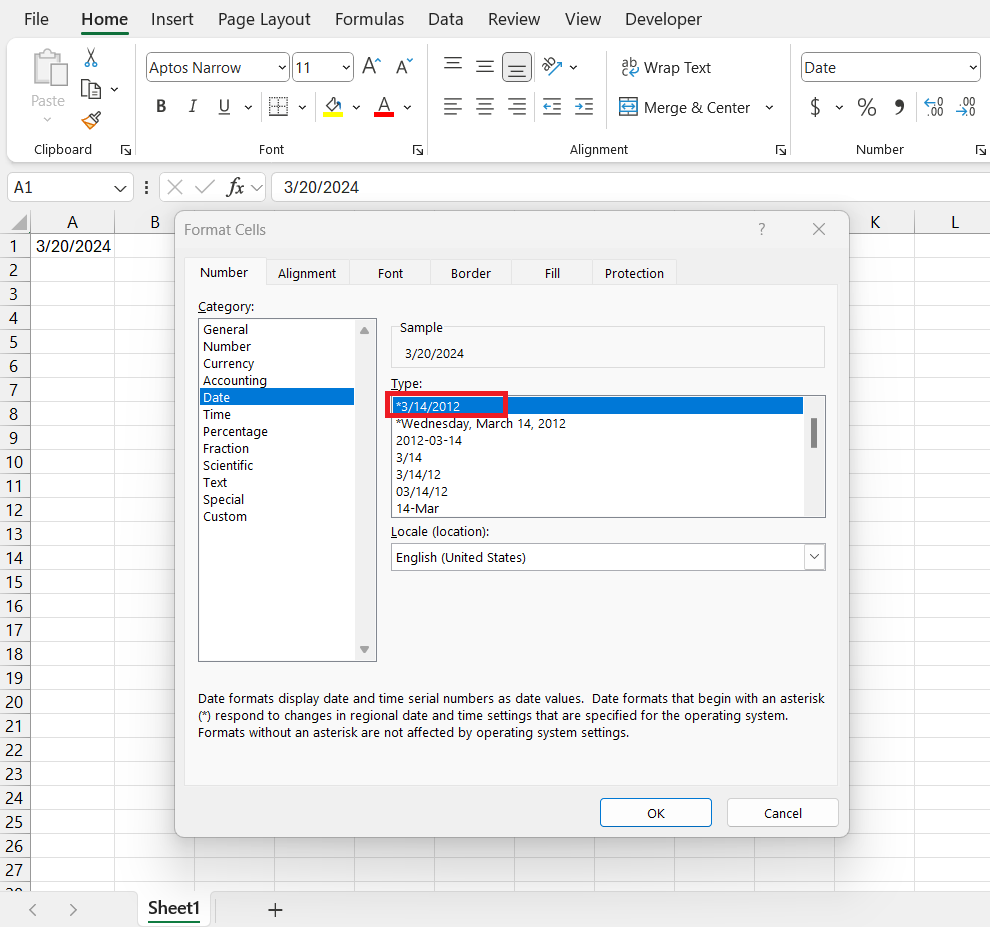
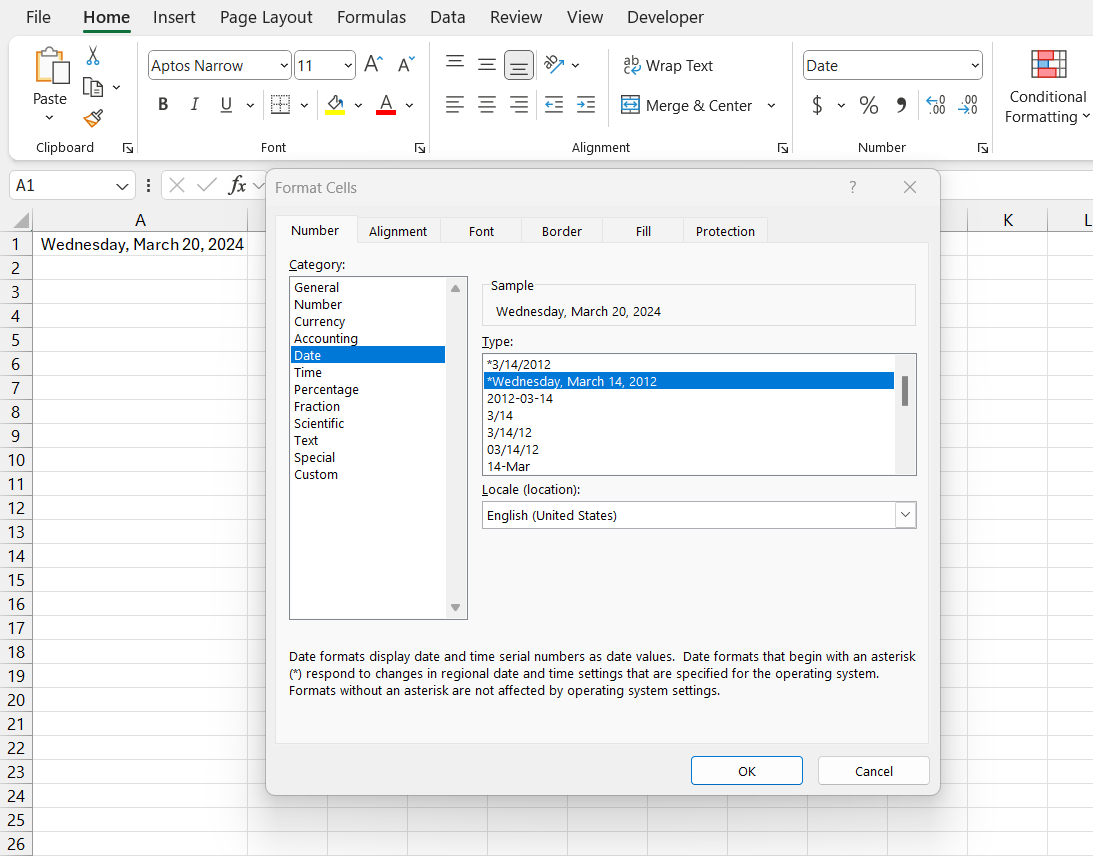
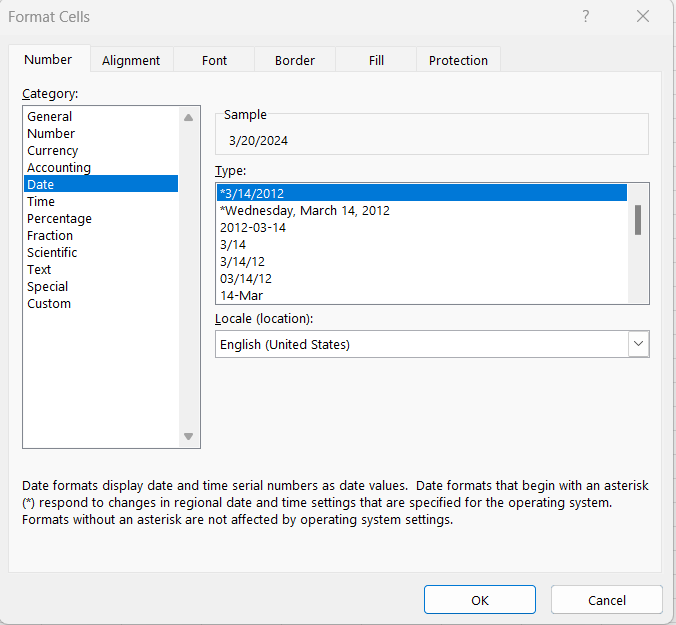
Have you noticed how when you input dates, they automatically take on a certain look? Those are the default settings at play. To see what format you’re currently working with, just cast a glance at the Format Cells dialog box, where the default selections have asterisks next to them.
The Importance of Custom Date Formats
Custom date formats in Excel are more than a matter of visual preference; they’re a tool for ensuring clarity and uniformity within your data. Imagine trying to collaborate when one user’s data screams ‘mm/dd/yyyy’ while someone else insists on ‘dd-mm-yy’. This can lead to confusion and errors, particularly when it comes to data analysis and reporting where the correct interpretation of dates is critical.
Moreover, custom date formats help maintain consistency across documents, which is essential for businesses and organizations that need to abide by specific reporting standards or formats. They also cater to the aesthetic aspect of data presentation, ensuring that reports look polished, and professional, and are formatted according to company policy or customer expectations. It’s about more than just making numbers pretty; it’s a vital functional element that can streamline workflows and prevent miscommunication.
Detailed Guide to Converting Dates
Using Built-in Date Format Options
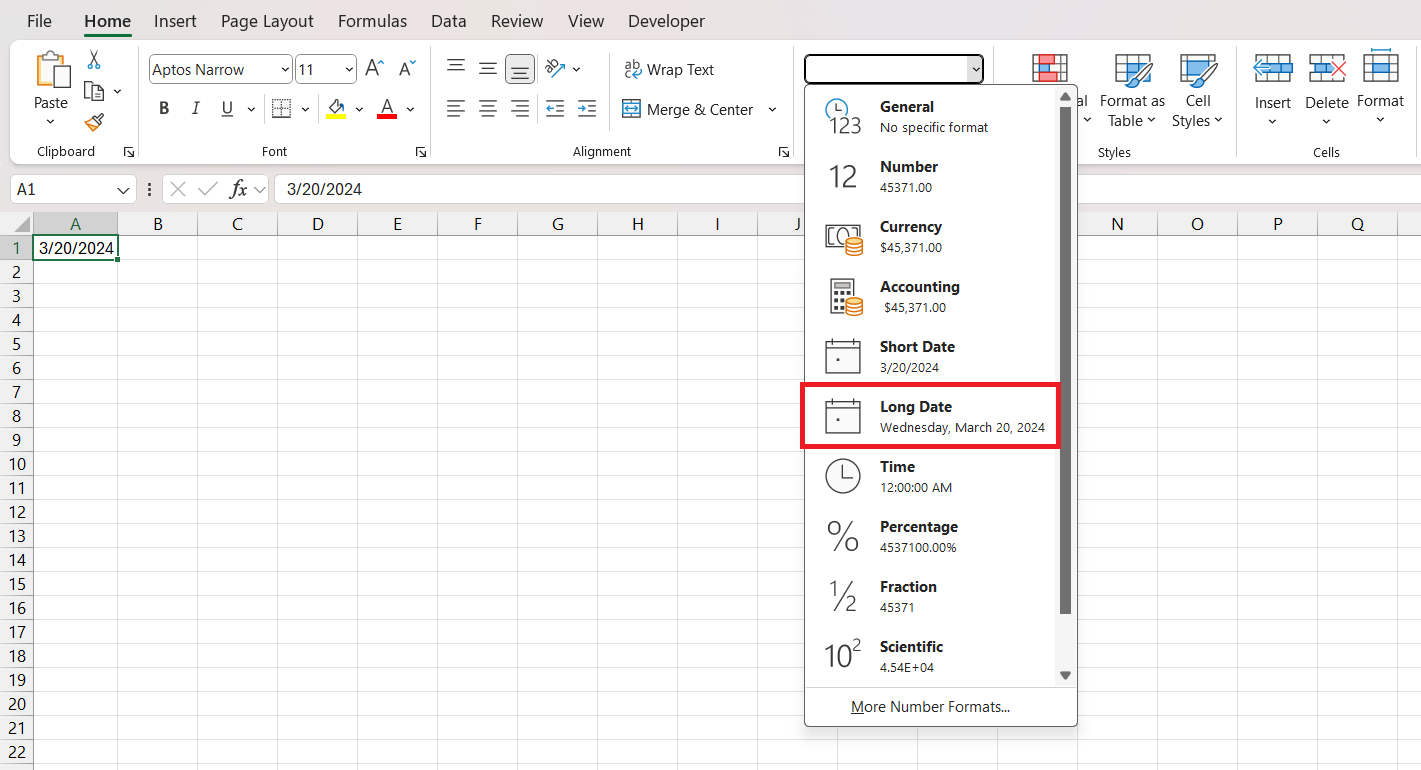
When you want to quickly change the presentation of dates in Excel, the built-in date format options are your first line of assistance. To take advantage of these, just select the dates you want to reformat, navigate to the Home tab on the ribbon, and find the Number group. Clicking the little arrow next to the Number Format box unveils a dropdown menu with various formats—the ubiquitous short date, its more informative cousin the long date, and, of course, time.
One more click is all it takes to shift your date’s attire from casual to formal or any style in-between that Excel offers. It’s almost like magic! If you have a go-to format that you use often, this is the quickest way to apply consistent styling across your data sets without much fuss.
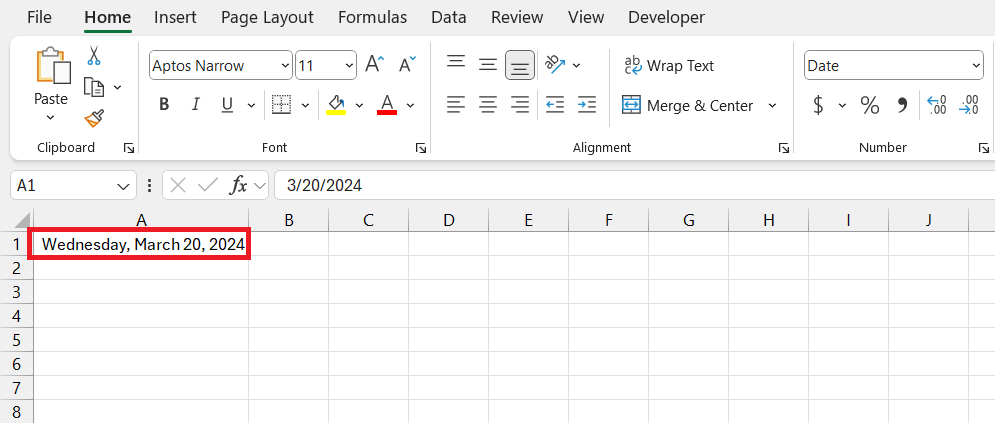
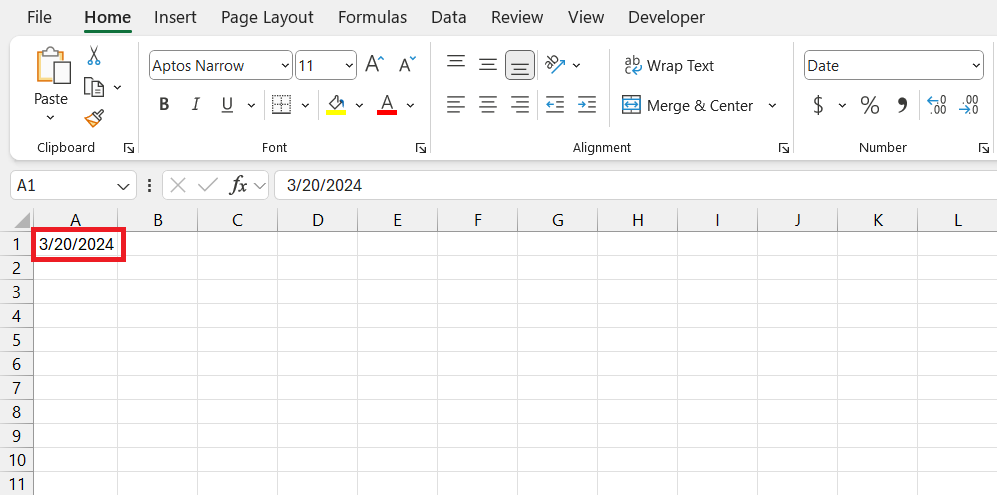
The new formatting will be applied in the cell.
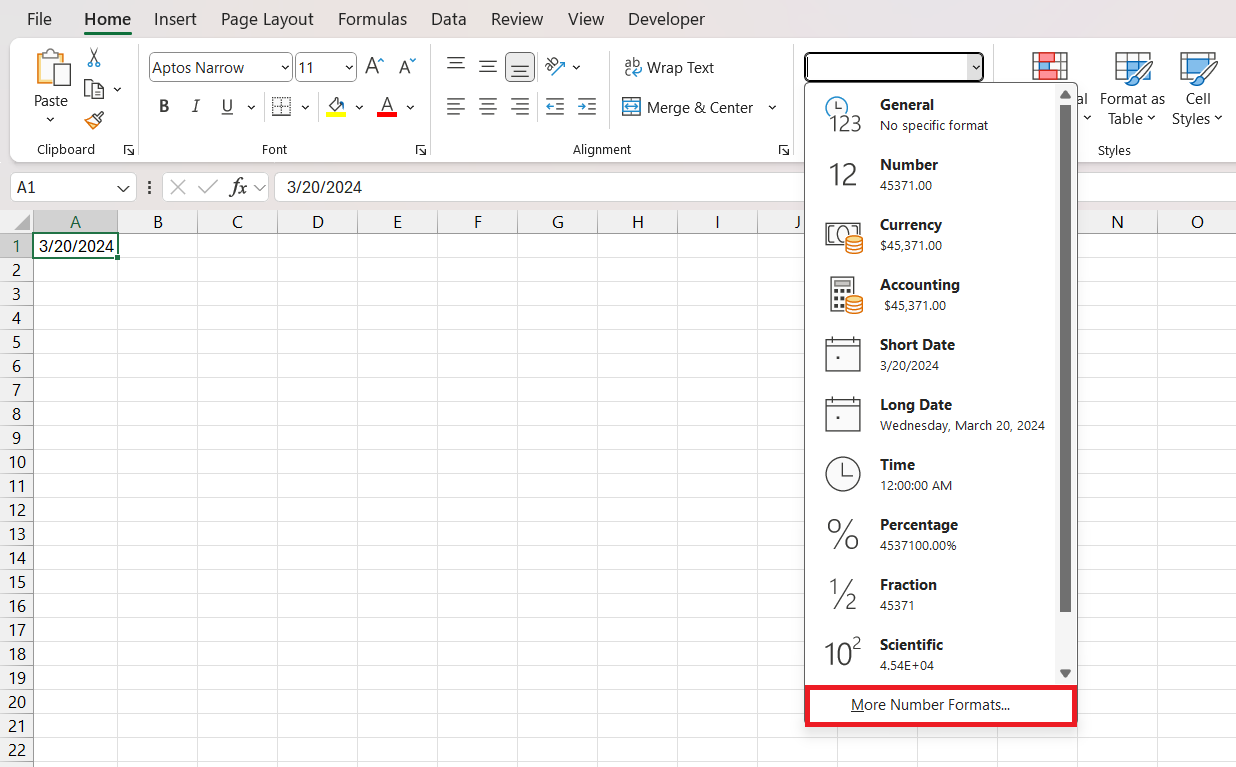
In the event none of the present options fits the bill, you aren’t out of choices. The More Number Formats link at the bottom of the dropdown list leads you to a broader collection of styles.
From there, tailor your dates precisely how you like them—Excel is quite accommodating in that regard.
Crafting Dates to MM YY format
When the existing options in Excel don’t suffice, crafting a custom date format becomes your creative playground. Let’s say you want your dates to sing a specific tune: just the month and year, in a MM YY format. Here’s how you can set up that stage to convert date to mm yy format:
STEP 1: Select the cells where you want this special date format.
STEP 2: Then, move your cursor to the Home tab and click on the Number group’s little launcher, or simply press Ctrl + 1, to open the Format Cells dialog.
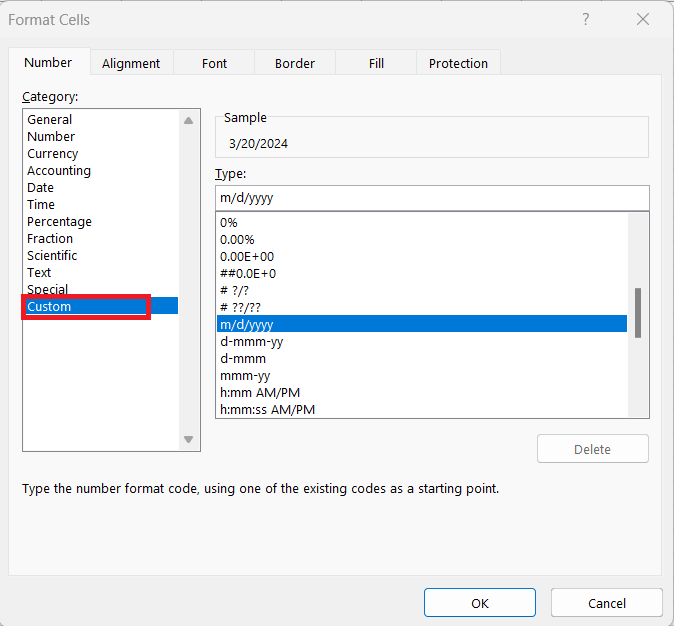
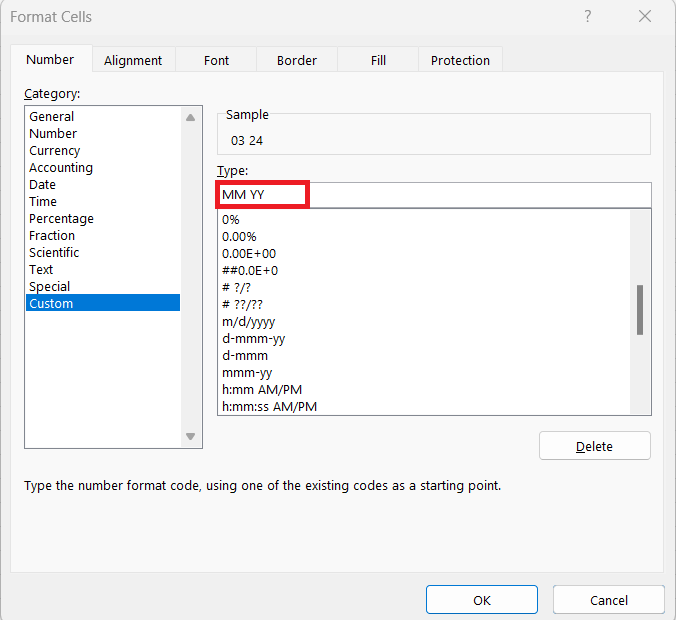
STEP 3: In the dialog that appears, choose ‘Custom’ from the Category list.
STEP 4: Now, in the Type box, enter mm yy.
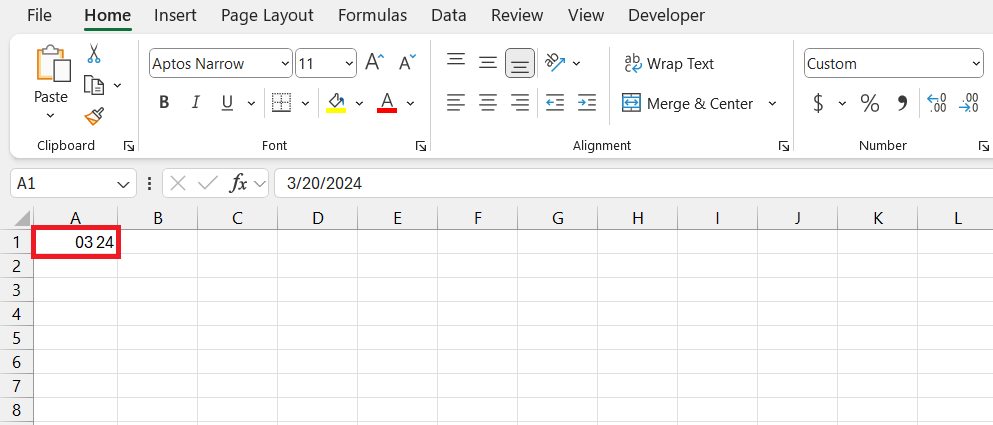
The result looks like this –
This sequence crafts a simple attire for your dates, focusing on just the month and year, giving your data a neat, uniform look perfect for summarizing information over time. Whether for tracking events, milestones, or financial periods, this format keeps it succinct.
Keep in mind that although this approach changes the display format, it doesn’t alter the underlying date. So, while your spreadsheet might now showcase a simplified 04 23, rest assured the full date is still there, working behind the scenes.
While Excel offers a wide range of date format symbols, remember that ‘mm’ stands for the month and ‘yy’ for the year. By combining these two, you maintain the integrity of your data while presenting it just the way you need.
Advanced Techniques for Date Conversion
Leveraging Formulas for Conversion
Leveraging formulas in Excel provides a dynamic way to convert dates into your desired format, especially when dealing with a vast array of data. Formulas can be designed to extract specific parts of a date, such as the month and year, and piece them together in a new format.
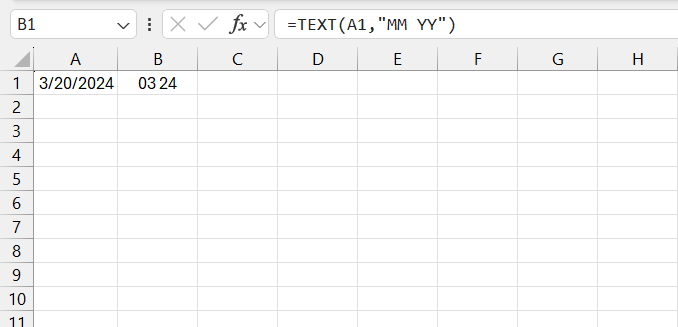
One such formula that you might find handy is the TEXT function, which can transform dates into a plethora of textual representations. To achieve the MM YY format, you would use:
=TEXT(your_date_cell,"MM YY")
Replace your_date_cell with the actual cell containing the date you wish to convert.
By applying this formula to a column next to your dates, you instantly create a new column with the converted format. This method ensures that your original dates remain intact while granting the versatility to display them however you like.
Utilizing Text Functions for a Quick Fix
Sometimes, you don’t need the full heft of a formula to convert your dates; a quick textual manipulation is all it takes. Utilizing text functions like LEFT, MID, and RIGHT alongside DATE and TEXT can be ideal for simple fixes, particularly if your data has been unceremoniously plopped down as text rather than in the proper date format Excel loves.
For instance, should you have dates typed out as ‘ddmmyyyy’ and need them in a ‘MM YY’ format, you could combine RIGHT, MID, and TEXT functions like this:
=TEXT(DATE(RIGHT(A1,4), MID(A1,3,2), LEFT(A1,2)),"MM YY")
Here, you’re pulling the year from the right, the month from the middle, and the day from the left of your text string, then weaving them into an actual date with DATE before applying the TEXT function to format it.
Text functions provide a nimble, straightforward way to reshape your date data when it strays from the pure format. They’re quick to implement and can significantly simplify data prep in Excel..
Optimizing Your Workflow: Tips and Tricks
Shortcuts for Speedier Date Formatting
Navigating through menus to format dates in Excel can be a drag on your productivity. Luckily, the program offers some nifty keyboard shortcuts that can significantly speed up the process. Here’s one to commit to memory:
Want to quickly set a date format to ‘dd-mmm-yy’? Just highlight the cell or range of cells containing the dates and press Ctrl+Shift+#. Instantly, your dates will adopt the ’01-Jan-15′ style format.
Don’t forget, though, while this shortcut is quick and convenient, it does apply the format based on the default ‘short date’ style, which might not match your regional settings. Therefore, if you’re looking for a different presentation, you’ll need to delve into the Format Cells dialog box for a more tailored touch.
Leveraging shortcuts like this can make you an Excel wizard in no time, saving you moments with every press that can add up to hours saved in the long run. Just remember, the more you practice them, the more inherent they become—muscle memory can be a powerful ally in the realm of data manipulation.
Best Practices for Data Consistency and Accuracy
For the meticulous minds and purveyors of pixel-perfect spreadsheets, nailing down data consistency and accuracy is the endgame. Here’s some expert advice to keep your date data on point and reliable:
- Use Single-Cell Input: Always input dates in individual cells. Merging day, month, and year into separate cells invites errors and makes calculations unnecessarily complex.
- Apply Uniform Formatting: Once you’ve chosen a date format, apply it uniformly across your workbook to maintain consistency. This is especially critical when multiple people access the document.
- Validation Rules: Implement data validation rules to ensure that only dates in the correct format can be inputted into cells, preventing the classic slip of ‘Feb 30th’.
- Avoid Manual Typing: Whenever possible, use Excel functions or dropdown calendars for date inputs to sidestep human error.
- Double-Check Imports: When importing or copying dates from other sources, always double-check them for format consistency and accuracy against your Excel sheet standards.
Remember, consistent and accurate dates not only look better but also make your data more trustworthy and easier to analyze. It’s worth the effort to iron out the wrinkles for a sleek, error-free experience.
Frequently Asked Questions
How Can I Convert a Series of Dates all at Once?
To convert a series of dates all at once in Excel, you can apply the same formatting to multiple cells simultaneously. Select the range containing the dates, then use the ‘Format Cells’ dialog to choose or create the desired date format.
Why Aren’t My Dates Converting Properly in Excel?
If your dates aren’t converting properly in Excel, it’s common that they may be formatted as text or affected by regional settings. Use the DATEVALUE() function on these ‘text dates’ to turn them into actual date values. Additionally, ensure your computer’s regional settings match the date format of your data.
How do I change the date format to MM YY in Excel?
To change the date format to MM YY in Excel, select the dates you wish to change, right-click and choose ‘Format Cells,’ then select ‘Custom’ in the Category list. In the Type field, enter “MM YY” and click ‘OK’ to apply the new format.
How do you convert date from MM DD YYYY to DD MM YYYY in Excel?
To convert the date from MM DD YYYY to DD MM YYYY in Excel, use the Format Cells feature. Select your dates, right-click, choose ‘Format Cells’, click on ‘Custom’ and type “DD MM YYYY” into the Type box, then click ‘OK’.
How I can change the dates to be 01/04/2023 13:00 instead of 04/01/2023?
To change dates from the format 04/01/2023 to 01/04/2023 13:00 in Excel, first ensure the dates are actual date values and not text. Then, select the cells, go to ‘Format Cells’, choose ‘Custom’, and type “DD/MM/YYYY HH:MM” in the Type field. Click ‘OK’ to apply the change.
John Michaloudis is a former accountant and finance analyst at General Electric, a Microsoft MVP since 2020, an Amazon #1 bestselling author of 4 Microsoft Excel books and teacher of Microsoft Excel & Office over at his flagship MyExcelOnline Academy Online Course.

