Free Practice Workbook
Key Takeaways
- Use a PNG logo for the best transparency results.
- Remove the background using Set Transparent Color or Remove Background.
- Adjust the transparency level to create a subtle watermark effect.
- Keep your logo the same size and position on every slide.
- Save the edited logo as a PNG.
Table of Contents
Why Make a Logo Transparent?
A transparent logo blends smoothly with your slide background. It removes the white box around the logo and gives your presentation a cleaner, more professional look. A transparent logo also helps keep the focus on your content instead of distracting viewers with a solid background. The process only takes a few minutes and does not require any additional software.
It makes your branding look more consistent across all slides. Whether your slide has a light, dark, or image background, a transparent logo fits in much better.
Some common reasons include:
- Branding company presentations
- Adding logos as subtle watermarks
- Creating certificates
- Designing marketing materials
- Making title slides look more professional
Transparent logos also work well when you use gradient, dark, or image backgrounds.
Preparing Your Logo for Transparency
When choosing a logo for PowerPoint, go for high-resolution unused gaming logos in either SVG or PNG format to ensure crispness and clarity. These formats preserve the quality of the image and offer transparency, doing away with unwelcome backgrounds.
If your logo is already saved with a transparent background, you may not need to remove anything. Using a clear and sharp logo also prevents it from looking blurry when resized.
Always remember, a high-resolution image is a key to a logo that remains sharp and professional when scaled up for larger displays or high-definition screens.
Step-by-Step Guide to Making Your Logo Transparent
Inserting Your Logo into PowerPoint
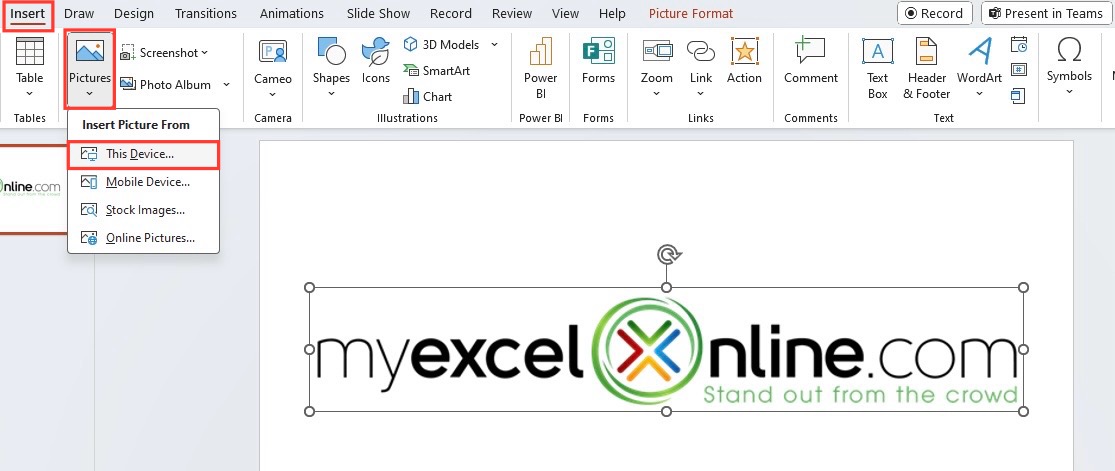
- Open your PowerPoint presentation.
- Go to the slide where you want to add the logo.
- Click Insert > Pictures.
- Select your logo and click Insert.
Once inserted, you can resize and position the logo before making any transparency changes. This makes it easier to see the final result.
Using the ‘Set Transparent Color’ Feature
This method works best for logos with a single-color background, such as white or another solid color.
Change Your Transparent Logo
Adjusting the Transparency Level
Adjusting the transparency of your logo can significantly improve the look of your slides.
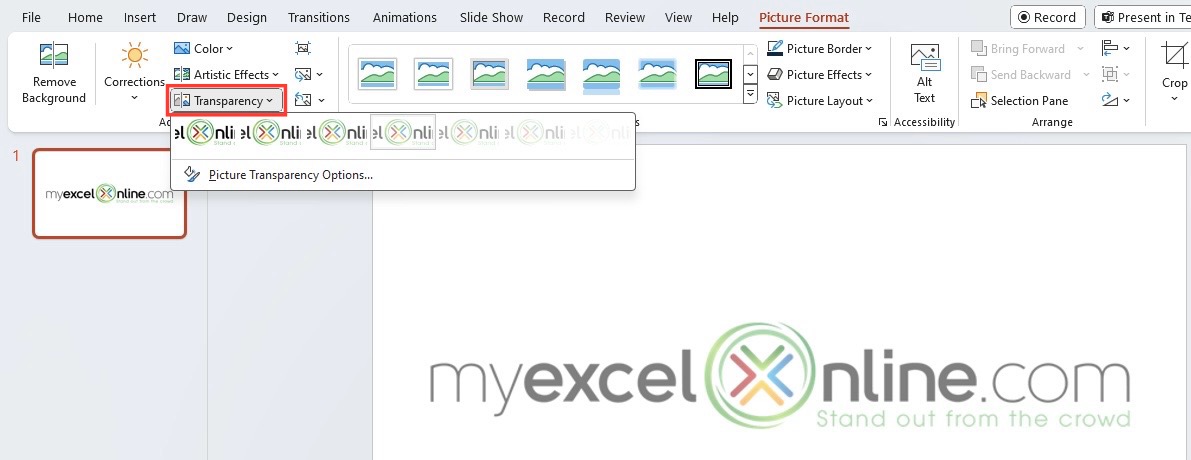
- Go to the Picture Format tab.
- Click Transparency.
- Choose a preset transparency level, or
- Click Picture Transparency Options and use the slider to adjust the transparency.
A lower transparency keeps the logo more visible, while a higher transparency creates a subtle watermark effect. Try different levels until the logo looks right on your slide.
Transparent Gradient Overlay
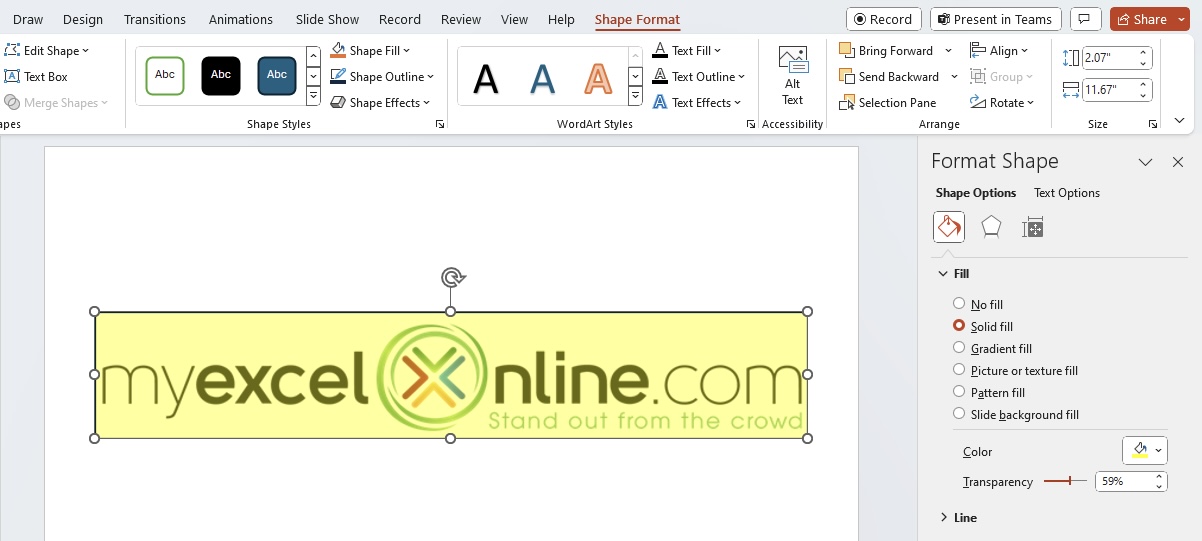
You can add a transparent gradient to make your logo look softer.
- Go to the Insert tab.
- Select Shapes and draw a shape over the logo.
- Right-click the shape and choose Format Shape.
- Under Fill, select Gradient fill.
- Adjust the transparency from 0% (solid) to 100% (fully transparent).
A gradient overlay is useful when you want the logo to blend gently into the background instead of standing out.
Save Your Transparent Logo
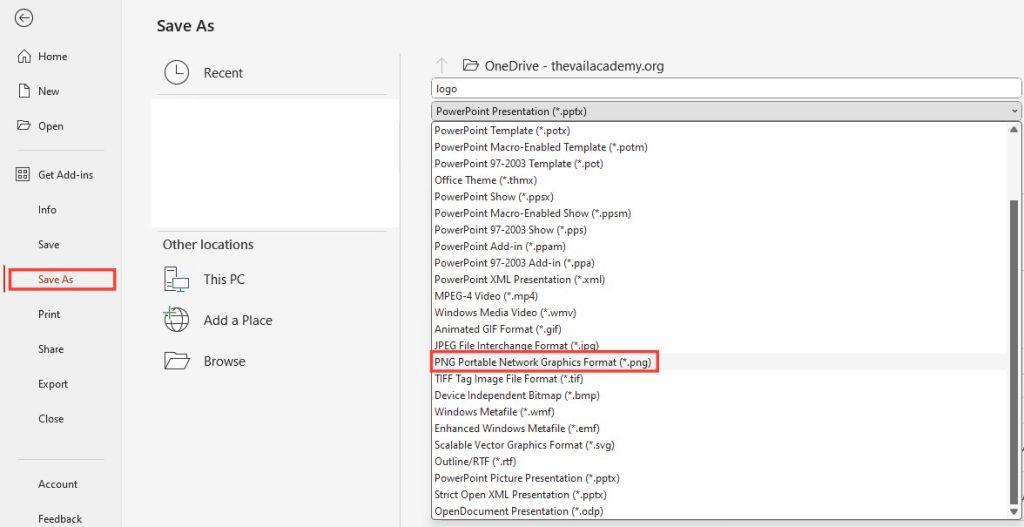
- Go to the File menu
- Select Save As
- Choose a destination
- Select a file type – PNG or TIFF
- Select Save
- Make sure the “Save transparency” checkbox is ticked
FAQs

John Michaloudis is a former accountant and finance analyst at General Electric, a Microsoft MVP since 2020, an Amazon #1 bestselling author of 4 Microsoft Excel books and teacher of Microsoft Excel & Office over at his flagship MyExcelOnline Academy Online Course.

 30 Days - Full Access