Key Takeaways
- Footnotes add sources or extra information to slides.
- PowerPoint footnotes are created manually using text boxes.
- Place footnotes at the bottom of the slide.
- Use superscript numbers to link content and footnotes.
- Keep formatting consistent across slides.
Table of Contents
What is a Footnote?
A footnote is a reference or explanation placed at the bottom of a slide. PowerPoint offers a flexible way to add footnotes to your slides. They can complement your slide’s design with options to alter font size, color, style, and even include hyperlinks or images. These capabilities allow for informative and aesthetically pleasing footnotes that enhance rather than distract from your presentation.
How to Insert Footnotes
Step 1: Open your PowerPoint presentation
Open a blank presentation and add slides as usual.
Step 2: Select the slide and position for your footnote
Go to the slide where you want to add a footnote. Now, select the location where you want to display the footnote. It is usually placed at the bottom of the slides.
Customize and Format Footnotes
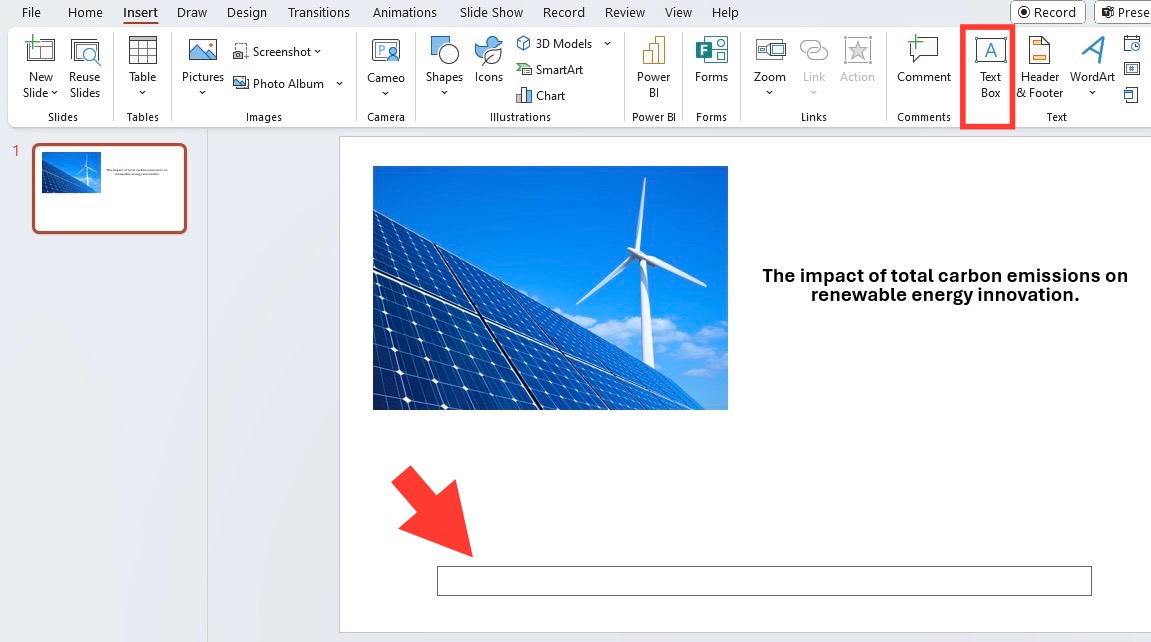
To create your footnote,
- Go to the Insert tab
- Select ‘Text Box‘ to place it on the selected slide
- Click where you want your footnote

- Add your explanatory note or citation.
- Adjust the font size to be smaller than your main content
- Pick a subtle color
- Italicize the text to differentiate it from the main text
A pro tip: Save a format template to make sure that you don’t have to adjust settings every single time. And keep footnotes concise – they’re aides to your main points.
Advanced Footnote Features
Add multiple footnotes in a single slide
If your slide is dense with data or references necessitating more than one footnote, fear not—PowerPoint’s got you covered. After creating your first footnote, hit ‘Enter’ for a new line within the same text box, and add the next footnote right beneath. Remember to correspond each new footnote with a superscript number nestled within the slide’s text. This keeps your audience tracking along nicely. Just be cautious—the more footnotes you add, the more essential it is to keep them organized and succinct to maintain your slide’s visual integrity and readability.
Use superscript and special characters
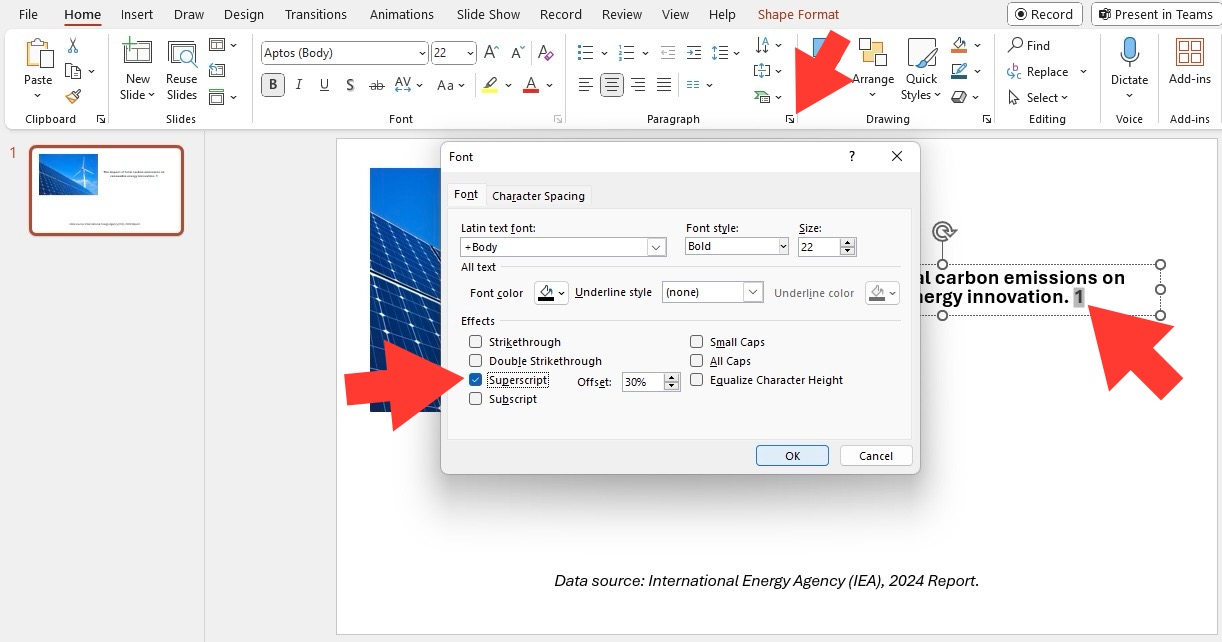
Incorporating superscript numbers or symbols next to the text that corresponds to your footnotes is a breeze. Simply highlight the number or symbol, go to the ‘Font’ group under the ‘Home’ tab, and click on ‘Superscript’ to elevate it. This distinguishes your reference mark from the rest of the text, guiding your audience’s eyes to the additional insights waiting at the slide’s bottom. For a touch of finesse, explore the ‘Symbol’ menu to find special characters if eccentric or industry-specific annotations are your jam.
Maximizing the Impact of Footnotes
Strategic placement for optimal audience engagement
When it comes to inserting footnotes in your presentation, strategic placement is vital for keeping your audience engaged. Place your footnotes at the bottom of the slide, but be mindful of the slide content to ensure they don’t get overlooked. The lower third of the slide is typically where viewers expect to find additional information, so sticking to this unwritten rule can optimize visual flow and comprehension. The key here is to enhance the experience, not hinder it with cluttered or hard-to-find information.
Incorporating footnotes into presentation design effectively
Melding footnotes with your PowerPoint design demands a judicious balance between visibility and subtlety. Your footnotes should harmonize with the theme and palette of your slides—think of them as the cherry on top that shouldn’t overshadow the sundae. Use a discrete but coherent design that aligns with the fonts, colors, and overall style of your slides. This integration not only amplifies professionalism but also solidifies your brand’s visual identity throughout the presentation. Remember, effective footnotes are like whispers adding depth to your story—they should be felt more than they are heard.
Troubleshoot Mistakes
Removing or editing existing footnotes
To edit an existing footnote,
- Click on the text box containing the footnote
- Make your desired changes directly in the text box
If you want to delete a footnote,
- Select the footnote text
- Press ‘Delete’ on your keyboard
Reuse footnotes across different presentations
Reusing footnotes can be a timesaver if you use it frequently on similar topics. To save a footnote style, follow these steps:
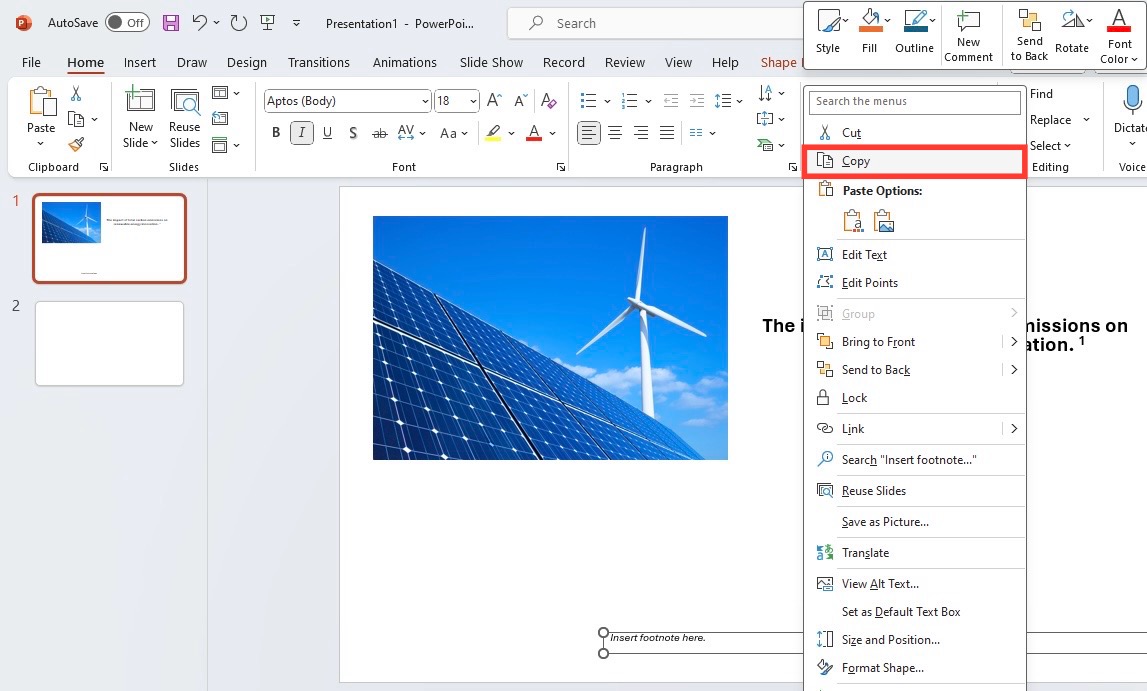
STEP 1: Select the Footnote text box.
STEP 2: Delete the current text and replace it with a placeholder like “XXX” or “Insert footnote here”.
STEP 3: Copy the text box by right-clicking and hitting Copy. Or simply CTRL+C.
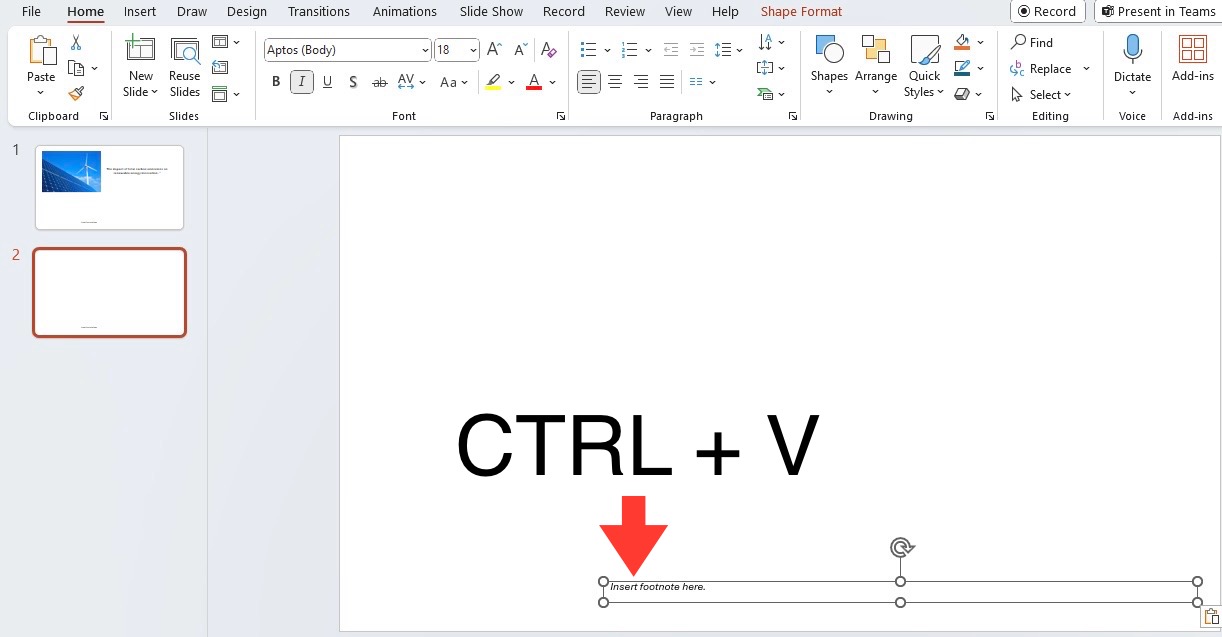
STEP 4: Use the copied style in future slides by pasting it. CTRL+V.
FAQs
1. Does PowerPoint have a footnote feature?
No, a footnote is not a built-in feature in PowerPoint. But it can be added manually.
2. Where should footnotes be placed?
A footnote is usually at the bottom of the slide.
3. How do I create a footnote reference?
Use a superscript number or symbol in the slide content.
4. Can I add multiple footnotes to one slide?
Yes, you can add as many as needed.
5. Can I reuse footnote formatting?
Yes, copy and paste a formatted footnote. You can also add a textbox for a footnote in the Slide Master.

John Michaloudis is a former accountant and finance analyst at General Electric, a Microsoft MVP since 2020, an Amazon #1 bestselling author of 4 Microsoft Excel books and teacher of Microsoft Excel & Office over at his flagship MyExcelOnline Academy Online Course.

 30 Days - Full Access