Key Takeaways
- You can recover a declined meeting from Deleted Items.
- Make sure to inform the client once you accept a declined meeting.
- Set up a notification to not miss any calendar invite.
- Mark a meeting as tentative if you are not sure that you will be able to attend it.
- Use the calendar view to quickly scan any upcoming meeting and your response for the same.
Table of Contents
How to Undo a Declined Meeting
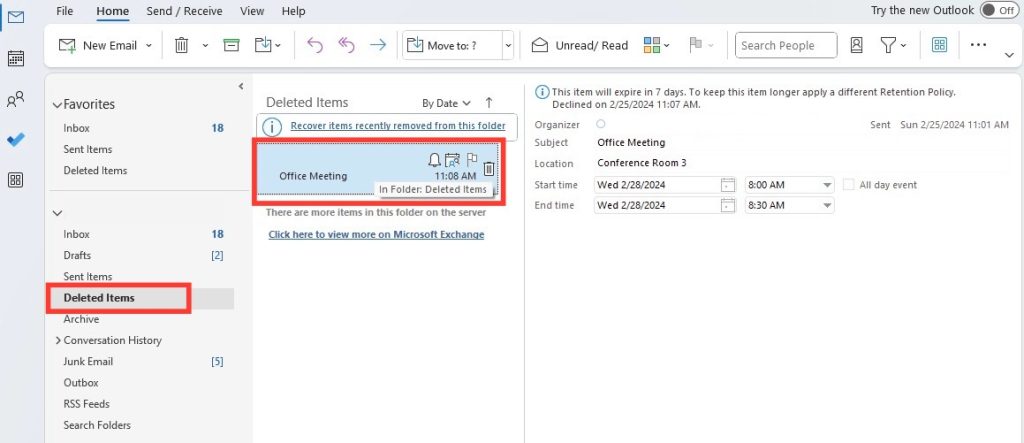
Find the Declined Meeting Invite
Follow the steps below to swiftly find a declined meeting in Outlook:
STEP 1: Open the calendar in Microsoft Outlook.
STEP 2: Go to the specific day when the meeting is scheduled to take place.
STEP 3: If you can’t find the meeting, go to the Deleted Items folder. Outlook sends declined meeting invites to the Deleted Folder.
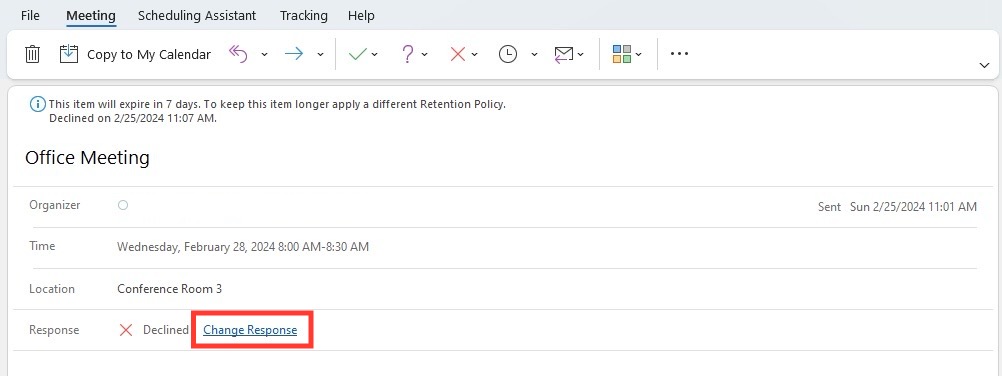
Change Response of Declined Meeting
Now that you have found the declined meeting, you can follow the steps below to accept it:
STEP 1: Open the declined meeting and click on Change Response.
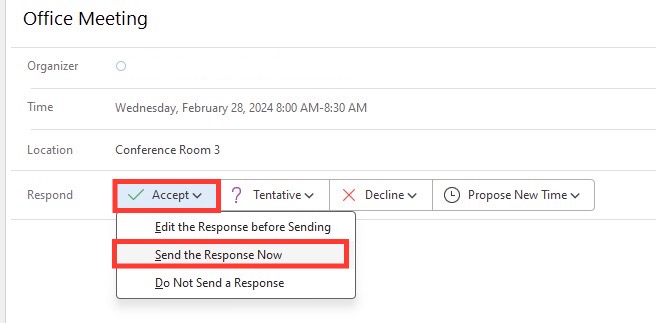
STEP 2: From the options provided, click on Accept.
STEP 3: After selecting Accept, you can choose to send a response to the invitee to apologize or explain about the confusion created.
By following these steps, you can correct your response and update the meeting organizer and other attendees of your changed response.
Pro Tips to Manage Meeting Invites
Setting Up Notifications
To avoid missing out on important updates about your meetings, setting up notifications for meeting responses in Outlook is key. Here’s how you can make sure that you’re informed every time someone responds to your invites:
STEP 1: Launch Outlook, go to File, and go to Options.
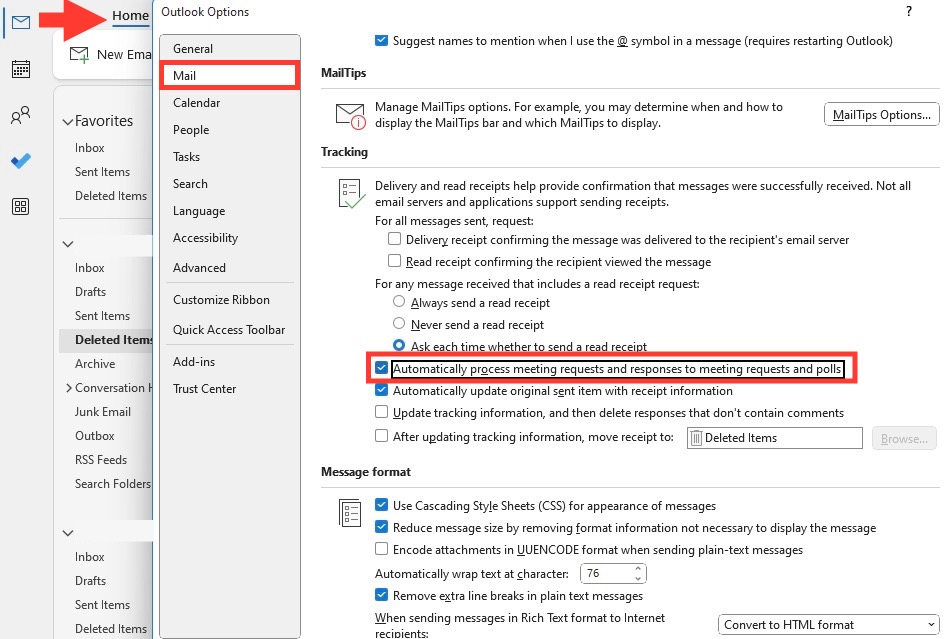
STEP 2: In the Mail category, navigate to Tracking.
STEP 3: Ensure that the “Process requests and responses on arrival” option is checked.
STEP 4: Additionally, you can enable the “Process receipts on arrival” to manage read receipts effectively.
Now, when someone responds to your meeting invite, you’ll receive a notification in your inbox. This can help you stay on top of RSVPs and more accurately keep track of attendee numbers. This makes it easier to manage and apply necessary adjustments to your meetings.
It is also handy to remember that Outlook automatically sends a notification for each response by default, but this feature can be customized to better suit individual needs.
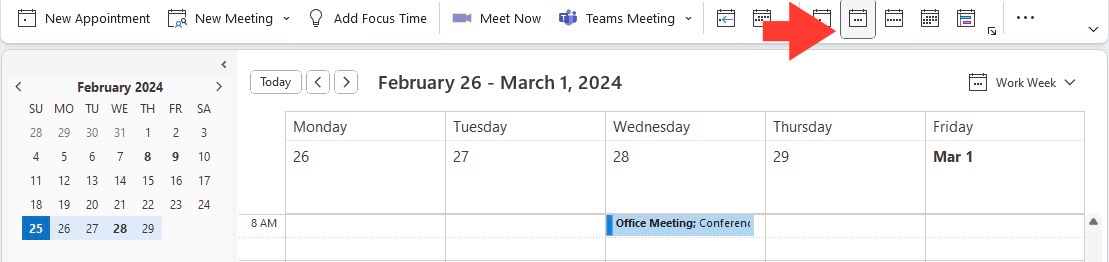
Utilizing Calendar Views
Outlook’s flexibility in calendar views is considerably beneficial in checking meeting activities. Here’s how to maximize this functionality:
STEP 1: Start by opening your Outlook Calendar.
STEP 2: Explore different views by selecting “Day,” “Work Week,” “Week,” “Month,” or “Schedule” under the “Home” tab.
STEP 3: Customize your view by selecting “View Settings” from the “View” tab. Here you can define filters, sort your meetings, and even highlight appointments with certain responses.
By taking full advantage of Outlook’s versatile views, you can ensure that meetings, whether accepted, tentative, or declined, are visually arranged in a way that complements your workflow. Quick scanning of your schedule becomes possible, aiding in productive time management and preventing oversights in meeting tracking.
Sending Responses with or without Comments
Outlook provides flexibility in how you communicate with meeting organizers. You have the option to send responses with or without comments:
- With Comments: If you choose to “Edit the Response before Sending,” you can include a message to the organizer. This could be an explanation, a condition of your attendance, or simply a courteous note.
- Without Comments: You might opt to send a response without additional comments for routine meetings where no clarification is needed.
To send a response with or without comments:
STEP 1: Click on the meeting invite in your Calendar or Inbox.
STEP 2: Select the appropriate response: “Accept,” “Tentative,” or “Decline.”
STEP 3: Choose “Send the Response Now” if you’re not adding any comments, which sends your RSVP immediately to the organizer.

STEP 4: If you need to add a note, select “Edit the Response before Sending.” Add your comments in the text box and then send.
By tailoring your RSVP, you maintain effective communication and ensure your responses are in line with the professional etiquette expected in collaborative work environments.
FAQ
Can You Undecline a Meeting Invite?
Yes, it is possible to recover a meeting after accidentally declining it in Outlook. First, find the meeting in the calendar or in the deleted folder. Then, change the response to ‘Accept’ and also provide a short explanation to avoid any confusion.
What to do after accepting a declined meeting?
Once you have accepted a declined meeting, you can either:
- Send a response to the organizer to explain the confusion.
- Accept without any response.
What to do if I Can’t Find the Declined Meeting Invitation?
If a declined meeting invitation is missing, you can either check the calendar or go to the deleted folder to find the declined meeting.
How to avoid missing any important meeting invite?
Many times, you get so busy with work that you completely miss an important meeting invite. To avoid such a mishap, you can set a notification so that you are alerted once you receive a meeting invite. This avoids any chance of surprises and provides you with more control.
What is the tentative option in the calendar?
The tentative option is like ‘maybe’ that keeps your options open. You should use this option when you are unsure about attending the meeting, but you want to block the time. This ensures that you still get alerted about the meeting without fully committing to it.

John Michaloudis is a former accountant and finance analyst at General Electric, a Microsoft MVP since 2020, an Amazon #1 bestselling author of 4 Microsoft Excel books and teacher of Microsoft Excel & Office over at his flagship MyExcelOnline Academy Online Course.


